
Subscribe to Our Youtube Channel
Related Manuals for Power Wheels GWH24


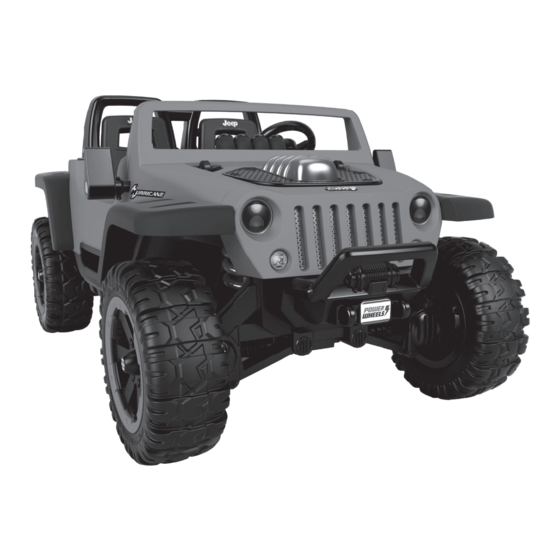
Summary of Contents for Power Wheels GWH24
- Page 1 GWH24 OWNER’S MANUAL MANUAL DEL USUARIO GUIDE DE L’UTILISATEUR...
-
Page 2: Table Of Contents
INDEX ÍNDICE SOMMAIRE BEFORE YOU BEGIN • ANTES DE EMPEZAR • AVANT DE COMMENCER ......3 DANGERS AND WARNINGS • PELIGROS Y ADVERTENCIAS DANGERS ET AVERTISSEMENTS ....................5 CHARGING • CARGAR • CHARGEMENT ..................10 PARTS • PIEZAS • PIÈCES ......................12 ASSEMBLY •... -
Page 3: Before You Begin Antes De Empezar Avant De Commencer
Funciona con 1 batería de 12V, 12 Ah de plomo ácido sellada que no derrama líquido (incluida). Funciona con 1 cargador de 12V (incluido). El cargador no es un juguete. Usar SOLO una batería y cargador de Power Wheels. El uso de cualquier otra batería o cargador dañará el vehículo. - Page 4 Age: 3-7 years. Weight Limit: 59 kg (130 lb). Edades: 3-7 años. Capacidad máxima: 59 kg (130 lb). Âge : 3 à 7 ans. Poids maximal : 59 kg (130 lb). Use this vehicle ONLY outdoors. Most interior flooring can be damaged by riding ®...
- Page 5 DANGER/POISON PELIGRO/ VENENO DANGER/POISON • SHIELD EYES. EXPLOSIVE GASES. CAN CAUSE BLINDNESS OR INJURY. • CUBRIRSE LOS OJOS. GASES EXPLOSIVOS. PUEDEN CAUSAR CEGUERA O LESIONES. • PROTÉGER LES YEUX. GAZ EXPLOSIFS. PEUT RENDRE AVEUGLE OU CAUSER DE GRAVES BLESSURES. • NO SPARKS / FLAMES / SMOKING •...
- Page 6 • Never modify the electrical system. Alterations could cause a fire. • Use only a Power Wheels battery and charger. Other batteries or chargers ®...
- Page 7 • Nunca modificar el sistema eléctrico. Las alteraciones podrían causar un incendio. • Usar solo una batería y cargador de Power Wheels. Otras baterías o cargadores podrían causar un incendio o explosión. • Los niños se pueden lastimar con las piezas pequeñas y con los bordes y puntas filosas de las piezas individuales del vehículo desmontado, así...
- Page 8 • Ne jamais modifier le système électrique. Toute modification peut provoquer un incendie. • Utiliser uniquement une batterie et un chargeur Power Wheels. Tout autre type de batterie ou de chargeur peut provoquer un incendie ou une explosion.
- Page 9 WARNING ADVERTENCIA AVERTISSEMENT Prevent injuries and deaths • Direct adult supervision required. • Never ride at night. • Keep children within safe riding areas. These areas must be: - away from swimming pools and other bodies of water to prevent drownings. - generally level to prevent tipovers.
-
Page 10: Charging • Cargar • Chargement
• Never charge the battery longer than 30 hours. No usar el cargador si está dañado. Failure to follow these instructions may damage • La batería Power Wheels de 12V incluye un fusible your battery and will void your warranty. térmico. El fusible térmico es un dispositivo •... - Page 11 18 hour first time charge 18 horas para la primera carga La première fois, charger la batterie pendant 18 heures. 14 hour charge after each use 14 horas después de cada uso Après chaque utilisation, la charger pendant 14 heures. •...
-
Page 12: Parts Piezas Pièces
PARTS PIEZAS PIÈCES Left and Right izquierda y derecha Gauche et droit Left and Right izquierda y derecha Gauche et droit Left and Right izquierda y derecha Gauche et droit... - Page 13 2 Rear Wheels (with driver) 2 Front Wheels (Left and Right) 2 ruedas traseras (con eje) 2 ruedas delanteras 2 roues arrière (izquierda y derecha) (avec organe moteur) 2 roues avant (gauche et droite) 2 Short Seat Belts 2 cinturones de seguridad cortos 2 ceintures de sécurité...
- Page 14 M4,5 x 1,9 cm Screw 0,4 cm x 3,8 cm Pin Tornillo M4,5 x 1,9 cm Clavija de 0,4 cm x 3,8 cm Vis M4,5 de 1,9 cm Tige de 0,4 cm x 3,8 cm x 55...
- Page 15 La batería se localiza dentro La batterie a été placée dans The battery is located inside del compartimento de la le compartiment. Retirer la the battery compartment. batería. Sacar la batería del batterie du véhicule avant Remove the battery from the vehículo antes de ensamblarlo.
-
Page 16: Assembly Montaje Assemblage
ASSEMBLY MONTAJE ASSEMBLAGE... - Page 17 Fit the rear clip over the rear bumper and lower onto the vehicle assembly. Colocar el clip trasero sobre la defensa trasera y bajarla. Placer le coffre au-dessus du pare-chocs arrière et l’abaisser.
- Page 18 Pull the motor harness through the opening in the rear clip and into the trunk. Jalar el arnés del motor por la apertura del clip trasero y en la cajuela. Tirer sur le câble du moteur pour qu’il passe dans l’ouverture du coffre.
- Page 19 Fit the tabs on the trunk cover into the slots on the rear clip. Push down into place. Ajustar las lengüetas de la cubierta de la cajuela en las ranuras del clip trasero. Presionar para ajustarlas en su lugar. Insérer les languettes de la porte du coffre dans les fentes du coffre.
- Page 21 With Power Wheels™ facing you, pinch the lower “T” on each end of the belt and insert them into the slots in the seat. Note: Do not insert the upper “T” into the slots. Repeat this process to attach the remaining short and long seat belts.
- Page 22 Fit the seat bar to the back of the seat. Insert four screws into the seat bar and tighten. Ajustar la barra del asiento en la parte trasera del asiento. Insertar cuatro tornillos en la barra del asiento y apretarlos. Fixer l’arceau à...
- Page 24 Fit the front grille to the grooves in the top side of the brush guard. Insert three screws into the front grille and tighten. Ajustar la rejilla delantera en las ranuras de la parte de arriba del protector. Insertar tres tornillos en la rejilla delantera y apretarlos.
- Page 25 The fenders are labeled 1, 2, 3 and 4. You will attach each fender to the vehicle as shown in the illustration. First fit the top edge of a fender over a ridge on the side of the vehicle. Then, fit the peg on the inside of a fender into the hole inside the wheel well.
- Page 26 x 12 Insert the curved end of the steering column down through the opening in the dash and then down through the hole in the vehicle floor. Hint: You may need to turn the steering column to fit it through both openings.
- Page 27 Carefully turn the vehicle over. Insert the curved end of the steering column through the hole in the steering linkage. Colocar el vehículo en posición vertical. Introducir el extremo curveado de la columna de mando en el orificio de la conexión de mando. Tourner soigneusement le véhicule à...
- Page 28 Insert a screw through the large opening in the steering column cap and tighten. Insertar un tornillo en el orificio grande de la tapa de la columna de mando y apretarlo. Insérer une vis dans la grande ouverture du capuchon de la colonne de direction et la serrer.
- Page 29 Turn both front axles forward until they drop into the axle slots. Girar hacia adelante ambos ejes delanteros hasta que se ajusten en las ranuras de los ejes. Faire pivoter les deux essieux vers l’avant jusqu’à ce qu’ils s’enclenchent dans les fentes. Insert a screw through the large opening in the front axle cap and tighten.
- Page 30 Insert a screw through the large opening in the front axle cap and tighten. Insertar un tornillo en el orificio grande de la tapa del eje delantero y apretarlo. Insérer une vis dans la grande ouverture du capuchon et la serrer. Front Wheel Rear Wheel Rueda delantera...
- Page 31 Insert a screw through the large opening in the front axle cap and tighten. Insertar un tornillo en el orificio grande de la tapa del eje delantero y apretarlo. Insérer une vis dans la grande ouverture du capuchon et la serrer.
- Page 32 Insert a screw through the large opening in the front axle cap and tighten. Insertar un tornillo en el orificio grande de la tapa del eje delantero y apretarlo. Insérer une vis dans la grande ouverture du capuchon et la serrer. Slide the rear axle through the large opening in the back end of ack end of...
- Page 33 Rear Wheel with Driver Rueda trasera con eje Roue arrière avec organe moteur...
- Page 34 Rear Wheel with Driver Rueda trasera con eje Rueda Roue arrière avec Roue organe moteur organ Insert a screw through the large opening in the wheel retainer and tighten. Insertar un tornillo en el orificio grande del sujetador de rueda y apretarlo. Insérer une vis dans la grande ouverture de la bague d’arrêt et la serrer.
- Page 35 Turn the vehicle upright. Position the steering wheel so that the tab is upright. Fit the steering wheel onto the end of the steering column. Colocar el vehículo en posición vertical. Colocar el volante de modo que la lengüeta esté en posición vertical. Ajustar el volante en el extremo de la columna de mando.
- Page 36 While pressing down on the steering wheel, grasp the steering column under the dash and pull it up as far as it will go. Mientras presiona el volante hacia abajo, sujetar la columna de mando debajo del tablero y jalarla lo máximo posible.
- Page 37 Pull up on the steering wheel to be sure it is assembled correctly. If you can remove the steering wheel, you have not inserted the pin properly. Please review assembly steps 45-48 and re-assemble the steering wheel. Jalar hacia arriba el volante para asegurarse de que está correctamente ensamblado. Si el volante se desprende, significa que la clavija no está...
- Page 38 Position the right side mirror with the recessed area facing up, as shown. “Snap” the right side mirror onto the post on the right side of the vehicle. Turn the mirror upright. Colocar el espejo lateral derecho con el área con hueco hacia arriba, tal como se muestra.
- Page 39 Position the left side mirror with the recessed area facing up, as shown. “Snap” the left side mirror onto the post on the left side of the vehicle. Turn the mirror upright. Colocar el espejo lateral izquierdo con el área con hueco hacia arriba, tal como se muestra.
- Page 41 C (LR14) BATTERIES PILAS C (LR14) PILES C (LR14) We recommend using alkaline batteries for longer battery life. Se recomienda usar pilas alcalinas para una mayor duración. Il est recommandé d’utiliser des piles alcalines car elles durent plus longtemps. Locate the FM radio/sound box on the dash. Loosen the screws in the battery compartment door. Remove the battery compartment door.
- Page 42 Battery Safety Information Conseils de sécurité sur les piles In exceptional circumstances, batteries may leak Lors de circonstances exceptionnelles, des fluids that can cause a chemical burn injury or substances liquides peuvent s’écouler des ruin your product. To avoid battery leakage: piles et provoquer des brûlures chimiques ou endommager le produit.
-
Page 43: Decoration Decoración Décoration
DECORATION DECORACIÓN DÉCORATION For best results, avoid repositioning a label once it has been applied to the vehicle. Para mejores resultados, evitar reposicionar las etiquetas. Pour de meilleurs résultats, éviter d’apposer un autocollant plus d’une fois sur le véhicule. -
Page 45: Battery Installation • Colocación De La Batería De
12V BATTERY INSTALLATION COLOCACIÓN DE LA BATERÍA DE 12 V INSTALLATION DE LA BATTERIE DE 12 V Press the tab and lift the trunk cover to remove it and access the battery compartment. Presionar la lengüeta y abrir la cubierta de la cajuela para quitarla y lograr acceso al compartimento de la batería. - Page 46 Plug the motor harness connector into the battery. Release the battery retainer. Make sure the battery retainer slides over the top of the battery. Enchufar el conector del arnés del motor en la batería. Soltar el sujetador de la batería. Asegurarse de que la abrazadera de la batería se ajuste sobre la batería.
-
Page 47: Règles Pour Une Conduite En Toute Sécurité
SAFE DRIVING RULES NORMAS DE SEGURIDAD PARA CONDUCIR RÈGLES POUR UNE CONDUITE EN TOUTE SÉCURITÉ • Un niño que no esté sentado en el asiento podría caerse, causar que se voltee el vehículo o bloquear la vista del conductor. • Usar el vehículo sólo durante el día o en áreas bien iluminadas. -
Page 48: Fonctionnement Du Véhicule
VEHICLE OPERATION FUNCIONAMIENTO DEL VEHÍCULO FONCTIONNEMENT DU VÉHICULE Beginner Use – Low Speed (4 km/h - 2,5 mph) • S’assurer que le levier de vitesse est à la position Principiantes – Velocidad lenta (4 km/h) de vitesse réduite Débutants – Vitesse réduite (4 km/h) •... - Page 49 • Avant de débrancher le dispositif inhibiteur, Advanced Use – High Speed (8 km/h - 5 mph) s’assurer que l’enfant sait comment manier Avanzados – Velocidad rápida (8 km/h) Conducteurs expérimentés – Vitesse élevée le volant, démarrer et arrêter le véhicule, et (8 km/h) qu’il connaît les règles de conduite sécuritaire.
- Page 50 Atencion: El radio FM se apagará Music and Sounds automáticamente después de varios minutos de • Press the power button to turn ON; press inactividad. Cada vez que se prende y apaga el again to turn power OFF. radio, se restablece a la estación 88.5. •...
-
Page 51: Care • Mantenimiento • Entretien
CARE MANTENIMIENTO ENTRETIEN BATTERY CARE • En condiciones de lluvia o nieve, guardar el vehículo bajo techo o cubrirlo totalmente. • If a battery leak develops, avoid contact with the Cargar la batería por lo menos una vez al mes leaking acid and place the damaged battery in mientras el vehículo no esté... -
Page 52: Mise Au Rebut De La Batterie
BATTERY DISPOSAL ELIMINACIÓN DE LA BATERÍA MISE AU REBUT DE LA BATTERIE • CONTAINS SEALED LEAD BATTERY. BATTERY MUST BE RECYCLED. • Recycle or dispose of the battery in an environmentally sound manner. • Do not dispose of a lead acid battery in a fire. The battery may explode or leak. -
Page 53: Warranty • Garantía • Garantie
Power Wheels ride-on vehicle (purchased ® Fisher-Price) against defects in materials and from an authorized dealer of Power Wheels workmanship. The six month limited warranty vehicles) against defects in materials and applies only to the 6 or 12 volt battery included workmanship. - Page 54 PÓLIZA DE GARANTÍA *Garantie limitée de un (1) an à partir de la date d’achat pour le véhicule Power Wheels ® . Garantie Mattel de México, S.A. de C.V., garantiza este limitée de six (6) mois à partir de la date d’achat producto por un periodo de 1 año en todas sus...
- Page 55 INFORMATION INFORMACIÓN RENSEIGNEMENTS Este dispositivo cumple con la Parte 15 del reglamento FCC STATEMENT (UNITED STATES ONLY) FCC. El uso está sujeto a las dos condiciones siguientes: This equipment has been tested and found to (1) este dispositivo no debe causar interferencia dañina y comply with the limits for a Class B digital device, (2) este dispositivo debe aceptar cualquier interferencia pursuant to Part 15 of the FCC rules.
- Page 56 FCA US LLC utilisées sous licence par Mattel. ©2019 FCA US LLC ©2020 Mattel. ® and ™ designate U.S. trademarks of Mattel, except as noted. ® et ™ désignent des marques de Mattel aux États-Unis, sauf indication contraire. GWH24-3A70 PRINTED IN MEXICO/IMPRIMÉ AU MEXIQUE 1102494513-3LA...
Need help?
Do you have a question about the GWH24 and is the answer not in the manual?
Questions and answers