Eventide H9000 User Manual
Hide thumbs
Also See for H9000:
- User manual (143 pages) ,
- Manual (10 pages) ,
- Instruction manual (7 pages)
Table of Contents
Advertisement
Quick Links
Advertisement
Table of Contents

Subscribe to Our Youtube Channel
Related Manuals for Eventide H9000


Summary of Contents for Eventide H9000
- Page 1 User Manual Version 2.0 P/N: #141242...
-
Page 3: Table Of Contents
1.2.8. Easy Sharing of FX Chains and Sessions 1.2.9. Compatibility with VSig3 Editing So tware 1.3. Hierarchy 1.3.1. Session 1.3.2. FX Chain 1.3.3. Algorithm 1.3.4. Parameter 2. Setup 2.1. Setting up Your H9000 2.1.1. Info Copyright © 2021, Eventide Inc. - Page 4 2.1.6. Preferences 2.1.7. Pedals 2.1.8. MIDI 2.1.9. Analog Refs 2.1.10. Network 2.1.11. Updating your H9000 Firmware 2.2. Setting up Your H9000R 2.2.1. Connecting to Emote With an Ethernet Connection 2.2.2. Connecting to Emote With a Wi-Fi Connection 2.2.3. Switching Networks 2.2.4.
- Page 5 4.5.1. Algorithms Overview 4.5.2. Con guring Audio I/O For an Algorithm 4.5.3. Algorithm Screen So t Keys 4.6. Parameters 4.6.1. Editing Parameters in an Algorithm 4.7. Meters 4.7.1. Assigning Input/Output sources to Meters 4.7.2. More Meters Copyright © 2021, Eventide Inc.
- Page 6 6. Using the H9000 as a Computer Audio Interface 6.1. Changing the USB Audio Sample Rate 6.2. Using the H9000 with macOS 6.2.1. Using the H9000 With Your Existing Computer Audio Interface 6.3. Using the H9000 with Windows 6.3.1. Setting Sample Rate on the H9000 using Windows...
- Page 7 8.2.2. Who is Covered Under the Warranty 8.2.3. When the Warranty Becomes E ective 8.3. WARRANTY INFORMATION 8.3.1. Who Performs Warranty Work 8.3.2. Shipping Within the 50 United States 8.3.3. Shipping Outside the 50 United States Copyright © 2021, Eventide Inc.
- Page 8 B.1. So t Reset / Access Point Mode / Clear Current State B.2. Fail Safe Updater / Recovery Mode B.3. Factory Reset B.4. USB Dump Data B.5. USB Self-Test Mode C. H9000 MIDI Functionality C.1. Velocity C.2. Trigger C.3. Toggle C.4. Note Number C.5.
- Page 9 Copyright © 2021, Eventide Inc.
-
Page 10: Introduction
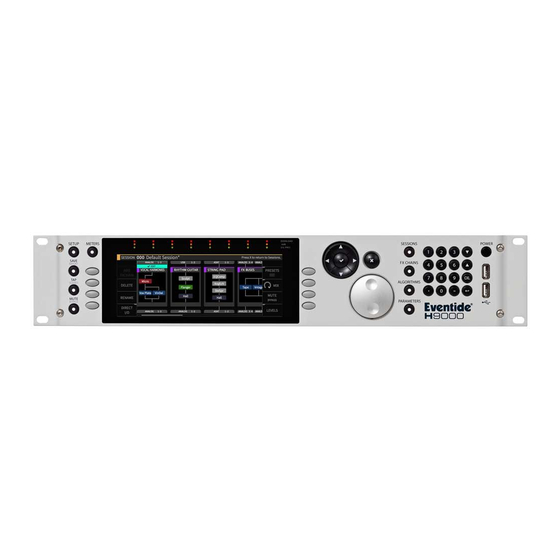
Congratulations on your purchase of the Eventide H9000, the new agship processor in the Eventide product line. The H9000 is designed to be an incredibly versatile tool, allowing you to process a large number of channels using the latest digital and networked audio formats, and o ering the great sounding e ects you have always loved from Eventide. -
Page 11: Features
• User’s manual 1.2. Features The H9000 is designed to be easy to use while giving you power, control, and versatility through the implementation of the following features: 1.2.1. Multiple Quad ARM Processors The H9000 uses multiple cutting-edge e ects processors, allowing it to process a large number of I/O... -
Page 12: Full Front Panel Control
1.2.9. Compatibility with VSig3 Editing So tware VSig3 is a cross-platform visual editor that enables the creation of custom algorithms for the H9000. It is available for download here: https://www.eventideaudio.com/products/so tware/algorithm-... -
Page 13: Hierarchy
1. Introduction 1.3. Hierarchy In order to get the most out of your H9000, please familiarize yourself with the four main terms below, which represent the “hierarchy” used in the product: • Session • FX Chain • Algorithm • Parameter Note The standard H9000’s front panel contains dedicated hardware buttons for all four of the above... -
Page 14: Session
1.3.2. FX Chain The H9000 allows you to chain up to four algorithms together into a custom FX Chain. The FX chain is fed by audio inputs, then the audio is routed through up to four algorithms, and then nally to audio outputs. -
Page 15: Algorithm
FFT or a reverb network. An Algorithm in the H9000 is a combination of some of these modules, and of certain variable values associated with the modules that make up that algorithm. The designer of the algorithm might choose to set some variables of some modules to a speci c value that cannot be changed by the user, while allowing that user to change the values of other variables. -
Page 16: Parameter
1.3.4. Parameter Parameters are the individual adjustments you can make within an algorithm (or FX chain). On the H9000, when you navigate to a speci c algorithm you are presented with its speci c parameters, which you can easily adjust. - Page 17 This page was intentionally le t 99.75% blank.
-
Page 18: Setup
2. Setup 2. Setup 2.1. Setting up Your H9000 Press the Setup button to enter the Setup menus for the H9000. The le t-hand side of the display shows a list of areas you can customize, including: • Info •... -
Page 19: Info
2.1.1. Info The Info screen is a display only; none of its settings can be adjusted. It provides a high-level overview of your H9000 unit, with the following information: 2.1.1.1. System Info This column displays: •... -
Page 20: Expansion Cards
This column displays revision and ID information for the DSP modules installed in your unit. 2.1.2. Expansion cards This column displays information on any expansion card(s) that are installed in the H9000’s three expansion slots (which are labeled slots A, B, and C). -
Page 21: Clock
2. Setup The Name screen allows you to create a custom name for your H9000. With custom names assigned, you can easily select the desired unit when using multiple units and controlling them with Emote. To assign a custom name to your unit: •... - Page 22 Word Clock Termination Status To use the H9000 at the end of a word clock chain, enable Word Clock Termination. To use the H9000 in the middle of a word clock chain, disable Word Clock Termination and use a BNC T piece.
- Page 23 FX chain; you choose which one you wish to make active. The Digital Audio Mode menu is where this selection is made. Use the Digital Audio mode selector to pick your preferred connector, which will then be available in the audio routing menus of the H9000. Available choices include: •...
- Page 24 Set this to “enabled” if the H9000 is at the end of a word clock chain. • Set this to “disabled” if the H9000 is in the middle of a word clock chain and a t-piece is being used. Copyright © 2021, Eventide Inc.
-
Page 25: Tempo
The tempo menu provides controls for setting the H9000’s tempo. The unit’s tempo a ects the H9000’s many time-based e ects, which can be synchronized to various clock sources. For example, a delay algorithm’s repeats can be synchronized to an incoming MIDI clock or your DAW. - Page 26 2. 1 .5. 1 .3. MIDI Clock In this mode, the H9000 will automatically set the tempo to an incoming MIDI signal (as long as that MIDI signal contains a valid MIDI clock signal). The external MIDI clock signal can arrive either via DIN, or USB-B.
-
Page 27: Preferences
2. Setup 2.1.6. Preferences The Preferences section controls various aspects of the H9000’s display. Use the cursor keys to highlight the setting you wish to adjust, then use the Enter key and/or wheel to adjust the setting. 2.1.6.1. Screen Brightness This control adjusts the brightness of the front panel screen on a scale of 1-10. - Page 28 2.1.6.7. Bonjour Enabled Turning this setting to “On” con gures the H9000 to advertise its services using the “Bonjour” protocol on the local area network. Bonjour is a zero-con guration network protocol that allows the H9000 to be automatically discovered by the Emote so tware.
-
Page 29: Pedals
2. Setup 2.1.7. Pedals The H9000 allows connection of up to four independent foot pedals; these pedals can be a “switch” type (on/o ) or a “continuous” type (volume) pedal. When setting up an FX chain and its underlying algorithms, you can map the action of the footswitch/foot pedals to any parameter of your choosing, allowing expressive control of the e ects. - Page 30 A ter you have selected the mode appropriate for your connected switch/pedal, press the Enter key to save your selection. 2.1.7.2. Calibrating Your Attached Pedals and Switches Once you have selected your desired type of pedal/switch, the H9000 will populate the rest of the display with relevant calibration tools. •...
-
Page 31: Midi
2.1.7.3. Control Voltages The H9000 can also be controlled using up to 4 control voltage sources. To do so, follow the instructions for setting up and calibrating an expression pedal. CV 1+2 will correspond to the TIP and RING of Expression Pedal 1, CV 3+4 will correspond to the TIP and RING of Expression Pedal 2. -
Page 32: Analog Refs
The Analog Reference Levels screen allows you to set the levels for the eight analog inputs and outputs present on the 25-pin DSUB connectors. This allows the H9000 to be installed in a wide variety of environments, and interface at an optimum level with a professional and some consumer equipment. -
Page 33: Network
1-2 of the DSUB connector will also a ect the XLR inputs and outputs. 2.1.10. Network The network screen controls settings for connecting your H9000 to a standard Local Area Network. Once a network connection is established, you can use the Emote so tware to view and control H9000 parameters and update your H9000’s rmware. - Page 34 2.1.10.2. Wireless Setup To connect the H9000 to a wireless network: Connect the included Wi-Fi dongle to one of the H9000’s four USB ports. On the network screen, any available wireless networks will be automatically listed beneath the Ethernet option.
- Page 35 OK so t key. You will then be connected to the Wireless network, and can use the Emote so tware to control the H9000. Copyright © 2021, Eventide Inc.
- Page 36 You can use the Emote so tware with the H9000 on this private network in environments where there is no LAN for the H9000 and the computer running Emote to connect to each other. To create an Access Point, press the so t key “START WIFI A/P”.
-
Page 37: Updating Your H9000 Firmware
2.1.11. Updating your H9000 Firmware 2.1.11.1. Firmware Update Your H9000 must be connected to Emote to update. This can be via a network connection using ethernet or WIFI, or a direct ethernet connection to your computer. Do not interrupt the network connection to your H9000 or close Emote during the update process. - Page 38 Once a connection to Emote has been established, go to the Devices View (the button labeled 9K in the menu bar) and locate the H9000 Firmware version at the bottom le t corner of the page. Click on “Updates” and you will be presented with a list of available rmware updates to choose from. Select a rmware version and click the “Install”...
-
Page 39: Setting Up Your H9000R
2.2. Setting up Your H9000R The H9000R lacks front panel controls, so all setup and con guration is done using Emote. Emote can initially connect to the H9000 in three ways: Ethernet, directly to the computer. Ethernet, through your local area network. -
Page 40: Connecting To Emote With An Ethernet Connection
Services. This installs a system component for nding any Bonjour services on the network, which allows your H9000 to show up in Emote automatically without needing to manually enter an IP address. A ter installing Bonjour Print Services, restart your computer, then open Emote. -
Page 41: Switching Networks
H9000R hijacking. The Network eld under the Network tab in Setup will be greyed out. Click the eld to bring up onscreen instructions on how to unlock it. Click “OK” in the resulting dialog box. Copyright © 2021, Eventide Inc. -
Page 42: Updating Your H9000R Firmware
H9000R. Warning Turn o the access point a ter you are nished using it. Otherwise it may interfere with Emote’s connectivity. 2.2.4. Updating Your H9000R Firmware Refer to Section 5.2.3.1: Emote's Devices View. Copyright © 2021, Eventide Inc. - Page 43 2. Setup Warning Please update the H9000R rmware before updating the Emote so tware. Otherwise, Emote may not be able to connect to the H9000. Copyright © 2021, Eventide Inc.
-
Page 44: Hardware
Press the Save/Import button to save the di erent types of presets to internal memory, as well as optionally saving to a user-supplied USB drive. Long-press the Save/Import button to import saved presets into the H9000. See the section “Saving and Importing” for more details. - Page 45 These eight unlabeled buttons (four on either side of the display) allow you to quickly navigate the H9000’s front panel user interface. The so t keys correspond to di erent functions and are always context sensitive to the currently screen.
- Page 46 Mode Buttons The H9000 has four dedicated Mode buttons that let you switch to any of the editing modes with a single touch. The selected button illuminates to indicate the current mode.
- Page 47 ◦ import any H9000 presets you have created or perform an o ine rmware update. Attach the included USB Wi-Fi dongle to connect the H9000 to a local area network ◦ Connect a class-compliant USB MIDI controller for real-time adjustment of many H9000 ◦...
-
Page 48: H9000R Front Panel
3. Hardware Note If you install the H9000 in a location where working with the front panel is not practical or convenient, all adjustments can also be made using Emote. 3.2. H9000R Front Panel The H9000R front panel has the following controls: Power Press the latching power button to turn the H9000R on or o . -
Page 49: Rear Panel
Startup Sequences (Section 3.3. Rear Panel The H9000 and H9000R have an identical rear panels. They o er a wide variety of audio and data connections, allowing them to be used in many di erent environments and work ows. Power Connector Connect the H9000 to your power source using a standard IEC power cable. - Page 50 3. Hardware The H9000 has 2 1/4” TRS inputs that allow for a variety of external control sources including expression pedals, foot switches, control voltages, or a combination. Relay (x2) The dual ¼” relay connectors allow the H9000 actions to close external circuits.
- Page 51 Connect a class-compliant USB MIDI controller (Section C) ◦ USB B Connector Connect the H9000 to your Mac or PC, allowing you to use it as a 16-input, 16-output computer audio interface (Section AES/EBU Connector This 25-pin DSUB female connector allows you to feed the H9000 with eight channels of AES- EBU digital audio, and also allows the unit to output eight channels.
- Page 52 3. Hardware This 25-pin female DSUB connector feeds the H9000 with 8 channels of balanced analog audio input. Tascam Standard pinout. Analog Output 8-channel This 25-pin female DSUB connector outputs 8 channels of balanced analog audio. Tascam Standard pinout. Note You can adjust the operating level of the 8-channel analog inputs and outputs in the Setup menu, between +4dBu and -10dBv.
- Page 53 3. Hardware This BNC connector allows the H9000 to sync its digital system clock to an incoming word clock signal. It is compatible with word clock signals ranging in sample rate from 44.1kHz to 96kHz. Word Clock Output This BNC connector outputs the H9000’s digital clock signal at the unit’s currently con gured sample rate.
-
Page 54: Front Panel Operation
4. Front Panel Operation 4. Front Panel Operation In this section, we will show you how to navigate the H9000 front panel and operate the unit. Note This chapter is not necessary for H9000R users. 4.1. A Note on “Latching” So t Keys: The H9000 UI has context-sensitive “so t keys”... -
Page 55: Things To Know About Signal Routing
FX chains support 32 inputs and 32 outputs. The outputs of an FX chain can be “multed” to an arbitrary number of physical Input/Output channels, computer audio interface channels, etc. 4.3. Sessions A Session is the “big picture” for the H9000, a snapshot of the current state of all settings on the unit. Copyright © 2021, Eventide Inc. -
Page 56: Session Screen So T Keys
FX chains. 4.3.1. Session Screen So t Keys The eight Sessions view so t keys o er additional session-related functions: • • Copy • Delete • Rename • Search • Preview • Load Copyright © 2021, Eventide Inc. -
Page 57: New
Cancel or OK so t keys. Note that you cannot delete factory sessions. These sessions are meant to always be available on the H9000 and never be removed. 4.3.5. Rename Press the Rename so t key to rename a currently highlighted session. You will then be presented with the naming screen where you can enter a new name. -
Page 58: Search
4.4. FX Chains Press the front panel FX Chains button to switch the display to the FX Chains view screen, where you can view and edit the FX chains of the currently loaded session. Copyright © 2021, Eventide Inc. -
Page 59: Con Guring The Audio Input/Output Of Your Fx Chain
Highlight the Replace block and press the Enter key. You will be presented with a list of available FX chain presets. • Navigate to the FX chain preset you wish to use as a replacement then press the Enter key to insert the chosen preset into the FX chain. Copyright © 2021, Eventide Inc. -
Page 60: Fx Chain So T Keys
4.4.3. FX Chain So t Keys The FX Chains screen contains eight so t keys that o er the following functions: • Add FX Chain • Delete • Rename • Direct I/O • Presets • Copyright © 2021, Eventide Inc. - Page 61 Press the Add FX Chain so t key to add a new FX chain to the currently loaded session. You can have up to four FX chains in your H9000. The H9000 will prompt you to select a name and I/O con guration for the FX chain, which will be routed automatically upon creation.
- Page 62 4. Front Panel Operation do not require any of the external processing the H9000 can provide, the eight analog input and outputs, along with their di erent routing options, allows the H9000 to work as a network-attached patch bay. In the Direct I/O screen, use the cursor keys to highlight the input/output you wish to assign, then use the wheel to select the physical input/output you wish to use in your direct I/O pathway.
- Page 63 Five additional so t keys are available in the Presets browser screen: 4.4.3.5. 1 . Rename Press the Rename so t key to rename the currently highlighted FX chain. Note that factory FX chains cannot be renamed. Copyright © 2021, Eventide Inc.
- Page 64 Use the cursor keys and enter key to select. The following tag categories are included: • E ect Type • Product Type • Instrument Type • Inputs/Outputs Copyright © 2021, Eventide Inc.
- Page 65 Product Type H9 as well as E ect Type Reverb. In this way, you can reach the same algorithm in several di erent ways. This powerful feature is a great way to narrow down the H9000’s vast list of FX chains to a more manageable selection that is appropriate to the task at hand.
- Page 66 FX chain for which you wish to adjust the level, and then use the wheel to adjust the output gain. Long-press the latching Gain/Levels so t key to show signal levels for the audio inputs/outputs of the currently highlighted FX chain. Three additional so t keys are available in the Gains/Levels screen: Copyright © 2021, Eventide Inc.
-
Page 67: Algorithms
4.5. Algorithms In the H9000, each FX chain can contain up to four separate signal processing algorithms. The Algorithms screen is where you work with these speci c algorithms; you can navigate to it by either: •... -
Page 68: Algorithms Overview
Expansion Card), then cursor over to the channel number and adjust it separately. This type of ne-tuned I/O control is particularly important when an expansion card is present, which can have 32 I/O channels per slot. • Use the wheel to cycle through the available input or output assignments. Copyright © 2021, Eventide Inc. -
Page 69: Algorithm Screen So T Keys
Press the Add Algorithm so t key to add a new algorithm to the currently selected FX chain. A new algorithm block will appear labeled “Select Algorithm”. • Use the cursor keys to highlight the “Select Algorithm” block and press the Enter ( ) key. Copyright © 2021, Eventide Inc. - Page 70 Press the latching Move so t key to change the location of an algorithm within the FX chain. You can move the algorithm in an FX chain to be above or below any other algorithm in series, or next to another algorithm in parallel. Copyright © 2021, Eventide Inc.
- Page 71 Their signal routing con guration Note The H9000 allows not only serial routing of algorithms, but also parallel and mixed serial/ parallel routing as well. The expert page is where you can view and control this aspect of the routing.
- Page 72 4.5.3.7. Gain Press the latching Gain so t key to change the display to a set of gain controls which adjust the output level of each algorithm within the FX chain. Copyright © 2021, Eventide Inc.
- Page 73 4.5.3.8. List Press the latching List so t key to view the main list of all algorithms available on the H9000. To the right of the list is a description eld that shows information for the currently highlighted algorithm, including: •...
- Page 74 Use the cursor up/down keys to navigate to the sort option you wish to use, and then press the Enter key. 4.5.3.8.3. Jump to Loaded Press this so t key to jump to the algorithm that is currently loaded in the FX chain. Copyright © 2021, Eventide Inc.
- Page 75 As you add tags, the main list of algorithms will be ltered to only show algorithms that contain text matching the tag(s) you have selected. This powerful feature is a great way to narrow down the H9000’s vast list of algorithms to a more manageable selection, one that is appropriate for the task at hand.
- Page 76 Press the Delete so t key to delete the currently highlighted algorithm. Factory algorithms cannot be deleted. Note The H9000 algorithms are organized into di erent banks, each one representing di erent categories of e ects. Each bank begins with a new 3-digit number (100, 200, etc.). Copyright © 2021, Eventide Inc.
-
Page 77: Parameters
4. Front Panel Operation 4.6. Parameters On the H9000, each algorithm contains a set of parameters; you adjust these parameters to adjust the sound of the algorithm you have selected. For example, a reverb algorithm contains parameters for settings such as room size, decay time, pre- delay, and so on. -
Page 78: Editing Parameters In An Algorithm
“cursor le t” back to the parameter category list. The parameters screen contains four additional so t keys: • Quick Map • Custom Map • Random • Functions Copyright © 2021, Eventide Inc. - Page 79 MIDI controllers, expression pedals, footswitches, control voltages, etc. The MIDI functionality on the H9000 is “plug-and-play”. You can connect a MIDI device to the 5-pin MIDI-in DIN port, or connect a MIDI class compliant interface to one of the USB connectors. All MIDI Channel con guration is done when individual controllers are mapped, as opposed to in a central MIDI settings screen.
- Page 80 • The external controller and the parameter are now paired. 4.6.1.2. Custom Map The Custom Map feature is also designed to map controllers to H9000 parameters, but with a much ner level of control. It works as follows: • Use the cursor keys to navigate to the parameter you wish to custom map a controller to, then press the Custom Map so t key.
- Page 81 To delete a custom mapping, use the cursor to navigate to which parameter mapping you would like to delete and press the Custom Map so t key. In the Controller Type menu, select “O ” and the mapping will be deleted Copyright © 2021, Eventide Inc.
- Page 82 Give it a whirl with your favorite algorithm and see what happens… 4.6.1.4. Functions Functions in the H9000 act much like Macros in Ableton Live; essentially, they are higher-level groupings of parameters that can be adjusted with a single knob.
- Page 83 As detailed earlier in the Custom Map settings, you can change the direction of a parameter’s value by inverting the min/max end cap markers. This can be useful for having one Function knob control multiple parameters that move in di erent directions. Copyright © 2021, Eventide Inc.
- Page 84 Press the Add/Remove or Enter key; the highlighted parameter is now mapped to the Function knob you had selected, and that Function’s number (e.g. F1) now appears on the le t side of that parameter’s entry in the list. Copyright © 2021, Eventide Inc.
- Page 85 The Custom Map dialog can also be accessed through this interface and used the same way as for individual parameters. Note Section C: H9000 MIDI Functionality for a comprehensive explanation of the H9000’s MIDI features. Copyright © 2021, Eventide Inc.
-
Page 86: Meters
4. Front Panel Operation 4.7. Meters The H9000 o ers an 8-channel set of dedicated three-segment hardware LED meters, positioned above the front panel color display. These LED meters are always active. The rst segment of the hardware LED meter represents signal presence, at any dB level. The second segment, if lit, means the signal is reaching -6dB, which represents nominal headroom and nominal S/N ratio. - Page 87 • highlighted metering channel, and that channel will now show the assignment above the channel number. On a stock H9000 unit with no expansion cards installed, the following single input/output channels can be assigned to the each meter: • •...
-
Page 88: More Meters
• Clear Clips • I/O Meters 4.7.2.1. Levels Press this latching so t key to switch to the Levels screen; you are presented with input and output level faders for the currently selected FX chains. Copyright © 2021, Eventide Inc. - Page 89 The I/O meters screen shows which bank of I/O metering you are on in the upper le t corner, and which of the 8 pages you are on in the upper-right corner. On a stock H9000 with no expansion cards...
-
Page 90: Saving And Importing Data
The H9000 allows you to save various types of data, both to its internal memory or a USB drive connected to any of the USB ports. Once you have saved this data to an attached USB drive, you can import it to a di erent H9000, allowing you to easily share your work among machines. -
Page 91: Saving
Press the front panel Save/Import button. The Save screen will appear and you will be presented with the following options: • Save Session • Save FX Chain • Save Preset • Export Sessions • Export Presets • Export FX Chains • Export Algorithms Copyright © 2021, Eventide Inc. -
Page 92: Exporting
If you have a USB stick plugged in, you will also see the “Export” options. The export options will NOT appear in the list if no drive is attached. Whereas “Saving” refers to storing something onto the H9000’s internal memory, “Exporting” transfers it from the H9000 to the ash drive. -
Page 93: Importing
When Saving with a USB stick plugged in, you’ll also be given the option to also export a ter the save is complete. 4.8.3. Importing Once you have saved H9000 data to a USB drive, that data can be imported to any H9000 unit by connecting the drive. Importing works as follows: •... - Page 94 4. Front Panel Operation Note Any algorithms you load would be sourced from a development environment, such as Eventide’s “VSig” so tware editor. The VSig so tware is available for download at: https:// www.eventideaudio.com/products/so tware/algorithm-editor/vsig3 Use the cursor up/down keys or wheel to select the data you wish to load, then press the SELECT key;...
-
Page 95: Scenes
Scenes are used to control sequenced program changes in the H9000. This mode can be useful when you are using the H9000 in a live environment such as a concert or theatrical production, and wish to “step through” di erent pre-con gured states in an order you have set up in advance. - Page 96 If your scenes are sequenced in the order to be used, it’s probably easier to use the Increment & Load/ Decrement & Load options. However, if you need to jump around or skip Scenes, you can use Increment/Decrement with the Load Current option. Copyright © 2021, Eventide Inc.
-
Page 97: Working With Scenes
Press this so t key to create a new Scene Map. You will be prompted to name the Scene Map, at which point it will be added to the list of created Scene Maps on the le t. Copyright © 2021, Eventide Inc. - Page 98 Press this so t key to activate the highlighted Scene Map. Once a Scene Map is activated, a green circle will appear to the le t of its text, indicating that it will now respond to MIDI messages. Copyright © 2021, Eventide Inc.
- Page 99 Once a Map is activated, the following so t keys are available for its contained scenes: 4.9.2.2. 1 . Add Action Highlight a scene on the right-hand side, and press the Add Action so t key. You will be presented with the choices of: • Scene Capture • Manual Copyright © 2021, Eventide Inc.
- Page 100 Note If the circle to the right of the scene text is red, then the Scene Map in which it is contained is not currently active and won’t receive MIDI messages. Copyright © 2021, Eventide Inc.
- Page 101 MIDI channel. 4.9.2.3. 1 . Select Source Mode You are presented with the source mode options of: • Load by number • Increment • Increment and load • Decrement • Decrement and load • Load current Copyright © 2021, Eventide Inc.
- Page 102 Use the cursor up/down keys or wheel to select an option from the above list, then press the Enter key. You will then be presented with the option to choose which MIDI channel to receive messages from. Copyright © 2021, Eventide Inc.
- Page 103 This page was intentionally le t 99.75% blank.
-
Page 104: Emote
VST3, VST, AU, and AAX plugin formats. Emote gives you control of all of the features and settings of your H9000 e ects processor, allowing you to cra t your e ects quickly and intuitively. Think of Emote as your artistic partner, letting you dig deeper into the creative potential of the H9000. -
Page 105: The Emote User Interface
Open Recent: Open a Session that you have recently opened from a le you have saved to ◦ your computer. Save ( ): Save the currently open Session and keep the same name and ◦ ctrl/⌘ location. Save As ( ): Save a Session le to your computer. ◦ ctrl/⌘ shift Copyright © 2021, Eventide Inc. - Page 106 ◦ Save As: Save an Fx Chain le to your computer. ◦ Save To H9000: Save an Fx Chain le to the connected H9000. ◦ Algorithm Import Algorithm: Currently only supports the .9ka le format. To upload algorithms in the ◦...
- Page 107 Algorithm 1 ( ▪ Algorithm 2 ( ▪ Algorithm 3 ( ▪ Algorithm 4 ( ▪ IO ( ▪ Session Tab ( ▪ Chain Tab ( ▪ Algo Tab ( ▪ Preset Tab ( ▪ Copyright © 2021, Eventide Inc.
- Page 108 Minimize ( ◦ ctrl/⌘ Meter Bridge: Displays all of the H9000’s hardware IO meters in a separate window that ◦ allows you to view any physical IO source or destination in banks of 8. This is useful for debugging setup issues or doing more precise gain staging, as these meters are hardware- based, unlike the so tware metering provided within each FX chain.
-
Page 109: Browser Window
TAP: Click the TAP button a single time to temporarily display the current tempo used by the ◦ H9000. Click the TAP tab repeatedly to manually set a new tempo. MUTE: Click the MUTE tab to toggle global mute on/o . - Page 110 Within that category, click on an algorithm type to toggle it on o . • The browser will now display algorithms that match any of the tags that are currently highlighted in red. • Right-click an algorithm in the browser and select “more info” to display its description. Copyright © 2021, Eventide Inc.
-
Page 111: Main Screen
Click the Connect toggle above the H9000 icon to connect to the desired H9000. Emote allows you to connect to multiple H9000 units at once. You can then click in the Browser on the speci c unit that Copyright © 2021, Eventide Inc. - Page 112 Emote is launched on a speci c machine. Click on the + Icon at the bottom of the Browser to manually enter the IP address of an H9000 on the network.
- Page 113 5. Emote 5.2.3.2. Setup View Please refer to Section 2.1: Setting up Your H9000 for information about these settings. Copyright © 2021, Eventide Inc.
- Page 114 The middle portion of the screen displays trigger sources and scenes contained in the currently active Scene Map. The right side of the screen displays options for the currently highlighted scene or trigger source. The bottom portion of the screen displays the FX chains in the currently loaded scene. Copyright © 2021, Eventide Inc.
- Page 115 Double click a Scene Map to activate it. The square to the le t of its text will change from grey to red, indicating that it is now active. Double-click it again to deactivate it. Copyright © 2021, Eventide Inc.
- Page 116 To delete a trigger source, click the - icon to the right of the trigger source that you’d like to delete. • To delete all trigger sources, right-click the ‘TRIGGER SOURCES’ text and a prompt will appear to delete all sources. Copyright © 2021, Eventide Inc.
- Page 117 5.2.3.4.6. FX Chain Display The bottom portion of the Scenes page in Emote will display the currently loaded FX chains and algorithms. This is useful for monitoring what changes are being made as you load scenes. Copyright © 2021, Eventide Inc.
- Page 118 Algorithm View, and Algorithm View displays the algorithms within the FX chain that is currently selected in FX chains View. 5.2.3.6. FX Chains View FX Chains View allows loading of speci c FX chains into available slots and also o ers adjustments of FX chain settings. Copyright © 2021, Eventide Inc.
- Page 119 Double-click the FX chain container name to type a new title, then press the RETURN key to save the new name. • Double-click on an individual algorithm shown in the FX chain to adjust its parameters. Copyright © 2021, Eventide Inc.
- Page 120 5.2.3.7. 1 . Editing Algorithm Routing Within an FX Chain • Click and drag an algorithm to a blank area of the main screen to move or copy that algorithm to one of the other available slots. Copyright © 2021, Eventide Inc.
- Page 121 Click on the audio I/O category (USB, AES/EBU, Analog, etc.) to show its available I/O channels. Click on an I/O channel of the top of the screen to activate it. The active channel will now show up as a routing block above the algorithms. Copyright © 2021, Eventide Inc.
- Page 122 Click on the I/O channel that you would like to move the currently selected I/O channel’s connections to. 5.2.3.8. Parameters View The Parameters pages allow you to adjust speci c parameters within an FX chain or algorithm. Option-click (macOS)/Alt-Click (Windows) on a parameter to return it to its default value. Copyright © 2021, Eventide Inc.
- Page 123 5. Emote 5.2.3.8. 1 . Algorithm Parameters Copyright © 2021, Eventide Inc.
- Page 124 5. Emote 5.2.3.8.2. FX Chain Parameters 5.2.3.8.3. MIDI and Controller Mapping Parameters and functions in Emote can be controlled by three di erent external controls: • MIDI • Expression • Functions Copyright © 2021, Eventide Inc.
-
Page 125: Using Emote As A Plug-In
Emote is needed in a given DAW project, and it does not matter which audio track it is placed on. Note Using Emote as a plug-in does not automatically route audio connections to the H9000, all audio connections must be con gured by using your selected DAW’s method of routing external audio e ects. - Page 126 H9000. In this case, automating any unused ones won’t have any e ect. If you replace an FX chain within the H9000, the DAW automation data will still exist, and will apply to whatever parameters are assigned to the Function in the newly created FX chain...
- Page 127 H9000’s DAW state data, simply reload the DAW project without saving. Note While the DAW State Recall is a useful feature for saving your H9000 data, it is best practice to also save a H9000 session with all of your settings.
-
Page 128: Using The H9000 As A Computer Audio Interface
6. Using the H9000 as a Computer Audio Interface The H9000 can stream 16 inputs and 16 outputs to/from your Windows or macOS DAW, serving as a powerful outboard e ects processor for your DAW’s tracks. 6.1. Changing the USB Audio Sample Rate When using the H9000 as a USB audio device, the H9000 is always the USB clock source and determines the sample rate. -
Page 129: Using The H9000 With Macos
When the sample rates match again, the warning message will be cleared and the audio un-muted. Warning If you change the sample rate in the DAW rst, you will have to change it again once the H9000’s clock is changed to match. This is because the H9000 cannot force the computer to re-sync at the new rate;... -
Page 130: Using The H9000 With Your Existing Computer Audio Interface
The H9000 is an outboard e ects processor, not a traditional, standalone “Computer Audio Interface” with control room monitoring functions. As a result, you will likely want to use the H9000’s computer connectivity in conjunction with your main computer audio interface. - Page 131 In your DAW of choice, select the Aggregate Device as your audio device for the DAW to use. • You will now have the I/O of your main audio interface AND the 16-input/output channels of the H9000 available to use in your DAW session as needed. • Ensure that the sample rates match on the following: The H9000’s internal clock...
-
Page 132: Using The H9000 With Windows
6.3. Using the H9000 with Windows The H9000 is compatible with computers running Windows 10 and higher. In order to use the H9000 as an audio interface with Windows, you must install the Windows driver, which can be downloaded at https://www.eventideaudio.com/support/product/9106/installers... -
Page 133: Setting Sample Rate On The H9000 Using Windows
6. Using the H9000 as a Computer Audio Interface 6.3.1. Setting Sample Rate on the H9000 using Windows Depending on the setup of your Windows machine, the H9000’s USB sample rate can be changed one of two ways: Windows OS method: Click the Windows menu bar icon on the bottom le t of your screen. - Page 134 In the Line Properties Window, click the “Advanced” tab. Select the appropriate sample rate, ◦ click “Apply”, then click “OK”. DAW method: Set your DAW’s Audio Device to “Eventide USB Audio Device” and select the appropriate ◦ sample rate. Copyright © 2021, Eventide Inc.
- Page 135 This page was intentionally le t 99.75% blank.
- Page 136 7. Expansion Cards 7. Expansion Cards The H9000 o ers optional network audio I/O via 3 expansion card slots with up to 32 channels of bidirectional audio each. Once installed, they will be listed on the front panel’s Setup page and Emote’s Devices View, and will appear as I/O channels within Emote and on the front panel.
- Page 137 7. Expansion Cards 7.1. MADI • Supports full AES5 compatibility • Sample Rate Clock Sources: H9000 or the selected MADI RX Stream • 32 In / 32 Out operation from 44.1kHz to 96kHz. • Optical, Coax or ExpressCard (RME proprietary) connections.
- Page 138 Audinate Brooklyn II Dante Module based design • 32 In / 32 Out operation from 44.1kHz to 96kHz. • Sample Rate Clock Sources: Brooklyn II Module, Dante network, H9000 • AES67 Support • Either 2 Primary and 2 Redundant Networks Connections or 4 Primary Network Connections...
- Page 139 Updater by following Audinate’s guide here: https://dev.audinate.com/GA/dante-updater/ userguide/webhelp/content/importing_ rmware.htm 7.2.3. Setup Neither Emote nor the H9000 contain setup options for Dante. All setup is done with Audinate’s Dante applications, available here: https://my.audinate.com/support/downloads/download-latest- dante-so tware Copyright © 2021, Eventide Inc.
- Page 140 DigiLink Connections feature a Primary and a Secondary Port which is switchable between 32/16 channel I/O. LoopSync Connections allow you to use Pro Tools to assign the clock source as either the H9000 or another HD device. Copyright © 2021, Eventide Inc.
- Page 141 H9000 via the expansion card’s DigiLink ports. To use the H9000 as a H/W insert in Pro Tools, rst you have to check your Hardware Setup page in Pro Tools to see which inserts the H9000 will correspond to.
- Page 142 Highlighting a device in the Peripherals window will allow you to view its I/O settings. In Pro Tools, the hardware inserts for HD I/O #1 and #2 will appear as A 1-16 and B 1-16. Since the H9000 is plugged into the Secondary port (HD I/O #3 and #4), its corresponding hardware inserts will be C 1-16 and D 1-16.
- Page 143 7. Expansion Cards In the example below, the Pro Tools insert C 5-6 will route to the H9000 HD expansion I/O 5-6. The H9000 counts the total number of expansion card I/O as one 32 channel device, while Pro Tools splits these up into 2 separate 16 channel devices.
- Page 144 Pro Tools Session. 7.3.4.2. Clock Source Displays either “Internal” or “LoopSync”. If the H9000 is the Clock Source in Pro Tools, then this will display “Internal”. If another HD device is the Clock Source in Pro Tools, then this will display “LoopSync”...
- Page 145 Indicates whether your H9000 is clock source in the LoopSync or if it is receiving clock externally. If GREEN, your H9000 is serving as the “Loop Master” to the rest of your HD System. If RED, your H9000 is receiving clock from another source through the LoopSync of your HD System.
- Page 146 Suitable ventilation must be provided for the unit at all times. In particular, the side vents must not be obstructed. It is best if there is an inch or more clearance between the top of the H9000 and the bottom of the units above and below.
- Page 147 The warranty DOES NOT COVER shipping damage, either to or from Eventide. If you receive a new unit from us in damaged condition, notify the carrier and us; we will arrange to le an insurance claim and either repair or exchange the unit.
- Page 148 The one-year warranty period begins on the day the unit is purchased from an Authorized Eventide Dealer or, if the unit is drop-shipped from Eventide, on the day shipped, plus a reasonable allowance for shipping delays. This applies whether or not you return your warranty registration form.
- Page 149 8.3.1. Who Performs Warranty Work The only company authorized to perform work under this warranty is Eventide Inc., Little Ferry, New Jersey. While you are free to give personal authorization to anyone else (or to work on it yourself), we will not honor claims for payment for parts or labor from you or from third parties.
- Page 150 This warranty gives you speci c legal rights and you may also have other rights, which vary from location to location. Copyright © 2021, Eventide Inc.
- Page 151 This page was intentionally le t 99.75% blank.
- Page 152 Class A ITE is a category of all other ITE which satis es the class A ITE limits but not the class B ITE limits. Such equipment should not be restricted in its sale but the following warning shall be included in the instructions for use: Copyright © 2021, Eventide Inc.
- Page 153 Compatibility Directive 2004/108/EEC. Warning This is a Class A product. In a domestic environment this product may cause radio interference in which case the user may be required to take adequate measures to correct this interference. Copyright © 2021, Eventide Inc.
- Page 154 A. Signal Flow A. Signal Flow A.1. Audio Signal Flow Copyright © 2021, Eventide Inc.
- Page 155 A. Signal Flow A.2. Control Signal Flow Copyright © 2021, Eventide Inc.
- Page 156 This will clear the current state of the H9000, and enable the Wi-Fi Access Point (as long as a Wi-Fi dongle is plugged into a USB-A port on the H9000). This does not a ect any of your saved sessions or presets, but will clear the currently loaded session, which includes all settings in Setup View.
- Page 157 To install an update using a FAT-32 formatted USB ash drive: • Download the “USB Installer for H9000”, which is available on the Eventide website. If for any reason you need a speci c rmware version, please contact support@eventide.com and we will provide you with the correct USB installer.
- Page 158 Emote and select the “Dump Data” option. The USB Dump Data feature can also be done using Emote for either type of H9000. In the Devices View, click the Update button, and a button to “Dump Data” will be available. This is useful if you’d like to make a backup of your H9000’s data before updating its rmware.
- Page 159 • Connect the drive to a USB port on the H9000. On the H9000, power on the unit while holding both the CHECK and X keys for at least two • seconds and wait for it to boot into self-test mode. You will see a progress bar that indicates the tests are being performed.
- Page 160 C. H9000 MIDI Functionality C. H9000 MIDI Functionality On the H9000, MIDI is always on and received simultaneously by all of the USB ports as well as the MIDI-in DIN connector. The H9000 does not currently transmit or respond to any SysEx messages.
- Page 161 C. H9000 MIDI Functionality C.4. Note Number Uses the whole range of the keyboard, using the note number as the control value. C.5. Note To Hz Uses the whole range of the keyboard, and emits a control value equal to the actual frequency of the note being played.
- Page 163 © Copyright 2021, Eventide Inc.
Need help?
Do you have a question about the H9000 and is the answer not in the manual?
Questions and answers