
Related Manuals for Proline TTR 92


Summary of Contents for Proline TTR 92
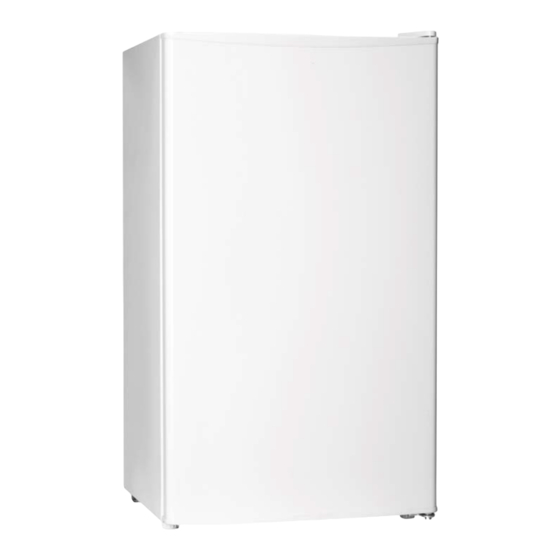
- Page 1 TTR 92 RÉFRIGÉRATEUR SOUS PLAN (48cm UNDER COUNTER REFRIGERATOR (48cm) UNDERCOUNTER KOELKAST (48cm) BAJO MOSTRADOR FRIGORÍFICO (48cm)
-
Page 2: Table Of Contents
Table des matières ATTENTION ..................................2 MISES EN GARDE IMPORTANTES ..........................5 DESCRIPTION..................................6 AVANT D'INSTALLER L'APPAREIL ..........................6 INSTALLATION .................................. 7 TEMPÉRATURE AMBIANTE ............................7 AVANT DE REMPLIR LE RÉFRIGÉRATEUR ........................7 RÉGLAGE DE TEMPÉRATURE ............................8 DÉPLACEMENT DE L'APPAREIL ............................ 8 UTILISATION DU RÉFRIGÉRATEUR .......................... -
Page 3: Attention
ATTENTION Cet appareil est destiné à un usage domestique uniquement. Toute utilisation autre que celle prévue pour cet appareil, ou pour une autre application que celle prévue, par exemple une application commerciale, est interdite. Si le câble d'alimentation est endommagé, il doit être remplacé... - Page 4 MISE EN GARDE: Ne pas utiliser de dispositifs mécaniques ou autres moyens pour accélérer le processus de dégivrage autres que ceux recommandés par le fabricant. MISE EN GARDE: Ne pas endommager le circuit de réfrigération. MISE EN GARDE: Ne pas utiliser d'appareils électriques à l'intérieur du compartiment de stockage des denrées, à...
- Page 5 promouvoir la réutilisation des ressources matérielles. La mise au rebut doit être faite de façon sûre dans des points de collecte publique prévus à cet effet. Installation et mise en service: L’appareil doit être installé sur le sol, sur une surface plane et horizontale en s’assurant que les ouvertures d’aération sont correctement dégagées.
-
Page 6: Mises En Garde Importantes
MISES EN GARDE IMPORTANTES Si vous souhaitez vous débarrasser d’un vieux congélateur ou d’un vieux réfrigérateur comportant se retrouvent une serrure sur la porte, veillez à ce que celle-ci soit désactivée afin d'éviter que des enfants enfermés à l'intérieur en jouant. ... -
Page 7: Description
DESCRIPTION 1. Compartiment à glace 2. Étagères 3. Couvercle du bac à légumes 4. Bac à légumes 5. Pied réglable 6. Thermostat et lampe 7. Étagères de la porte AVANT D'INSTALLER L'APPAREIL Avant de brancher l'appareil, vérifiez que la tension indiquée sur la plaque signalétique correspond à celle des prises de votre domicile. -
Page 8: Installation
L'appareil doit être mis à la terre. Le fabricant n'est pas responsable des dommages pouvant résulter du branchement sur une prise sans mise à la terre. INSTALLATION Installez l’appareil dans une pièce sèche et suffisamment aérée. L’emplacement ne doit pas être directement exposé... -
Page 9: Réglage De Température
arrive à la température adéquate. Nettoyez l'intérieur de l'appareil avec de l'eau chaude et un peu de produit nettoyant, afin d'enlever les poussières liées à la fabrication et au transport. RÉGLAGE DE TEMPÉRATURE La température du réfrigérateur se règle au moyen du bouton de réglage situé à l'intérieur。 Ajustez le bouton de réglage selon vos besoins ou préférences. - Page 10 Traitement des produits frais Pour de meilleurs résultats: Ne conservez que des aliments très frais et de bonne qualité. Enveloppez les aliments ou couvrez-les avant de les mettre au réfrigérateur. Cela permet de garder les leur saveur et leur couleur. aliments frais et d’éviter qu’ils ne se déshydratent et ne perdent Cela permet également d'éviter les transferts d'odeurs entre les aliments.
- Page 11 nécessairement de manière hermétique). Faites attention à choisir un poisson très frais si vous avez l'intention de le garder pour le jour d'après ou pour plus tard. Lavez les poissons entiers sous l'eau froide pour enlever les saletés et les écailles papier essuie-tout.
-
Page 12: Inversion Du Sens D'ouverture De La Porte
DÉGIVRAGE DU COMPARTIMENT À GLACE Le compartiment à glace doit être dégivré régulièrement ou dès que l’épaisseur du givre dépasse 3 mm. 1. Débranchez l’appareil. 2. Sortez les bacs à glaçons. Vérifiez que le bac d’égouttage est correctement positionné sous le compartiment à glace. 3. - Page 13 4. Déplacez le cache du trou du côté gauche vers le côté droit. Soulevez la porte et posez-la sur une surface rembourrée pour éviter de la rayer. 5. Démontez le pied de mise à l’horizontale. Dévissez et retirez la goupille de la charnière inférieure. Retournez la charnière inférieure et réassemblez sa goupille.
-
Page 14: Conseils D'économie D'énergie
CONSEILS D'ÉCONOMIE D'ÉNERGIE Afin d'optimiser la consommation d'énergie de votre appareil: Faites en sorte que le réfrigérateur soit suffisamment aéré (voir section Installation). Laissez refroidir les boissons et les aliments chauds avant de les mettre dans l'appareil. Ouvrez la porte le moins souvent possible. ... -
Page 15: Dépannage
La porte est ouverte trop souvent. afin que la température puisse se stabiliser. Une grande quantité d'aliments vient d'être mise dans l'appareil. SPÉCIFICATIONS Marque Proline Type d'appareil Réfrigérateur Sous Plan (48cm) Classe climatique + fourchette de N (+16°C ~ +32°C) températures ambiantes Classe de protection contre les chocs électriques... - Page 16 En raison des mises au point et améliorations constamment apportées à nos produits, de petites incohérences peuvent apparaî tre dans le mode d'emploi. Veuillez nous excuser pour la gêne occasionnée. Darty Plc © UK: EC1N 6TE 10/04/2014...
- Page 18 Table of Contents WARNINGS ..................................2 IMPORTANT SAFETY INSTRUCTIONS .......................... 4 NAMES OF PARTS ................................5 BEFORE INSTALLING THE FRIDGE ..........................5 INSTALLATION .................................. 6 AMBIENT TEMPERATURE ............................... 6 BEFORE PLACING FOOD IN THE FRIDGE ........................6 TEMPERATURE CONTROL .............................. 6 MOVING YOUR APPLIANCE ............................
-
Page 19: Warnings
WARNINGS This appliance is intended for domestic household use only and should not be used for any other purpose or in any other application, such as for non-domestic use or in a commercial environment. If the supply cord is damaged, it must be replaced by the manufacturer, its service agent or similarly qualified persons in order to avoid a hazard. - Page 20 WARNING: Do not use mechanical devices or other means to accelerate the defrosting process, other than those recommended by the manufacturer. WARNING: Do not damage the refrigerant circuit. WARNING: Do not use electrical appliances inside the food storage compartments of the appliance, unless they are of the type recommended by the manufacturer.
-
Page 21: Important Safety Instructions
For installation, servicing: Appliance should be placed on a horizontal floor and keep the ventilation freely. Don’t try to replace or repair any components by yourself, ask the service agency for help if necessary. For handling: Always handle the appliance to avoid any damage. For the method of bulb replacement please see section “Bulb replacement”... -
Page 22: Names Of Parts
NAMES OF PARTS 1. Ice box compartment 2. Shelves 3. Cover for vegetable container 4. Vegetable container 5. Leveling foot 6. Temperature control knob with bulb assembly 7. Door shelves BEFORE INSTALLING THE FRIDGE Before connecting your refrigerator to the power supply, check that the voltage stated on the rating label of your appliance corresponds to the voltage in your home. -
Page 23: Installation
INSTALLATION Install the appliance in a dry, well ventilated room. The installation location should neither be exposed to direct sunlight nor near a heat source, e.g. a cooker, radiator, etc. To ensure adequate ventilation for the appliance, allow a minimum of 10 cm of airspace on each side of the cabinet. -
Page 24: Moving Your Appliance
0 is off setting 1 is warmest setting 5 is coldest setting In the 0 position the appliance does not operate (the cooling system is switched off), but power supply is not interrupted. The running time and temperature are affected by where the fridge is located, how often the door is opened and the temperature of the room the fridge is located in. - Page 25 Make sure that strong smelling foods are wrapped or covered and stored away from foods such as butter, milk and cream which can be tainted by strong odours. Cool hot foods down before placing them in the fridge. Dairy foods and eggs ...
-
Page 26: Making Ice Cubes
Take care not to store the following at temperatures of less than 7°C for long periods: Citrus fruit, melons, aubergines, pineapple, papaya, courgettes, passion fruit, cucumber, peppers, tomatoes. Undesirable changes will occur at low temperatures such as softening of the flesh, browning and/or accelerated decaying. - Page 27 1. Remove the top right hinge cover. 2. Remove the screws and then top hinge. 3. Remove the top left screw cover. 4. Move the hole cover from the left side to the right side. Lift the door and place it on a padded surface to prevent it from scratching.
-
Page 28: Tips For Saving Energy
6. Fit the bottom hinge and replace the levelling foot. 7. Fit the door back on. Ensure the door is aligned horizontally and vertically so that the seals are closed on all sides before finally tightening the top hinge. 8. Fix the top hinge on the top of the appliance. 9. -
Page 29: Cleaning And Maintenance
CLEANING AND MAINTENANCE Do not use abrasive cleaning agents or solvents. 1. Set the temperature control knob to the 0 position and disconnect the mains plug from the mains socket. 2. Take out the food and store in a cool location. 3. -
Page 30: Specifications
SPECIFICATIONS Brand Proline Appliance type Under Counter Refrigerator (48cm) Climate class + Ambient range N (+16°C ~ +32°C) Electric shock protection class Rated voltage and frequency 220-240V~ 50Hz Input power Lamp power ≤10W Energy consumption 0.304kWh/24h Refrigerant/Amount R600a/22 g Rated current 0.55A... - Page 31 Inhoudsopgave WAARSCHUWINGEN ................................2 BELANGRIJKE VEILIGHEIDSVOORZORGEN ........................4 BENAMING VAN DE ONDERDELEN ..........................5 INSTALLATIE ..................................6 OMGEVINGSTEMPERATUUR .............................. 6 VOORDAT U LEVENSMIDDELEN IN DE KOELKAST ......................7 TEMPERATUURREGELING ..............................7 UW APPARAAT VERPLAATSEN ............................7 LEVENSMIDDELEN IN DE KOELKAST BEWAREN ......................8 IJSBLOKJES MAKEN ................................
-
Page 32: Waarschuwingen
WAARSCHUWINGEN Dit apparaat is uitsluitend bedoeld voor huishoudelijk gebruik en mag niet worden gebruikt voor andere doeleinden of in andere toepassingen, zoals voor niet-huishoudelijk gebruik of in een commerciële omgeving. Een beschadigd netsnoer mag uitsluitend worden vervangen door de fabrikant, een erkende reparatieservice of vaklui met gelijkwaardige kwalificaties om gevaar te voorkomen. - Page 33 WAARSCHUWING: gebruik geen andere mechanische apparatuur of middelen dan diegene door de fabrikant worden aanbevolen om het ontdooiproces te versnellen. WAARSCHUWING: zorg ervoor dat het koelvloeistofcircuit niet wordt beschadigd. WAARSCHUWING: gebruik geen elektrische apparaten in de voedselvakken van het apparaat, tenzij dit door de fabrikant ervan wordt aanbevolen.
-
Page 34: Belangrijke Veiligheidsvoorzorgen
grondstoffen te bevorderen. Lever het apparaat in bij een inzamelpunt in uw gemeente. Installatie en onderhoud: Plaats het apparaat op een horizontaal oppervlak en zorg voor voldoende ventilatie. Vervang of repareer de onderdelen niet zelf. Indien nodig, raadpleeg het servicecentrum. Hantering: Hanteer het apparaat altijd met de nodige voorzichtigheid om schade te voorkomen. -
Page 35: Benaming Van De Onderdelen
BENAMING VAN DE ONDERDELEN 1. Ijsvak 2. Legplank 3. Deksel voor groentebak 4. Groentelade 5. Stelvoetje 6. Assemblage thermostaatknop en lamp 7. Deurvakken VOORDAT U HET APPARAAT INSTALLEERT Controleer voordat u het apparaat op de netvoeding aansluit of de spanning die is aangegeven op het typeplaatje van uw apparaat overeenstemt met de netspanning in uw woning. -
Page 36: Installatie
Dit apparaat moet geaard worden. De fabrikant is niet aansprakelijk voor schade als gevolg van gebruik zonder aarding. INSTALLATIE Installeer dit apparaat in een droge, goed geventileerde ruimte. De plaats waar het apparaat wordt geï nstalleerd mag niet aan rechtstreeks zonlicht of een andere warmtebron zijn blootgesteld, zoals een fornuis, radiator enz. -
Page 37: Voordat U Levensmiddelen In De Koelkast
VOORDAT U LEVENSMIDDELEN IN DE KOELKAST Verwijder alle verpakkingsmateriaal. Laat het lege apparaat ongeveer 2 – 3 uur werken zodat alle vakken kunnen afkoelen tot de juiste temperatuur. Reinig de binnenkant van het apparaat met warm water en een sopje om eventuele fabricage- en transportresten te verwijderen. -
Page 38: Levensmiddelen In De Koelkast Bewaren
van een lek door beschadiging van de koelelementen moet u de diepvriezer uit de nabijheid van naakte vlammen en warmtebronnen houden en de ruimte waarin het apparaat zich bevindt gedurende enkele minuten goed ventileren. LEVENSMIDDELEN IN DE KOELKAST BEWAREN De koelkast helpt om bederfelijke levensmiddelen langer vers te houden. Verse levensmiddelen Voor een optimaal resultaat: * Bewaar alleen levensmiddelen van goede kwaliteit die zeer vers zijn. -
Page 39: Ijsblokjes Maken
Vis en zeevruchten Hele vis en filets moeten op de dag van aankoop worden geconsumeerd. Bewaar deze in de koelkast op een schaal en dek af met plastic of aluminiumfolie of vetvrij papier. * Als vis een dag of langer moet worden bewaard, moet men erop letten dat men zeer verse vis koopt. -
Page 40: Het Ijsvak Ontdooien
HET IJSVAK ONTDOOIEN Ontdooi het ijsvak regelmatig of wanneer de ijslaag meer dan 3mm dik is. 1. Haal de stekker uit het stopcontact. 2. Verwijder de bakjes voor ijsblokjes. Zorg dat de opvangbak zich juist onder het ijsvak bevindt. 3. - Page 41 4. Verplaats de kap van links naar rechts. Til de deur op en plaats deze op een zacht oppervlak om krassen te vermijden. 5. Verwijder de stelvoetjes. Schroef de onderste scharnierpen los en haal af. Keer het onderste scharnier om en maak de onderste scharnierpen opnieuw vast.
-
Page 42: Tips Om Energie Te Besparen
TIPS OM ENERGIE TE BESPAREN Voor het meest energie-efficiënte gebruik van uw apparaat: * Zorg voor voldoende ventilatie van uw koelkast-diepvries als aanbevolen in de installatie-instructies. * Laat warme gerechten afkoelen voordat u deze in het apparaat zet. * Open de deur zo weinig mogelijk. * Sluit de geopende deur altijd zo snel mogelijk. -
Page 43: Problemen Oplossen
Open zo weinig mogelijk de deur en laat de De deur werd te vaak geopend. temperatuur stabiliseren. Onlangs is een grote hoeveelheid voedsel ingezet. TECHNISCHE GEGEVENS Merk Proline Type apparaat Undercounter Koelkast (48cm) Klimaatklasse + bereik N(+16° C ~ +32° C) omgevingstemperatuur Elektrische veiligheidsklasse... - Page 44 Onze verontschuldiging voor eventueel ongemak als gevolg van kleine onnauwkeurigheden, die ondanks onze zorgen in deze gebruiksaanwijzing kunnen voorkomen omdat wij onze producten voortdurend verbeteren en ontwikkelen. Darty Plc © UK: EC1N 6TE 10 / 04 / 2014...
- Page 45 Í ndice ADVERTENCIAS ................................2 INSTRUCCIONES IMPORTANTES SOBRE SEGURIDAD ..................... 4 NOMBRE DE LOS COMPONENTES ..........................5 ANTES DE INSTALAR EL APARATO..........................5 INSTALACIÓN ..................................6 TEMPERATURA AMBIENTE ............................6 ANTES DE INTRODUCIR LOS ALIMENTOS EN EL FRIGORÍ FICO ................7 CONTROL DE LA TEMPERATURA..........................
-
Page 46: Advertencias
ADVERTENCIAS Este aparato ha sido concebido para uso exclusivamente doméstico y no se debe utilizar con ningún otro objetivo ni aplicación, como el uso no doméstico o con fines comerciales. Si el cable eléctrico está dañado, deberá ser sustituido por el fabricante, el servicio técnico o persona con formación similar para evitar cualquier peligro. - Page 47 medios para acelerar el proceso de descongelación, y siga solo las indicaciones del fabricante. ADVERTENCIA: No dañe el circuito refrigerante. ADVERTENCIA: No utilice aparatos eléctricos dentro de los compartimentos para la conservación de alimentos del aparato, a menos que sean del tipo recomendado por el fabricante. No guarde en este aparato sustancias explosivas como latas de aerosol con propelente inflamable.
-
Page 48: Instrucciones Importantes Sobre Seguridad
Instalación, reparación: El aparato debe colocarse en suelo horizontal y con buena ventilación. No intente reemplazar o reparar ninguno de los componentes usted mismo. Solicite ayuda a un taller de reparación. Manejo: Utilice siempre el aparato desde el mango para evitar daños. Las instrucciones para sustituir la bombilla están en la sección “Sustitución de la bombilla”... -
Page 49: Nombre De Los Componentes
NOMBRE DE LOS COMPONENTES 1. Caja de hielo 2. Estanterí a 3. Cubierta para el compartimento de las verduras 4. Compartimento para verdura 5. Pie nivelador 6. Control de temperatura y luz 7. Estanterí as de la puerta ANTES DE INSTALAR EL APARATO Antes de conectar el aparato a la toma de corriente, compruebe que la tensión indicada en la placa de caracterí... -
Page 50: Instalación
El aparato debe estar conectado a tierra. El fabricante no se responsabiliza de los daños que puedan producirse por el uso del aparato sin estar conectado a tierra. INSTALACIÓ N Instale el aparato en una habitación seca y bien ventilada. A la hora de decidir la ubicación del aparato nunca deberá... -
Page 51: Antes De Introducir Los Alimentos En El Frigorí Fico
ANTES DE INTRODUCIR LOS ALIMENTOS EN EL FRIGORÍ FICO Retire todo el embalaje del aparato. El aparato debe funcionar vací o durante 2 – 3 horas para conseguir que cada compartimento se refrigere hasta alcanzar la temperatura adecuada. ... -
Page 52: Conservación De Alimentos En El Frigorí Fico
ecológico, es explosivo. Por ello, debe tener cuidado durante su transporte e instalación para evitar que los elementos refrigerantes de su electrodoméstico resulten dañados. En caso de que se produzca una fuga provocada por daños en los elementos refrigerantes, retire su congelador de la proximidad de fuentes de llamas o calor y ventile la estancia en la que se encuentra el electrodoméstico durante unos minutos. -
Page 53: Elaboración De Cubitos De Hielo
provocarse una intoxicación. La carne de ave cocinada se deberá enfriar y refrigerar rápidamente. Extraiga el relleno del interior del ave, y guárdelo por separado. Pescado y marisco El pescado entero o filetes de pescado se debe consumir el dí a de su adquisición. -
Page 54: Descongelación De La Caja De Hielo
NOTA: Esta caja de hielo no es un verdadero equipo para fabricar hielo ni un compartimento congelador, y podrí a no mantener los helados congelados o congelar los artí culos. La temperatura de esta caja de hielo no produce suficiente frí o para congelar alimentos de forma segura. - Page 55 2. Retire los tornillos y la bisagra superior. 3. Retire la cubierta del tornillo superior izquierdo. 4. Mueva la cubierta del agujero del lado izquierdo al derecho. Eleve la puerta y deposí tela sobre una superficie acolchada para que no se arañe.
-
Page 56: Consejos Para Ahorrar Energí A
7. Vuelva a instalar la puerta. Asegúrese de que está alineada horinzontalmente y verticalmente, de manera que las juntas se cierren por todos los lados antes de apretar del todo la bisagra superior. 8. Fije la bisagra superior en la parte de arriba del aparato. 9. -
Page 57: Resolución De Problemas
Reemplazo de la bombilla 1. Ajuste el mando de la temperatura a 0 y desenchufe el aparato de la toma de corriente. 2. Desenchufe el aparato. 3. Retire la cubierta de la bombilla con un destornillador de punta plana (no incluido). -
Page 58: Especificaciones
ESPECIFICACIONES Marca Proline Tipo de electrodoméstico Bajo mostrador Frigorí fico (48cm) Clase de clima + Rango de temperatura N(+16°C ~ +32°C) ambiente Clase protección contra descarga eléctrica Tensión nominal y frecuencia 220-240V~ 50Hz Potencia Potencia máxima de la bombilla ≤10W Consumo de energí...
Need help?
Do you have a question about the TTR 92 and is the answer not in the manual?
Questions and answers