Table of Contents
Advertisement
Quick Links
Store this manual in the pocket provided
on the underside of the seat cover as
illustrated above.
Baby Trend, Inc.
13048 Valley Blvd.
Fontana CA 92335
VC01_En_042123.1
www.babytrend.com
Carefully r
manual. Failu
risk of
Stor
1-800-328-7363
(8:00 a.m. ~ 4:30 p.m. PST)
www.babytrend.com
WARNING
Carefully read and understand all instructions and warnings in this
manual. Failure to properly use this Car Seat increases the risk of
SERIOUS INJURY or DEATH in a sudden stop or crash.
KEEP INSTRUCTIONS FOR FUTURE USE.
Store this manual in the pocket provided
on the underside of the seat cover. See back cover for location.
Trooper
Convertible Car Seat
OWNER'S MANUAL
For instructions in French, log on to
www.babytrend.com or call: 1-800-328-7363.
™
Scan QR Code
for Trooper
™
how to videos
VC01
Copyright © 2023, Baby Trend, Inc.
Advertisement
Table of Contents

Subscribe to Our Youtube Channel
Related Manuals for BABYTREND Trooper VC01


Summary of Contents for BABYTREND Trooper VC01
- Page 1 Trooper ™ how to videos VC01 OWNER’S MANUAL For instructions in French, log on to www.babytrend.com or call: 1-800-328-7363. Baby Trend, Inc. 1-800-328-7363 13048 Valley Blvd. (8:00 a.m. ~ 4:30 p.m. PST) Fontana CA 92335 www.babytrend.com VC01_En_042123.1...
-
Page 2: Table Of Contents
Table of Contents Table of Contents 1.0 General Warnings and Information ..........3 5.12 Seat Fabric Removal and laundering.......... 40 5.13 Low Birth Weight Harness Shortening Routing......41 2.0 Use Recommendations ..............5 5.14 Pillow, Seat Insert and Harness Covers Use......45 2.1 Rear facing seat requirements............ -
Page 3: General Warnings And Information
1.0 General Warnings and Information 1.0 General Warnings and Information WARNING! • Secure this car seat with the vehicle seat belt or UAS Lower anchor connectors at all times (even when there is no child in it). An DEATH or SERIOUS INJURY can occur: unsecured car seat can injure others if a crash occurs. -
Page 4: Use Recommendations
2.0 Use Recommendations 2.0 Use Recommendations The American Academy of Pediatrics and Baby Trend recommend 2.2 Forward facing seat requirements children remain in a rear-facing car seat for as long as possible, until they reach the highest weight or height allowed by their seat. Weight and Height Requirements: •... -
Page 5: Car Seat Parts
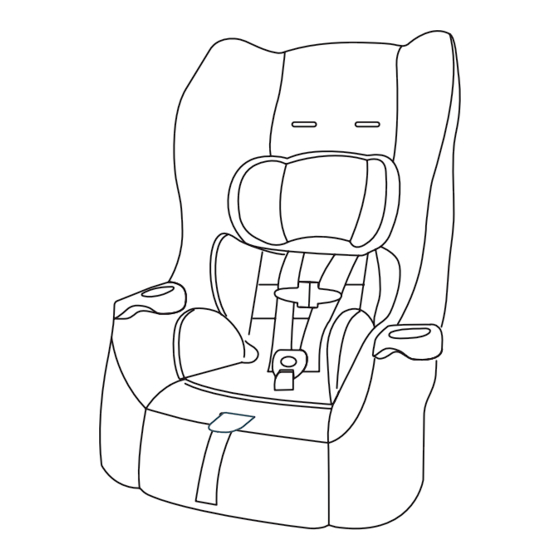
3.0 Car Seat Parts Top Tether Webbing Tension Adjuster Harness Harness Covers Head pillow Slots x 5 Seat pad Splitter Plate Harness Chest clip Webbing Tension Seat insert Instruction Manual Adjuster Release Button Storage Flip Foot Harness Webbing Twist Crotch buckle End Loops Indicator Stripe Rear Facing... -
Page 6: Selecting A Vehicle Seating Location
4.0 Selecting a Vehicle Seating Location 4.0 Selecting a Vehicle Seating Location WARNING! Whenever possible, this car seat should be secured in the rear center, seating position. The rear seat directly DEATH or SERIOUS INJURY can occur: behind the front seats NOT in a third Fig. -
Page 7: Safe Vehicle Seat Belt Systems
4.0 Selecting a Vehicle Seating Location 4.0 Selecting a Vehicle Seating Location 4.2 Check that the Vehicle Seat Meets the Following Requirements • Please review your vehicle owner’s manual to determine the best location for the car seat or to determine if any locations are unsafe WARNING! for car seat installation. - Page 8 4.0 Selecting a Vehicle Seating Location 4.0 Selecting a Vehicle Seating Location Lap Belts (Manually Adjusted) A lap belt Combination Lap/Shoulder that is manually adjusted and will remain Belt with Sliding Latch Plate A tightly adjusted around the car seat while combination lap/shoulder belt with Fig.
-
Page 9: Locking Clip Installation
4.0 Selecting a Vehicle Seating Location 4.0 Selecting a Vehicle Seating Location 4.4 Locking Clip Installation 4.5 UNSAFE Vehicle Seat Belt Systems Locking clip under the seat cover next to DO NOT use the following types of seat belt systems with the car seat. Locking Clip is stored under the seat cover of the car instruction manual. -
Page 10: Preparation For Installation In Vehicle
4.0 Selecting a Vehicle Seating Location 4.0 Selecting a Vehicle Seating Location Passive Restraint – Lap or Shoulder 4.6 Preparation for Installation in Vehicle Belt Mounted on Door DO NOT use a When available, UAS is the recommended method of securing the car seat belt that is connected to the door in seat in the vehicle. -
Page 11: Uas
4.0 Selecting a Vehicle Seating Location 4.0 Selecting a Vehicle Seating Location 4.8 Top Tether Anchor Locations 3. Check again for any active frontal air bags. DO NOT use a location that has an active frontal air bag or is adjacent to an Active Air bag Top Tether Locations are indicated by the following symbol: such that, when deployed, the Active Air bag may come into contact Top Tether symbol:... -
Page 12: Installation And Use
5.0 Installation and Use 5.0 Installation and Use 5.1 Child Placement in The Car Seat The American Academy of Pediatrics and Baby Trend recommend children remain in a rear-facing car seat as long as possible, until they reach the highest weight or height allowed by their seat. WARNING! DEATH or SERIOUS INJURY can occur: •... -
Page 13: Installation Diagrams
5.0 Installation and Use 5.0 Installation and Use 5.1.1 Installation Diagrams 5.2 Rear Facing Installation with Lap/Shoulder Belt Routing paths for Rear Facing installation See section 2.1 for requirements. - Weight 1.8 - 18 kg, (4 and 40 lbs) - Height is 102 cm (40 in) or less. - Top of head has NOT reached 25.4 mm (1 in) from top of seatback Lap/Shoulder belt... -
Page 14: Rear Facing Installation With Lap Belt
5.0 Installation and Use 5.0 Installation and Use 4. Use body weight or apply weight in 5.3 Rear Facing Installation with Lap Belt. seat with hand to compress the vehicle seat cushion then insert the seat buckle See section 2.1 for requirements. tongue into the buckle and pull seat belt - Weight is 1.81 - 18 kg (4 - 40 lbs). - Page 15 5.0 Installation and Use 5.0 Installation and Use 4. Use body weight or apply weight in 5.4 Rear Facing Installation with UAS Lower Connectors seat with hand to compress the vehicle See section 2.1 for use requirements. seat cushion then insert the seat buckle - Weight is 1.81 - 18 kg, (4 - 40 lbs).
-
Page 16: Forward Facing Installation With Lap/Shoulder Belt And Top Tether
5.0 Installation and Use 5.0 Installation and Use 4. Use body weight or apply weight in 5.5 Forward Facing Installation with Lap/shoulder seat with hand to compress the vehicle Belt and Top Tether seat cushion then insert the UAS lower Top Tether connector onto the vehicle anchor See section 2.2 for requirements. -
Page 17: Forward Facing Installation With Lap Belt And Top Tether
5.0 Installation and Use 5.0 Installation and Use 4. Route seat belt through forward facing 5.6 Forward Facing Installation with Lap Belt and Top Tether belt path (Fig. 31a). Requirements. See section 2.2: Top Tether 5. Put weight in seat with hand to compress •... -
Page 18: Forward Facing Installation With Uas Lower Connector And Top Tether
5.0 Installation and Use 5.0 Installation and Use 4. Route seat belt through forward facing 5.7 Forward Facing Installation with UAS Lower Connector and belt path (Fig. 33a). Top Tether Top Tether with UAS Lower Connector See section 2.2 for requirements. 5. -
Page 19: Aircraft Installation
5.0 Installation and Use 5.0 Installation and Use Top Ears Max Height 4. Route UAS lower connectors through 5.9 Child Placement In The Car Seat forward facing belt path (Fig. 35a). 5. Put weight in seat with hand to compress 1. -
Page 20: Shoulder Height Adjustment
5.0 Installation and Use 5.0 Installation and Use 4. Insert the buckle tongues into the 5.10 Shoulder Height Adjustment buckle (Fig. 37a). NOTE: Pull up and test buckle tongues 1. Shoulder Height Positions to be sure they are secure. Rear Facing: Positions 1, 2 and 3. Forward Facing: Positions 3, 4 and 5 5. -
Page 21: Crotch Buckle Adjustment
5.0 Installation and Use 5.0 Installation and Use 12.7 to 25.4mm 5.11 Crotch Buckle Adjustment 5.12 Seat Fabric Removal And Laundering (1/2 to 1 inch) above thigh Seat Fabric Removal If the gap between the buckle and thigh is not between 12.7 to 25.4mm 1. -
Page 22: Low Birth Weight Harness Shortening Routing
5.0 Installation and Use 5.0 Installation and Use 5.13 Low Birth Weight Harness 5.13 Low Birth Weight Harness Shortening Routing cont. Shortening Routing 8. From top side feed harness loop down though bottom 1. Remove the head pillow and set aside of seat slot (1). - Page 23 5.0 Installation and Use 5.0 Installation and Use 5.13 Low Birth Weight Harness Shortening Routing cont. 5.13 Low Birth Weight Harness Shortening Routing cont. 19. Thread buckle through the seat fabric. 20. Install seat insert. Seat insert use is not required.
-
Page 24: Pillow, Seat Insert And Harness Covers Use
5.0 Installation and Use 5.0 Installation and Use 5.13 Low Birth Weight Harness Shortening Routing cont. 5.14 Pillow, Seat Insert and Harness Covers Use cont. 2. Seat Insert Use 31. Child in car seat with seat insert, • Use is not mandatory. without pillow and harness covers. -
Page 25: Securing The Pillow
5.0 Installation and Use 5.0 Installation and Use 5.16 Cup holders Removal, 5.17 Securing Pillow Installation and Cleaning. 1. Insert pillow attachment straps Removal through the appropriate shoulder belt position (Fig. 48a). - Press tab on bottom of cup holder Fig. -
Page 26: Safety Checklist/Safe Practices
5.0 Use and Installation - 6.0 Safety 7.0 Additional Information 5.19 UAS or Top Tether Removal Please Drive Safely To remove the car seat from the vehicle, squeeze Press to release the webbing tension release button on the 7.1 Certification UAS lower connector or Top Tether to loosen This Car Seat is certified for use in Motor Vehicles thewebbing (Fig. -
Page 27: Registration Information
(date) can be found on a white label located on the hours of 8:00 am and 4:30 PM, Pacific Time, Monday bottom of the car seat. through Friday or visit us online at www.babytrend.com USA Toll Free: 1-800-328-7363 8:00 a.m. to 4:30 p.m. (PST) Monday - Friday or www.babytrend.com... -
Page 28: Warranty
10.0 Warranty 10.0 GARANTIA WARRANTY GARANTIA DO NOT RETURN YOUR PRODUCT TO THE NO DEVUELVA SU PRODUCTO A LA TIENDA. POR ® ® STORE. PLEASE CONTACT BABY TREND FAVOR CONTACTE A BABY TREND PARA PIEZAS REPLACEMENT PARTS, SERVICE AND REPAIR. DE REPUESTO, SERVICIO Y REPARACION. - Page 29 10.0 GARANTIE GARANTIE NE PAS RETOURNER VOTRE PRODUIT AU MAGASIN. ® VEUILLEZ CONTACTER BABY TREND POUR DES PIÈCES DE RECHANGE, ENTRETIEN ET RÉPARATION. La garantie Baby Trend couvre les vices de fabrication dans ® les 180 jours suivant l'achat du produit. Tout produit qui a été...
- Page 30 Copyright © 2023, Baby Trend, Inc. Copyright © 2023, Baby Trend, Inc.
Need help?
Do you have a question about the Trooper VC01 and is the answer not in the manual?
Questions and answers