Advertisement
Available languages
Available languages
Quick Links
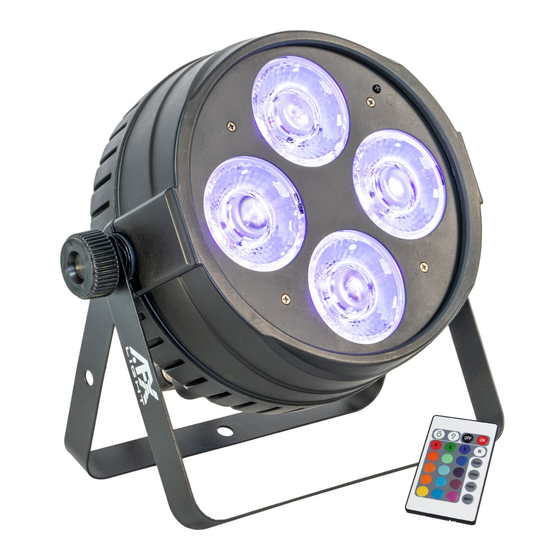
CLUB-UV450
CODE: 16-2116
GB - DMX CONTROLLED
UV PAR PROJECTOR 4 X 50W
F - PROJECTEUR PAR DMX A LED UV 4 X 50W
D - DMX GESTEUERTER UV PAR STRAHLER
4 X 50W
NL - DMX BESTUURDE UV PAR PROJECTOR 4 X 50W
E - PROYECTOR PAR DMX DE LED UV 4 X 50W
DMX Channels - p. 2
GB - User Manual - p. 3
F - Manuel d'Utilisation - p. 8
D - Bedienungsanleitung - S. 13
View the product on our website
NL - Handleiding - p. 18
and download the multilanguage
manual
ES - Manual de Instrucciones - p. 23
Advertisement

Related Manuals for afx light CLUB-UV450


Summary of Contents for afx light CLUB-UV450
-
Page 1: Table Of Contents
CLUB-UV450 CODE: 16-2116 GB - DMX CONTROLLED UV PAR PROJECTOR 4 X 50W F - PROJECTEUR PAR DMX A LED UV 4 X 50W D - DMX GESTEUERTER UV PAR STRAHLER 4 X 50W NL - DMX BESTUURDE UV PAR PROJECTOR 4 X 50W E - PROYECTOR PAR DMX DE LED UV 4 X 50W DMX Channels - p. -
Page 2: Dmx Channels
DMX CHANNELS © Copyright LOTRONIC 2023... -
Page 3: User Manual
In the event that a fixture must be returned to the factory, it is important that the fixture be returned in the original factory box and packing. CONTENTS OF THE CARTON • 1 pc. CLUB-UV450 • 1 pc. power cable • 1 pc. signal cable •... - Page 4 the unit by yourself. Repairs carried out by unskilled people can lead to damage or malfunction. Please contact the nearest authorized technical assistance center. Always use the same type of spare parts. • Make sure the power cord is never crimped or damaged. •...
- Page 5 Cabling must have a male XLR connector on one end and a female XLR connector on the other end. Termination reduces signal errors. To avoid signal transmission problems and interference, it is always advisable to connect a DMX signal terminator. CAUTION Do not allow contact between the common and the fixture’s chassis ground.
- Page 6 IR REMOTE CONTROLLER Please operate the remote control within a distance of 6m and 30° between the remote and the appliance. Aim the remote at the sensor. Remove all obstacles between the remote and the sensor. The remote control might not work properly if the sensor is exposed to strong sunshine. If the remote control doesn’t work properly, please check the batteries.
- Page 7 on the unit’s optics. a. Clean with soft cloth using normal glass cleaning fluid. b. Always dry the parts carefully. SPECIFICATIONS Power supply ........................100-240V~50/60Hz Consumption ............................. 450W Light source ..........................4 x 50W UV LED UV wave length ..........................390-400nm Dimensions ........................
-
Page 8: F - Manuel D'utilisation
Conservez le carton et tous les matériaux d’emballage afin de pouvoir trans- porter l’appareil en toute sécurité. CONTENU DE L'EMBALLAGE • 1 pc. CLUB-UV450 • 1 pc. cordon d'alimentation • 1 pc. câble signal • 1 pc. mode d'emploi EXPLICATION DES SYMBOLES SUR L'APPAREIL L’éclair dans le triangle attire l’attention sur un danger physique (due à... - Page 9 • La température ambiante ne doit pas dépasser 40°C. Ne pas faire fonctionner l’appareil à des températures supérieures. • En cas de dysfonctionnement, arrêtez immédiatement l’appareil. N’essayez jamais de réparer l’appareil par vous-même. Une réparation mal faite peut entraîner des dommages et des dys- fonctionnements.
- Page 10 ATTENTION Il ne doit y avoir aucun contact entre le commun et la masse du châssis de l’appareil. La mise à la masse du commun peut provoquer une boucle de masse et votre appareil fonctionne d’une façon étrange. Testez les câbles à l’aide d’un ohm-mètre afin de vérifier la polarité et de vous assurer que les broches ne sont pas connectées à...
- Page 11 MENU DESCRIPTION M-XX Réglage de la sensibilité du micro LODA ON/OFF Recharger toutes les données V2.0 Version du logiciel CALI CODE (Password: 088) Mot de passe Étalonnage FREQ Low/High Plage de fréquences PWM CH05 5 canaux CH09 9 canaux REST ON/OFF Effacer tout MANU...
- Page 12 DIAGRAMME PHOTOMETRIQUE NETTOYAGE DE L'APPAREIL Le nettoyage des lentilles optiques internes et externes et / ou des miroirs doit être effectué pério- diquement pour optimiser la puissance lumineuse. La fréquence de nettoyage dépend de l’environ- nement dans lequel le projecteur fonctionne: Un environnement humide, enfumé ou particulière- ment sale peut causer une plus grande accumulation de saleté...
-
Page 13: D - Bedienungsanleitung
Zustand sein. Sofort die Transportfirma benachrichtigen und das Verpackungsmaterial aufbewahren, wenn Teile Transportschäden aufweisen. Verpackungsma- terial auch für späteren Transport des Geräts aufbewahren. VERPACKUNGSINHALT • 1 x CLUB-UV450 Lichteffektgerät • 1 Netzkabel • 1 Signalkabel • Bedienungsanleitung ZEICHENERKLÄRUNG... - Page 14 paraturen dürfen nur von einem Fachmann vorgenommen werden. Alle verwendeten Ersatzteile müssen mit den Originalteilen identisch sein. • Das Gerät nicht an ein Dimmerpack anschließen. • Das Netzkabel niemals quetschen oder beschädigen. • Beim Abziehen des Netzsteckers nur am Stecker ziehen, niemals am Kabel. •...
- Page 15 Ein XLR Kabel mit 3-pol. XLR Stecker an den Ausgang des Steuergeräts und die 3-pol. XLR Buchse an den DMX Eingang des Geräts anschliessen. Auf diese Weise können mehrere Geräte hinterein- ander in Serie geschlossen werden. Die Kabel müssen abgeschirmt, 2-adrig sein und einen XLR Stecker auf der einen und eine XLR Buchse auf der anderen Seite besitzen.
- Page 16 MENU DESCRIPTION M-XX Einstellung der Mikrofonempfindlichkeit LODA ON/OFF Alle Daten neu laden V2.0 Softwareversion CALI CODE (Password: 088) Passwort Kalibrierung FREQ Low/High PWM-Frequenz eingestellt CH05 5 Kanäle CH09 9 Kanäle REST ON/OFF Alles zurücksetzen MANU UXXX 000-255 Manuelle Kanalsteuerung TEMP TXXX Aktuelle Temperatur Benutzung der Fernbedienung...
- Page 17 PHOTOMETRISCHES DIAGRAMM PFLEGE Aufgrund von Staub- und Schmutzablagerungen müssen die inneren und äußeren Linsen regel- mäßig gereinigt werden, um die Lichtausbeute zu optimieren. 1. Mit normalem Glasreiniger und einem weichen Tuch das Gehäuse abwischen. 2. Die externe Optik mit Glasreiniger und einem weichen Tuch alle 3 Wochen reinigen. 3.
-
Page 18: Handleiding
Bewaar het karton en alle verpakkingsmaterialen. Indien het toestel moet gerepareerd worden is het belangrijk het toestel in zijn originele verpakking te versturen. VERPAKKINGSINHOUD • 1 st. CLUB-UV450 • 1 st. handleiding • 1 st. voedingskabel • 1 st. signaalkabel... - Page 19 • Sluit het toestel niet op een dimmer pack aan. • Nooit het netsnoer beschadigen of platdrukken. • Nooit aan de kabel trekken. • Nooit in de lichtbron kijken. Gevoelige personen kunnen een epileptische shock ondergaan (vooral bedoeld voor epileptica) •...
- Page 20 KABELCONNECTOREN De kabel moet een XLR stekker op één eind en een XLR contra op het andere eind hebben. DMX CONNECTOR CONFIGURATIE De eindweerstand vermindert signaalfouten. Om transmissie problemen en storingen te voorko- men is het aanbevolen een DMX signaal eindweerstand aan te sluiten. LET OP Geen contact maken tussen common en chassis massa.
- Page 21 MENU OMSCHRIJVING M-XX Instelling microfoongevoeligheid LODA ON/OFF Laad alle gegevens opnieuw V2.0 Software versie CALI CODE (Password: 088) Wachtwoord Kalibratie FREQ Low/High PWM-frequentie ingesteld CH05 5 kanalen CH09 9 kanalen REST ON/OFF Alles resetten MANU UXXX 000-255 Handmatige kanaalregeling TEMP TXXX Huidige temperatuur AFSTANDSBEDIENING...
- Page 22 FOTOMETRISCH DIAGRAM REINIGING Vanwege mist, rook- en stofresidus moeten de interne en externe optische lenzen en de spiegel pe- riodiek worden schoon gemaakt om de lichtuitvoer te optimaliseren. De frequentie van het reinigen hangt af van de omgeving waarin het armatuur werkt (zoals rook, mistresten, stof, dauw). 1.
-
Page 23: Manual De Instrucciones
Guarde la caja y todos los materiales de embalaje para un transporte seguro. CONTENIDOS DEL PAQUETE • 1 pc. CLUB-UV450 • 1 pc. Cable de corriente • 1 pc. cable de señal • 1 pc. Manual de instrucciones EXPLICACIÓN DE LOS SÍMBOLOS EN EL DISPOSITIVO... - Page 24 • La temperatura ambiente no debe exceder los 40°C. No utilice el dispositivo a temperaturas más altas. • En caso de mal funcionamiento, apague el dispositivo inmediatamente. Nunca intente reparar el dispositivo usted mismo. Una reparación incorrecta puede provocar daños y mal funcionamien- to.
- Page 25 CONECTORES DE CABLES El cable debe tener un conector XLR macho en un lado y un conector XLR hembra en el otro. Una resistencia de fin de línea reduce los errores de señal. Para evitar problemas de transmisión de la señal, siempre es recomendable conectar una resistencia de fin de línea DMX. ATENCIÓN No debe haber contacto entre el común y la tierra del chasis del dispositivo.
- Page 26 Función del botón: <MENU>: >: Se desplaza al primer nivel de opciones o sale del menú o función actual <UP>: Navega hacia arriba en la lista del menú o aumenta el valor numérico en una función <DOWN>: Navega hacia abajo en la lista del menú o disminuye el valor numérico en una función <ENTER>: activa el menú...
- Page 27 PRECAUCIÓN: Peligro de explosión si la batería no se sustituye correctamente. Sustitúyalo sólo con el mismo tipo o uno equivalente. ADVERTENCIA: No ingiera la batería. Peligro de quemaduras químicas. En caso de duda de que las pilas hayan sido ingeridas o introducidas en cualquier parte del cuerpo, acuda inmediatamente al médico.
- Page 28 Follow us on Instagram Assembled in PRC Designed by LOTRONIC S.A. Av. Z. Gramme 9 B - 1480 Saintes © Copyright LOTRONIC 2023...
Need help?
Do you have a question about the CLUB-UV450 and is the answer not in the manual?
Questions and answers