Table of Contents
Advertisement
Available languages
Available languages
Quick Links
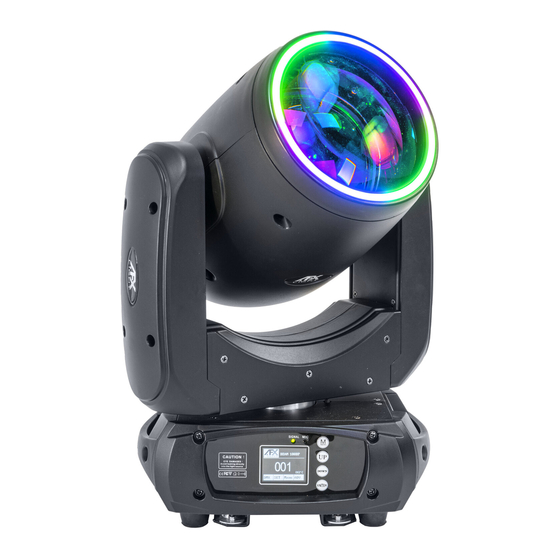
BEAM-100LED-MKII
CODE: 16-2081
WITH DUAL PRISM & LIGHT RING
AVEC DOUBLE PRISME & ANNEAU LUMINEUX
MIT DOPPELPRISMA & LICHTRING
MET DUAL PRISMA & LICHT RING
GB - User Manual - p. 9
F - Manuel d'Utilisation - p. 13
D - Bedienungsanleitung - S. 17
NL - Handleiding - p. 21
Designed by LOTRONIC S.A.
LED MOVING HEAD 100W
LYRE A LED 100W
LED MOVING HEAD 100W
LED MOVING HEAD 100W
Assembled in PRC
Av. Z. Gramme 9
B - 1480 Saintes
Advertisement
Table of Contents

Related Manuals for afx light BEAM-100LED-MKII


Summary of Contents for afx light BEAM-100LED-MKII
- Page 1 BEAM-100LED-MKII CODE: 16-2081 LED MOVING HEAD 100W WITH DUAL PRISM & LIGHT RING LYRE A LED 100W AVEC DOUBLE PRISME & ANNEAU LUMINEUX LED MOVING HEAD 100W MIT DOPPELPRISMA & LICHTRING LED MOVING HEAD 100W MET DUAL PRISMA & LICHT RING GB - User Manual - p.
-
Page 2: Installation Diagram (Fig. 3)
CONNECTORS (fig. 1) DISPLAY (fig. 2) INSTALLATION DIAGRAM (fig. 3) FIXTURE LINKING (fig. 4) - Page 3 PHOTOMETRIC DIAGRAM (fig. 5) GOBO & COLOUR WHEEL DIMENSIONS www.afx-light.com...
-
Page 4: Dmx Channel Table
DMX CHANNEL TABLE © Copyright LOTRONIC 2022... - Page 5 www.afx-light.com...
- Page 6 © Copyright LOTRONIC 2022...
- Page 7 www.afx-light.com...
- Page 8 © Copyright LOTRONIC 2022...
-
Page 9: Unpacking Instructions
USER MANUAL UNPACKING INSTRUCTIONS Immediately upon receiving a fixture, carefully unpack the carton, check the contents to ensure that all parts are present and have been received in good condition. Notify the freight company immediately and retain packing material for inspection if any parts appear to be damaged from shipping or the carton itself shows signs of mishandling. -
Page 10: Disconnect Device
• In the event of a serious operating problem, stop using the unit immediately. Never try to repair the unit by yourself. Repairs carried out by unskilled people can lead to damage or malfunction. Please contact the nearest authorized technical assistance center. Always use the same type of spare parts. -
Page 11: Power Link
CONTROL CONNECTION (FIG4) Connect the provided XLR cable to the 3-pin XLR output of your controller and the other side to the male 3-pin XLR input of the moving head. You can chain multiple moving heads together through serial linking. The cable needed should be 2-core, screened cable with XLR input and output connec- tors. -
Page 12: Specifications
Reset Default Yes/No Reset default Signal set Wire Wired Reverse Pan (on/off) Reverse Pan Reverse Tilt (on/off) Reverse Tilt Select Pan 630/540/360 Select Pan Select Tilt 270/180/90 Select Tilt Mic sensitivity 0-99% Mic sensitivity OFF signal mode (On/Off) Off at original status and ON at re- set status Scan quick mode Scan quick mode... -
Page 13: Manuel D'utilisation
MANUEL D'UTILISATION DÉBALLAGE Dès réception de l’appareil, ouvrez le carton et vérifiez que le contenu est complet et en bon état. Sinon, prévenez immédiatement le transporteur et conservez l’emballage s’il montre des signes de mauvais traitements. Conservez le carton et tous les matériaux d’emballage afin de pouvoir trans- porter l’appareil en toute sécurité. -
Page 14: Remplacement Du Fusible
ment. Coupez l'alimentation et attendez 15 minutes que l'appareil refroidisse avant d'effectuer une intervention. • NE PAS OUVRIR le boîtier dans les 5 minutes suivant l'arrêt. • En cas de dysfonctionnement, arrêtez immédiatement l’appareil. N’essayez jamais de réparer l’appareil par vous-même. Une réparation mal faite peut entraîner des dommages et des dys- fonctionnements. -
Page 15: Montage
Attention : Si le fusible continue à sauter après avoir été remplacé, ARRÊTEZ l’appareil. Contactez votre revendeur. Vous risquez d’endommager l’appareil si vous continuez à l’utiliser. INSTALLATION (FIG. 3) Fixez l’appareil au moyen des trous de vis sur l’étrier. Assurez-vous que l’appareil est solidement fixé... -
Page 16: Entretien
MENU MENU DESCRIPTION DMX address A001-AXXX Réglage de l'adresse DMX 22CH Mode 22 canaux Channel Mode 24CH Mode 24 canaux 30CH Mode 30 canaux DMX Mode Internal pro- Exécution automatique Auto run Master/Alone gram 1-9 Internal pro- Contrôle par le son Music run Master/Alone gram 1-9... - Page 17 Entrée/sortie signal ........................DMX 3 broches Entrée/sortie alimentation ........................ Powercon Indice de protection ............................. IP20 Dimensions ........................299 x 184 x 423mm Poids ................................10kg NOTE IMPORTANTE : Les produits électriques ne doivent pas être mis au rebut avec les ordures ménagères. Veuillez les faire recycler là où...
- Page 18 • Das Gerät gehört zur Schutzklasse 1 und darf nur an eine Steckdose mit Schutzkontakt ange- schlossen werden. • Nur für Innengebrauch! • Um Brand und Stromschlag zu vermeiden, das Gerät vor Regen und Feuchtigkeit schützen. Keine brennbaren Materialien während des Betriebs in der Nähe des Geräts lassen. •...
-
Page 19: Auswechseln Der Sicherung
• Rainbow Effekt mit einstellbarer Geschwindigkeit und Drehrichtung • Linearer Dimmer • 25x/Sek. Super schneller LED Shutter/Strobe Effekt mit Geschwindigkeitsregelung • Vorprogrammierter variabler/willkürlicher Strobe Effekt und dimmbarer Pulse Effekt • 1.8" TFT LCD Display • Ventilatorkühlung • Managementsystem mit konstanter Temperaturanzeige •... - Page 20 hängestellen für das Sicherheitskabel besteht. (s. Abb. rechts). Wenn Sie das Gerät an einem Tra- versensystem befestigen, benutzen Sie einen passenden Haken, den Sie mit einer M10 Schraube am Omega-Halter befestigen. Als zusätzliche Sicherheitsmassnahme müssen Sie ein Stahlkabel an einer der Aufhängestellen befestigen. BEDIENFELD (ABB.
-
Page 21: Technische Daten
• Die externe Optik mit Glasreiniger und einem weichen Tuch alle 3 Wochen reinigen. • Alle Teile komplett reinigen, bevor Sie das Gerät wieder ans Netz anschließen. • Kühlschlitze und Ventilatoren regelmäßig reinigen TECHNISCHE DATEN Versorgung ...........................90-260V~50/60Hz Verbrauch ..............................150W PAN ............................ - Page 22 VEILIGHEIDSINSTRUCTIES • Bewaar deze handleiding. • Wees zeker dat u het toestel op de juiste spanning aansluit en dat de lichtnetspanning niet hoger dan de op de zijde van het toestel aangegeven spanning is. • Alleen voor gebruik binnenshuis! • Dit apparaat behoort tot beschermingsklasse I. Het moet dus verplicht worden geaard. Een be- voegde persoon moet de elektrische aansluiting uitvoeren.
- Page 23 • Uiterst nauwkeurige optiek met een projectiehoek van 2° • Elektrische focus over 2-3m • Prisma met 16 en 24 facetten met instelbare snelheid en richting • Soepele, nauwkeurige 8/16 bit PAN/TILT met inversie • Scanpositiegeheugen met automatische herpositionering na een incident •...
- Page 24 en bevestig de klem d.m.v. een M10 moer in de centergat van de omega houder. Voor een betere veiligheid, bevestig tenminste één geschikte staalkabel op één van de bevestigingspunten op de onderzijde van het toestel. CONTROLE PANEEL (AFB. 2) Druk de MENU toets om in het hoofdmenu te gaan. Druk de UP/DOWN toetsen totdat u de ge- wenste functie bereikt.
- Page 25 • Reinig de lamp met een hoogwaardig glasreinigingsmiddel en een zachte doek. • Droog de delen altijd zorgvuldig. • Reinig de externe optische delen tenminste alle 20 dagen. • Reinig regelmatig koelspleten en ventilatoren. SPECIFICATIES Voeding ..........................90-260V~50/60Hz Opgenomen vermogen ..........................150W PAN ............................
- Page 26 View the item on our website © Copyright LOTRONIC 2022...
Need help?
Do you have a question about the BEAM-100LED-MKII and is the answer not in the manual?
Questions and answers