Table of Contents
Advertisement
Quick Links
Advertisement
Table of Contents

Related Manuals for FLYSURFER SONIC4


Summary of Contents for FLYSURFER SONIC4
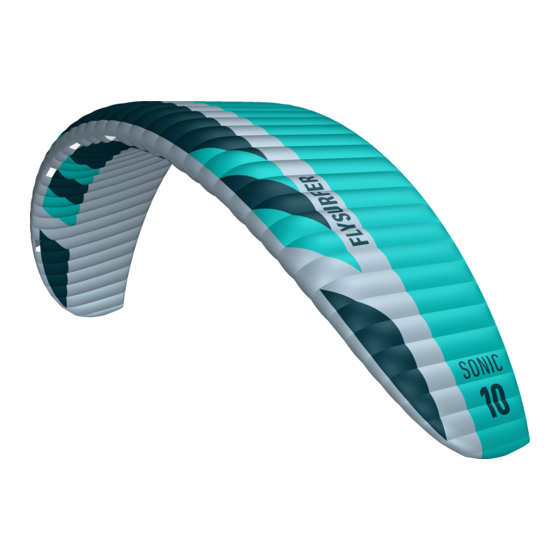
- Page 1 USER MANUAL SONIC4...
- Page 2 SONIC ⁴ User Manual ENGLISH 06-2023 Änderungen vorbehalten / data subject to change © FLYSURFER Kiteboarding 2023, www.flysurfer.com...
-
Page 3: Table Of Contents
CONTENT Release of Liability ..........................4 Safety Notes ............................. 5 02.01 Do not fly with kites................................5 Overview of the kite ..........................6 Handling ..............................8 04.01 Setting Up a foil kite ...............................8 04.02 Sorting the bridle ................................9 04.03 Securing a foil kite ................................9 Launching ..............................10 05.01 Self launching a foil kite at the edge of the wind window ..................10 05.02 Edge of the wind window with a helper on a foil kite ....................11... -
Page 4: Release Of Liability
FLYSURFER Product and any of its components. To release Skywalk GmbH & Co. KG and all related parties from any and all liability for any loss, damage, injury or expense that you or any users of your FLYSURFER product may suffer, or that your next of kin may suffer, as a result of the use of the FLYSURFER product, due to any cause whatsoever, including negligence or breach of contract on the part of Skywalk GmbH &... -
Page 5: Safety Notes
01. Kitesurfing is a potentially dangerous sport, that holds risks for the athlete or the people surrounding them. Incorrect use of this product may result in serious injury or even death for the user or third parties. Every user should be qualified by a FLYSURFER kiteschool or a FLYSURFER dealer. -
Page 6: Overview Of The Kite
03 OvERvIEW Of THE KITE... - Page 7 If a change is made, it should be made symmetrically. on any terrain. The streamlined construction ensures that the We recommend the help of a FLYSURFER sales partner to ensure kite remains agile and highly maneuverable while maintaining correct settings of the Profile Momentum Adjuster.
-
Page 8: Handling
04 HANDLING Check your bridle for tangles. Make sure that none of the lines are caught around the back of the kite. A kite needs to be secured properly even if the wind is light. A runaway kite can be a serious danger to people or animals downwind. -
Page 9: Sorting The Bridle
If the lines are still twisted, untwist them by turning the bar. Lightly tension up the bridle again to check it. If necessary, It may be possible (especially after not being careful when pa- repeat the last step till the left and right bridles are separated. cking away or setting up the kite) that the bar has to be pushed through the lines again to untwist. -
Page 10: Launching
Open the deflate valves. A deflated kite will flap around on Walk downwind a bit as the kite inflates. the ground less. 05 LAUNCHING Pay attention that the downwind wingtip does not fold over upwind. Please check not only the wind and weather conditions, but also all your equipment, especially the safety system before laun- ching. -
Page 11: Edge Of The Wind Window With A Helper On A Foil Kite
05.02 Edge of the wind window If the kite is threatening to collapse over the assistant, you with a helper on a foil kite can either walk downwind, or the assistant upwind. It is important that your helper is experienced with this tech- nique and you have explained them how it‘s done. -
Page 12: One Line Relaunch
06.02 One Line Relaunch When the kite is at least one wingspan above the water, let go of one of the leader lines. Make sure you keep hold of the other one and the bar is in the right position. Grab one steering line high above the floater. -
Page 13: Drainage
06.03 Drainage Lower the kite towards the helper along the edge of the wind window. The drainage system ensures that water or dirt are automati- cally removed from the kite. The kite has to be turned upright onto its side. Try to achieve this by pulling on one steering line. Try to prevent the upper wingtip from collapsing. -
Page 14: Self-Landing By Backstall
07.02 Self-landing by backstall 07.03 Self-landing using the frontline Safety Warning: Keep at least two line-lengths sa- Make sure that you have a large enough landing area that fety distance downwind. We generally recom- is free of any obstacles that can damage the kite. Fly the kite mend landing with the help of an assistant. -
Page 15: Safety System
08 SAfETy SySTEM Hook in the chickenloop and secure it with the chickendick. Slowly release the endline bit by bit. Make sure that it has not The SOUL kites are equipped with a Frontline Safety (FLS). wrapped itself around any part of your body. Do not let the end- After triggering the Quick Release, the Control Bar will slide up line slip too quickly through your fingers to avoid getting burns to the stopper ball / knot. -
Page 16: Self-Rescue With A Foil Kite
09.01 Self-Rescue with a foil kite Grab the kite. Packing down in deep water is only recommended for experi- enced kiters and should be practiced beforehand. Activate the quick release. Lay the tips on top of each other, and then the bar on top and roll up the kite. -
Page 17: Packing Up
10 PACKING UP Lay the bar on-top of the kite and a bit away from the tips A FLYSURFER kite can be packed into its bag very quickly. It is important that the bridle is securely packed inside the kite and the bar never gets into or goes through the bridle lines. -
Page 18: Kite Care
11 KITE CARE 12.01 Replacing the Sparepart Lines and Pulleys FLYSURFER kites are very durable and very UV and saltwater re- The Sparepart Lines are the yellow lines that run through the sistant. With proper care, your kite may last even longer. Even- pulley system known as the mixer. -
Page 19: Little Connection Lines
A spe- cial binding agent (silicone sealing compound) for the X-Light Cloth is available through Flysurfer sales partners or directly at FLYSURFER. A repair manual is included with the binding agent. -
Page 20: Trimmen
13 TRIMMEN If this is not the case, you just have to move the metal ring of the mixer (C-Level) until all 3 knots are at the same level. As all lines change length over time, we have built in a way to correct the flying characteristics quickly and easily. - Page 21 The Trim Checker serves as an aid to fix the front main and back Keep the A-level under tension. Then compare it with the main lines. It can be attached to objects with a Larkshead and black marked lines of the B- and C-level. Bring the C-Level up enables you to carry out the bridle check yourself.
-
Page 22: Profile Moment Adjuster (Pma's)
13.04 Profile Moment Adjuster (PMA‘s) Reach into the closest air intake valve to get to the PMA. Note: It is important to check the kite first as it is shown in the bar manual in the trim check section. Changing the PMAs should only be done by a professional when the bar, lines, mi- xer, bridle and sail have been checked. -
Page 23: Repair & Spare Parts
14 REPAIR & SPARE PARTS Repairs can be done at either our workshop in the head office, or by a FLYSURFER sales partner who offers a repair service. High quality original spare parts for all our FLYSURFER products can be ordered directly from our Online-Shop:... - Page 24 FLYSURFER Kiteboarding Brand of Skywalk GmbH & Co. KG Windeckstr. 4 83250 Marquartstein, GERMANY WEBSITE: www.flysurfer.com EMAIL: info@flysurfer.com PHONE: +49 (0) 86 41 69 48 - 30...
Need help?
Do you have a question about the SONIC4 and is the answer not in the manual?
Questions and answers