
Related Manuals for Kraus Mateo KPF-2610


Summary of Contents for Kraus Mateo KPF-2610
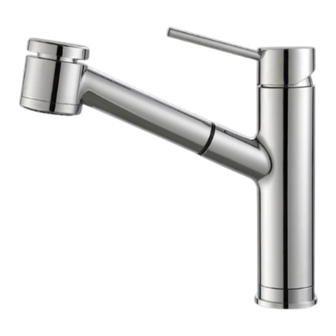
- Page 1 I N S TA L L AT I O N MA N UA L Mateo™ Single Lever Pull Out Kitchen Faucet KPF-2610 www.kraususa.com I toll free: 1.800.775.0703 I © 2014-2015 Kraus USA Inc. I REV. August 25, 2015...
- Page 2 Thank you for purchasing Kraus We would like to take this opportunity to thank you for your business with Kraus USA. It is our sincere hope that you are completely satisfied with your experience. We welcome any questions or comments you may have, and will be glad to assist you in the future.
-
Page 3: Prior To Installation
8 5/16” • Make sure you have all necessary parts by checking the diagram and parts list. If (257mm) (21mm) any part is missing or damaged, please contact Kraus Customer Service at 800- 1 15/16” ∅ 775-0703 for a replacement 50mm) 1 3/8”... - Page 4 Diagram and Parts List Tools You Wil Adjustable w Silicone Se A. Spray Head G. Hot & Cold Waterlines B. Faucet Body H. Weight C. Deck & Putty Plate I. Quick Connect D. Base J. Hex Wrench Set E. Spray Hose J1.
- Page 5 Faucet Dimensions 10.31” 10.2” (262mm) 8.125” (258mm) (207mm) º Ø1.94” (Ø50mm 2.5” (63mm) Chec 10.31” (262mm) 10.2” (258mm) 8.125” (207mm) º Ø1.94” (Ø50mm) 9/16-24UNEF (3/8” Compression) Check Value...
- Page 6 Step 1A: Install base without deck & putty plate Insert base (D) into sink or countertop with “FR↑NT” facing forward. Tighten screws on base (D) with 4mm hex wrench (J) until base is secure on sink or countertop Installer Tip: Rotate the two half-moon shaped locking nuts inward before inserting base (D) into sink or...
- Page 7 1” (25.4 mm) max. Ø 1-3/8” (35 mm) min. Ø 1-1/2” (38 mm) max. Half Moon Loc Step 2: Install faucet Insert spray hose (E) into small hole of base (D). Insert hot & cold waterlines (G) and supply hose (F), one by one, in large hole of base Installer Tip: To remove Quick Connect (I), push...
- Page 8 Half Moon Loc Half Moon Locking Nuts Step 4: Connect waterlines to main valve Thread hot & cold waterlines (G) onto angle stops. Tighten with adjustable wrench until snug. Turn on the angle stops and check for leaks (DO NOT TURN FAUCET ON) Cold Step 5: Connect quick connect...
- Page 9 Half Moon Locking Nuts Step6: Install weight Attach weight (H) on the designated mark on the spray hose (E) Cold Designated Mark Step 7: Flush faucet Remove spray head (A). Hold tip of spray hose (E). Turn faucet on for 1 minute to flush any debris. Reconnect spray head (A)
-
Page 10: Replacement Part List
Replacement Part List 1. Metal Assembly Handle 2. Cartridge Cover 3. Locking Nut 4. Cartridge 5. Set Screw 6. Base 7. Cover & Putty Plate 8. Spray Head 9. Quick Connect 10. Spray Hose 11. Weight 12. Hex Wrench 2.5mm 13. -
Page 11: Troubleshooting
Trouble - Shooting If you have followed the instructions carefully and your faucet still does not work properly, take the following corrective steps: P R O B L E M C A U S E A C T I O N Leakage under the Locking nut (3) has Unscrew joystick from... - Page 12 Trouble - Shooting If you have followed the instructions carefully and your faucet still does not work properly, take the following corrective steps: P R O B L E M C A U S E A C T I O N Hose does not retract Weight (11) may be Readjust weight (11)
-
Page 13: Care And Maintenance
Push Left Open Hot Water Care & Maintenance *To keep the product clean & shining, follow the steps below: Rinse with clean water & dry with a soft cloth Do not clean with soaps, acid, polish, abrasives, or harsh cleaners Do not use cloth with a coarse surface Unscrew the aerator and clean when necessary *This installation manual is subject to change without further notice. - Page 14 If Kraus is unable to provide a replace- ment and repair is not practical or cannot be made in timely fashion, Kraus may elect to refund the purchase price in exchange for the return of the product.
- Page 15 NON-APPLICABILITY OF THIS WARRANTY By the purchase and use of our products, you agree that Kraus is not liable for incidental, consequential or special damages associated with the return, replacement, installation or use of your product. This includes freight costs, cartridge replacement, labor, travel time,...
- Page 16 www.kraususa.com...
Need help?
Do you have a question about the Mateo KPF-2610 and is the answer not in the manual?
Questions and answers