
Related Manuals for ESAB Pipeweld Orbiter


Summary of Contents for ESAB Pipeweld Orbiter
- Page 1 Pipeweld Orbiter Instruction manual Valid for: serial no. 18020 0463 487 001 GB 20210927...
-
Page 3: Table Of Contents
Removing the tip control lead screw and barrel (up/down) ....Removing the wire feed motor .............. 6.13 6.14 Removing the bearing housing ............. TROUBLESHOOTING ................. Error codes ..................... Portable Appliance Testing (PAT) ............ORDERING SPARE PARTS ................ DIAGRAM ......................0463 487 001 © ESAB AB 2021... - Page 4 TABLE OF CONTENTS ORDERING NUMBERS ..................47 WEAR PARTS ...................... ACCESSORIES ....................49 Rights reserved to alter specifications without notice. 0463 487 001 © ESAB AB 2021...
-
Page 5: Safety
For product operation instructions please refer to the supplied USB memory stick. Safety precautions Users of ESAB equipment have the ultimate responsibility for ensuring that anyone who works on or near the equipment observes all the relevant safety precautions. Safety precautions must meet the requirements that apply to this type of equipment. - Page 6 Protect your eyes and body. Use the correct welding screen and filter lens and wear protective clothing. • Protect bystanders with suitable screens or curtains. NOISE - Excessive noise can damage hearing Protect your ears. Use earmuffs or other hearing protection. 0463 487 001 - 6 - © ESAB AB 2021...
- Page 7 For further information contact the nearest ESAB dealer. ESAB has an assortment of welding accessories and personal protection equipment for purchase. For ordering information contact your local ESAB dealer or visit us on our website. 0463 487 001 - 7 - ©...
-
Page 8: Introduction
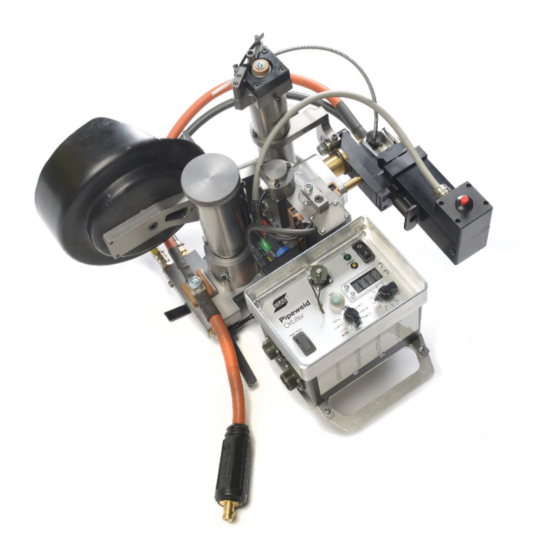
1 system for outside diameters of 200 mm (8 in.) pipe and above without the need to swap the drivetrain. The Pipeweld Orbiter is not sided and the same unit can weld both sides of the joint. The unit has its own wire feed system and torch eliminating the need for secondary feeders, torch hose packs and cables. -
Page 9: Technical Data
Gas pre-flow 0–20 s Gas post-flow 0–20 s Welding torch control Electronic 50 mm (1.97 in.) vertical, 55 mm (2.17 in.) horizontal Weight (without wire and cables) 16 kg (35.3 lb) 60% duty cycle 275 A 100% duty cycle 248 A 0463 487 001 - 9 - © ESAB AB 2021... -
Page 10: Installation
Adjusting the pipe diameter The Pipeweld Orbiter has to be adjusted to the pipe diameter before positioning the device on the pipe. See the table below for pipe diameters to be used in in. and mm and the corresponding setting for each leg. -
Page 11: Installing The Travel Band
Installing the travel band NOTE! The Pipeweld Orbiter can be moved or slide down on the band when the power is off. To enable the motor brake, the power must be turned on. The Pipeweld Orbiter moves around the pipe by travelling along a band. Follow these steps to install the travel band. -
Page 12: Adjusting The Unit To The Band Width
Locking arm in position A: The drive wheel is fully extended allowing the device to be placed on the band. • Locking arm in position B and travel motor lifted: The Pipeweld Orbiter can be moved around the band. •... -
Page 13: Mounting The Unit On The Travel Band
3 wheels are positioned correctly on the band to avoid accidental dismounting. To remove the Pipeweld Orbiter from the pipe, return the locking arm to position B, raise the safety lever and return the arm to position A. - Page 14 Both the drive and idle wheels are dual type. When installing the unit onto the band the uppermost wheel must be mounted on the band. The lower wheel is now located on the latch plate allowing seamless travel over the joint in the band. 0463 487 001 - 14 - © ESAB AB 2021...
-
Page 15: Operation
WARNING! Care should be taken to ensure any power source being used is switched to Mig/Mag mode and has contactor control to avoid the unit becoming live when not welding. 0463 487 001 - 15 - © ESAB AB 2021... -
Page 16: Connections And Control Devices
Connection for wire feed motor (yellow) Gas hose connection to Pipeweld Connection for remote pendant Orbiter Before starting the welding, it is necessary to connect the system to the power supply/gas box. 0463 487 001 - 16 - © ESAB AB 2021... -
Page 17: Control Box Operation
Operating the power switch illuminates the display LEDs to indicate the fuse is functioning and 24 V is present from the power supply unit. The Run and error LEDs flash and the display scrolls through ESAB Pipeweld Orbiter, software version number and board number. After approximately 6 s the display is determined by the position of the control switch. -
Page 18: Remote Pendant Box
If held for longer than 2 s, the display shows LStp and the system reverts back to the stored parameter settings. Programming unit - HHPU The programming unit provides various system functions including: 0463 487 001 - 18 - © ESAB AB 2021... - Page 19 ENT, BACK and HOME. Navigation buttons Back button Home button Display HHPU screen configurations The following table shows menus for the configurations that can be made with the programming unit. 0463 487 001 - 19 - © ESAB AB 2021...
- Page 20 OSC. DWELL FAR 0–250 ms 1.4 COPY SETTINGS FROM PASS xx e.g. 01 (password protected) TO PASS xx e.g. ALL 1.5 TRANSFER SETTINGS HHPU TO BUG BUG TO HHPU 2.0 SYSTEM PARAMETRS 0463 487 001 - 20 - © ESAB AB 2021...
- Page 21 TEST MODE INPUTS TEST MODE MOTORS 4.0 PROGRAM UPDATES HHPU PROGRAM INFO UPDATE HHPU PROGRAM BUG PROGRAM INF0 UPDATE BUG PROGRAM DEFAULT SETTINGS 5.0 BUG LAST CHANGED HHPU SERIAL No. DATE 0463 487 001 - 21 - © ESAB AB 2021...
- Page 22 5 OPERATION Example of setting wire speed 0463 487 001 - 22 - © ESAB AB 2021...
- Page 23 5 OPERATION Example of reprogramming control box software Connect the portable USB port to the programming unit and insert memory stick. 0463 487 001 - 23 - © ESAB AB 2021...
-
Page 24: Weld Start
5.5.1 Setting the welding direction The Pipeweld Orbiter has to be set for the desired welding direction: clockwise or counterclockwise. The settings are made for the welding torch and the gas hose connection. Connect the gas hose with the connection for the welding direction to be used, (a) for clockwise operation (unit moves up), (b) for counterclockwise operation (unit moves down). -
Page 25: Adjusting The Torch Angle
Button for manual torch adjustment Press the red button to manually adjust the torch angle. Use the release lever to rotate the torch away from the pipe e.g. for cleaning. 0463 487 001 - 25 - © ESAB AB 2021... -
Page 26: Adjusting The Spool Tension
Adjusting the spool tension Spool holder tension screw Spool tension is controlled by adjusting the spool holder tension screw. Set the tension carefully so the spool does not slip when wire is fed. 0463 487 001 - 26 - © ESAB AB 2021... -
Page 27: Maintenance
Use two levers to ensure that the drive wheels (2) do not tip over on the shaft and cause damage. Change the drive wheels (2). Reinstall the drive wheels (2) in reverse order. Use the shims (1) to clamp the middle spacer (3) properly. 0463 487 001 - 27 - © ESAB AB 2021... -
Page 28: Replacing The Bowden Cable
Insert the new Bowden cable into the torch and tighten collet nut (2). Insert the Bowden cable into the wire feed block and tighten clamp plate screws (3). CAUTION! Ensure the Bowden cable does not touch the wire feed wheels. 0463 487 001 - 28 - © ESAB AB 2021... -
Page 29: Replacing The Welding Tip
Remove gas nozzle from torch. Loosen the collet nut (1) with pliers and withdraw the tip (2). Replace the tip (2). Tighten the collet nut (1) and put the cover into position. 0463 487 001 - 29 - © ESAB AB 2021... -
Page 30: Replacing The Wire Feed Wheels
Force the wire feed wheels and the insulation bushing (3) off the shaft. Reinstall the wire feed wheels in reverse order. NOTE! Make sure the gears of the wire feed wheels are meshing. 0463 487 001 - 30 - © ESAB AB 2021... -
Page 31: Removing The Control Box
Remove the two screws (1) from the sub-plate (2) and slide the control box away for access to the cable connections on the back. Remove the four cables. The control box can be removed. 0463 487 001 - 31 - © ESAB AB 2021... -
Page 32: Removing The Stepper Motor
Remove the four screws retaining the stepper motor to the case with an Allen key (2.5 mm). Carefully withdraw the motor from the case to not damage the cables. Disconnect the cables from the connector block and the red release button. 0463 487 001 - 32 - © ESAB AB 2021... -
Page 33: Removing The Drive Motor
Allen key (2.5 mm) and pull it out of the bottom barrel (8). 10. Remove splined gear and spacer. 11. Reinstall in reverse order. NOTE! Ensure the cable slot is facing the torch before fitting the assembly to the base. 0463 487 001 - 33 - © ESAB AB 2021... -
Page 34: Removing The Tip Control Motor (Near/Far)
Take the assembly out of the tip control body (5). Remove the gear. Reinstall in reverse order. NOTE! Ensure the distance between the carrier inner face and the middle of the gear is 65 mm (2.56 in). 0463 487 001 - 34 - © ESAB AB 2021... -
Page 35: Removing The Tip Control Motor (Up/Down)
Remove the four screws and take off the terminal cover plate to gain access to the connector block (see figure in section "Removing the tip control motor (near/far)"). Disconnect wires from connector block. 0463 487 001 - 35 - © ESAB AB 2021... -
Page 36: Removing The Tip Control Lead Screw And Barrel (Near/Far)
The helical gear (2) is secured to the lead screw (3) via a grub screw into a dimple on the shaft. This will give the correct position relative to the mating gear. 0463 487 001 - 36 - © ESAB AB 2021... -
Page 37: Removing The Tip Control Lead Screw And Barrel (Up/Down)
Remove the circlip (1) from the lead screw and pull the lead screw out from the bearing. On the near/far body, remove the three screws (2) and take off the cover and barrel nut. Reinstall in reverse with new circlip. 0463 487 001 - 37 - © ESAB AB 2021... -
Page 38: Removing The Wire Feed Motor
Remove the splatter guard and the wire straightening mechanism (4) together with the insulating strip. Remove the wire feed insulation block. 10. Remove the four screws retaining the motor with an Allen key (2.5 mm). Disconnect the cables from the motor. 0463 487 001 - 38 - © ESAB AB 2021... -
Page 39: Removing The Bearing Housing
10. Insert both brass barrels (4) and check the brass barrels slide in and out freely to ensure correct alignment. 11. Tighten screws on the bearing housing (5) properly and recheck the brass barrels (4) still slide freely. 0463 487 001 - 39 - © ESAB AB 2021... -
Page 40: Troubleshooting
5 .2.2 using a DC test voltage of 2121 V between the shorted input mains conductors and safety earth. The voltage applied to the insulation under test is gradually raised from zero to 2121 V DC and held at that value for 60 s maximum. 0463 487 001 - 40 - © ESAB AB 2021... -
Page 41: Ordering Spare Parts
Repair and electrical work should be performed by an authorised ESAB service technician. Use only ESAB original spare and wear parts. Pipeweld Orbiter is designed and tested in accordance with the international and European standards EN 12100:2010, EN 60974-5 and EN 60974-10. On completion of service or repair work, it is the responsibility of the person(s) performing the work to ensure that the product still complies with the requirements of the above standards. -
Page 42: Diagram
DIAGRAM DIAGRAM 0463 487 001 - 42 - © ESAB AB 2021... - Page 43 DIAGRAM 0463 487 001 - 43 - © ESAB AB 2021...
- Page 44 DIAGRAM 0463 487 001 - 44 - © ESAB AB 2021...
- Page 45 DIAGRAM 0463 487 001 - 45 - © ESAB AB 2021...
- Page 46 DIAGRAM 0463 487 001 - 46 - © ESAB AB 2021...
- Page 47 ORDERING NUMBERS Ordering no. Denomination Type 0459 990 708 Pipeweld orbiter Bug 0459 990 380 Pipeweld Orbiter Package incl. 30m Cable 0463 488 001 Spare parts list Technical documentation is available on the Internet at: www.esab.com 0463 487 001 - 47 -...
- Page 48 PipeWeld Shroud Assembly 0459990406 PipeWeld Wirefeed Ins Block 0459990407 PipeWeld Splatter Cover 0459990408 PipeWeld Wirefeed wheel set 0459990410 PipeWeld leaf spring 0459990415 PipeWeld torch body o-ring 0459990519 PipeWeld Orbiter Basic Consumable Kit 0463 487 001 - 48 - © ESAB AB 2021...
- Page 49 ACCESSORIES ACCESSORIES 0459 990 381 PipeWeld Orbiter Prog Kit 0459 990 382 PipeWeld Orbiter Tool Kit 0459 990 700 Travel Band 10.75" spaced to 6.625" 0459 990 525 8" ID Pipe 10.75"Orbiter Travel Band 0459 990 383 10.75"Orbiter Travel Band 0459 990 384 12.75"Orbiter Travel Band...
- Page 50 For contact information visit esab.com ESAB AB, Lindholmsallén 9, Box 8004, 402 77 Gothenburg, Sweden, Phone +46 (0) 31 50 90 00 http://manuals.esab.com...
Need help?
Do you have a question about the Pipeweld Orbiter and is the answer not in the manual?
Questions and answers