Table of Contents
Advertisement
Quick Links
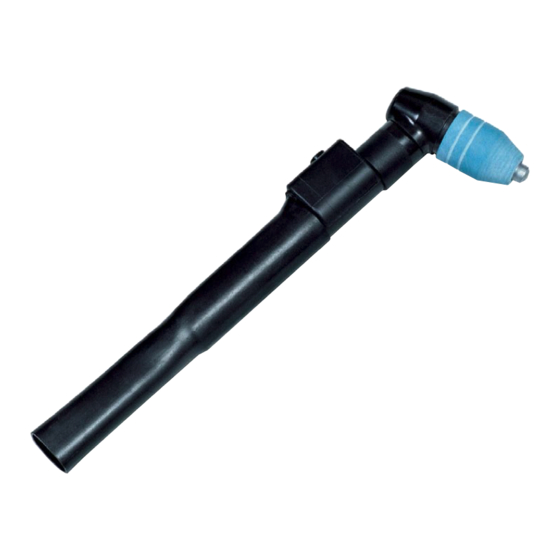
PLASMA ARC CUTTING TORCH
This manual provides installation and operation instructions for the following PT-27 torches:
P/N 21620 - 25 ft (7.6 m), PT-27, w/PLUG Pilot Arc Connection
P/N 21621 - 50 ft (15.2 m), PT-27, w/PLUG Pilot Arc Connection
P/N 21661 - 25 ft (7.6 m), PT-27, w/RING Pilot Arc Connection
P/N 21662 - 50 ft (15.2 m), PT-27, w RING Pilot Arc Connection
These INSTRUCTIONS are for experienced operators. If you are not fully familiar with the principles of operation and
safe practices for arc welding equipment, we urge you to read our booklet, "Precautions and Safe Practices for Arc
Welding, Cutting, and Gouging", Form 52-529. Do NOT permit untrained persons to install, operate, or maintain this
equipment. Do NOT attempt to install or operate this equipment until you have read and fully understand these
instructions. If you do not fully understand these instructions, contact your supplier for further information. Be sure
to read the Safety Precautions before installing or operating this equipment.
Be sure this information reaches the operator.
You can get extra copies through your supplier.
INSTRUCTION MANUAL
PT-27
F-15-203-C
January, 2002
Advertisement
Table of Contents

Related Manuals for ESAB PT-27


Summary of Contents for ESAB PT-27
- Page 1 P/N 21661 - 25 ft (7.6 m), PT-27, w/RING Pilot Arc Connection P/N 21662 - 50 ft (15.2 m), PT-27, w RING Pilot Arc Connection These INSTRUCTIONS are for experienced operators. If you are not fully familiar with the principles of operation and safe practices for arc welding equipment, we urge you to read our booklet, "Precautions and Safe Practices for Arc...
-
Page 2: Table Of Contents
USER RESPONSIBILITY This equipment will perform in conformity with the description thereof contained in this manual and accompanying labels and/or inserts when installed, operated, maintained and repaired in accordance with the instructions provided. This equipment must be checked periodically. Malfunctioning equipment should not be used. Parts that are broken, missing, worn, distorted or contaminated should be replaced immediately. -
Page 3: Description
"live" parts of the torch and machine must be avoided. Also, the improper use of any of the gases employed can present a safety hazard. Before beginning operation with the PT-27 torch, refer to the Safety Precautions and operating instructions in the appropriate power source instruction manual. - Page 4 SECTION 1 DESCRIPTION 7.3" (185 mm) 3" (76 mm) 75° 1" (25.4 mm) 1" (25.4 mm) Figure 1-2. PT-27 Dimensions 80 A 50 A 30 A Figure 1-3. PT-27 Cutting Performance...
-
Page 5: Optional Equipment
SECTION 1 DESCRIPTION 1.4 OPTIONAL EQUIPMENT (NOT SUPPLIED WITH TORCH) A. Spare Parts Kits - The spare parts kits listed in figure 1-4 are recommended for maintaining the PT-27 torch with minimum downtime. PART NUMBER PART NUMBER DESCRIPTION (50/70 A Kit - P/N 21623) -
Page 6: Assembly And Operation
ASSEMBLY AND OPERATION 2.1 GENERAL 2.2 ASSEMBLY Make sure power switch on console is in the Install PT-27 front end parts as shown in Figure 2-1. "OFF" position and primary input power is deenergized. WARNING The torch head contains a gas flow check valve that acts in conjunction with circuitry within the power source. -
Page 7: Steel Heat Shield Guards
SECTION 2 ASSEMBLY AND OPERATION 2.3 STEEL HEAT SHIELD GUARDS (Refer to Figure 2-2) ADJUST GUIDE BY TURNING IN A CLOCKWISE DIRECTION ONLY. THIS WILL PREVENT ACCIDENTAL LOOSENING OF SHIELD. STEEL GUARD STAND OFF GUIDE IF GUIDE IS TOO P/N 21420 TIGHT ON SHIELD, OPEN SLOT WITH SCREWDRIVER. -
Page 8: Maintenance
Replace the shield if more than 1/8 inch (3.2 mm) has eroded from the face. Refer to Figure 3-1. A. Disassemble the front end of the PT-27 as follows: 5. Swirl Baffle: This is a ceramic part and may crack or chip if dropped. Always replace if 1. -
Page 9: Seat Maintenance, Removal, And Replacement
NOTE It is not necessary to remove the seat in order to inspect. Do not attempt to use any tool other than the ESAB Seat Tool, P/N 0558003027 to remove or replace the seat. If the seat is distorted or damaged, the elec- trode will not fit properly. -
Page 10: Removing/Replacing Torch Head And Switch From Service Line
SECTION 3 MAINTENANCE 3.4 REMOVING / REPLACING TORCH HEAD AND SWITCH FROM SERVICE LINE (Refer to Figure 3-3) FLEX SUPPORT SERVICE LINE ASSEMBLY SHEATH VINYL TAPE PUSH THE FLEX SUPPORT BACK FROM HANDLE. REMOVE TAPE HOLDING SHEATH AND PULL THE SHEATH BACK. -
Page 11: Pilot Arc Lead Connection And Strip Insulation
SECTION 3 MAINTENANCE 3.5 PILOT ARC LEAD CONNECTION AND STRIP INSULATION (Refer to Figure 3-4) PILOT ARC INSULATOR SLIDE INSULATOR ONTO LEAD. FOLD BACK LEADS BY WIRE LEAD ATTACH KNIFE CONNECTIONS TURNING THE INSULA- TOR END FOR END. CENTER INSULATOR OVER CONNECTION TAPE LEADS TO INSULATOR. -
Page 12: Switch And Pilot Arc Plugs
SECTION 3 MAINTENANCE 3.6 SWITCH AND PILOT ARC PLUGS (Refer to Figure 3-5) CHROME PLATED TERMINAL WHITE SWITCH LEADS (2) BRASS TERMINAL FROM TORCH SWITCH BLACK PILOT ARC LEAD SWITCH PLUG STRAIN RELIEF P/N 2062336 TUBING - P/N 18226 STRAIN RELIEF TUBING - 18226 BLUE JUMPER (SEE BELOW) -
Page 13: Replacement Parts
SECTION 4 REPLACEMENT PARTS 4.1 General Replacement parts may be ordered from your ESAB distributor or from: Replacement parts are illustrated on the following fig- ESAB Welding & Cutting Products ures. When ordering replacement parts, order by part Attn.: Customer Service Dept. - Page 14 THE SEAT IS REMOVED AND REPLACED USING THE *REPLACEMENT TORCHES ARE ESAB SEAT TOOL. (REFER TO FIGURE 3-2) SUPPLIED WITH 50 AMP NOZ- ZLES. ALL TORCH ASSEMBLIES AND REPLACEMENT HEADS ARE SUPPLIED WITH THE SEAT INSTALLED. Figure 4-1. PT-27 Torch Assembly Replacement Parts...
- Page 15 THE SEAT IS REMOVED AND REPLACED USING THE *REPLACEMENT TORCHES ARE ESAB SEAT TOOL. (REFER TO FIGURE 3-2) SUPPLIED WITH 50 AMP NOZ- ZLES. ALL TORCH ASSEMBLIES AND REPLACEMENT HEADS ARE SUPPLIED WITH THE SEAT INSTALLED. Figure 4-2. PT-27 Torch Assembly Replacement Parts...
- Page 16 ESAB Welding & Cutting Products, Florence, SC Welding Equipment COMMUNICATION GUIDE - CUSTOMER SERVICES A. CUSTOMER SERVICE QUESTIONS: Order Entry Product Availability Pricing Delivery Order Changes Saleable Goods Returns Shipping Information Eastern Distribution Center Telephone: (800)362-7080 / Fax: (800) 634-7548...
Need help?
Do you have a question about the PT-27 and is the answer not in the manual?
Questions and answers