Table of Contents
Advertisement
Available languages
Available languages
Quick Links
Operating instructions
DE
EN
English,1
Deutsch, 15
PL
CS
Česky, 57
Polski, 43
LTF 11S111
All manuals and user guides at all-guides.com
NL
Nederland, 29
SK
Slovensky, 71
Contents
Loading the racks, 7-8
Adjusting upper rack
Wash cycles, 10
Table of wash cycles
Shutting off the water and electricity supplies
Cleaning the dishwasher
Preventing unpleasant odours
Cleaning the sprayer arms
Cleaning the water inlet filter
Troubleshooting, 14
DISHWASHER
EN
1
Advertisement
Chapters
Table of Contents

Related Manuals for Hotpoint Ariston LTF 11S111


Summary of Contents for Hotpoint Ariston LTF 11S111
-
Page 1: Table Of Contents
Positioning and levelling Connecting the water and electricity supplies Advice regarding the first wash cycle Technical data Assistance Description of the appliance, 6 Overall view LTF 11S111 Control panel Loading the racks, 7-8 Lower rack Upper rack Adjusting upper rack Third rack... -
Page 2: Product Fiche
All manuals and user guides at all-guides.com Product Fiche Product Fiche HOTPOINT ARISTON Brand LTF 11S111 Model Rated capacity in standard place settings (1) Energy efficiency class on a scale from A+++ (low consumption) to D (high consumption) 302.0 Energy consumption per year in kWh (2) 1.07... -
Page 3: Precautions And Advice
All manuals and user guides at all-guides.com Precautions and advice Disposal This appliance was designed and manufactured • Disposal of packaging material: observe local in compliance with international safety standards legislation so that the packaging may be reused. The following information has been provided for • The European Directive 2012/19/EU relating safety reasons and should therefore be read to Waste Electrical and Electronic Equipment... -
Page 4: Installation And Assistance
All manuals and user guides at all-guides.com Installation Connecting the water outlet hose If the appliance must be moved at any time, keep it in an Connect the outlet hose (without bending it) to a drain duct with upright position; if absolutely necessary, it may be tilted onto its a minimum diameter of 4 cm. -
Page 5: Advice Regarding The First Wash Cycle
All manuals and user guides at all-guides.com Anti-condensation strip (depending on the The machine has a buzzer/set of tones After installing the dishwasher, open the door and stick the dishwasher model ) to inform the user that a command has adhesive transparent strip under the wooden shelf in order been implemented: power on, cycle end etc. -
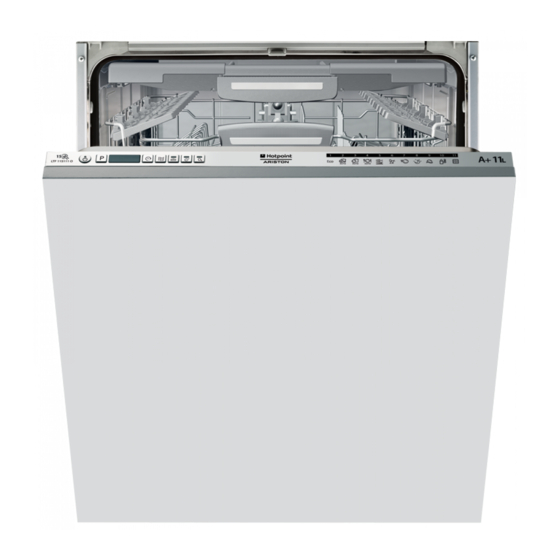
Page 6: Description Of The Appliance
All manuals and user guides at all-guides.com Description of the appliance Overall view Upper rack Upper sprayer arm Tip-up dispensers Rack height adjuster Third rack* Lower rack Lower sprayer arm Washing filter Salt dispenser Detergent and rinse-aid dispensers and device Active Oxigen Data plate **** Control panel... -
Page 7: Loading The Racks
All manuals and user guides at all-guides.com Loading the racks Tips Several dishwasher models are fitted with tip-up sectors Before loading the racks, remove all food residues from the They can be used in a vertical position when arranging dishes crockery and empty liquids from glasses and containers. No or in a horizontal position (lower) to load pans and salad bowls preventive rinsing is needed under running water. -
Page 8: Third Rack
All manuals and user guides at all-guides.com The upper rack can be adjusted for height based on requirements: The geometry of the rack makes it possible to place such small high position to place bulky crockery in the lower rack and low items as coffee cups in the area in the middle. position to make the most of the tip-up compartments/sectors by creating more space upwards. -
Page 9: Start-Up And Use
All manuals and user guides at all-guides.com Start-up and use Measuring out the detergent Starting the dishwasher A good wash result also depends on the correct 1. Turn the water tap on. amount of detergent being used. Exceeding the stated 2. Open the door and press ON-OFF button: the ON/OFF amount does not result in a more effective wash and indicator lights, options and the display come on. -
Page 10: Wash Cycles
All manuals and user guides at all-guides.com Wash cycles Wash-cycle data is measured under laboratory conditions according to European Standard EN 50242. Based on the different conditions of use, the wash-cycle duration and data can change. The number and type of wash cycles and options may vary depending on the dishwasher model. Wash cycle Approximate Water... -
Page 11: Special Wash Cycles And Options
All manuals and user guides at all-guides.com Special wash cycles and Options Notes: Multi-functional tablets (Tabs) Optimum performance levels when using the “Fast" and "Express This option optimises washing and drying results. 30’” cycles can be achieved by respecting the specified number When using multi-functional tablets, press the MULTI- of place settings. FUNCTIONAL TABLETS button; the corresponding indicator light/symbol will light up. If the button is pressed again, the To reduce consumption even further, only run the dishwasher option will be deselected. -
Page 12: Rinse Aid And Refined Salt
All manuals and user guides at all-guides.com Rinse aid and refined salt Switch on and off the dishwasher using the ON/OFF button. Press Only use products which have been specifically designed and hold the P button for a few seconds until you hear a beep. for dishwashers. Switch on the dishwasher with the ON/OFF button, the set level Do not use table/industrial salt or washing-up liquid. (water softener set to medium level). -
Page 13: Care And Maintenance
All manuals and user guides at all-guides.com Care and maintenance Cleaning the filters The filter assembly consists of three filters which remove food residues from the washing water and then recirculate the water. They should be cleaned if you wish to achieve the best results in every wash. -
Page 14: Troubleshooting
All manuals and user guides at all-guides.com Troubleshooting Whenever the appliance fails to work, check for a solution from the following list before calling for Assistance. Problem: Possible causes / Solutions: • Switch off the appliance by pressing the ON/OFF button, switch it back on after approximately The dishwasher does not start or one minute and reset the program. cannot be controlled. - Page 15 Installation und Kundendienst, 18-19 Positionierung und Nivellierung Wasser- und Elektroanschlüsse Technische Daten Hinweise zur ersten Inbetriebnahme Kundendienst Beschreibung Ihres Geschirrspülers, 20 Geräteansicht LTF 11S111 Schalterblende Körbe beladen, 21-22 Geschirrspüler-Unterkorb Geschirrspüler-Oberkorb Einstellung Oberkorb Dritter Korb Starten und Gebrauch, 23 Starten des Geschirrspülers Einfüllen des Spülmittels...
-
Page 16: Datenblatt
All manuals and user guides at all-guides.com Datenblatt Datenblatt HOTPOINT ARISTON Marke LTF 11S111 Modell Nennkapazität in Standardgedecken für den Standardreinigungszyklus (1) Energieeffizienzklasse (A+++ niedriger Verbrauch) bis D (hoher Verbrauch) 302.0 Energieverbrauch pro Jahr in kWh (2) 1.07 Energieverbrauch Standardreinigungszyklus in kWh... -
Page 17: Vorsichtsmaßregeln Und Hinweise
All manuals and user guides at all-guides.com Vorsichtsmaßregeln und Hinweise Entsorgung D a s G e r ä t w u r d e n a c h d e n s t r e n g s t e n • B e f o l g e n S i e d i e l o k a l e n V o r s c h r i f t e n ;... -
Page 18: Installation Und Kundendienst
All manuals and user guides at all-guides.com Installation - Kundendienst Anschluss des Ablaufschlauchs Im Falle eines Umzugs sollte das Gerät möglichst in vertikaler Schließen Sie den Ablaufschlauch, ohne ihn zu krümmen, an eine Position transportiert werden, falls erforderlich, neigen Sie das Ablaufleitung mit Mindestdurchmesser von 4 cm an. -
Page 19: Technische Daten
All manuals and user guides at all-guides.com Kundendienst Kondensationsschutzstreifen Öffnen Sie nach dem Einbau des Geschirrspülers die Gerätetür und bringen Sie den transparenten Klebestreifen unter dem Bevor Sie den Kundendienst anfordern: Holzbord an, um es vor eventuellem Kondenswasser zu • sollten einige Kontrollen vorab selbst durchgeführt werden schützen. -
Page 20: Beschreibung Ihres Geschirrspülers
All manuals and user guides at all-guides.com Beschreibung des Gerätes Geräteansicht Geschirrspüler-Oberkorb Oberer Sprüharm Hochklappbare Ablagen Einstellung der Korbhöhe Dritter Korb* Geschirrspüler-Unterkorb Unterer Sprüharm Spülsiebe Salzbehälter Spülmittelkammern, Klarspülerbehälter und Ozonvorrichtung Active Oxigen* Typenschild Schalterblende Schalterblende Taste Startzeitvorwahl Taste Programmwahl Taste und Anzeigeleuchte Multifunktions-Tabs Taste und Kontrollleuchte Taste und Kontrollleuchte Extra Dry... -
Page 21: Körbe Beladen
All manuals and user guides at all-guides.com Beladen der Körbe Hinweise Einige Geschirrspülermodelle verfügen über klappbare Bevor Sie das Geschirr in den Geschirrspüler einräumen, Bereiche*, die in senkrechter Stellung zum Einsortieren von befreien Sie es von Speiserückständen und entleeren Sie Gläser Tellern oder in waagerechter Stellung (umgeklappt) für Töpfe und Behälter von Flüssigkeitsresten. -
Page 22: Dritter Korb
All manuals and user guides at all-guides.com Der Oberkorb kann in der Höhe verstellt werden: stellen Sie ihn in Die Geometrie des Korbes erlaubt das Einräumen von kleinem die oberste Position, wenn Sie großes Geschirr in den Unterkorb Geschirr im mittleren Bereich des Korbes. einräumen wollen. -
Page 23: Starten Und Gebrauch
All manuals and user guides at all-guides.com Inbetriebsetzung und Gebrauch Starten des Geschirrspülers Einfüllen des Spülmittels Ein gutes Spülergebnis hängt auch von einer 1. Öffnen Sie den Wasserhahn. korrekten Spülmitteldosierung ab. Eine zu hohe 2. Die Gerätetür öffnen und die ON-OFF-Taste drücken: die Dosierung ist nicht gleichzusetzen mit einem besseren Kontrollleuchten ON/OFF, Optionen und das Display leuchten Spülergebnis, man belastet dadurch nur die Umwelt. -
Page 24: Spülprogramme
All manuals and user guides at all-guides.com Programme Die Programmdaten sind Labormessdaten, die gemäß der europäischen Vorschrift EN 50242 erfasst wurden. Je nach den unterschiedlichen Einsatzbedingungen können die Dauer und die Daten der Programme anders ausfallen. Die Anzahl und die Art der Spülprogramme und -optionen sind abhängig vom jeweiligen Geschirrspülermodell. Wasserverbrauch Energieverbrauch Programm Trocknen Optionen... -
Page 25: Sonderprogramme Und Optionen
All manuals and user guides at all-guides.com Sonderprogramme und Optionen Hinweis: Extratrocken Die optimale Leistung der Programme "Schnell und Express Zur Optimierung des Trockengrades des Geschirrs 30´" ist dann gewährleistet, wenn die Anzahl der angegebenen drücken Sie die Taste EXTRA TROCKEN; die Taste leuchtet auf. Maßgedecke eingehalten wird. Durch erneuten Druck auf die Taste wird die Option deaktiviert. Das Für einen geringeren Verbrauch sollte die Maschine voll Eine höhere Temperatur während des letzten Spülgangs und ein beladen werden. -
Page 26: Klarspüler Und Regeneriersalz
All manuals and user guides at all-guides.com Klarspüler und Regeneriersalz Wasser versorgt. Verwenden Sie bitte nur Spezialspülmittel für Dieser Geschirrspüler kann so eingestellt werden, dass die Geschirrspüler. Verwenden Sie bitte kein Koch- oder Industriesalz und auch keine Handspülmittel. Bitte befolgen Umweltbelastung reduziert und die Spülleistungen entsprechend Sie die auf der Verpackung befindlichen Anweisungen. -
Page 27: Reinigung Und Pflege
All manuals and user guides at all-guides.com Reinigung und Pflege Die Filter reinigen Die Siebgruppe setzt sich aus drei Filtern zusammen, die Spülwasser reinigen, von Speiseresten befreien und wieder in Umlauf bringen. Um optimale Spülergebnisse zu gewährleisten, müssen diese gereinigt werden. Reinigen Sie die Filtersiebe regelmäßig. -
Page 28: Störungen Und Abhilfe
All manuals and user guides at all-guides.com Störungen und Abhilfe Sollten Betriebsstörungen auftreten, kontrollieren Sie bitte folgende Punkte, bevor Sie sich an den Kundendienst wenden. Störungen: Mögliche Ursachen/Lösung : • Schalten Sie das Gerät durch Drücken der ON/OFF-Taste aus und nach etwa einer Minute Die Spülmaschine startet nicht wieder ein und wiederholen Sie die Programmeinstellung. - Page 29 Plaatsing en waterpas zetten Hydraulische en elektrische aansluitingen Aanwijzingen voor de eerste afwascyclus Technische gegevens Service Beschrijving van het apparaat, 34 LTF 11S111 Aanzichttekening Bedieningspaneel Het laden van de rekken, 35-36 Onderrek Bovenrek Het regelen van de hoogte van het bovenrek...
-
Page 30: Productkaart
Productkaart All manuals and user guides at all-guides.com Productkaart HOTPOINT ARISTON Merk LTF 11S111 Model Beladingscapaciteit in standaard couverts (1) Energie-efficiëntieklasse op een schaal van A+++ (laag gebruik) tot D (hoog gebruik) 302.0 Jaarlijks energieverbruik in kWh (2) 1.07 Energieverbruik van de standaard wascyclus in kWh... -
Page 31: Voorzorgsmaatregelen En Advies
All manuals and user guides at all-guides.com Voorzorgsmaatregelen en advies Afvalverwijdering H e t a p p a r a a t i s o n t w o r p e n e n g e b o u w d • Houd u aan de locale normen, zodat het overeenkomstig de internationale veiligheidsnormen. -
Page 32: Installatie, Service
All manuals and user guides at all-guides.com Installatie - Service Aansluiting van de buis op de waterafvoer Als u het apparaat verplaatst moet u het verticaal houden; Verbind de afvoerbuis, zonder hem te buigen, aan een als dit niet mogelijk is moet u het naar achteren kantelen. afvoerleiding met een minimum doorsnede van 4 cm. -
Page 33: Aanwijzingen Voor De Eerste Afwascyclus
All manuals and user guides at all-guides.com Service Anticondensstrip Nadat u de afwasautomaat heeft ingebouwd opent u de deur en plakt u de doorzichtige plakstrip onder het houten werkvlak, Voordat u de Servicedienst inschakelt: zodat u het beschermt tegen eventuele condens. • Dient u te controleren of u de storing zelf kunt oplossen (zie Storingen en Oplossingen). -
Page 34: Beschrijving Van Het Apparaat
All manuals and user guides at all-guides.com Beschrijving van het apparaat Aanzichttekening Bovenrek Bovenste sproeiarmen Opklaprekjes Regeling hoogte bovenrek Derde rek* Onderrek Onderste sproeiarmen Filter Zoutreservoir Wasmiddelbakje, reservoir glansspoelmiddel en Active Oxigen mechanisme Typeplaatje Bedieningspaneel Bedieningspaneel Toets Selecteren Programma Toets Uitgestelde Start Toets en controlelampje Multifunctie tabletten Toets en Controlelampje controlelampje... -
Page 35: Het Laden Van De Rekken
All manuals and user guides at all-guides.com Het laden van de rekken Advies Enkele modellen vaatwasser beschikken over uitklapbare delen Voordat u de vaat inlaadt moet u overtollige etensresten deze kunnen in verticale positie worden gezet voor het plaatsen verwijderen en glazen en bekers legen. Het is niet noodzakelijk van borden, of in horizontale positie (neer), om pannen en de vaat met water af te spoelen voor u hem in de vaatwasser slakommen beter te plaatsen. -
Page 36: Het Regelen Van De Hoogte Van Het Bovenrek
All manuals and user guides at all-guides.com Het bovenrek kan naar believen in hoogte worden aangepast: De vorm van het rek maakt het mogelijk om in het middengedeelte naar boven toe als men in het onderrek volumineuze vaat wil ook klein serviesgoed, zoals koffiekopjes, te plaatsen. plaatsen, naar beneden toe om goed te kunnen profiteren van alle plek in de opklaprekjes of de uitklapbare delen, zodat er naar boven toe meer plaats is. -
Page 37: Starten En Gebruik
All manuals and user guides at all-guides.com Starten en gebruik Start de vaatwasser Het vaatwasmiddel toevoegen 1. Open de waterkraan. Een goed wasresultaat hangt ook af van een correcte 2. Open de deur en druk op de ON-OFF toets: de controlelampjes dosering van het vaatwasmiddel. Teveel vaatwasmiddel ON/OFF, de opties en het display gaan aan. betekent niet automatisch een efficiëntere reiniging. 3. -
Page 38: Programma's
All manuals and user guides at all-guides.com Programma’s De gegevens van de programma’s zijn gemeten in laboratoriumomstandigheden volgens de Europese vorm EN 50242. Aan de hand van de verschillende gebruiksmogelijkheden kunnen de duur en de programmagegevens verschillen. Het aantal en het soort programma’s en opties verschilt aan de hand van het model afwasautomaat. Programma’s Duur van het Waterverbruik Energieverbruik... -
Page 39: Speciale Programma's En Opties
All manuals and user guides at all-guides.com Speciale programma's en Opties N.B.: Extra Drogen de beste prestaties van de programma's "Snel en Express Voor het beter drogen van de vaat drukt u op de 30'" worden bereikt als u het aantal aangegeven couverts niet toets EXTRA DROOG. Het symbool/controlelampje gaat aan. overschrijdt. -
Page 40: Glansmiddel En Onthardingszout
All manuals and user guides at all-guides.com Glansmiddel en zout de vervuiling en het optimaliseren van de wasprestaties. Dit Gebruik uitsluitend producten die speciaal voor gegeven kunt u bij uw plaatselijke waterbedrijf opvragen. vaatwasmachines bestemd zijn. Schakel het apparaat in met de ON/OFF toets. Houd de P toets Gebruik geen keukenzout of industrieel zout en ook geen enkele seconden ingedrukt tot u een geluidssignaal hoort. -
Page 41: Onderhoud En Verzorging
All manuals and user guides at all-guides.com Onderhoud en verzorging Reinig geregeld het watertoevoerfilter bij de kraan. - Doe de waterkraan dicht. - Schroef het uiteinde van de watertoevoerbuis los, verwijder het filter en reinig het voorzichtig onder stromend water. - Doe het filter op zijn plaats en schroef de buis vast. -
Page 42: Storingen En Oplossingen
All manuals and user guides at all-guides.com Storingen en oplossingen Als er storingen zijn in de werking van het apparaat dient u eerst de volgende punten na te gaan voor u zich tot de Servicedienst wendt. Storingen: Mogelijke oorzaken / Oplossingen: •... - Page 43 Połączenie hydrauliczne i elektryczne Dane techniczne Przed pierwszym użyciem Serwis Opis urządzenia, 48 Widok ogólny Panel sterowania Napełnianie koszy, 49-50 LTF 11S111 Kosz dolny Kosz górny Regulacja górnego kosza Trzeci kosz Uruchomienie i użytkowanie, 51 Uruchomienie zmywarki Napełnianie dozownika detergentu Programy, 52 Tabela programów...
-
Page 44: Karta Produktu
All manuals and user guides at all-guides.com Karta produktu Karta produktu HOTPOINT ARISTON Marka LTF 11S111 Nazwa modelu Pojemność znamionowa, wyrażona liczbą standardowych kompletów naczyń (1) Klasa efektywności energetycznej, skla od A+++ (niskie zużycie) do D (wysokie zużycie) 302.0 Zużycie energii w kWh rocznie (2) 1.07... -
Page 45: Zalecenia I Środki Ostrożności
All manuals and user guides at all-guides.com Zalecenia i środki ostrożności Utylizacja Niniejsze urządzenie zostało zaprojektowane i • Utylizacja materiałów opakowaniowych: dostosować wyprodukowane zgodnie z międzynarodowymi się do lokalnych przepisów; w ten sposób opakowanie normami bezpieczeństwa. Poniższe ostrzeżenia będzie mogło zostać ponownie wykorzystane. podane zostały ze względów bezpieczeństwa i należy •... -
Page 46: Instalacja I Serwis
All manuals and user guides at all-guides.com Instalacja Serwis Techniczny Podłączenie węża odprowadzającego wodę W przypadku przenoszenia należy trzymać urządzenie w Podłączyć przewód odprowadzający, nie zginając go, do pozycji pionowej; w razie konieczności przechylić je do tyłu. przewodu kanalizacyjnego o średnicy minimum 4 cm. Przewód odprowadzający musi znajdować... -
Page 47: Dane Techniczne
All manuals and user guides at all-guides.com Serwis Techniczny Pasek antykondensacyjny Po zabudowaniu zmywarki otworzyć drzwi i przykleić przezroczysty pasek samoprzylepny pod drewnianym blatem, aby zabezpieczyć Przed zwróceniem się do Serwisu Technicznego: go przed ewentualnymi skroplinami. • Sprawdzić, czy problemu nie można rozwiązać samodzielnie (patrz Nieprawidłowości w działaniu i Ostrzeżenia dotyczące pierwszego mycia sposoby ich usuwania). -
Page 48: Opis Urządzenia
All manuals and user guides at all-guides.com Opis urządzenia Widok ogólny Kosz górny Zraszacz górny Składane półeczki Regulator wysokości kosza Trzeci kosz* Kosz dolny Zraszacz dolny Filtr zmywania Pojemnik na sól Pojemniki na detergent, pojemnik na środek nabłyszczający i Active Oxygen* Tabliczka znamionowa Panel sterowania Panel sterowania... -
Page 49: Napełnianie Koszy
All manuals and user guides at all-guides.com Ładowanie koszy Zalecenia Niektóre modele zmywarek wyposażone są w pochylne półki Przed napełnieniem koszy, usunąć z naczyń resztki żywności i które można ustawić w pozycji pionowej celem ułożenia talerzy opróżnić szklanki oraz kieliszki z pozostałych w nich płynów. Nie lub w pozycji poziomej (obniżonej) celem ułożenia garnków i jest konieczne płukanie naczyń... -
Page 50: Trzeci Kosz
All manuals and user guides at all-guides.com W zależności od wymagań, możliwe jest dokonanie regulacji Budowa kosza umożliwia umieszczenie w środkowej części wysokości kosza górnego: umieszczenie kosza w pozycji górnej również małych naczyń, takich jak filiżanki od kawy. umożliwia ułożenie w koszu dolnym niewymiarowych naczyń; umieszczenie kosza w pozycji dolnej umożliwia wykorzystanie pochylnych półeczek i uzyskanie większej przestrzeni w kierunku górnym. -
Page 51: Uruchomienie I Użytkowanie
All manuals and user guides at all-guides.com Uruchomienie i użytkowanie Uruchomienie zmywarki Napełnianie dozownika detergentu 1. Otworzyć zawór wody. Dobry rezultat mycia zależy również od właściwego 2. Otworzyć drzwi i nacisnąć przycisk ON-OFF: zapalą się dozowania środka myjącego, jego nadmierna ilość nie zwiększa skuteczności mycia, powoduje natomiast kontrolki ON/OFF, opcje i wyświetlacz. -
Page 52: Programy
All manuals and user guides at all-guides.com Programy Dane programów są mierzone w warunkach laboratoryjnych zgodnie z europejską normą EN 50242. W zależności od poszczególnych warunków użytkowania, czas trwania oraz dane programów mogą się zmieniać. Liczba i rodzaj programów i opcji zmieniają się w zależności od modelu zmywarki. Czas trwania Zużycie wody Zużycie energii... -
Page 53: Programy Specjalne I Opcje
All manuals and user guides at all-guides.com Programy specjalne i opcje Uwagi: Suszenie dodatkowe najlepszą skuteczność działania programów “Fast i Express Aby zoptymalizować suszenie naczyń, należy 30’” uzyskuje się przestrzegając zaleceń dotyczących ilości nacisnąć przycisk EXTRA SUSZENIE, zaświeci się właściwa wkładanych naczyń. -
Page 54: Wlewanie Płynu Nabłyszczającego
All manuals and user guides at all-guides.com Płyn nabłyszczający i sól ochronna zmywania w zależności od twardości wody. Dane dotyczące Stosować wyłącznie produkty przeznaczone do twardości wody można uzyskać w przedsiębiorstwie zmywarek. odpowiedzialnym za dostawy wody pitnej. Nie używać soli kuchennej i przemysłowej ani detergentów do zmywania ręcznego. -
Page 55: Konserwacja I Utrzymanie
All manuals and user guides at all-guides.com Konserwacja i utrzymanie Od czasu do czasu czyścić filtr dopływu wody znajdujący się na wyjściu zaworu. - Zamknąć zawór wody. - Po zamknięciu zaworu należy odkręcić końcówkę przewodu doprowadzającego wodę do zmywarki, wyjąć filtr i delikatnie umyć... - Page 56 All manuals and user guides at all-guides.com Anomalie i środki zaradcze Jeśli w pracy urządzenia pojawiają się anomalie w pracy, należy skontrolować następujące punkty przed zwróceniem się do Obsługi technicznej (patrz Obsługa techniczna). Niektóre z usterek są sygnalizowane za pomocą lampek zapalających się na panelu sterowania. Przed wezwaniem pomocy technicznej należy zanotować, które z lampek świecą.
- Page 57 Připojení k elektrické síti a k rozvodu vody Upozornění pro první mytí Technické údaje Servisní služba Popis zařízení, 62 Celkový pohled Ovládací panel LTF 11S111 Plnění košů, 63-64 Spodní koš Horní koš Nastavení výšky horního koše Třetí koš Spuštění a použití, 65 Uvedení...
-
Page 58: Informační List Výrobku
All manuals and user guides at all-guides.com Informační list výrobku Informační list výrobku HOTPOINT ARISTON Značka LTF 11S111 Model Kapacita počtu standardních sad nádobí (1) Třída energetické účinnosti na stupnici A+++ (nejnižší spotřeba) až D (vysoká spotřeba) 302.0 Roční spotřeba energie v kWh (2) 1.07... -
Page 59: Opatření A Rady
All manuals and user guides at all-guides.com Opatření a rady Likvidace Zařízení bylo navrženo a vyrobeno v souladu • Likvidace obalových materiálů: Při jejich s platnými mezinárodními bezpečnostními předpisy. odstraňování postupujte v souladu s místním Tato upozornění jsou uváděna z bezpečnostních předpisy a dbejte na možnou recyklaci. -
Page 60: Instalace, Servisní Služba
All manuals and user guides at all-guides.com Instalace - Servisní služba Při stěhování udržujte zařízení dle možností ve svislé poloze; Dbejte na to, aby hadice nebyla příliš ohnutá ani stlačená. dle potřeby je můžete naklonit na zadní stranu. Připojení hadice vypouštění vody Ustavení... -
Page 61: Upozornění Pro První Mytí
All manuals and user guides at all-guides.com (v závislosti Zařízení je vybaveno akustickými signály/tóny Pás proti tvorbě kondenzátu na modelu myčky ), které avizují realizovaný ovládací příkaz: Po vestavění myčky otevřete dvířka a přilepte pod dřevěnou zapnutí, konec cyklu apod. polici průsvitný... -
Page 62: Popis Zařízení
All manuals and user guides at all-guides.com Popis zařízení Celkový pohled Horní koš Horní ostřikovací rameno Sklopné držáky Mechanismus nastavení výšky koše Třetí koš Spodní koš Spodní ostřikovací rameno Mycí filtr Nádržka na sůl Vanička na mycí prostředek, nádržka na leštidlo a zařízení... -
Page 63: Plnění Košů
All manuals and user guides at all-guides.com Plnění košů Doporučení: Některé modely myček nádobí disponují naklonitelnými částmi Před plněním košů odstraňte z nádobí zbytky jídla a vylijte které lze použít ve svislé poloze k uložení talířů nebo ve ze sklenic a pohárů tekutiny, které v nich zůstaly. Není třeba vodorovné... -
Page 64: Nastavení Výšky Horního Koše
All manuals and user guides at all-guides.com Horní koš je výškově nastavitelný dle potřeby: do horní polohy Geometrie koše umožňuje umístit do středové části také malé kvůli umístění neskladného nádobí; do spodní polohy kvůli využití nádobí, jako jsou například šálky na kávu. prostorů... -
Page 65: Spuštění A Použití
All manuals and user guides at all-guides.com Uvedení do činnosti a použití Uvedení myčky do činnosti Dávkování mycího prostředku 1. Otevřete kohoutek přívodu vody. Dobrý výsledek mytí závisí také na správném dávkování 2. Otevřete dvířka a stiskněte tlačítko ZAPNOUT-VYPNOUT: mycího prostředku, přičemž platí, že při překročení Rozsvítí... -
Page 66: Programy
All manuals and user guides at all-guides.com Programy Údaje programů jsou naměřeny v laboratorních podmínkách v souladu s evropskou normou EN 50242. V závislosti na různých podmínkách použití může docházet ke změnám doby trvání a dat programů. Počet a druh programů a volitelných funkcí se mění v závislosti na modelu myčky. Doba trvání... -
Page 67: Speciální Programy A Volitelné Funkce,67
All manuals and user guides at all-guides.com Speciální programy a Volitelné funkce Poznámky: Extra sušení Nejlepších výsledků s programy „Rychlé mytí“ a „Express 30’“ Pro zlepšení sušení nádobí stiskněte tlačítko je možné dosáhnout, když bude dle možností dodržen počet EXTRA SUŠENÍ; rozsvítí se příslušná kontrolka. Dalším uvedených souprav. -
Page 68: Leštidlo A Regenerační Sůl
All manuals and user guides at all-guides.com Leštidlo a regenerační sůl optimalizuje výkon mytí v závislosti na tvrdosti vody. Údaj lze Používejte pouze specifické mycí prostředky pro myčky zjistit u organizace zabývající se dodávkou pitné vody. nádobí. Zapněte a vypněte myčku tlačítkem ZAPNOUT/VYPNOUT. Nepoužívejte kuchyňskou ani průmyslovou sůl ani mycí... -
Page 69: Údržba A Péče
All manuals and user guides at all-guides.com Údržba a péče Čištění filtrů Filtrační jednotka je tvořena dvěma filtry, které čistí vodu použitou k mytí od zbytků jídla a opětovně ji uvádějí do oběhu: K zabezpečení trvale dobrých výsledků mytí je třeba filtry čistit. Pravidelně... -
Page 70: Poruchy A Způsob Jejich Odstranění
All manuals and user guides at all-guides.com Poruchy a způsob jejich odstranění Když se na zařízení vyskytnou poruchy v činnosti, zkontrolujte dříve, než se obrátíte na Servisní službu, následující body. Poruchy: Možné příčiny / Řešení: Nedochází k uvedení myčky do •... - Page 71 Pripojenie k elektrickej sieti a k rozvodu vody Upozornenia pre prvé umývanie Technické údaje Servisná služba Popis zariadenia, 76 Celkový pohľad Ovládací panel LTF 11S111 Naplňte koše, 77-78 Dolný kôš Košík na príbory Horný kôš Tretí kôš Uvedenie do činnosti a použitie, 79 Uvedenie umývačky do činnosti...
-
Page 72: Opis Výrobku
All manuals and user guides at all-guides.com Opis výrobku Opis výrobku HOTPOINT ARISTON Značka LTF 11S111 Model Kapacita počtu štandardných súprav riadu (1) Trieda energetickej účinnosti na stupnici A+++ (najnižšia spotreba) až D (vysoká spotreba) 302.0 Ročná spotreba energie v kWh (2) 1.07... -
Page 73: Opatrenia A Rady
All manuals and user guides at all-guides.com Opatrenia a rady • Európska smernica 2012/19/ES o odpade tvorenom Zariadenie bolo navrhnuté a vyrobené v súlade elektrickými a elektronickými zariadeniami (WEEE) s platnými medzinárodnými bezpečnostnými predpismi. predpokladá, že elektrospotrebiče nesmú byť Tieto upozornenia sú uvádzané z bezpečnostných likvidované... -
Page 74: Inštalácia, Servisná Služba
All manuals and user guides at all-guides.com Inštalácia a Servisná služba Pri prenášaní udržujte zariadenie podľa možností vo zvislej Tlak v rozvode vody sa musí pohybovať v rozmedzí polohe; v prípade potreby ho môžete nakloniť na zadnú stranu. uvedenom v tabuľke Technických údajov (viď vedľa). Dbajte na to, aby hadica nebola príliš... -
Page 75: Upozornenia Pre Prvé Umývanie
All manuals and user guides at all-guides.com Servisná služba Kábel nesmie byť ohnutý ani stlačený. Skôr ako sa obrátite na Servisnú službu: V prípade poškodenia musí byť napájací kábel vymenený • Skontrolujte, či nie ste schopní poruchu odstrániť sami (viď výrobcom alebo jeho strediskom Servisnej služby, aby sa predišlo Poruchy a spôsob ich odstránenia). -
Page 76: Popis Zariadenia
All manuals and user guides at all-guides.com Popis zariadenia Celkový pohľad Horný kôš Horné ostrekovacie rameno Sklopné držiaky Nastavenie výšky horného koša Tretí kôš* Spodný kôš Dolné ostrekovacie rameno Umývací filter Nádobka na soľ Vanička na umývací prostriedok, nádržka na leštidlo a zariadenie Active Oxigen Štítok s parametrami Ovládací... -
Page 77: Naplňte Koše
All manuals and user guides at all-guides.com Naplňte koše Rady Niektoré modely umývačiek riadu sú vybavené sklopnými časťa- Pred plnením odstráňte z riadu zvyšky jedla a vylejte z pohárov mi*, ktoré môžu byť použité vo zvislej polohe na uloženie tanierov a z nádob tekutiny, ktoré... -
Page 78: Tretí Kôš
All manuals and user guides at all-guides.com Horný kôš je výškovo nastaviteľný podľa potrieb: jeho horná Geometria koša umožňuje umiestniť do strednej časti aj malý poloha umožňuje umiestnenie nespratného riadu do spodného riad ako napríklad šálky na kávu. koša; spodná poloha umožňuje využiť priestor sklopných držiakov alebo sklopných častí... -
Page 79: Uvedenie Do Činnosti A Použitie
All manuals and user guides at all-guides.com Uvedenie do činnosti a použitie Uvedenie umývačky do činnosti Dávkovanie umývacieho prostriedku Dobrý výsledok umývania závisí aj od správneho 1. Otvorte kohútik prívodu vody. dávkovania umývacieho prostriedku. Pri prekročení 2. Otvorte dvierka a stlačte tlačidlo ZAPNÚŤ-VYPNÚŤ: Rozsvietia odporúčaného množstva sa účinnosť... -
Page 80: Programy
All manuals and user guides at all-guides.com Programy Parametre programov sú namerané v laboratórnych podmienkach, v súlade s európskou normou EN 50242. V závislosti na rôznych podmienkach použitia môže dochádzať k zmenám doby trvania a parametrov programov. Počet a druh programov a možností sa mení v závislosti od modelu umývačky. Doba trvania Spotreba vody Spotreba energie... -
Page 81: Špeciálne Programy A Voliteľné Funkcie
All manuals and user guides at all-guides.com Špeciálne programy a Voliteľné funkcie Poznámky: Extra sušenie Najlepšiu účinnosť programov “Rýchle umývanie” a “Express 30’” Na zlepšenie sušenia riadu stlačte tlačidlo EXTRA dosiahnete, ak podľa možností dodržíte množstvo uvedených SUŠENIE; rozsvieti sa príslušná kontrolka. Ďalším stlačením súprav. -
Page 82: Leštidlo A Regeneračná Soľ
All manuals and user guides at all-guides.com Leštidlo a regeneračná soľ životného prostredia a optimalizuje umývanie podľa tvrdosti vody. Používajte len špecifické umývacie prostriedky pre Údaj o tvrdosti vody je možné získať od organizácie zaoberajúcej umývačky riadu. sa dodávkou pitnej vody. Nepoužívajte kuchynskú... -
Page 83: Údržba A Starostlivosť
All manuals and user guides at all-guides.com Údržba a starostlivosť Pravidelne čistite vstupný filter rozvodu vody, umiestnený na výstupe z vodovodného kohúta. - Zatvorte kohút prívodu vody. - Odskrutkujte koncovú časť prívodnej hadice vody, odložte filter a opatrne ho vyčistite pod prúdom tečúcej vody. - Vložte filter späť... -
Page 84: Poruchy A Spôsob Ich Odstránenia
All manuals and user guides at all-guides.com Poruchy a spôsob 195110510.03 ich odstránenia 08/2013 jk - Xerox Fabriano Keď sa na zariadení vyskytnú poruchy v činnosti, skôr, ako sa obrátite na Servisnú službu, skontrolujte nasledujúce body. Poruchy: Možné príčiny / Riešenia: •...
Need help?
Do you have a question about the LTF 11S111 and is the answer not in the manual?
Questions and answers