Table of Contents
Advertisement
Available languages
Available languages
Operating instructions
NL
EN
English,1
Nederland, 15
LTF 11H121
Contents
Assistance
Installation, 4-5
Loading the racks, 7-8
Adjusting upper rack
Wash cycles, 10
Table of wash cycles
Shutting off the water and electricity supplies
Cleaning the dishwasher
Preventing unpleasant odours
Cleaning the sprayer arms
Cleaning the water inlet filter
Troubleshooting, 14
DISHWASHER
EN
1
Advertisement
Table of Contents

Related Manuals for Hotpoint Ariston LTF 11H121


Summary of Contents for Hotpoint Ariston LTF 11H121
-
Page 1: Table Of Contents
Connecting the water and electricity supplies Advice regarding the first wash cycle Technical data Ecodesign Regulation Description of the appliance, 6 Overall view Control panel LTF 11H121 Loading the racks, 7-8 Lower rack Cutlery basket Upper rack Cutlery tray Adjusting upper rack... -
Page 2: Precautions, Advice And Assistance
Precautions, advice and Assistance a dangerous obstacle. T h i s a p p l i a n c e w a s d e s i g n e d a n d • Keep detergent and rinse aid out of reach of manufactured in compliance with international children. - Page 3 Assistance Phosphate-free and chlorine-free detergents containing enzymes • We strongly recommend that you use detergents Before contacting Assistance: that do not contain phosphates or chlorine, as • Check whether the problem can be resolved using the these products are harmful to the environment. Troubleshooting guide (see Troubleshooting). • Enzymes provide a particularly effective action • Restart the programme to check whether the problem at temperatures around 50°C. As a result has ceased to exist.
-
Page 4: Installation
Installation Connecting the water outlet hose If the appliance must be moved at any time, keep it in an Connect the outlet hose (without bending it) to a drain duct with upright position; if absolutely necessary, it may be tilted onto its a minimum diameter of 4 cm. -
Page 5: Advice Regarding The First Wash Cycle
Anti-condensation strip (depending on the The machine has a buzzer/set of tones After installing the dishwasher, open the door and stick the dishwasher model ) to inform the user that a command has adhesive transparent strip under the wooden shelf in order been implemented: power on, cycle end etc. -
Page 6: Description Of The Appliance
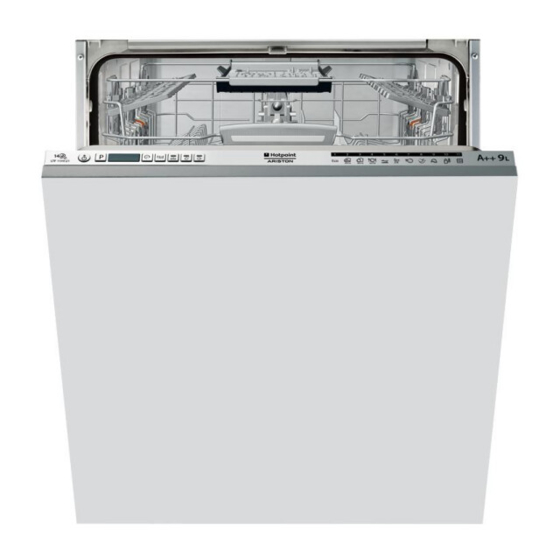
Description of the appliance Overall view Upper rack Upper sprayer arm Tip-up dispensers Rack height adjuster Lower rack Lower sprayer arm Washing filter Salt dispenser Detergent and rinse-aid dispensers and device Active Oxigen Data plate **** Control panel Control panel Delayed start button Select wash cycle button Multi-functional tablets button and indicator light ON-OFF/Reset button... -
Page 7: Loading The Racks
Loading the racks Tips Several dishwasher models are fitted with tip-up sectors Before loading the racks, remove all food residues from the They can be used in a vertical position when arranging dishes crockery and empty liquids from glasses and containers. No or in a horizontal position (lower) to load pans and salad bowls preventive rinsing is needed under running water. -
Page 8: Cutlery Tray
Tip-up compartments with adjustable position The upper rack can be adjusted for height based on requirements: The side tip-up compartments can be positioned at three high position to place bulky crockery in the lower rack and low different heights to optimize the arrangement of crockery inside position to make the most of the tip-up compartments/sectors the rack. by creating more space upwards. Wine glasses can be placed safely in the tip-up compartments by inserting the stem of each glass into the corresponding slots. Adjusting the height of the upper rack In order to make it easier to arrange the crockery, the upper rack may be moved to a higher or lower position. -
Page 9: Start-Up And Use
Start-up and use Measuring out the detergent Starting the dishwasher 1. Turn the water tap on. A good wash result also depends on the correct amount of detergent being used. Exceeding the stated 2. Open the door and press ON-OFF button: the ON/OFF amount does not result in a more effective wash and indicator lights, options and the display come on. -
Page 10: Wash Cycles
Wash cycles The number and type of wash cycles and options may vary depending on the dishwasher model. Wash cycles Approximate Instructions on wash-cycle selection and Wash cycle with Options duration of detergent dosage drying wash cycles Environmentally-friendly wash cycle with low energy Delayed start –... -
Page 11: Special Wash Cycles And Options
Special wash cycles and Options Notes: Multi-functional tablets (Tabs) Optimum performance levels when using the “Fast" and "Express This option optimises washing and drying results. 30’” cycles can be achieved by respecting the specified number When using multi-functional tablets, press the MULTI- of place settings. FUNCTIONAL TABLETS button; the corresponding indicator light/symbol will light up. If the button is pressed again, the The Eco wash cycle complies with regulation EN-50242. -
Page 12: Rinse Aid And Refined Salt
Rinse aid and refined salt Switch on and off the dishwasher using the ON/OFF button. Only use products which have been specifically designed Press and hold the P button for a few seconds until you hear for dishwashers. a beep. Switch on the dishwasher with the ON/OFF button, the Do not use table/industrial salt or washing-up liquid. set level appears on the display (the water softening system is Follow the instructions given on the packaging. -
Page 13: Care And Maintenance
Care and maintenance Cleaning the filters The filter assembly consists of three filters which remove food residues from the washing water and then recirculate the water. They should be cleaned if you wish to achieve the best results in every wash. Clean the filters regularly. -
Page 14: Troubleshooting
Troubleshooting Whenever the appliance fails to work, check for a solution from the following list before calling for Assistance. Problem: Possible causes / Solutions: • Switch off the appliance by pressing the ON/OFF button, switch it back on after approximately The dishwasher does not start or one minute and reset the program. cannot be controlled. • The appliance has not been plugged in properly. •... - Page 15 Hydraulische en elektrische aansluitingen Aanwijzingen voor de eerste afwascyclus Technische gegevens Service Ecodesign Regulation Beschrijving van het apparaat, 19 Aanzichttekening Bedieningspaneel LTF 11H121 Het laden van de rekken, 20-21 Onderrek Bestekkorf Bovenrek Besteklade Starten en gebruik, 22 Het starten van de afwasautomaat Het vaatwasmiddel toevoegen Programma’s, 23...
-
Page 16: Algemene Veiligheid
Voorzorgsmaatregelen en advies Afvalverwijdering H e t a p p a r a a t i s o n t w o r p e n e n g e b o u w d • Houd u aan de locale normen, zodat het overeenkomstig de internationale veiligheidsnormen. - Page 17 Installatie - Service Aansluiting van de buis op de waterafvoer Als u het apparaat verplaatst moet u het verticaal houden; Verbind de afvoerbuis, zonder hem te buigen, aan een als dit niet mogelijk is moet u het naar achteren kantelen. afvoerleiding met een minimum doorsnede van 4 cm.
- Page 18 Service Anticondensstrip Nadat u de afwasautomaat heeft ingebouwd opent u de deur en plakt u de doorzichtige plakstrip onder het houten werkvlak, Voordat u de Servicedienst inschakelt: zodat u het beschermt tegen eventuele condens. • Dient u te controleren of u de storing zelf kunt oplossen (zie Storingen en Oplossingen). Aanwijzingen voor de eerste afwascyclus • Start het programma opnieuw om te controleren of Nadat het apparaat is geïnstalleerd, onmiddellijk voor de eerste...
- Page 19 Beschrijving van het apparaat Aanzichttekening Bovenrek Bovenste sproeiarmen Opklaprekjes Regeling hoogte bovenrek Onderrek Onderste sproeiarmen Filter Zoutreservoir Wasmiddelbakje, reservoir glansspoelmiddel en Active Oxigen mechanisme Typeplaatje Bedieningspaneel Bedieningspaneel Toets Selecteren Programma Toets Uitgestelde Start Toets en controlelampje Multifunctie tabletten Toets en Controlelampje controlelampje Toets en controlelampje Extra droog Onthardingszout ON-OFF/Reset Toets en controlelampje...
- Page 20 Het laden van de rekken Advies Enkele modellen vaatwasser beschikken over uitklapbare delen Voordat u de vaat inlaadt moet u overtollige etensresten deze kunnen in verticale positie worden gezet voor het plaatsen verwijderen en glazen en bekers legen. Het is niet noodzakelijk van borden, of in horizontale positie (neer), om pannen en de vaat met water af te spoelen voor u hem in de vaatwasser slakommen beter te plaatsen.
- Page 21 Opklaprekjes met verschillende standen Het bovenrek kan naar believen in hoogte worden aangepast: De opklaprekjes aan de zijkant kunnen op drie verschillende naar boven toe als men in het onderrek volumineuze vaat wil hoogten worden gezet om de plaatsing van de vaat in het rek plaatsen, naar beneden toe om goed te kunnen profiteren van te optimaliseren.
- Page 22 Starten en gebruik Start de vaatwasser Het vaatwasmiddel toevoegen 1. Open de waterkraan. Een goed wasresultaat hangt ook af van een correcte 2. Open de deur en druk op de ON-OFF toets: de controlelampjes dosering van het vaatwasmiddel. Teveel vaatwasmiddel ON/OFF, de opties en het display gaan aan. betekent niet automatisch een efficiëntere reiniging. 3. Doseer het vaatwasmiddel. (zie hiernaast). Bovendien is dit niet goed voor het milieu. 4.
- Page 23 Programma’s Het aantal en het soort programma’s en opties verschilt aan de hand van het model afwasautomaat. De duur Programma's van het Aanwijzingen voor het kiezen van het Programma Opties programma programma en de dosering van het afwasmiddel droogfunctie is slechts ter indicatie Ecologisch wasprogramma met laag Uitgestelde Start - Tabs...
- Page 24 Speciale programma's en Opties N.B.: Extra Drogen de beste prestaties van de programma's "Snel en Express Voor het beter drogen van de vaat drukt u op de 30'" worden bereikt als u het aantal aangegeven couverts niet toets EXTRA DROOG. Het symbool/controlelampje gaat aan. overschrijdt. Als u nogmaals op de toets drukt, wordt de optie geannuleerd. Het programma Eco volgt de richtlijn EN-50242 en heeft een Door een hogere temperatuur te behouden tijdens de laatste langere duur dan de rest van de programma's.
- Page 25 Glansmiddel en zout van de waterhardheid worden geregeld voor het beperken van Gebruik uitsluitend producten die speciaal voor de vervuiling en het optimaliseren van de wasprestaties. Dit vaatwasmachines bestemd zijn. gegeven kunt u bij uw plaatselijke waterbedrijf opvragen. Gebruik geen keukenzout of industrieel zout en ook geen Schakel het apparaat in met de ON/OFF toets. Houd de P toets wasmiddelen voor handwas.
- Page 26 Onderhoud en verzorging Reinig geregeld het watertoevoerfilter bij de kraan. - Doe de waterkraan dicht. - Schroef het uiteinde van de watertoevoerbuis los, verwijder het filter en reinig het voorzichtig onder stromend water. - Doe het filter op zijn plaats en schroef de buis vast. Reinigen van de filters De filtergroep wordt gevormd door drie filters die etensresten uit het waswater verwijderen en zorgen dat het weer schoon...
- Page 27 Storingen en oplossingen Als er storingen zijn in de werking van het apparaat dient u eerst de volgende punten na te gaan voor u zich tot de Servicedienst wendt. Storingen: Mogelijke oorzaken / Oplossingen: • Schakel het apparaat uit met de ON/OFF toets, schakel het na een minuut De vaatwasser start niet of volgt de weer in en stel het programma opnieuw in.
- Page 28 195110571.01 03/2013 pb - Xerox Fabriano...
Need help?
Do you have a question about the LTF 11H121 and is the answer not in the manual?
Questions and answers