
Related Manuals for Garmin GTR 200B


Summary of Contents for Garmin GTR 200B
- Page 1 GTR 200/GTR 200B COM Transceiver Installation Manual 190-01553-00 December, 2020 Revision P...
- Page 2 Garmin. Garmin hereby grants permission to download a single copy of this manual and of any revision to this manual onto a hard drive or other electronic storage...
- Page 3 The Bluetooth® word mark and logos are registered trademarks owned by Bluetooth SIG, Inc. and any use of such marks by Garmin is under license. Other trademarks and trade names are those of their respective owners.
- Page 4 Software are valuable trade secrets of Garmin and/or its third-party providers and that the Software in source code form remains a valuable trade secret of Garmin and/or its third-party providers. You agree not to reproduce, decompile, disassemble, modify, reverse assemble, reverse engineer, or reduce to human readable form the Software or any part thereof or create any derivative works based on the Software.
-
Page 5: Table Of Contents
TABLE OF CONTENTS PARAGRAPH PAGE Section 1 General Description ................1-1 1.1 Introduction........................1-1 1.2 Equipment Description ....................1-1 1.3 Technical Specifications ....................1-2 1.4 Certification ........................1-5 1.5 Reference Documents ...................... 1-5 Section 2 Installation Overview .................2-1 2.1 Introduction........................2-1 2.2 Unit Configurations ...................... -
Page 6: Paragraph Page
PARAGRAPH PAGE 4.11 Receiver Audio ......................4-6 4.12 Pilot/Copilot PTT Inputs....................4-6 4.13 TX Interlock........................4-6 4.14 Discrete Inputs ....................... 4-7 Appendix A Shield Block Connector Installation Instructions .....A-1 A.1 Shield Block Installation Parts..................A-1 A.2 Shield Termination Technique – Method A.1 (Standard) ..........A-3 A.3 Shield Termination Technique - Method A.2 (Daisy Chain) ........ - Page 7 LIST OF FIGURES FIGURE PAGE Section 1 General Description ................1-1 Section 2 Installation Overview .................2-1 Figure 2-1 CAN Bus Configuration..................2-6 Section 3 Installation Procedures ..............3-1 Figure 3-1 GTR 200/200B Front Panel ................3-4 Figure 3-2 Configuration Mode Home Page ................ 3-5 Figure 3-3 COM Setup Page....................
- Page 8 FIGURE PAGE Figure A-5 Method B.1 (Quick Term) for Shield Termination .......... A-8 Figure A-6 Method B.2 (Daisy Chain-Quick Term) for Shield Termination..... A-9 Figure A-7 Daisy Chain between Methods A and B ............A-10 Figure A-8 D-Sub Spliced Signal Wire illustration............A-11 Appendix B Serial Interface Specifications ............B-1 Appendix C Outline and Installation Drawings ..........C-1 Figure C-1 GTR 200/200B Outline Drawing ...............C-1...
- Page 9 Appendix A Shield Block Connector Installation Instructions ....A-1 Table A-1 Parts not supplied for a Shield Block Installation (Figure A-1) ......A-1 Table A-2 Shielded Cable Preparations for Garmin Connectors......... A-3 Table A-3 Shielded Cable Preparations – (Quick Term)............. A-9 Appendix B Serial Interface Specifications ............B-1...
-
Page 10: Section 1 General Description
011-02980-10 with Serial Number Prefix 5JC GTR 200B 011-02980-20 with Serial Number Prefix 5JD GTR 200B FAA-PMA 011-02980-40 with Serial Number Prefix 5JD CAUTION The GTR 200/200B has a display that is coated with a special anti-reflective coating that is very sensitive to waxes and abrasive cleaners. CLEANERS CONTAINING AMMONIA WILL HARM THE ANTI-REFLECTIVE COATING. -
Page 11: Technical Specifications
HFP v1.6 Wide Band Speech mode), A2DP, and AVRCP. Bluetooth Connectivity (GTR 200B only) The GTR 200B stores 10 paired devices and overwrites the least recently connected device when a new device is paired. Only 1 Bluetooth connection allowed at one time. -
Page 12: Table 1-4 Display Specifications
1.3.3 Display The display on the GTR is a sunlight readable LCD display. Table 1-4 Display Specifications Characteristics Specifications Width: 3.46” (88.0mm) Display Size Height: 0.843” (21.4mm) Width: 2.95” (74.98mm) Active Area Height: 0.486” (12.36mm) Resolution 200 x 33 pixels Left: 45... -
Page 13: Table 1-6 Com Receiver Specifications
The GTR 200/200B receiver meets the requirements of RTCA DO-186B section 2.2 for a class C receiver. Table 1-6 COM Receiver Specifications Characteristics Specifications Frequency Range 118.000 to 136.975 MHz, 25 kHz channel spacing Headset Audio Output 60 mW minimum into a 150 Ω load Audio Response Less than 6 dB of variation between 350 and 2500 Hz. -
Page 14: Certification
1.4 Certification The GTR 200/200B does not have TSO authorization. The GTR 200B Part Number 011-02980-40 has FAA-PMA 1.4.1 FCC Grant of Equipment Authorization Table 1-7 FCC Grant of Equipment Authorization Model FCC ID IC ID GTR 200 IPH-02115-01 1792A-02115-01... -
Page 15: Section 2 Installation Overview
(includes items in Table 2-2) 010-01087-21 011-02980-20 Serial Number Prefix 5JD GTR 200B FAA-PMA, 010-01087-40 011-02980-40 Serial Number Prefix 5JD GTR 200B Standard FAA-PMA, 010-01087-41 011-02980-40 Serial Number Prefix 5JD 2.3 Available Accessories 2.3.1 Standard Accessories Table 2-2 Standard Kit Accessories... -
Page 16: Installation Considerations
Table 2-3 Contents of Connector Kits (011-03240-00/-01), see Figure C-2 Item Part Number Quantity Backshell w/Hardware, 37 pin 011-00950-03 Connector Plate 115-01879-00 Ring Terminal 117-00147-01 Single Coax Connector Plate Adapter 125-00165-00 Pan Head Phillips Screw 8-32 x .312 211-60209-09 Flat Head Phillips Screw 4-40 x .250 211-63234-08 Flat Head Phillips Screw 4-40 x .375 211-63234-10... -
Page 17: Antenna Considerations
2.5 Antenna Considerations This section contains mounting location considerations for the antennas required for the GTR 200/200B. For mounting the COM antenna, refer to the aircraft manufacturer’s data. 2.5.1 COM Antenna Location The GTR 200/200B COM antenna should be well removed from all projections, engines and propellers. The ground plane surface directly below the antenna should be a flat plane over as large an area as possible (18 inch square, minimum). - Page 18 NOTE Canadian installations are required to meet Industry Canada specifications for maximum radiation as documented in Radio Specifications Standard 102 (RSS-102). For more information about RF exposure and related Canadian regulatory compliance, contact: Manager, Radio Equipment Standards Industry Canada 365 Laurier Avenue Ottawa, Ontario K1A 0C8 In accordance with Canadian Radio Specifications Standard 102 (RSS 102), an RF safety...
-
Page 19: Mounting Considerations
2.6 Mounting Considerations The GTR 200/200B is designed to mount in the avionics stack in the aircraft instrument panel within view and reach of the pilot. The primary unit location should minimize pilot head movement when transitioning between looking outside of the cockpit and viewing/operating the GTR 200/200B. The location should be such that the GTR 200/200B unit is not blocked by the glare shield on top, or by the throttles, control yoke, etc. -
Page 20: Figure 2-1 Can Bus Configuration
2.7.2 CAN Bus Considerations The CAN (controller area network) bus (Figure 2-1) is an interface format used to establish communication between several LRUs in the G3X system. Each end of the CAN bus “backbone” must be terminated. Each node length (distance from CAN bus backbone to each LRU) must be 0.3 meter or less in length (keeping the node lengths as short as practicable is recommended). -
Page 21: Air Circulation And Cooling
2.8 Air Circulation and Cooling The GTR 200/200B unit meets all requirements without external cooling. However, as with all electronic equipment, lower operating temperatures extends equipment life. Reducing the operating temperature by 15° to 20°C (27° to 36°F) reduces the mean time between failures (MTBF). Units tightly packed in the avionics stack heat each other through radiation, convection, and sometimes by direct conduction. -
Page 22: Section 3 Installation Procedures
If the unit is damaged, notify the carrier and file a claim. To justify a claim, save the original shipping container and all packing materials. Do not return the unit to Garmin until the carrier has authorized the claim. -
Page 23: Backshell Assembly
3.3 Backshell Assembly Refer to Appendix A for backshell and Shield Block ground assembly instructions. 3.4 Mounting Requirements 3.4.1 Rack Installation Use the dimensions shown in Appendix C to prepare the mounting holes for the unit. You may also use the GTR 200/200B unit mounting rack itself as a template for drilling the mounting holes. -
Page 24: Antenna Installation And Connections
3.5 Antenna Installation and Connections The GTR 200/200B requires a standard 50 vertically polarized antenna. Follow the antenna manufacturer’s installation instructions for mounting the antenna. The antenna should be mounted on a metal surface or a ground plane with a minimum area of 18 inches x 18 inches. -
Page 25: Post Installation Configuration And Checkout Procedures
3.6 Post Installation Configuration and Checkout Procedures 3.6.1 System Configuration Overview This section contains checks to ensure the system is properly installed and functioning correctly as well as instructions for configuring the GTR 200/200B to the specific installation. Follow the instructions in Section 3.6.2 through Section 3.6.7.1 in order to complete all post installation configuration and checkout... -
Page 26: Figure 3-2 Configuration Mode Home Page
3.6.4 Configuration Pages The first page displayed in configuration mode (see Section 3.6.3) is the Configuration Mode Home page (Figure 3-2). From the Configuration Mode Home page, turn the LARGE Knob to select the desired subpage then press the SMALL Knob to display the subpage. Figure 3-2 Configuration Mode Home Page There are eight subpages available in configuration mode, each of these subpages is described in the following sections:... -
Page 27: Table 3-3 Configuration Default Settings
3.6.4.1 Default Settings Table 3-3 lists the default values for the configuration mode settings. Table 3-3 Configuration Default Settings Page Setting Default Note SIDETONE COM SETUP MIC GAIN RF SQLCH INTERCOM ENABLED RECEIVER OUT GAIN 100% AUX 1 SQUELCH AUX 1 VOLUME AUDIO SETUP AUX 1 MUTE (MUSIC) AUX 2 SQUELCH... -
Page 28: Figure 3-3 Com Setup Page
3.6.4.2 COM Setup Page The COM Setup page (Figure 3-3) allows the installer to configure various transmit and receive settings as listed in Table 3-4. For testing purposes, an “X” will appear in the appropriate TX, RX, and SQ checkboxes when the GTR 200/200B is transmitting, receiving, or the squelch is overridden or open (‘open’... -
Page 29: Figure 3-5 Mon Swap Selection
Table 3-4 COM Setup Page Selections Increasing or decreasing this setting, increases or decreases the transmit microphone gain respectively. Mic gain can be set from 0 to 10. A setting of 5 (default) represents the factory calibration, most headsets/microphones should work fine at this setting. -
Page 30: Figure 3-6 Audio Setup Page (Aux And Music Disabled)
3.6.4.3 Audio Setup The Audio Setup page (Figure 3-6, Figure 3-7) allows the installer to configure the various audio settings listed in Table 3-6. Refer to Section 3.6.4 to select the Audio Setup Page. Use the LARGE Knob to scroll through the listed functions, then use the SMALL Knob to adjust the setting of the function. -
Page 31: Figure 3-8 Softkey Setup Page
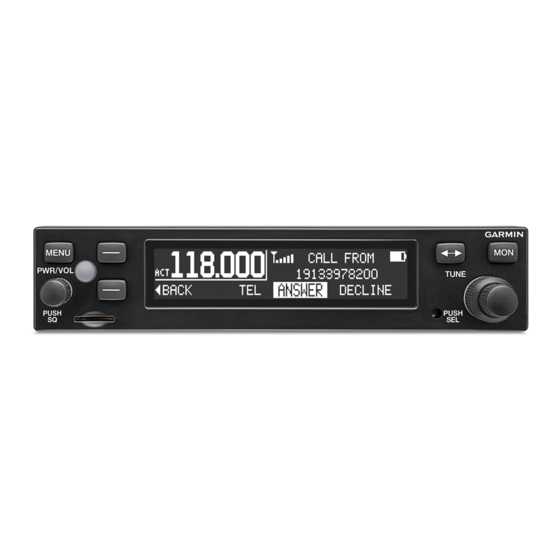
Toggles between media control play and pause TELEPHONE */** Moves directly to the telephone menu *Indicates that function is not available when the intercom is set to off **Indicates the function is only available on the GTR 200B model 190-01553-00 GTR 200/200B Installation Manual Rev. P... -
Page 32: Figure 3-9 Discrete Setup Page
3.6.4.5 Discrete Setup Page The Discrete Setup page (Figure 3-9) allows the installer to configure the operation of the discrete inputs per the options listed in Table 3-7. It is not necessary to connect the discrete inputs, if a discrete input is used it is normally connected to a momentary contact pushbutton. -
Page 33: Figure 3-10 Lighting Setup Page
3.6.4.6 Lighting Setup Page The Lighting Setup page (Figure 3-10) allows the installer to configure the operation of the bezel keys and display lighting, per the options listed in Table 3-8. Refer to Section 3.6.4 to select the Lighting Setup Page. Use the LARGE Knob to scroll through the listed functions, then use the SMALL Knob to adjust the setting of the function. -
Page 34: Figure 3-11 Lighting Graph
The Lighting Graph page Figure 3-11 graphically displays the input (voltage or percentage of lighting sensor) and brightness in real time. Brightness level is displayed as the vertical (Y) axis, and input level is displayed as the horizontal (X) axis. The graph changes according to the backlight control settings, and the lighting source input level. -
Page 35: Figure 3-13 Headset Tests Page
3.6.5 Unit Ground Checks (Configuration Mode) Refer to Section 3.6.3 to put the GTR 200/200B into configuration mode. 3.6.5.1 Headset Tests Page The Headset Tests page (Figure 3-13) allows the installer to test the operation of the headset outputs. Refer to Section 3.6.4 to select the Headset Tests Page. -
Page 36: Figure 3-14 Com Tests Page
3.6.5.2 COM Tests Page The COM Tests page (Figure 3-14) allows the installer to test the operation of the COM functions. Refer to Section 3.6.4 to select the COM Tests Page. Figure 3-14 COM Tests Page Perform the below procedure to verify proper COM configuration. 1. -
Page 37: Figure 3-15 Audio Tests Page
3.6.5.3 Audio Tests Page The Audio Tests page (Figure 3-15) and the following procedure will ensure that the audio level into the GTR 200/200B AUX/Music inputs (listed in Table 3-9) is set to the ideal level for best sound quality and noise rejection. -
Page 38: Table 3-10 Discrete Inputs
3.6.5.4 Lighting Bus Interface Check The display and bezel key backlighting on the GTR 200/200B can track an external lighting/dimmer bus input and use it to vary the display and bezel key backlight levels accordingly. This check is only applicable if Lighting Source (on the Lighting Setup Page, Section 3.6.4.6) is set to 14V or 28V, and verifies that the interface is connected correctly. -
Page 39: Table 3-11 Tx Interlock Connections
3.6.6 Unit Ground Checks (Normal Mode) 3.6.6.1 TX Interlock Checkout Connect pins 4 and 5 per Appendix Table 3-11 TX Interlock Connections Pin Name Description Active low output that indicates the GTR 200/200B is TX INTERLOCK OUT transmitting. This output is normally connected to the TX INTERLOCK IN of other COM radios installed in the aircraft. - Page 40 3.6.7 Flight Checks 3.6.7.1 COM Flight Check After the installation is complete, perform the following required flight checks to ensure satisfactory transceiver performance. Check the communications transceiver at a range of at least 50 nautical miles: (This check verifies unit receiver sensitivity test and transmitter range) 1.
-
Page 41: Unit Software
The Software Update page (Figure 3-17) allows the installer to load unit software using a micro SD software loader card. Section 3.7.3 lists instructions on creating the loader card NOTE Garmin recommends the use of a Sandisk® brand 4GB micro SD card for updating unit software. Figure 3-17 Software Update Page 190-01553-00 GTR 200/200B Installation Manual Rev. -
Page 42: Figure 3-18 Micro Sd Insertion
2. Download the GTR 200/200B System software to your PC. 3. Ensure that you have a micro SD card (Garmin recommends a Sandisk® brand 4GB micro SD card) connected to the PC in the micro SD card slot or by using an SD card adapter that allows a micro SD card to be used. -
Page 43: Figure 3-20 Software Update Page - No Update Found
GTR 200B reboots. While a Bluetooth firmware update is being performed in the GTR 200B, the status on the Bluetooth menu page in normal mode will report UPDATING FIRMWARE. When the Bluetooth update is completed, the Bluetooth functions will return to normal operation. -
Page 44: Disabling Bluetooth
NOTE Once disabled, the GTR 200B Bluetooth function does not remain disabled after turning the unit off and back on. The GTR 200B Bluetooth function is always enabled following a power cycle. 3.9 Continued Airworthiness Other than for regulatory checks, maintenance of the GTR 200/200B is ‘on condition’ only. Periodic maintenance of the GTR 200/200B is not required. -
Page 45: Section 4 Connector Pinout Information
4 CONNECTOR PINOUT INFORMATION 4.1 Pin Function List 4.1.1 J2001 Connector Figure 4-1 J2001 Looking at rear of unit Table 4-1 J2001 Connector Pin Name AIRCRAFT POWER DISC 1* LIGHTING BUS IN TX INTERLOCK OUT TX INTERLOCK IN* CAN BUS LO CAN BUS HI ID IN AUX MONO IN 2... -
Page 46: Power
Table 4-1 J2001 Connector Pin Name RECEIVER AUDIO LO COPILOT HS LO AUX 1 LO AUX MONO IN 1 PILOT HS LO COPILOT MIC LO PILOT PTT* PILOT MIC LO MUSIC LO *Indicates Active Low 4.2 Power Pins 1 & 20 supply power to the GTR 200/200B. Refer to drawings in Appendix D for power and ground wire gauges. -
Page 47: Can Bus
4.4 CAN Bus The CAN bus conforms to the BOSCH standard for Controller Area Network 2.0-B, and complies with ISO 11898. Pins 25 and 26 are used to terminate the CAN bus. The CAN bus on J2001 is used for communications between G3X system LRUs, and is the preferred connection method to G3X systems. -
Page 48: Serial Data - Rs-232
4.6 Serial Data – RS-232 Section 4.6.1.1 details the formats that can be selected for the RS-232 channel. NOTE The GTR 200/200B can be installed into the G3X system using an RS-232 or CAN bus (preferred) connection. Pin Name RS-232 IN RS-232 OUT 4.6.1 NMEA Format... -
Page 49: Aux Mono Audio
4.8 Aux Mono Audio Auxiliary audio mono audio inputs have a nominal input impedance of 600 Ω, max. rated input level is 5 Vrms. Pin Name AUX MONO IN 1 AUX 1 LO AUX MONO IN 2 AUX 2 LO 4.9 Headset Audio Headset audio outputs Pin Name... -
Page 50: Receiver Audio
4.11 Receiver Audio RECEIVER AUDIO OUT is a 40 mW audio output that is intended to drive a recording device or an audio panel. RECEIVER AUDIO OUT supplies 40 mW (4.9 Vrms) into a 600 load, and is generally connected to the audio panel (if used). -
Page 51: Discrete Inputs
4.14 Discrete Inputs These discrete inputs are active low and are configurable. Active-Low discrete inputs are considered active if either the voltage to ground is ≤3.5 VDC or the resistance to ground is ≤375 Ω. These inputs are considered inactive if the voltage to ground is 6.5-33 VDC or the resistance to ground is >100 kΩ. -
Page 52: Appendix A Shield Block Connector Installation Instructions
APPENDIX A SHIELD BLOCK CONNECTOR INSTALLATION INSTRUCTIONS A.1 Shield Block Installation Parts Table 2-3 and Table A-1 list the parts needed to install a Shield Block. Parts listed in Table 2-3 supplied in the GTR 200/200B Connector Kit (011-003240-00) and the GTR 200/200B Connector Kit FAA-PMA (011-003240-01). -
Page 53: Figure A-1 Shield Block Install Onto A Backshell
NOTE In Figure A-1, “AR” denotes quantity “As Required” for the particular installation. Figure A-1 Shield Block Install onto a Backshell 190-01553-00 GTR 200/200B Installation Manual Rev. P Page A-2... -
Page 54: Shield Termination Technique - Method A.1 (Standard
A.2 Shield Termination Technique – Method A.1 (Standard) 1. The appropriate number of Shield Block Backshells will be included in the particular LRU connector kit. Figure A-2 Method A.1 for Shield Termination Table A-2 Shielded Cable Preparations for Garmin Connectors Number of Window Window... - Page 55 Connect a Flat Braid (item 4, Figure A-2) to the shield exposed through the window of the prepared cable assembly from step 2. The Flat Braid should go out the front of the termination towards the connector. It is not permitted to exit the rear of the termination and loop back towards the connector (see Figure A-2).
-
Page 56: Figure A-3 Insulation/Contact Clearance
Secondary Method: Solder a Flat Braid (item 4, Figure A-2) to the shield exposed through the window of the prepared cable assembly. Ensure a solid electrical connection through the use of acceptable soldering practices. Use care to avoid applying excessive heat that burns through the insulation of the center conductors and shorts the shield to the signal wire. - Page 57 NOTE Refer to Figure A-1 for all item numbers in the following steps 6-13. 6. Insert newly crimped pins and wires into the appropriate connector housing location as specified by the installation wiring diagrams. 7. Cut the Flat Braid (item 6) to a length that, with the addition of a ring terminal, will reach one of the tapped holes of the Shield Block backshell (item 1).
-
Page 58: Shield Termination Technique - Method A.2 (Daisy Chain
A.3 Shield Termination Technique - Method A.2 (Daisy Chain) In rare situations where more braids need to be terminated for a connector than three per ring terminal it is allowable to daisy chain a maximum of two shields together (see Figure A-4) before coming to the ring terminal. -
Page 59: Figure A-5 Method B.1 (Quick Term) For Shield Termination
Connect a Flat Braid (item 4, Figure A-5) to the folded back shield of the prepared cable assembly. The flat braid should go out the front of the termination towards the connector. It is not permitted to exit the rear of the termination and loop back towards the connector (Figure A-5). Make this connection using an approved shield termination technique. -
Page 60: Shield Termination-Method B.2 (Daisy Chain-Quick Term
Table A-3 Shielded Cable Preparations – (Quick Term) Number of Pins Quick Term Min Quick Term Max Quick Term Backshell Size Std/HD (inches) (inches) Float (inches) 9/15 1.25 2.25 1.75 15/26 25/44 37/62 50/78 A.5 Shield Termination-Method B.2 (Daisy Chain-Quick Term) In rare situations where more braids need to be terminated for a connector than three per ring terminal it is allowable to daisy chain a maximum of two shields together before coming to the ring terminal (Figure A-6). -
Page 61: Daisy Chain Between Methods A And B
A.6 Daisy Chain between Methods A and B In rare situations where more braids need to be terminated for a connector than three per ring terminal and a mixture of Method A.1 Method B.1 have been used, it is allowable to daisy chain a maximum of two shields together from a Method A termination to a Method B (Figure A-7). -
Page 62: Figure A-8 D-Sub Spliced Signal Wire Illustration
Figure A-8 D-Sub Spliced Signal Wire illustration 190-01553-00 GTR 200/200B Installation Manual Rev. P Page A-11... -
Page 63: Appendix B Serial Interface Specifications
APPENDIX B SERIAL INTERFACE SPECIFICATIONS B.1 Electrical Interface The I/O signals are compatible with RS-232. Data is generated at 9600 baud with a word length of 8 bits, one stop bit, and no parity. The data format for the serial communication is: Baud rate 9600 Data bits... - Page 64 B.2.1 Message Definitions B.2.1.1 Frequency Types B.2.1.1.1 Enhanced Frequency Type Enumeration Tower Ground Automatic Terminal Information Service or ATIS Air Traffic Frequency Approach Arrival Automatic Weather Observing Station Clearance/Delivery Common Traffic Advisory Frequency Departure Flight Service Station Remote Flight Service Station <...
- Page 65 B.2.1.1.2 Legacy Frequency Type Enumeration Tower Ground Automatic Terminal Information Service or ATIS Air Traffic Frequency Approach Arrival Automatic Weather Observing Station Clearance/Delivery Common Traffic Advisory Frequency Departure Flight Service Station Remote Flight Service Station < Unicom Mandatory Frequency > No type specified Undefined B.2.2 Input Messages...
- Page 66 Message format (GTR 225/GNC 255): “GRM”.....Company identifier. “C” ....Message class. “00”....Message identifier. mk ....Active frequency: m = MHz, where m = desired MHz frequency - 30h, ranging from 118 to 136 MHz, (i.e. 76h to 88h, A2h); k = (KHz offset / 25KHz) + 30h, ranging from 000 to 975KHz in 25 KHz steps.
- Page 67 NOTE The GTR will ignore this message while transmitting on the active COM frequency. B.2.2.2 Set Standby Frequency and Transceiver Function This message is used to set the Standby frequency as well as the transceiver function. Message format (GTR 200/200B): “GRM”.....Company identifier.
- Page 68 Message format (SL30): “MRR”.....Company identifier. “V”....Message class. “29”....Message identifier. mk ....Standby frequency: m = MHz, where m = desired MHz frequency - 30h, ranging from 118 to 136 MHz, (i.e. 76h to 88h, A2h); k = (KHz offset / 25KHz) + 30h, ranging from 000 to 975KHz in 25 KHz steps.
- Page 69 B.2.2.3 Select Squelch Override This message is used to turn the receiver manual squelch override on and off. Message format: “GRM”.....Company identifier. “C” ....Message class. “03”....Message identifier. n .......Squelch override: (ASCII) 0 = off; 1 = on Example message: $PGRMC030<chksm><CR><LF> Set the squelch to normal operation.
- Page 70 B.2.2.4.2 Remote Airport Frequency Input This message is used to input frequency data for the specified list type. Message format (GTR 200/200B): “GRM”.....Company identifier. “C” ....Message class. “05”....Message identifier. t ......List type: (ASCII) “0”, “1”,…, “9”. f......Frequency type (see Extended Frequency Type Enumeration). mk ....Frequency: m = MHz, where m = desired MHz frequency - 30h, ranging from 118 to 136 MHz, (i.e.
- Page 71 B.2.2.5 Remote Frequency Identifier Lookup Table The following two messages work together in allowing remotely connected devices to provide frequency identifier lookup information. The host device will send a Set Remote Frequency Table Entry message to add entries to the table, and Delete Remote Frequency Table Entries message to remove entries from the table.
- Page 72 B.2.2.6 Request Output Data This message is used to request an output message be sent. Message format: “MRR”.....Company identifier. “C” ....Message class. “06”....Message identifier. ii .......Output identifier of requested message: “03” = software version message. dd .....Message data, set to “00”. a .......Request type, set to “0”.
- Page 73 Message format (SL 40): “MRR”.....Company identifier. “C” ....Message class. “01”....Message identifier. mk ....Active frequency: m = MHz, where m = desired MHz frequency - 30h, ranging from 118 to 136 MHz, (i.e. 76h to 88h, A2h); k = (KHz offset / 25KHz) + 30h, ranging from 000 to 975KHz in 25 KHz steps.
- Page 74 B.2.3.2 Software Version This message is used to output the software version string. Message format: “MRR”.....Company identifier. “C” ....Message class. “03”....Message identifier. vvvv ....Software version in ASCII Example message: $PMRRC030200<chksm><CR><LF> Software version is 2.00. B.2.3.3 Communications Error This message is used to indicate a communications error. When possible, the company identifier and message class will match the company identifier and message class of the offending message.
-
Page 75: Figure C-1 Gtr 200/200B Outline Drawing
2X .05 1.3 SPACING DIMPLE 6.25 158.8 BEZEL RACK FRONT DIMPLE 4X .437 11.1 FROM FRONT OF A/C PANEL TO MOUNTING HOLES 7.00 177.8 Figure C-1 GTR 200/200B Outline Drawing 190-01553-00 GTR 200/GTR 200B Installation Manual Revision P Page C-1... -
Page 76: Figure C-2 Gtr 200/200B Assembly Drawing
CONNECTOR KIT: 011-03240-00 212-00018-04 330-00625-37 PMA CONNECTOR KIT: 011-03240-01 212-20065-00 115-01879-00 117-00147-01 212-00024-04 211-63234-10 QTY 4 233-00087-00 RACK: 115-01878-00 PMA RACK: 115-01878-02 GTR 200 UNIT 011-02980-XX Figure C-2 GTR 200/200B Assembly Drawing 190-01553-00 GTR 200/GTR 200B Installation Manual Revision P Page C-2... -
Page 77: Figure C-3 Gtr 200/200B Installation Drawing
SPRING SNAPS INTO PLACE. TAB IN PLACE RETAINING SPRING IN PLACE RESULT SLIGHTLY DEPRESS RETAINING STEP 2 SPRING AND INSERT CONNECTOR PLATE PARALLEL TO REAR OF RACK. Figure C-3 GTR 200/200B Installation Drawing 190-01553-00 GTR 200/GTR 200B Installation Manual Revision P Page C-3... -
Page 78: Appendix C Outline And Installation Drawings
LIP MUST BE FLUSH WITH THE FRONT OF THE AIRCRAFT PANEL .437 11.1 TYPICAL DISTANCE FROM FRONT OF PANEL TO MOUNTNG HOLES SECTION A-A Figure C-4 GTR 200/200B Panel Cutout Drawing 190-01553-00 GTR 200/GTR 200B Installation Manual Revision P Page C-4... -
Page 79: Appendix D Interconnect Examples
APPENDIX D Interconnect Examples Figure D-1 GTR 200/200B Interconnect Example Notes 190-01553-00 GTR 200/GTR 200B Installation Manual Revision P Page D-1... -
Page 80: Appendix D Interconnect Examples
ID LO ID LO SEE NOTE 16. SEE NOTE 16. COM ANTENNA COM ANTENNA J2002 J2002 P2002 P2002 Figure D-2 GTR 200/200B- Power & Ground/Intercom/GDU 37X/46X CAN Bus Interconnect Example 190-01553-00 GTR 200/GTR 200B Installation Manual Revision P Page D-2... -
Page 81: Figure D-3 Gtr 200/200B- Power & Ground/Intercom/Gdu 37X Rs-232 Interconnect Example
APPENDIX D Interconnect Examples Figure D-3 GTR 200/200B- Power & Ground/Intercom/GDU 37X RS-232 Interconnect Example 190-01553-00 GTR 200/GTR 200B Installation Manual Revision P Page D-3... -
Page 82: Figure D-4 Gtr 200/200B- Power & Ground/Gma 240/Gns 430/Aera 79X
POWER GROUND/DATA GROUND BLACK WIRE POWER GROUND/DATA GROUND BLACK WIRE COM ANTENNA COM ANTENNA NOTE 15 NOTE 15 J2002 J2002 P2002 P2002 Figure D-4 GTR 200/200B- Power & Ground/GMA 240/GNS 430/aera 79X Interconnect Example 190-01553-00 GTR 200/GTR 200B Installation Manual Revision P Page D-4... -
Page 83: Figure D-5 Gtr 200/200B- Mono Audio/Remote Mount Jack Interconnect Example
MUSIC INPUT USING REMOTE MOUNT JACK MUSIC 1 IN LEFT NOTE 5 NOTE 5 MUSIC 1 IN RIGHT MUSIC 1 IN LO Figure D-5 GTR 200/200B- Mono Audio/Remote Mount Jack Interconnect Example 190-01553-00 GTR 200/GTR 200B Installation Manual Revision P Page D-5... -
Page 84: Figure D-6 Gtr 200/200B Can Bus Interconnect Drawing
ID LO ID LO SEE NOTE 16. SEE NOTE 16. COM ANTENNA COM ANTENNA COM ANTENNA COM ANTENNA J2002 J2002 P2002 P2002 Figure D-6 GTR 200/200B CAN Bus Interconnect Drawing 190-01553-00 GTR 200/GTR 200B Installation Manual Revision P Page D-6... -
Page 85: Figure D-7 Dual Gtr 200/200B200/200B Gma 240 Interconnect Drawing
TIE TOGETHER TO IDENTIFY GTR AS COM 2. ID LO ID LO SEE NOTE 16. SEE NOTE 16. COM ANTENNA COM ANTENNA J2002 J2002 P2002 P2002 Figure D-7 Dual GTR 200/200B200/200B GMA 240 Interconnect Drawing 190-01553-00 GTR 200/GTR 200B Installation Manual Revision P Page D-7... -
Page 86: Figure D-8 Lemo Jack Interconnect Drawing
PILOT MIC LO 36 6. MIC LO PILOT PTT 35 PILOT PTT 35 ALL SPLICES FROM LEMO JACK OCCUR AT GTR END OF HARNESS Figure D-8 LEMO Jack Interconnect Drawing 190-01553-00 GTR 200/GTR 200B Installation Manual Revision P Page D-8... -
Page 87: Figure D-9 Gtr 200/200B - J2001 Connector Layout
MIC IN PTT* LEFT RIGHT LEFT RIGHT IN 2 BUS IN POWER J2001 AS VIEWED LOOKING AT THE REAR OF THE UNIT Figure D-9 GTR 200/200B - J2001 Connector Layout 190-01553-00 GTR 200/GTR 200B Installation Manual Revision P Page D-9...
Need help?
Do you have a question about the GTR 200B and is the answer not in the manual?
Questions and answers