Table of Contents
Advertisement
Quick Links
Advertisement
Table of Contents

Related Manuals for Crosley CF4503


Summary of Contents for Crosley CF4503
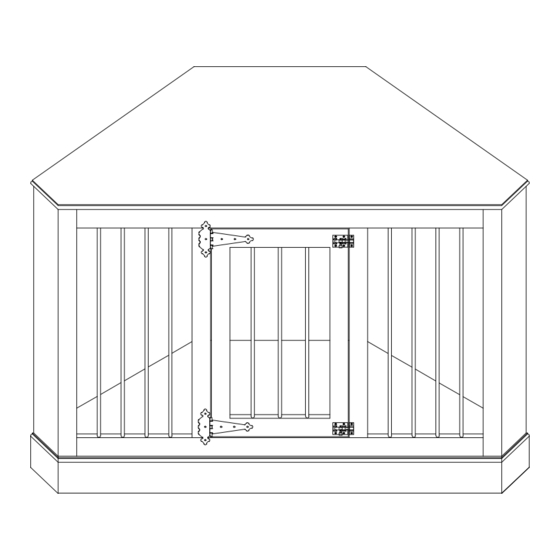
- Page 1 Corner Credenza Pet Crate CF4503...
- Page 2 PART LIST Bottom Right Panel Door Frame Left Panel 1 PC 1 PC 1 PC 1 PC 1 PC Back Center Panel Back Panel 1 PC 2 PCS HARDWARE LIST Ø8 x 30mm Ø1/4" x 38mm Ø3 x 15mm Wood Dowel Bolt Spring Washer Flat Washer...
- Page 3 Please do not use tools to assemble this unit unless specifically indicated. Locked Unlocked Reference the images above any time the instructions state "lock the hardware". Note: Be sure to check all hardware is locked when completed. Step 1. Carefully lay top (part A) on a soft surface, such as carpet. Attach door frame (part E) to top (part A) using wood dowels (part #1) and lock the hardware.
- Page 4 Step 2. Attach left panel (part C) and right panel (part D) to top (part A) using wood dowels (part #1) and lock the hardware. #1 #1 Step 3. Attach back center panel (part F) to top (part A) using wood dowel (part #1) and lock the hardware.
- Page 5 Step 4. Attach bottom (part B) to assembled unit (parts C, D, E & F ) using wood dowels (part #1), spring washers (part #3), flat washers (part #4), bolts (part #2) and allen wrench (part #6). #1 #1 Step 5. Carefully turn unit upright. Attach back panels (part G) to assembled unit (parts A, B, C, D, &...
- Page 6 Note: It is important to adjust levelers once fully assembled and upright. Extend adjustable leveler until it's firmly in contact with the floor. If relocating, adjust leveler as needed until it's firmly in contact with the floor in new location.
- Page 7 Ø8*3/4" Ø8*1-1/2" Wall Anchor Washer Short Screw Long Screw Safety Wall Safety Strap Kit Strap 1 PC 2 PCS 1 PC 1 PC 1 PC 1 SET SAFETY WALL STRAP INSTALLATION Note: It is highly recommended to install this safety strap kit to prevent tipping, damage and/or injury 1.Insert short screw (C) through washer (B) and safety wall strap (E) and attach to top (part A) using phillips head screwdriver.
Need help?
Do you have a question about the CF4503 and is the answer not in the manual?
Questions and answers