Advertisement
Quick Links
Advertisement

Summary of Contents for Crosley CF4001
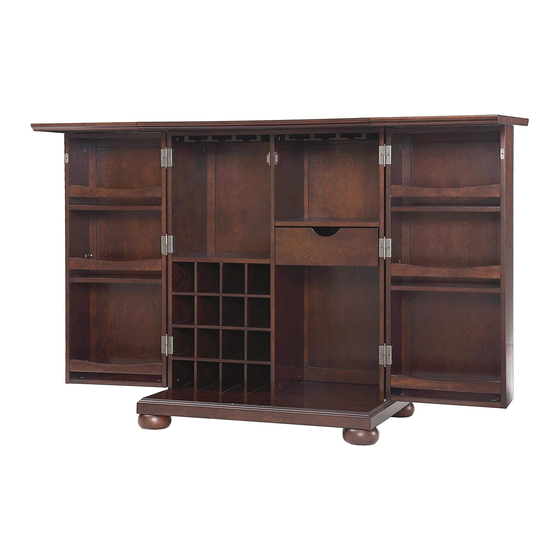
- Page 1 Expandable Bar Cabinet CF4001...
- Page 2 Congratulations! You have purchased a stylish piece of Crosley Furniture. We strive to provide fine furniture products, built with quality materials and hand finished details. Please carefully follow the assembly instructions to ensure your furniture is assembled correctly to provide long lasting enjoyment.
- Page 3 2 of 15...
- Page 4 3 of 15...
- Page 5 Step 1. Insert Cam Bolts (Part #2) into pre-drilled holes of Parts A, D, E, F, I, M, N, O, P & S with a Phillips Head screw driver as shown. Attach Hardware Knobs (Part #8) to Door Fronts (Parts S) with Round Head Bolts (Part #9) using Phillips Head screwdriver as shown. Attach Door catchs (Part# 10) to Part E with Round Head Screws (Part# 12) using Phillips Head Screwdriver as shown.
- Page 6 5 of 15...
- Page 7 Step 2. Attach Stopper (Part #7) to Part H with Round Head Screw (Part #12) into pre-drilled hole using Phillips Head screw driver as shown. Attach Parts E & F to Part H using Wood Dowels & Cam Locks as shown. Step 3.
- Page 8 Step 4. Attach Front Panel I to Parts D & F using Cam Locks as shown. Step 5. Carefully turn cabinet onto its end with Part X flat on the floor. Attach Base L to Parts D, E, F, & I using Wood Dowels and Barrel Nuts as shown.
- Page 9 Attach Stem Ware Holders (Parts B & C) to Expandable Top A with Wood Dowels and 1 ½" Step 6. Screws (Part #14) using Phillips Head screwdriver as shown. Note: Pay close attention to positioning of Parts B & C. Stem Ware Holder B is an L shaped part. Holder C is a T shaped part.
- Page 10 9 of 15...
- Page 11 Step 9. Slide Parts J & K together to create wine storage grid. Insert assembled Parts J & K into their appropriate position as shown. Insert assembled drawer from Step 8 into its appropriate position as shown. 10 of 15...
- Page 12 Step 10. (Front Left Storage Door) - Attach Part Q to Door Side O with Wood Dowels & Cam Locks as shown. Set Rails R into place on Door Side O with Wood Dowels as shown. Attach Door Panel P to Parts Q & R with Wood Dowels and Cam Locks as shown.
- Page 13 Step 11. (Front Right Storage Door) - Attach Part Q to Door Side M with Wood Dowels & Cam Locks as shown. Set Rails R into place on Door Side M with Wood Dowels as shown. Attach Door Panel N to Parts Q & R with Wood Dowels and Cam Locks as shown.
- Page 14 13 of 15...
- Page 15 14 of 15...
-
Page 16: Limited Manufacturer's Warranty
In accordance with the "Moss-Magnuson Warranty Act" of July 10, 1975, this is termed a "limited warranty" which in no way compromises Crosley Furniture’s high standards of Quality and Workmanship. 15 of 15...


Need help?
Do you have a question about the CF4001 and is the answer not in the manual?
Questions and answers