Advertisement
IMPORTANT SAFETY INSTRUCTIONS


READ AND UNDERSTAND ALL INSTRUCTIONS. Failure to follow all instructions listed below may result in electric shock, fire and/or serious injury.
- This product is for indoor use only.
- Do not get the product wet. Do not use if this product is exposed to moisture.
- Do not disassemble. This product has no user-serviceable parts.
- As with all electrical devices, use caution when plugging and unplugging this unit into an outlet or plugging/unplugging other devices into this unit. Do not force this unit into an outlet. Do not force plugs into this outlet.
- If required, use only UL/ETL approved extension cords with this product.
- If this unit is used in a manner not specified by the manufacturer, the protection provided by this equipment may be impaired.
- Do not overload the tool. It must be used for powering devices less than the product rating.
- For use in grounded outlets only. Do not remove grounding prong from back of product.
- Operate this product using only the AC power type listed in the product specifications.
- Two- or three-prong plugs may be used with this product. Do not force a polarized plug (one prong larger than the other) into this product. Flip plug over and retry.
- Save these instructions. Refer to them frequently and use them to instruct others who may use this product. If you loan someone this product, loan them these instructions also.
SPECIFICATIONS
Ratings: 0.2 to 15 Amps max or 24 to 1800 watts max. @ 100-120V AC (50-60Hz)
Display Auto Off: 2 minutes
Input: 120V AC @60Hz
Output: 15 Amps Max 120V AC @60Hz
Operating Temperature: 32º to 104ºF (0º to 40 Cº)
Operating Humidity: 20% to 80% Relative Humidity
Operating Altitude: Up to 6500 ft. (2000m)
Battery Requirement: (2) LR44 Button Cells
Transient Voltage:1500V
Degree of Protection: IP20 (Protected against solid objects up to 12 mm)
Pollution degree: 2
Grounding: 
Measurement Category: CAT III
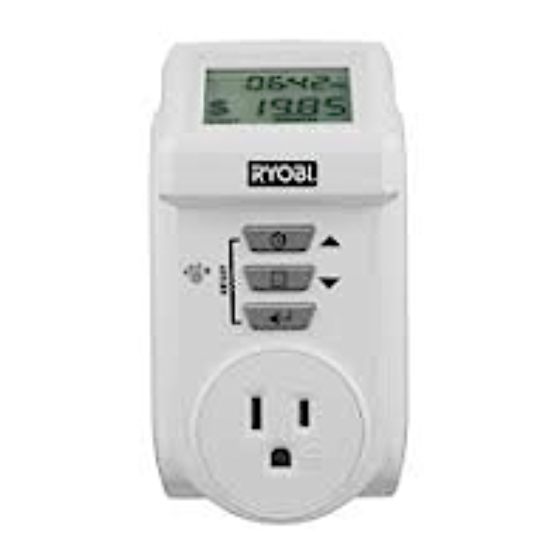
OPERATION
USING THE DEVICE

- Clock/timer button
- Center button
- Enter button
- Overload indicator
- LCD display
The power usage meter calculates the cost of power usage by most electronic devices which plug into a 120 volt AC outlet.
Cost is determined by the rate per Kilowatt hour (kWh) charged by your local electric company. Call your electric company for rates, or check your most recent statement.
NOTE: The cost of operation is only calculated after the rate per kilowatt hour is programmed.
This product displays Amps, Kilowatt Hours, Watts, cost of operation, and the total price for the time period the device was connected.
- Before first use, remove the plastic strip from the battery compartment on the back of unit.
- Press and hold the Enter button
![]() (C) until the time display flashes.
(C) until the time display flashes. - The default setting is a 12 hour clock.
- To set hours and minutes, press the Clock/timer button
![]() (A) or Center button
(A) or Center button ![]() (B).
(B). - Press Enter button (C) again to set the price per kilowatt hour (max. 0.99). Press the Clock/ timer and Center buttons (A) or (B) to change the amount in cents.
- When you have input the time and price per kilowatt hour, press and hold the Enter button (C) until the display stops flashing.
- Plug the power usage meter into a standard, grounded wall outlet or UL/ETL approved, grounded 15 Amp capable extension cord.
- Plug the device you wish to monitor into the power usage meter.
- When the device is plugged into the power usage meter, it will begin displaying power used in Watts. This is the default setting.
- To toggle the display between Kilowatt hours, Amps, and Watts, press the Center button
![]() (B).
(B). - Press
![]() to change to a 24-hour clock.
to change to a 24-hour clock. - Press
![]() again to change to the duration of time the device has been connected to the meter.
again to change to the duration of time the device has been connected to the meter.
- To toggle the display between Kilowatt hours, Amps, and Watts, press the Center button
 (C) until the time display flashes.
  (A) or Center button
  (B).
(B). (B).
(B). to change to a 24-hour clock.
The display shows minutes from 1-59, then shows the time in hours. At 24 hours, the meter switches to time displayed in days.
- To display the cost per kilowatt hour, press the Enter button
![]() (C).
(C). - To toggle between Cost Per Day, Cost Per Week, Cost Per Month, Cost Per Year, and Total Cost calculated so far, press the Center button
![]() (B).
(B).
- To toggle between Cost Per Day, Cost Per Week, Cost Per Month, Cost Per Year, and Total Cost calculated so far, press the Center button
- The meter will continue to calculate cost until the device is unplugged. The information on the display will remain in memory until the meter is reset.
- To reset the power usage meter, press the Clock/ timer and Enter buttons (A) and (C) at the same time, until the display shows all zeros.
NOTE: If you do not reset the meter to clear the memory, it will retain the most recent reading and add it to the next one. - The meter goes into Automatic Off mode after two minutes of inactivity. Pressing any button will bring the display back up.
 (B).
(B).OVERLOAD WARNING
If the electrical current going through the power usage meter exceeds 15 Amps, the overload indicator light (D) will come on. If this occurs, the power usage meter should not be used, and the device you are attempting to measure should be powered down and disconnected from the meter.
REPLACING THE BATTERIES
The power usage meter uses two (2) LR44 button cell batteries to retain readings in memory.
Estimated battery life is 4-6 months.
To replace the batteries:
- Push on the two latches of the battery cover to remove it.
- Remove the depleted batteries.
- Install two new batteries as shown and push the cover back into place until it clicks to close.

- Reset the unit as previously instructed in Using the Power Usage Meter.

CLEANING
If the unit becomes dirty or dusty, unplug it from outlet. Unplug any attached devices. Wipe outside of product with a dry or lightly dampened rag only. Allow to dry completely prior to use. Do not use spray cleaners.

Documents / ResourcesDownload manual
Here you can download full pdf version of manual, it may contain additional safety instructions, warranty information, FCC rules, etc.
Advertisement


Need help?
Do you have a question about the E49CM01 and is the answer not in the manual?
Questions and answers