Table of Contents
Advertisement
Quick Links
Advertisement
Table of Contents

Related Manuals for Bosch MBA5785 0B Series


Summary of Contents for Bosch MBA5785 0B Series
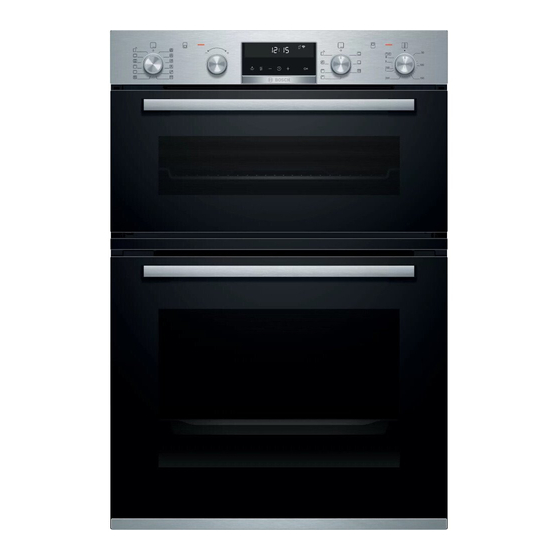
- Page 1 Double oven MBA5785.0B User manual and installation instructions [en]...
-
Page 2: Table Of Contents
en Safety ¡ Do not connect the appliance if it has been Table of contents damaged in transit. 1.2 Intended use INFORMATION FOR USE This appliance is designed only to be built into kitchen units. Read the special installation Safety .............. 2 instructions. - Page 3 Safety en Loose food remnants, fat and meat juices WARNING ‒ Risk of injury! may catch fire. Scratched glass in the appliance door may ▶ Before using the appliance, remove the develop into a crack. worst of the food residues and remnants ▶ Do not use any harsh or abrasive cleaners from the cooking compartment, heating ele- or sharp metal scrapers to clean the glass ments and accessories.
-
Page 4: Safety
en Safety The outside of the appliance gets very hot WARNING ‒ Risk of suffocation! when the cleaning function is in progress. Children may put packaging material over ▶ Never hang combustible objects, e.g. tea their heads or wrap themselves up in it and towels, on the door handle. -
Page 5: Preventing Material Damage
Preventing material damage en 2 Preventing material damage Fruit juice dripping from the baking tray leaves stains 2.1 General that cannot be removed. ATTENTION! When baking very juicy fruit flans, do not pack too ▶ Objects on the cooking compartment floor at over much on the baking tray. - Page 6 en Familiarising yourself with your appliance Note: Allow frozen food to defrost before cooking. The appliance requires: ¡ This saves the energy that would otherwise be re- ¡ A maximum of 1 W when the appliance is in opera- quired to defrost it. tion with the display switched on ¡...
-
Page 7: Familiarising Yourself With Your Appliance
Familiarising yourself with your appliance en Function selector Heating-up control Use the function selector to set the types of → "Heating-up control", Page 9 heating and other functions. Temperature selector You can turn the function selector clockwise or Use the temperature selector to set the temper- anti-clockwise from the zero setting . -
Page 8: Programme
en Familiarising yourself with your appliance Symbol Type of heating and What it's used for/how it works temperature range Keeping food warm Keep cooked food warm. 60 - 100 °C Defrosting Gently defrost frozen food. 30 - 60 °C Slow cooking Slowly and gently cook seared, tender pieces of meat in uncovered cookware. 70 - 120 °C The heat is emitted evenly from above and below at a low temperature. - Page 9 Familiarising yourself with your appliance en Top oven Symbol Function Oven light Illuminate the cooking compartment without heating. Pyrolytic self-cleaning Set the cleaning function, which cleans the cooking compartment virtually inde- pendently. → "Pyrolytic self-cleaning ", Page 22 The temperature can be set in 1 degree increments up 4.4 Temperature and setting levels to 100 °C, and in 5 degree increments thereafter.
- Page 10 en Accessories Lighting Main cooking compartment The cooking compartment has five shelf positions. The oven light lights up the cooking compartment. With most types of heating and functions, the lighting lights up during operation. The lighting goes off when operation ends.
- Page 11 You will find a comprehensive range of products for pull-out rails and pull out the pull-out rails. your appliance in our brochures and online: www.bosch-home.com Accessories vary from one appliance to another. When purchasing accessories, always quote the exact product number (E no.) of your appliance.
- Page 12 en Before using for the first time 6 Before using for the first time Configure the settings for initial start-up. Clean the ap- Before heating the appliance, wipe the smooth sur- pliance and accessories. faces in the cooking compartment with a soft, damp cloth.
- Page 13 Time-setting options en 8 Time-setting options Your appliance has different time-setting options, with Requirement: is highlighted on the display. which you can control its operation. Use the button to reset the timer duration to zero. ▶ a After a few seconds, the appliance applies the 8.1 Overview of the time-setting options change and ...
- Page 14 en Meat thermometer ¡ In order to achieve a good cooking result, do not Use the or button to delay the end time. ▶ delay the end time once the appliance is already in a The appliance applies the change after a few operation.
- Page 15 Programme en Ensure that the tip of the meat thermometer is Use the function selector to set a suitable type of correctly positioned in the meat: heating. – The tip must be roughly in the middle of the lights up in the display and the core temperature food.
- Page 16 en Programme No. Food Cookware Weight range Add liquid Shelf Information posi- Weight setting tion Universal pan. 0.2 - 0.75 kg Spread out beside 04 Chips Frozen Total weight each other on the uni- versal pan Universal pan with 0.1–0.8 kg 05 Prebaked bread rolls Frozen, prebaked greaseproof paper Total weight...
- Page 17 Programme en No. Food Cookware Weight range Add liquid Shelf Information posi- Weight setting tion Roasting dish with 0.5–2.5 kg Add stock or Do not sear the meat 20 Beef roulades Stuffed with vegetables Total weight of all water, for ex- beforehand or meat of the stuffed roul- ample, to the...
-
Page 18: Childproof Lock
en Childproof lock No. Food Cookware Weight range Add liquid Shelf Information posi- Weight setting tion Roasting dish with 0.5–3.0 kg Cover the Place in the cook- 29 Joint of pork, with glass lid Weight of meat bottom of the ware fatty side up; crackling E.g. -
Page 19: Sabbath Mode
Sabbath mode en If rapid heating does not switch off automatically, 12.1 Setting rapid heating for the main oven press the button. To ensure an even cooking result, do not place the appears in the display. food in the cooking compartment until rapid heating a Rapid heating starts after a few seconds. - Page 20 en Cleaning and servicing Display Basic setting Selection Time display = hide the time = display the time Childproof lock can be adjusted = no → "Childproof lock", Page 18 ...
-
Page 21: Cleaning And Servicing
Cleaning and servicing en Appliance front Surface Suitable cleaning agents Information Stainless steel ¡ Hot soapy water To prevent corrosion, remove any patches of limescale, grease, starch or albumin (e.g. egg white) on stainless steel surfaces imme- ¡ Special stainless steel cleaning products diately. - Page 22 en Pyrolytic self-cleaning 15.2 Cleaning the appliance WARNING ‒ Risk of fire! Loose food remnants, fat and meat juices may catch In order to avoid damaging the appliance, you must fire. clean your appliance only as specified, and with suit- Before using the appliance, remove the worst of the able cleaning products.
- Page 23 Pyrolytic self-cleaning en Use the function selector to set Pyrolytic self- The outside of the appliance gets very hot when the cleaning . cleaning function is in progress. Use the temperature selector to set the cleaning set- Never touch the appliance door. ▶...
- Page 24 en Cleaning assistance 17 Cleaning assistance The cleaning assistance is a fast alternative for occa- a When the cooking time has elapsed, a signal sionally cleaning the cooking compartment. The clean- sounds and the duration is at zero in the display. ing assistance softens dirt by vaporising the soapy wa- Switch off the appliance and leave the cooking com- ter.
- Page 25 Shelf supports en Push the rail into the front socket until the rail Pull the rail out towards the front until the retainer at also rests against the cooking compartment wall, the back unhooks. and then press this downwards ...
- Page 26 en Shelf supports Push the retainer in between the lower and the 18.5 Detaching the rails in the top cooking upper bar. compartment WARNING ‒ Risk of burns! The shelf supports get very hot Never touch the shelf supports when hot. ▶...
- Page 27 Appliance door en 19 Appliance door To ensure that your appliance retains its appearance Close the appliance door fully . Grab hold of the and remains fully functioning for a long time, you can appliance door with both hands (on the left and detach the appliance door and clean it.
- Page 28 en Appliance door Using both hands, press down on the left and right Clean the door cover. of the door cover from above to check whether the → "Suitable cleaning agents", Page 20 appliance has been pushed in as far as it will go. Undoing and removing the left- and right-hand screws on the appliance door ...
- Page 29 Appliance door en Turn the intermediate pane until the arrow is in Put the door cover in position and push down on it the top right. until you hear it click into place. Insert the intermediate pane into the retainer ...
- Page 30 en Appliance door Close the appliance door fully . Grab hold of the Close the locking levers on the left- and right-hand appliance door with both hands (on the left and hinges. right) and pull it upwards and out . a The locking levers are closed.
- Page 31 Appliance door en Remove the door cover . WARNING ‒ Risk of injury! Scratched glass in the appliance door may develop into a crack. Do not use any harsh or abrasive cleaners or ▶ sharp metal scrapers to clean the glass on the oven door, as they may scratch the surface.
- Page 32 en Appliance door Slide the intermediate pane until it is in the left- and Slide the inner pane in. In doing so, ensure that the right-hand retainers . inner pane is in the retainer . Push the intermediate pane upwards until it is in the Push the inner pane upwards until it is in the left- retainer ...
-
Page 33: Troubleshooting
Troubleshooting en Note: Ensure that the appliance door slides onto the Close the locking levers on the left- and right-hand hinges without any resistance. If you feel any resist- hinges. ance, check whether you are sliding it in at the cor- rect opening. Slide the appliance door straight onto the two hinges. -
Page 34: Customer Service
en Troubleshooting Fault Cause and troubleshooting The time does not ap- The basic setting has been changed. pear in the display Change the basic setting for the time display. ▶ when the appliance is → "Basic settings", Page 19 switched off. Childproof lock is activated. ... -
Page 35: How It Works
Disposal en 21 Disposal 21.1 Disposing of old appliance This appliance is labelled in accord- ance with European Directive Valuable raw materials can be reused by recycling. 2012/19/EU concerning used elec- Unplug the appliance from the mains. trical and electronic appliances Cut through the power cord. (waste electrical and electronic equip- Dispose of the appliance in an environmentally ment - WEEE). - Page 36 en How it works ¡ Keep the appliance door closed when using the Notes ¡ When baking on several layers, always use hot air. grill. Baked goods that are placed in the oven at the Never grill with the appliance door open. same time will not necessarily be ready at the same ¡...
- Page 37 How it works en Food Accessories/cookware Shelf pos- Type of Temperature Cooking ition heating in °C/grill time in mins setting Rich fruit cake Deep 23 cm diameter 140-150 180-210 Fruit pie 20 cm diameter plate or 160-170 60-70 pie tin Quiche...
- Page 38 en How it works 23.5 Food selection Selection for the top oven Food Accessories/cook- Shelf pos- Type of Temperature in Cooking time in ware ition heating °C mins Scones Baking sheet 200-210 10-12 Small cakes 12-cup-tin 150-160 25-35 Lamb chops, height 2-3 cm Wire rack ...
- Page 39 How it works en ¡ Baking tins/dishes on the wire rack 23.8 Test dishes First wire rack: Level 3 These overviews have been produced for test institutes Second wire rack: Level 1 to facilitate appliance testing in accordance with EN Shelf positions for baking on three levels: 60350-1.
-
Page 40: Installation Instructions
en Installation instructions Recommended settings for grilling Selection for the main oven Food Accessories/cookware Shelf pos- Type of Temperature in Cook- ition heating °C/grill setting ing time in mins Toasting bread Wire rack 5–6 Do not preheat the appliance. Recommended settings for grilling Selection for the top oven Food... - Page 41 Installation instructions en ¡ To ventilate the appliance, there must be a gap of WARNING ‒ Risk of fire! 20 mm between all intermediate floors and the wall. It is dangerous to use an extended power cord and non-approved adapters. ▶ Do not use multiple socket strips. ▶...
- Page 42 en Installation instructions An all-pole isolating switch must be integrated into the Do not kink or trap the connection cable, or route it permanent electrical installation according to the install- over sharp edges. ation regulations. Centre the appliance. Identify the phase and neutral conductors in the socket.
- Page 44 Expert advice for your Bosch home appliances, help with problems or a repair from Bosch experts. Find out everything about the many ways Bosch can support you: www.bosch-home.com/service Contact data of all countries are listed in the attached service directory.
Need help?
Do you have a question about the MBA5785 0B Series and is the answer not in the manual?
Questions and answers