Braeburn PREMIER Series Installer's Manual
Non-programmable thermostats, for systems up to 2 heat / 1 cool, up to 3 heat / 2 cool heat pump, up to 2 heat / 2 cool conventional
Hide thumbs
Also See for PREMIER Series:
- User manual (20 pages) ,
- Detailed installer manual (17 pages) ,
- Installer manual (17 pages)
Table of Contents
Advertisement
Advertisement
Table of Contents

Subscribe to Our Youtube Channel
Related Manuals for Braeburn PREMIER Series


Summary of Contents for Braeburn PREMIER Series
- Page 1 ® Detailed REMIER ERIES User Manual Non-Programmable Thermostats 3020 For Systems Up to 2 Heat / 1 Cool Up to 3 Heat / 2 Cool Heat Pump 3220 Up to 2 Heat / 2 Cool Conventional Read all instructions before proceeding. Store this manual for future reference 3020W-110-03...
-
Page 2: Table Of Contents
Contents 4 Additional Operation Features 1 About Your Thermostat Auto Changeover Mode ........13 Thermostat Features ..........3 Compressor Protection ........14 Thermostat and Display ........... 4 Locking and Unlocking the Thermostat....15 2 Setting User Options AC Power Monitor ..........17 Advanced User Options .......... -
Page 3: About Your Thermostat
Congratulations! You are in control of one of the easiest-to-use thermostats on the market today. This thermostat has been designed to provide you with years of reliable performance and comfort control. Features • SpeedBar Multi-Function Button simplifies programming and setting changes. ®... - Page 4 1 About Your Thermostat INSTRUCTIONS User Manual...
-
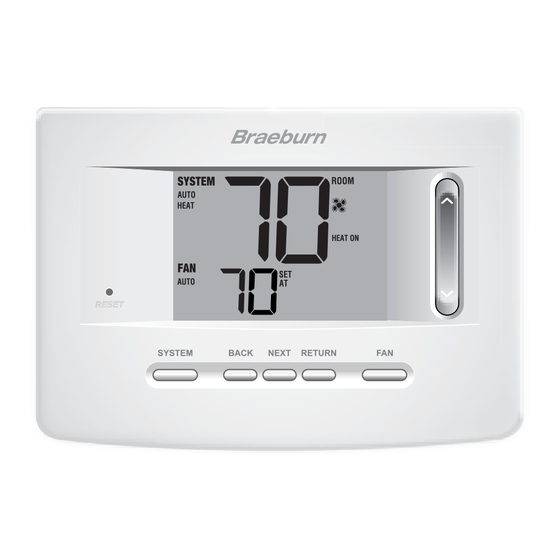
Page 5: Thermostat And Display
® Outdoor Temperature Indicator..Displays along with the outdoor temperature reading (see note below) Battery Compartment ....Located in the back of thermostat NOTE: If a Braeburn outdoor sensor was connected you can view the outdoor temperature by pressing the ®... -
Page 6: Setting User Options
2 Setting User Options Advanced User Options User options allow you to customize some of your thermostat’s features. Most users will not need to make any changes to the settings in this section. To enter the User Options menu, press and hold RETURN button for approximately 3 seconds until the screen changes and displays the first... -
Page 7: Table Of User Options
Table of User Options NOTE: A detailed description of each User Option follows this table. No. User Options Factory Setting Comments Default Options Filter Service Disables filter service monitor feature. 30, 60, 90, Monitor Selects a number of days that must pass before the 120, 180, 365 thermostat will flash a Service Filter reminder in the display screen. -
Page 8: Service Monitors (Filter, Uv And Humidifier Pad)
Service Monitors (Filter, UV and Humidifier Pad) User Options 1, 2 and 3 There are three user selectable service monitors that will display reminders for a required air filter, UV bulb or humidifier pad replacement. The SERVICE segment flashes in the display along with FILTER, UV or HUMID. -
Page 9: Thermostat Lock Code
Thermostat Lock Code User Option 5 The Thermostat Lock Code sets a 3-digit code that you may use at any time to lock or unlock the thermostat. Setting the code in the user options mode does not activate the lock feature (See Locking/Unlocking Thermostat, page 15). -
Page 10: Setting The Fan Control Mode
Setting the FAN Control Mode The Fan Control has 3 modes of operation – AUTO, ON and CIRC. The mode can be selected by pressing the button to scroll through the different modes. NOTE: Depending on how your thermostat was configured, some fan modes may not be available. AUTO The system fan will run only when your heating or cooling system is running. -
Page 11: Setting The Temperature
Setting the Temperature SpeedBar INSTRUCTIONS Temperature Adjustment – Press the SpeedBar up or ® down to adjust the current set temperature. Status Indicators Status indicators appear in the display to let you know if your system is heating, cooling or off. HEAT ON Indicates that your heating system is running. -
Page 12: Resetting The Thermostat
Resetting the Thermostat INSTRUCTIONS This thermostat provides you with a reset button that will erase all of your user settings. The reset feature does not affect the Installer Settings. To reset the thermostat, use a small object such as a tooth pick or paperclip and gently press the button located inside the small hole on the front of the thermostat housing labeled “reset”. -
Page 13: Additional Operation Features
INST 4 Additional Operation Features Auto Changeover Mode Auto Changeover mode is a feature enabled/disabled in the Installer Settings (see Installer Manual). If enabled, it is selected by pressing the SYSTEM button until AUTO HEAT or AUTO COOL appears in the display. When Auto Changeover mode is enabled and selected, the system automatically switches between heating and cooling when the room temperature meets the programmed heating or cooling set points. -
Page 14: Compressor Protection
Compressor Protection Compressor protection is enabled/disabled in the Installer Settings (See Installer Manual). If enabled, this feature is automatically present in cooling and/or heating (heat pump only) modes. This thermostat includes an automatic compressor protection delay to avoid potential damage to your system from short cycling. -
Page 15: Locking And Unlocking The Thermostat
Locking and Unlocking the Thermostat Your 3-digit Lock Code is set in the “User Options” portion of this manual (See “Setting User Options”, page 7 and 9). Once the code is set, the thermostat can be locked or unlocked at any time by entering that code. To lock or unlock the thermostat, press and hold the NEXT RETURN... - Page 16 Locking and Unlocking the Thermostat (cont.) If you entered a valid code the thermostat will be locked or unlocked (depending on its previous state). When locked, the word LOCKED appears in the display (Figure 3). If an invalid code is entered the word NO will briefly appear, indicating that an incorrect code was entered (Figure 4).
-
Page 17: Ac Power Monitor
Installer Settings (See Installer Manual). If a Braeburn indoor remote sensor was installed and properly configured in the Installer Settings, the thermostat will sense temperature at a remote location or at a combination of a remote location and the thermostat location. -
Page 18: Outdoor Remote Sensing
Outdoor remote sensing is enabled by installing a Braeburn remote outdoor sensor. No additional ® configuration is required. If a Braeburn outdoor remote sensor was installed you may press the BACK and NEXT buttons at the same time to view the outdoor temperature. User Manual... -
Page 19: Thermostat Maintenance
5 Thermostat Maintenance Thermostat Cleaning Never spray any liquid directly on the thermostat. Using a soft damp cloth wipe the outer body of the thermostat. Never use any abrasive cleansers to clean your thermostat. Changing the Batteries This thermostat requires two (2) properly installed “AA” alkaline batteries to provide power for the thermostat if 24 volt AC power is not connected. - Page 20 Montgomery, IL 60538 Store this manual for future reference. ® Braeburn Systems LLC 2215 Cornell Avenue • Montgomery, IL 60538 Technical Assistance: www.braeburnonline.com Call us toll-free: 866-268-5599 (U.S.) 630-844-1968 (Outside the U.S.) 3020W-110-03 ©2020 Braeburn Systems LLC • All Rights Reserved.
Need help?
Do you have a question about the PREMIER Series and is the answer not in the manual?
Questions and answers