Table of Contents
Advertisement
Quick Links
Advertisement
Table of Contents

Related Manuals for Harman Martin ERA 400 Performance CLD


Summary of Contents for Harman Martin ERA 400 Performance CLD
- Page 1 ERA 400 Performance CLD ERA 400 Performance WRM User manual...
-
Page 2: Dimensions
Martin®, HARMAN® and all other trademarks in this document pertaining to services or products by Martin Professional™ or its affiliates and subsidiaries are registered as the property of HARMAN®... -
Page 3: Table Of Contents
Table of contents Dimensions..................2 Safety information................4 Introduction..................8 Before using the product for the first time ......... 8 Fixture overview ................9 Physical installation................. 10 Fixture location ................10 Mounting the fixture ..............10 Fastening the fixture to a flat surface ..........10 Mounting the fixture on a truss ............. -
Page 4: Safety Information
Safety information WARNING! Read the safety precautions in this manual before installing, operating or servicing this product. The following symbols are used to identify important safety information on the product and in this manual: Warning! Warning! Warning! Warning! Warning! Warning! Safety Powerful See user... - Page 5 Use only a source of AC power that complies with local building and electrical codes and has both overload and ground-fault (earth-fault) protection. Isolate the fixture from power immediately if any seal, cover, cable, or other component is damaged, defective, deformed or showing signs of overheating. Do not reapply power until repairs have been completed.
- Page 6 Position the fixture so that persons cannot be exposed to the fixture's light output at a distance of less than 3.8 m (12.5 ft.) from the fixture, and so that prolonged staring into the light output at less than 15.3 m (50 ft.) from the fixture is not expected.
- Page 7 If the fixture is installed in a location where it may cause injury or damage if it falls, install as directed in this manual a secondary attachment such as a safety cable that will hold the fixture if a primary attachment fails. The secondary attachment must be approved by an official body such as TÜV as a safety attachment for the weight that it secures, must comply with EN 60598-2-17 Section 17.6.6 and must be capable of bearing a static suspended load that is...
-
Page 8: Introduction
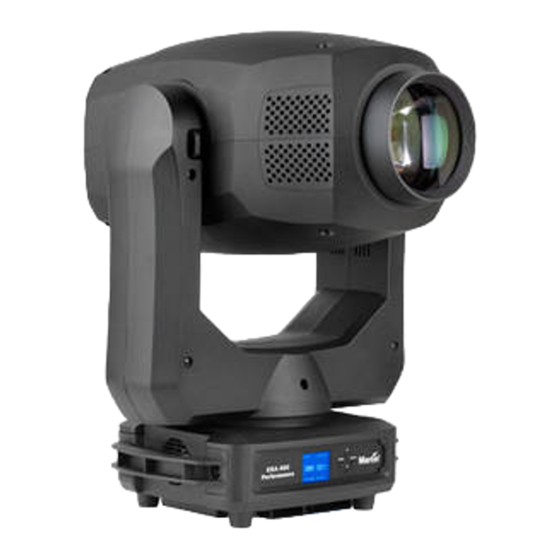
Introduction The ERA 400 Performance from Martin® is a compact fully featured profile fixture with a 300W white LED engine that produces a sharp gobo projection with a flat field. The fixture provides 540° of pan movement, 260° of tilt movement, motorized 1:3 zoom, motorized focus lens, motorised beam shaping shutters, smooth full-range dimming, strobing shutter and pulse effects, full CMY color mixing system, 9 color filters, 7 user-replaceable rotating gobos, 9 static gobos, a rotating prism, and iris making the fixture ideal for live shows, TV events, stage,... -
Page 9: Fixture Overview
Fixture overview 1 – Display The display shows the fixture status and user setup menu. When DMX is not detected, the display backlight will flash on and off. 2 - Buttons MENU: Activate the menu mode, or return to the previous level of the menu structure. DOWN: Decrease a parameter setting, or go down a menu branch UP: Increase a parameter setting, or go up a menu branch ENTER: Confirm the selected function... -
Page 10: Physical Installation
Physical installation Warning! Read ‘Safety information’ on page 4 before installing the fixture. Warning! The safety and suitability of lifting equipment, installation location, anchoring method, mounting hardware and electrical installation are the responsibility of the installer. All local safety regulations and legal requirements must be observed when installing and connecting the ERA 400 Performance fixture. - Page 11 4. Fasten the omega brackets to mounting holes A on the base of the fixture using the bracket’s quarter-turn fasteners. Turn quarter-turn fasteners a full 90° to lock them (see illustration on right). 5. Working from a stable platform, hang the fixture vertically on the truss and fasten the rigging clamps onto the truss.
-
Page 12: Ac Power Connection
AC power connection Warning! Read ‘Safety information’ on page 4 before installing the fixture. Warning! The mains power input cable supplied with the fixture is rated 6 A and can supply only one fixture with mains power. Do not connect any device to the fixture’s MAINS OUT socket when using this input cable. -
Page 13: Data Network Requirements
Data network requirements A DMX 512 data link is required in order to control the fixture via DMX. The fixture has 3-pin and 5- pin XLR connectors for DMX data input and output. Up to 32 devices can be linked together on a single daisy chain. The total number of fixtures in one 512-channel DMX universe is limited by the number of DMX channels required by the fixtures. -
Page 14: Fixture Setup
Fixture Setup This section explains the fixture characteristics you can set that determine how it can be controlled and will behave. You choose the settings using the menus available from the control panel, and they are retained even when the fixture is powered off. Options can also be set over the DMX line using RDM from a suitable controller, see “Setting options by RDM”... - Page 15 Dimming curves Four dimming modes are available: LINEAR The increase in light intensity appears to be linear as DMX value is increased. SQUARE Light intensity control is finer at low levels and coarser at high levels. INV SQ (Inverse square law) Light intensity control is coarser at low levels and finer at high levels.
-
Page 16: Set All Settings To Factory Default
Press ENTER to confirm. Set all settings to factory default To return all settings to factory default, select DEFAULT SETTINGS and press ENTER to confirm, FACTORY DEFAULT will show on the display. Use the UP and DOWN buttons to select NO (cancel) or YES (return all settings except calibrations to factory defaults). - Page 17 Setting values Go to the MANUAL CONTROL menu and press ENTER. Use the UP and DOWN buttons to select the function you wish to control. You can select Strobe, Dimmer, Dimmer Fine, Cyan, Magenta, Yellow, Color, Gobo1, RGobo1, Gobo2, Prism, R-Prism, Iris, Zoom, Focus, Blade1 Pos, Blade1 Ang, Blade2 Pos, Blade2 Ang, Blade3 Pos, Blade3 Ang, Blade4 Pos, Blade4 Ang, Blade Rot, Pan, Pan Fine, Tilt, Tilt Fine and Pan/Tilt Speed.
-
Page 18: Setting Options By Rdm
Setting options by RDM You can remotely configure the fixture over the DMX line using RDM. Martin® offers a range of suitable RDM-compatible controllers. Martin® M-PC is a Windows-based application available from Martin® that lets you set up, manage and control a lighting installation from a PC that is connected to the installation via a DMX data link. -
Page 19: Rdm
As a minimum, the ERA 400 Performance fixture supports the following RDM functions: Device discovery DISC_UNIQUE_BRANCH DISC_MUTE DISC_UN_MUTE Device management COMMS_STATUS QUEUED_MESSAGE STATUS_MESSAGES STATUS_ID_DESCRIPTION CLEAR_STATUS_ID SUPPORTED_PARAMETERS DEVICE_INFO DEVICE_MODEL_DESCRIPTION MANUFACTURER_LABEL DEVICE_LABEL ... -
Page 20: Effects
Effects This section describes the effects provided by the ERA 400 Performance fixture. See ‘DMX protocol’ on page 26 for a full list of the DMX channels and values required to control the different effects. Dimming Overall intensity can be precisely adjusted from 0 to 100% using 16-bit coarse and fine control. Strobe effects An electronic shutter provides instant open and blackout, random and variable speed flash from 1 to 25 flashes per second, and pulse effects. -
Page 21: Gobos
Gobos The fixture contains two gobo wheels with gobo positions as shown below: Gobo wheel 1 (rotating/indexing gobos) Gobo Wheel 2 (static gobos) Martin ERA 400 Performance user manual... -
Page 22: Focus
On Gobo Wheel 1, individual gobos can be set to indexed positions, and rotated clockwise and counter-clockwise. Gobo shake is also available on both wheels. When option “Blackout Color Move” or “Blackout Gobo Move” are set to Enable using DMX channel 30, the fixture blacks out during color and/or gobo changes. - Page 23 Martin ERA 400 Performance user manual...
-
Page 24: Maintenance
Maintenance Read Safety information on page 6 before maintaining the fixture. Always comply with the safety instructions. Refer any service operation not described in this user manual to a qualified service technician. Excessive dust, smoke fluid, and particle buildup degrades performance, causes overheating and will damage the fixture. -
Page 25: Service And Repairs
Service and repairs There are no user serviceable parts inside the fixture. Do not open the housing. Never try to repair the fixture by yourself as this may result in damage, malfunction and it may potentially void your product warranty. The equipment must only be serviced or repaired by an authorized Martin service technician. -
Page 26: Dmx Protocol
DMX protocol STD. Value Function Fade Default Shutter Snap 000-019 Blackout 020-024 Open 025-064 Strobe 1: FastSlow 065-069 Open 070-084 Strobe 2: opening pulse, fast slow 085-089 Open 090-104 Strobe 3: closing pulse, fast slow 105-109 Open 110-124 Strobe 4: random strobe, fast ... - Page 27 STD. Value Function Fade Default 000-007 Open 008-015 Gobo1 016-023 Gobo2 024-031 Gobo3 032-039 Gobo4 040-047 Gobo5 048-055 Gobo6 056-063 Gobo7 064-072 Gobo1 Shaking 073-081 Gobo2 Shaking 082-090 Gobo3 Shaking 091-099 Gobo4 Shaking 100-108 Gobo5 Shaking 109-117 Gobo6 Shaking 118-127 Gobo7 Shaking 128-190 Wheel rotate counterclockwise FastSlow...
- Page 28 STD. Value Function Fade Default 106-112 Gobo7 Shaking 113-119 Gobo8 Shaking 120-127 Gobo9 Shaking 128-190 Wheel rotate clockwise FastSlow 191-192 Stop 193-255 Wheel rotate counterclockwise SlowFast Prism Snap 000-010 No Effect 011-127 Prism1 On 128-255 Prism1 Macro1 – Macro32 Prism rotation Fade 000-127 Index 0 ->...
- Page 29 STD. Value Function Fade Default Blade system rotation Fade 000-126 Counter clockwise 45 degrees 0 127-128 Not rotated (square) 129-255 0 Clockwise 45 degrees 000-255 Pan 0 - 100% Fade 000-255 Pan Fine 0- 100% Fade 000-255 Tilt 0 - 100% Fade 000-255 Tilt Fine 0 - 100%...
-
Page 30: Control Menus
Control menus To access the control menus, press the MENU button. Use the UP and DOWN buttons to navigate the menus. Select any required menu option using the ENTER button. For more information, see “Using the control menus” on page 14. Default fixture settings are shown in bold. - Page 31 Menu Second-level Sub-menu Explanation menu UNIT( °C* / °F) Martin ERA 400 Performance user manual...
- Page 32 Menu Second-level Sub-menu Explanation menu DEFAULT FACTORY Return all settings (except SETTINGS DEFAULT calibrations) to factory defaults Run test sequence of all functions. To test a specific function, use Up/Down buttons to scroll through TEST ALL TESTING functions and pause. Press Enter to restart test sequence.
- Page 33 Menu Second-level Sub-menu Explanation menu LEDs have been powered on since manufacture (not user-resettable) Displays currently active software SW VERSION version FIXTURE ID 0-9999 User-settable fixture ID number RDM UID Displays fixture’s unique RDM ID Displays temperature in °C of all TEMPERATURES LED / CPU TEMP PCBs...
- Page 34 Menu Second-level Sub-menu Explanation menu All (NO* / YES) Reset fixture PAN / TILT Reset pan and tilt movement RESET (NO* / YES) EFFECTS Reset of all effects (NO* / YES) STROBE DIMMER DIMMER FINE CYAN MAGENTA YELLOW COLOR GOBO1 RGOBO1 GOBO2 PRISM...
- Page 35 Menu Second-level Sub-menu Explanation menu MAGENTA -128 -> 127 YELLOW -128 -> 127 COLOR -128 -> 127 GOBO1 -128 -> 127 RGOBO1 -128 -> 127 GOBO2 -128 -> 127 PRISM -128 -> 127 RPRISM -128 -> 127 IRIS -128 -> 127 ZOOM -128 ->...
-
Page 36: Troubleshooting
Troubleshooting This section describes a few common problems that may occur during operation and provides some suggestions for easy troubleshooting: Symptom Potential cause Remedies No light from fixture, Power supply issue, Ensure that the mains supply is connected or fans not working. such as blown fuse, and supplying power to the fixture.. -
Page 37: Specifications
Specifications Physical Weight .....................22.5 kg (49.6 lbs) Dimensions ............ 379 x 237 x 632 mm (14.9 x 9.3 x 24.9 in) Dynamic Effects Color mixing…………………………………………………CMY, independently variable 0-100% Color wheel………………………………………………………………….9 color filters plus open Rotating gobo wheel..7 gobos plus open, wheel rotation, gobo rotation, indexing and shake Static gobo wheel………………………9 gobos plus open, wheel indexing, rotation and shake Beam effects……………………………………………………………..Rotating three-facet prism Zoom…………………………………………………………………………………………Motorized... - Page 38 Connections AC power input ............... Neutrik True1 PowerCon AC power throughput............... Neutrik True1 PowerCon DMX data in/out..............3-pin & 5-pin locking XLR Electrical AC power ................ 100-240V nominal, 50/60 Hz Power supply unit ...........Auto-ranging electronic switch mode Fuse ......................T 10 A Typical power and current 120V, 60Hz ................
- Page 39 • Supplier’s Declaration of Conformity Harman Professional, Inc. have issued an FCC Supplier’s Declaration of Conformity for this product. The Declaration of Conformity is available for download from the ERA 400 Performance CLD, ERA 400 Performance WRM of the Martin website at http://www.martin.com...
- Page 40 Photobiological Safety Warning The label shown below is displayed on this product. If it becomes difficult or impossible to read, it must be replaced using the illustration below to reproduce a new label sized 45 x 37 mm / 45 x 27 mm, in black on a yellow background.
- Page 41 · Harman Professional Solutions · 8500 Balboa Blv d· Northridge CA 91329 · United States...
Need help?
Do you have a question about the Martin ERA 400 Performance CLD and is the answer not in the manual?
Questions and answers