Table of Contents
Advertisement
Quick Links
Advertisement
Table of Contents

Related Manuals for Whynter UIM-502SS


Summary of Contents for Whynter UIM-502SS
- Page 1 Whynter Energy Star Built-In Ice Maker MODEL # : UIM-502SS Instruction Manual Congratulations on your new WHYNTER product. To ensure proper operation, please read this Instruction Manual carefully before using this product. Keep this manual in a safe place for future reference.
-
Page 2: Table Of Contents
TABLE OF CONTENTS PARTS AND FEATURES SAFETY PRECAUTIONS INSTALLATION INSTRUCTIONS 5 - 6 ELECTRICAL REQUIREMENTS WATER SUPPLY AND FILTER REVERSING THE DOOR SWING OPERATION 10 - 12 CARE AND MAINTENANCE 13 - 14 TROUBLESHOOTING WARRANTY INFORMATION... -
Page 3: Parts And Features
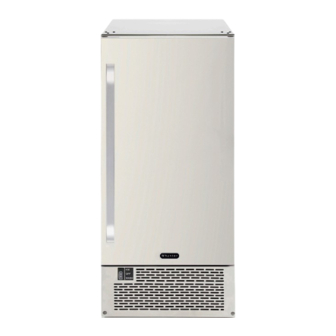
PARTS A ND FEATURES DIAGRAM OF ICE SCOOP PLACEMENT Hinge Distribution Tube Door Ice Mold Water Trough Float Ice Bin Selector Switch Hinge Leveling Foot (2) Water Supply Hoses NSF Inline Water Filter Control Panel Power Plug Drain Hose Ice Scoop and Hook Water Inlet Gravity Drain Outlet... -
Page 4: Safety Precautions
TO REDUCE THE RISK OF FIRE, ELECTRICAL WARNING SHOCK, OR INJURY WHEN USING YOUR ICE MAKER, FOLLOW THESE BASIC PRECAUTIONS: READ ALL INSTRUCTIONS BEFORE USING THE ICE MAKER. WARNING: RISK OF DANGER TO SMALL CHILDREN AND SMALL ANIMALS. ENTRAPMENT AND SUFFOCATION DANGER IF NOT PROPERLY SECURED. DISPOSED OR ABANDONED APPLIANCES ARE STILL DANGEROUS BEFORE YOU DISPOSE OF YOUR ICE MAKER: REMOVE THE DOOR TO PREVENT CHILDREN FROM CLIMBING INTO THE UNIT. -
Page 5: Installation Instructions
INSTALLATION Excessive Weight Hazard Use two or more people to move and install ice maker. Failure to do so can result in back or other injury. Remove packaging materials IMPORTANT: Do not remove any permanent instruction labels or the data label on your ice maker. Remove tape and glue from your icemaker before using •... - Page 6 • When installing the ice maker under a counter, follow the recommended spacing dimensions shown. Place electrical and water supplies and drain fixtures in the recommended locations as shown. • This unit MUST be installed in an area protected from the elements, e.g., wind, rain, water spray or drips.
-
Page 7: Electrical Requirements
ELECTRICAL REQUIREMENTS Electrical Shock Hazard Plug into a grounded 3-prong outlet. Never remove the grounding prong from the plug. Never use an adapter. Never use an extension cord. Failure to follow these instructions can result in fire, electrical shock, or death. Before you move your ice maker into its final location, it is important to make sure you have the proper electrical connection: A standard electrical supply (115V, 60Hz, 15A), properly grounded in accordance with... -
Page 8: Water Supply And Filter
Water Supply Connections The water supply should be ready at the point of installation. The water supply pressure should be a minimum of 15 psi with a static pressure not more than 80 psi. (A wall outlet directly behind the ice maker will make installation easier.) NSF Inline Water Filter Installation (Model No. -
Page 9: Reversing The Door Swing
Installation Types This ice maker is designed for free-standing, recessed, or built-in installation. In every setting, there must be adequate ventilation and access for service. Never install or operate the unit in an enclosed area, such as a closed cabinet. Freestanding installation: A free-standing installation will allow you to install the ice maker in any place you desire provided you have access to a water supply and a drain. -
Page 10: Operation
OPERATION Descriptions of LEDs and buttons: Red LED: Ice Full indicator light. When this LED is lit, the ice storage bin is full of ice or there is something Control Box (rear of unit) between the two arms of the ice-full sensor in the ice storage bin. The unit will stop working. - Page 11 OPERATION Final Check List before Operation 1. Have all packing materials and tape been removed from the interior and exterior of the ice maker? 2. Did you clean the ice storage bin? We recommend cleaning the interior surface with lukewarm water using a soft cloth.
- Page 12 How the machine makes ice There are two distinct cycles: Freeze and Harvest. Freezing: During the freezing cycle, the compressor pumps refrigerant, the fan motor blows air and the water pump circulates water. When the batch of ice has been fully formed, the ice maker stops the freezing cycle and begins the harvest cycle.
-
Page 13: Care And Maintenance
CARE AND MAINTENANCE Before proceeding with cleaning and maintenance operations, make sure the power line of the unit is disconnected and the water line is shut off. (EXCEPTION: Cleaning of ice-making system) The ice machine cleaner contains acids. DO NOT use or mix with any other solvent-based cleaner products. Use rubber gloves to protect your hands. - Page 14 1. Disconnect power to the unit. 2. Open the door and take out the removable storage bin. With a clean cloth, wipe down the interior of the unit with a sanitizing solution made of 2 tablespoons of baking soda and a quart of warm or hot water.
-
Page 15: Troubleshooting
TROUBLESHOOTING Many common ice maker problems are easily resolved. Try the troubleshooting suggestions below to see if the problems can be resolved before having to contact the service department. Problem Possible Cause Probable Correction Plug the ice maker in. • •... -
Page 16: Warranty Information
All defective products and parts covered by this warranty will be repaired or replaced on a mail-in basis to Whynter’s Service Center. This warranty is not transferable. After the expiration of the warranty, the cost of labor and parts will be the responsibility of the original owner.
Need help?
Do you have a question about the UIM-502SS and is the answer not in the manual?
Questions and answers