Advertisement
Quick Links
Advertisement

Related Manuals for SEI FA1165456


Summary of Contents for SEI FA1165456
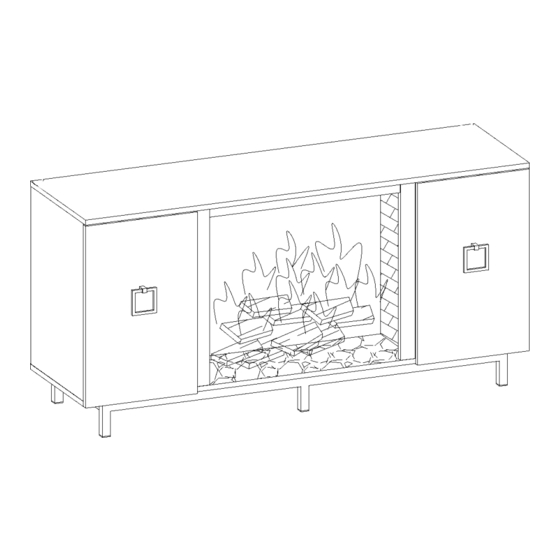
- Page 1 FA1165456...
- Page 4 Metal frame Cross bar Top panel Marco de metal Barra transversal Panel superior Cadre métallique Barre transversale Panneau supérieur Bottom panel Left side panel Right side panel Panel inferior Panel lateral izquierdo Panel lateral derecho Panneau inférieur Panneau latéral gauche Panneau latéral droit Left vertical panel Right vertical panel...
- Page 5 Smaller shelf Left door Right door Estante más pequeño Puerta izquierda Puerta derecha Étagère plus petite Porte de gauche Porte de droite Back panel Left vertical rail Right vertical rail Panel posterior Carril vertical izquierdo Carril vertical derecho Panneau arrière Rail vertical gauche Rail vertical droit Upper rail...
- Page 6 Bolt ø1/4”X1/2” L Allen wrench Wood dowel ø5/16”X1-3/16”L Cerrojo Llave Allen Clavija de madera Boulon Clé Allen Cheville en bois Cam lock Cam bolt Small bolt M4x20 Bloqueo de leva Perno de leva Perno pequeño Verrouillage de la came Boulon à cames Petit boulon Screw ø3/16”X1-3/8”L...
- Page 7 Screw Bracket Tornillo Atar Paréntesis ø1/8”X9/16” L Cravate Crochet Screw ø1/8”X11/16” L Back holder Bolt ø1/4”X1-9/16”L Tornillo Soporte tresero Cerrojo Support arrière Boulon Hinge Screw ø3/16”X9/16”L Screw ø3/16”X1”L Bisagra Tornillo Tornillo Charnière...
- Page 8 Step 1: Screw cam bolt (5) into pre-drilled holes on Top panel (C). Left vertical panel (G) Right vertical panel (H) Paso 1: Perno de leva de tornillo (5) en orificios preperforados en el panel superior (C). Panel vertical izquierdo (G) Panel vertical derecho (H) Étape 1: Boulon à...
- Page 9 Step 2: Attach Right vertical rail (O) to Right vertical panel (H) & left vertical rail (N) to Left vertical panel (G), Using Wood dowel (3) & Cam lock (4) Paso 2: Conecte el riel vertical derecho (O) al panel vertical derecho (H) y el riel vertical izquierdo (N) al panel vertical izquierdo (G), usando clavija de madera (3) y bloqueo de leva (4) Étape 2: Fixer le rail vertical droit (O) au panneau vertical droit (H) et le rail...
- Page 10 Step3: Connect Right vertical rail (O) and Left vertical rail (N) with Upper rail (P) use Wood dowel (3),then attach Vertical panel (G&H) using Wood dowel (3) & Cam lock (4) tighten and paper cover (8). , using Screw (7) fix Upper rail ( P)on Top panel (C) Paso 3: Conecte el riel vertical derecho (O) y el riel vertical izquierdo (N) con el riel superior (P) use la clavija de madera (3), luego conecte el panel vertical (G&H) usando la clavija de madera (3) y el bloqueo de leva (4) apriete y cubierta de papel...
- Page 11 Step 4: Attach Left side panel (E) and Right-side panel (F) on Top panel (C) using Wood dowel (3) & Cam lock (4) tighten, and stick Paper cover (8) on cam lock hole, then insert Back panel(M) into box Paso 4: Coloque el panel lateral izquierdo (E) y el panel del lado derecho (F) en el panel superior (C) usando la clavija de madera (3) y el bloqueo de la leva (4) apriete, y pegue la cubierta de papel (8) en el orificio de bloqueo de la leva, luego inserte el panel posterior (M) en la caja...
- Page 12 Step 5: Attach Bottom panel (D) to pre- assembled unit on STEP 4 using Wood dowel (3) & Bolt (18) and Allen wrench (2) tighten Paso 5: Conecte el panel inferior (D) a la unidad premontada en el STEP 4 utilizando clavija de madera (3) y perno (18) y llave Allen (2) apretar Étape 5: Fixez le panneau inférieur (D) à...
- Page 13 Step7: Attach pre-assembled unit on Step 6 to Bottom panel (D) using Bolt (1) and Allen wrench (2) as shown. Paso 7: Conecte la unidad premontada en el paso 6 al panel inferior (D) usando bolt (1) y la llave Allen (2) como se muestra. Étape 7: Fixez l’unité...
- Page 14 Step 8: Assemble Hinge (19) on Left door (K) and Right door (L) using Screw (20) as shown Paso 8: Montar bisagra (19) en la puerta izquierda (K) y la puerta derecha (L) usando el tornillo (20) como se muestra Étape 8: Assemblez la charnière (19) sur la porte gauche (K) et la porte droite (L) à...
- Page 15 Step 9: Assemble Left door (K) and Right door(L) on pre-assembled unit Step 7 using screw (20), Tighten Shelf pin (9) on pre-drilled hole of Vertical panel (G) (H) and side panel (E) (F), then assemble the Handle (10) on Door (K) (L) using small bolt (6) Paso 9: Ensamble la puerta izquierda (K) y la puerta derecha (L) en la unidad preensamblada Paso 7 usando tornillo (20), apriete el pasador del estante (9) en el orificio preperforado del panel vertical (G) (H) y el...
- Page 16 Step 10: Put the Small shelf (J) into wood body Then put bigger shelf B from the back into the wood body Paso 10: Coloque el estante pequeño (J) en el cuerpo de madera Luego coloque el estante B más grande desde la parte posterior en el cuerpo de madera Étape 10: Mettez la petite étagère (J) dans le corps en bois Ensuite, mettez une plus grande étagère B de l’arrière dans le corps en bois...
- Page 17 Step 11: Assemble Back holder (17) one wood body back panel as shown using Screw (16) Paso 11: Montar el soporte posterior (17) un panel posterior del cuerpo de madera como se muestra usando tornillo (16) Étape 11: Assembler le support arrière (17) un panneau arrière de corps en bois comme indiqué...
- Page 18 Step 12: Then put into firebox, and fix Block (Q) using Screw (21), Attached Bracket (15) using Screw (13) as shown Paso 12: Luego colóquelo en la caja de fuego y fije el bloque (Q) usando el tornillo (21), el soporte adjunto (15) usando el tornillo (13) como se muestra Étape 12: Ensuite, mettez dans la chambre de combustion et fixez le bloc (Q) à...
- Page 19 Anti-tipping hardware must be used for this product to avoid tipping and injury. Se debe usar hardware antivuelco para este producto para evitar que se vuelque y se lesione. Une quincaillerie anti-basculement doit être utilisée pour ce produit afin d'éviter tout basculement et blessure. 19 |...
- Page 20 20 |...
- Page 21 21 |...
-
Page 22: One Year Limited Warranty
Requests for missing or damaged parts must be requested within one year of purchase. Damages or missing parts reported outside of one year will not be honored. SEI Furniture is under no obligation to provide parts or replacement merchandise. Replacement part requests will not be honored for fully assembled or modified items. -
Page 23: Garantía Limitada De Un Año
Las solicitudes de piezas faltantes o dañadas deben solicitarse en el plazo de un año a partir de la compra. Los daños o piezas faltantes informados fuera de un año no serán aceptados. SEI Furniture no tiene la obligación de proporcionar piezas o mercadería de reemplazo. No se aceptarán solicitudes de piezas de repuesto para artículos completamente ensamblados o modificados. -
Page 24: Garantie Limitée D'un An
Les demandes de pièces manquantes ou endommagées doivent être effectuées dans l'année suivant l'achat. Les dommages ou pièces manquantes signalés en dehors d'un an ne seront pas honorés. SEI Furniture n'a aucune obligation de fournir des pièces ou des marchandises de remplacement. Les demandes de pièces de rechange ne seront pas honorées pour les articles entièrement assemblés ou... - Page 25 FA5223 ELECTRICAL SPECIFICATIONS ESPECIFICACIONES ELÉCTRICAS CARACTÉRISTIQUES ÉLECTRIQUES Voltage: Tensión: Tension: 120V, 60 Hz Amps: Amperios: Intensité de courant: 12.5 Amps Watts: Watts: Puissance: 1500 Watts Lighting: Iluminación: Éclairage:...
- Page 27 Safety Seguridad Sécurité Note! Nota: Remarque!
- Page 28 Electric Firebox Insert Cámara de combustión Foyer électrique User’s Operating Manual eléctrica insertable encastrable Manual de funcionamiento Guide de l'utilisateur del usuario Consumer safety Información de Information de sécurité information: seguridad para el pour le consommateur: Please read this manual before Veuillez lire ce guide avant consumidor: installing and operating this...
- Page 29 Important Operating and Instrucciones importantes Directives importantes Safety Instructions: de operación y seguridad: concernant la sécurité et l'utilisation : CAUTION: PRECAUCIÓN: MISE EN GARDE : High temperatures! Keep draperies, Mantenga las cortinas, cables Tenir les draperies, les cordons electrical cords, and other eléctricos y otros enseres a una électriques et tout ameublement à...
- Page 30 Important Operating and Safety Information: When using electrical appliances, the following basic precautions should always be followed to reduce the risk of fire, electric shock, and injury. • Read all instructions before using this heater. • Use this heater only as described in this manual. Any other use not recommended by the manufacturer may cause fire, electric shock, or injury.
- Page 31 Información importante de operación y seguridad: Cuando use artefactos eléctricos, siempre debe respetar las siguientes precauciones básicas para reducir el riesgo de incendio, descarga eléctrica y lesiones. • Lea todas las instrucciones antes de usar este calefactor. • Use este calefactor de la manera exacta que se describe en este manual. Cualquier otro uso no recomendado por el fabricante puede causar un incendio, una descarga eléctrica o lesiones.
-
Page 32: Conservez Ces Directives
Information importante concernant la sécurité et l'utilisation: Lorsque vous utilisez des appareils électriques, respectez toujours les précautions de base afin de réduire les risques d'incendie, de chocs électriques et de blessures. • Lisez toutes les directives avant d'utiliser la fournaise. •... - Page 33 Maintenance: Mantenimiento: Entretien: 1. Cleaning your fireplace: 1. Limpieza de su chimenea: 1. Nettoyage de votre foyer: You may clean exterior of unit with Puede limpiar el exterior de la Vous pouvez laver l'extérieur de a soft, damp, lint-free cloth. unidad con un paño suave, húmedo l'unité...
- Page 34 Installation Instructions: Instrucciones de Directives d'installation: instalación: Once the location has been Después de preparar el lugar de Une fois l'emplacement préparé, prepared, the fireplace insert can colocación, podrá instalar la l'insert de cheminée peut être be installed. chimenea insertable. installé.
- Page 35 Operating Instructions: Control Panel on the Front of Unit: LED screen 1. Power 2. Flame . Heater 4. Down Light 5. Log 6.Time 1. On/Off Main Power Button a. Press to switch the unit ON/OFF. Child Lock: turn the unit on and hold POWER button for at least 5 seconds until you hear a beep sound (and the log blinks) to enter the Child Lock mode.
- Page 36 Instrucciones de operación: Panel de control en el frente de la unidad: Pantalla LED 1. Encendido 2. Flama . Calentador 4. Luces empotradas 5. Tronco 6.Tiempo 1. Botón de encendido/apagado principal a. Presione para encender/apagar la unidad. b. Bloqueo para niños: encienda la unidad y mantenga presionado el botón de ENCENDIDO durante al menos 5 segundos hasta que escuche un pitido (y el registro parpadee) para ingresar al modo de bloqueo para niños.
- Page 37 Directives d'utilisation: Panneau de commande à l'avant de l'unité: Ecran LED 1. D'alimentation 2. Flamme . Chauffe-eau 4. Downlight 5. Grume 6. Heure 1. Bouton d'alimentation principal marche/arrêt a. Appuyez pour allumer / éteindre l'appareil. b. Verrouillage enfant: allumez l'appareil et maintenez le bouton POWER enfoncé pendant au moins 5 secondes jusqu'à...
- Page 38 Remote Control Operating Procedures: (1) Power: Press to turn the unit ON/OFF (2) Flame: Press to adjust the level of brightness of the flame: F5- F4- F3- F2- F1- OFF. (F5 being the brightest and F1 the dimmest) : raise the level of flame brightness : lower the level of flame brightness (3) Timer: Press to adjust the duration of the heater: 30 min- 1H- 2H- 3H- 4H- 5H- 6H- 7H- 8H- 9H- OFF...
- Page 39 Procedimientos de Operacion con el Control Remoto: (1) Encendido/apagado: Presiónelo para encender/apagar la unidad. (2) Llama: Presiónelo para ajustar el nivel de intensidad de la llama: F5- F4- F3- F2- F1- Apagado. (F5 es la mayor intensidad y F1, la menor) : eleva el nivel de intensidad de la llama : reduce el nivel de intensidad de la llama...
- Page 40 Mode d'Emploi du Contrôle a Distance: (1) Alimentation: Appuyez pour allumer ou éteindre l'unité. (2) Flamme: Appuyez pour ajuster la luminosité des flammes: F5 - F4 - F3 - F2 - F1 - OFF (ARRÊT). (F5 étant le niveau le plus clair et F1, le plus sombre) : augmente la luminosité...
-
Page 41: Troubleshooting
Heater is unplugged from wall outlet. Plug the cord into an outlet. Power cord or power plug are damaged. Contact a SEI customer service. Heater doesn't turn on with the Power outlet for power plug prong is Check the power outlet and power switch. - Page 42 Loose wiring at the wall power outlet. connections. Contact a qualified electrician. Flames are frozen. Flame element is not attached to the Contact SEI customer service motor. Rotation motor is defective. Contact SEI customer service Flame element isn't seated properly.
-
Page 43: Solución De Problemas
Enchufe el cable a un tomacorriente. tomacorriente. El cable de alimentación o el enchufe Comuníquese con Servicio al cliente están dañados. de SEI. El calefactor no se enciende El tomacorriente para el enchufe está Revise el tomacorriente y reemplácelo cuando presiono el interruptor de suelto. - Page 44 Las llamas permanecen estáticas. El elemento de llama no está Comuníquese con Servicio al cliente de conectado al motor. SEI. El motor de rotación presenta Comuníquese con Servicio al cliente de defectos. SEI. El elemento de llama no está...
-
Page 45: Dépannage
Le cordon ou la prise électrique sont Prenez contact avec le service à la endommagés. clientèle de SEI. La fournaise ne s'allume pas à La prise électrique pour la fiche est Vérifiez la prise électrique et l'aide de l'interrupteur de lâche. - Page 46 Les flammes ne bougent pas. L'élément des flammes n'est pas relié Prenez contact avec le service à la au moteur. clientèle de SEI. Prenez contact avec le service à la Le moteur rotatif est défectueux. clientèle de SEI. L'élément des flammes n'est pas installé...
- Page 47 INSTRUCCIONES PARA LA DIRECTIVES DE MISE À LA GROUNDING INSTRUCTIONS CONEXIÓN A TIERRA TERRE Debe conectar a tierra este producto. Ce produit doit être mis à la terre. S'il Si tiene un funcionamiento incorrecto o vient à mal fonctionner ou à subir une presenta desperfectos, la conexión a panne, la mise à...
- Page 48 FCC STATEMENT DECLARACIÓN DE LA FCC ÉNONCÉ DE LA FCC NOTE: This equipment has been tested NOTA: Este equipo fue probado y se REMARQUE : Cet équipement a été and found to comply with the limits for confirmó que cumple con los límites testé...
- Page 49 25 |...
Need help?
Do you have a question about the FA1165456 and is the answer not in the manual?
Questions and answers