Advertisement
Quick Links
Advertisement

Related Manuals for Haier HH-T900GC


Summary of Contents for Haier HH-T900GC
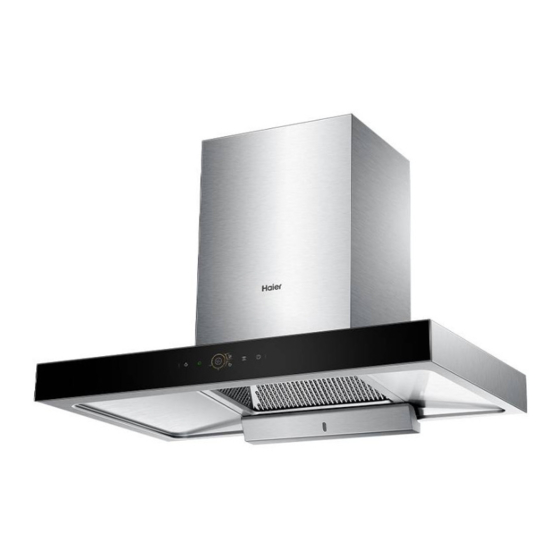
- Page 1 Range Hood HH-T900GC model...
-
Page 3: Table Of Contents
SAVE THESE INSTRUCTIONS The models shown in this user guide may not be available in all markets and are subject to change at any time. For current details about model and specification availability in your country, please contact your local Haier dealer. -
Page 5: Introduction
INTRODUCTION Thank-you for purchasing a Haier rangehood. This user guide explains the features and functions, and will help you get the most out of your rangehood. We hope you enjoy your new rangehood. -
Page 7: Safety And Warnings
If installation is p erformed by a qualified person, the product should be tested to confirm ● proper operation, and the correct use of the product explained to the use If the power supply cord is damaged, it must only be replaced by your Haier trained and ● supported service technician or qualified person. - Page 8 INSTALLATION INSTRUCTIONS Contents of packaging Haier Range Hood HH-T890 model Rangehood (1) Installation instructions Check valve Universal ducting User guide manual (1) assembly (1) hose (180) (2) Check valve Wall plate (1) Inner decorative Oil receptacle (1) gasket (1) cover holder (1)
- Page 9 INSTALLATOIN INSTRUCTIONS Names of principal components Volute Hand-tightened Intake ring Main housing Inner decorative cover Outer decorative Top cover Check valve cover assembly Oil Cover LED Light (1)
- Page 10 INSTALLATION INSTRUCTIONS Please read the entire instructions before installing the rangehood. Product dimensions PRODUCT DIMENSIONS Overall height of product min. 610 – max. 990 Overall width of product Overall depth of product Height of canopy Width of flue Depth of flue Centre of ducting to left edge of product Centre of ducting to back edge of product Outside diameter of check valve assembly...
- Page 11 INSTALLATION INSTRUCTIONS Height of rangehood MINIMUM CLEARANCES Height top of gas cooktop to base of rangehood min. 650 – max. 700 Height of rangehood installation if ducted through the ceiling min. 610 if ducted through the rear min. 990 Depth of rangehood installation...
-
Page 12: Installation Instructions
INSTALLATION INSTRUCTIONS Installation WARNING! This product is heavy and requires two persons for installation. WARNING! Failure to install the screws or fixing device in accordance with these instructions may result in electrical hazards. The manufacturer is not liable for any damage caused by not following these instructions. Prepare the rangehood for installation Before commencement, unpack the rangehood and check that it functions correctly. - Page 13 INSTALLATION INSTRUCTIONS Fig.2 Install the supports Attach the supports to the back of the rangehood as shown in Fig.3. Fig.3...
- Page 14 INSTALLATION INSTRUCTIONS Connect the check valve assembly Place the check valve gasket and check valve assembly onto the air outlet on top of the main unit, and screw in place using the 8 cross recessed pan head screws. Secure the main unit (this requires 2 persons) Attach the main unit to the wall plate.
-
Page 15: About Your Rangehood
ABOUT YOUR RANGEHOOD Technical Data LED Lamp Input Power: 3 W ,Rated Voltage: 12 V Cap Type: Buckle, Size: 220 mmX58 mm Type of Power Rated Voltage: 230V~ Rated Frequency: 50 Hz Motor Rated Power 219 W Input Rated Power Input 222 W Air flow... -
Page 16: Operating Instructions - Control Panel
OPERATING INSTRUCTIONS – CONTROL PANEL Medium and high speed Boost speed Gestures window light Air purification Air flow Air pressure Soft speed Interconnection Power 1.Switch on and off range hood; The device is powered on for the first time, “ ”... - Page 17 Press for the second time to enter the high speed. “ ” Press for the first time to enter the medium speed. “ ” Press for the second time to enter the high speed. “ ” 5.Time delay; When the machine is running, press this button to enter delay-off mode; unit will run soft speed for 3 minutes and turn off automatically.
-
Page 18: Cleaning And Maintenance
CLEANING AND MAINTENANCE We recommend following ‘Cleaning and maintenance’ instructions for safety and optimal performance of your rangehood. Preparation for cleaning and maintenance Be sure to unplug the power cord before commencing cleaning or servicing of the ● rangehood. Always wear rubber gloves during cleaning and maintenance to guard against injury ●... - Page 19 CLEANING AND MAINTENANCE Cleaning the fan (every 3 months) (this requires 2 persons) Remove the oil receptacle. ● If the inner decorative cover has been extended, unhook it from the decorative cover ● holder and slide it back down between the main housing and outer decorative cover. Loosen the screws attaching the ducting to the check valve assembly and remove the ●...
-
Page 20: Troubleshooting
Solutions for common faults In case of a fault, first try the suggestions below. If the problem cannot be fixed, please get touch with your local Haier after-sales service centre. Only professional technicians may dismantle and repair the rangehood. PROBLEM... - Page 21 TROUBLESHOOTING PROBLEM POSSIBLE CAUSE WHAT TO DO Oil leak. Too much oil in the oil Remove waste oil in the oil receptacle. receptacle. Oil cover has not been Clean the oil cover in accordance with cleaned. the instructions. Main housing hasn't been Wipe the main housing every day cleaned.
-
Page 22: Manufacturer's Warranty
This product is not designed for commercial use (whatsoever). Any commercial use by a customer will affect this product’s Manufacturer’s Warranty. Service under this Manufacturer’s Warranty must be provided by a Haier Authorised Repairer. Such service shall be provided during normal business hours.This Manufacturer’s Warranty certificate should be shown when making any claim.
Need help?
Do you have a question about the HH-T900GC and is the answer not in the manual?
Questions and answers