Advertisement
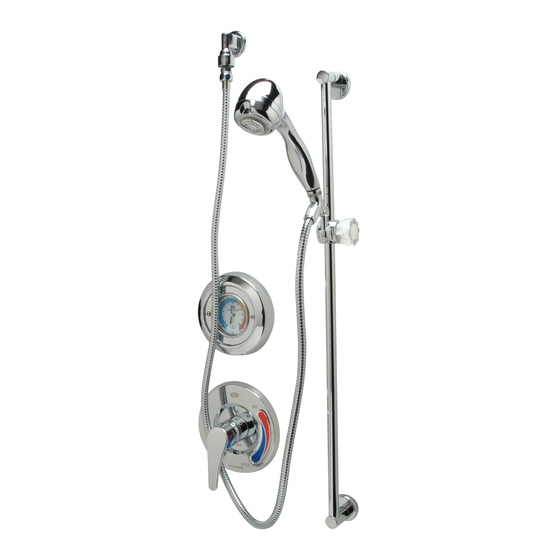
TEMP-GARD III
Pressure Balancing Shower/
Tub & Shower Valve
Z7300 Series
Operation Installation Maintenance Instructions Replacement Kits
WARNING: Cancer and Reproductive Harm - www.P65Warnings.ca.gov
ADVERTENCIA: Cáncer y daño reproductivo - www.P65Warnings.ca.gov
AVERTISSEMENT: Cancer et effets néfastes sur la reproduction - www.P65Warnings.ca.gov
INSTALLATION OF TEMP-GARD III SHOWER VALVE (Refer to page 4 for part no.)
1. Install rough piping and valve body as shown.
Do not use PEX or CPVC CTS piping from
valve to tub spout, as the reduced ID re-
sults in too much back pressure for valve
to function properly. When facing valve, HOT
"H" is on left and COLD "C" is on right. Tub
port "T" should face down and shower port "S"
should face upward. The ears on the valve at
the 5 o'clock and 11 o'clock positions may be
used to attach the valve to framing of wall if
necessary.
WARNING: Caution should be taken
when heating valve for sweat connec-
tions to avoid damaging internal rubber
and plastic components in valve.
FOR OPTIMUM VALVE
PERFORMANCE, BALANCE SUPPLY
PRESSURES TO LESS THAN 5 PSI
PRESSURE DIFFERENTIAL BETWEEN
HOT AND COLD WATER SUPPLIES.
2. Always install valve with mud guard (23) so that the indicated surface on mud guard is flush with finished wall.
The hole in the wall should be 4" in diameter.
3. If valve is to be used for a shower only, wrap threads on tub plug (24) with teflon tape and install plug into tub
port on shower valve.
4. When the final outer wall is finished remove mud guard and open both supply stops on valve by turning counter
clockwise.
5. Loosen and remove escutcheon (19) from valve. Carefully remove cartridge (10) from valve by holding car
tridge as close to the valve body (1) as possible and wiggling back and forth until cartridge comes out of the
valve. Place thumb and finger on gray part of cartridge to remove it, as shown in Figure 4.
6. With the cartridges removed from all valves in the system, turn on water supply and flush the system of any
debris. If the water coming out of the valve while flushing is going behind finished wall, a hose bib flushing
out kit (RK7300-20HB) may be used to allow the water to be directed to a drain by attaching a garden hose
to valve.
7. If hot and cold supply inlets are reversed simply remove cartridge and reinstall with cartridge flipped
o
180
. The handle adaptor (12) will need to be readjusted. To adjust handle adaptor remove and turn
o
180
. Handle should always turn through cold, then hot. Reinstall cartridge and tighten escutcheon
to 150 in lbs. The system will need to be flushed again before installing shower heads.
ZURN INDUSTRIES, LLC 5900 Elwin Buchanan Drive, Sanford, NC U.S.A. 27330, Ph. 1-800-997-3876, Fax 919-775-3541
In Canada: ZURN INDUSTRIES LIMITED 7900 Goreway Drive, Unit 10, Brampton, Ontario L6T 5W6, Ph. 905-405-8272, Fax 905-405-1292
Rev. H
Date: 10/29/2018
C.N. No. SAN008373
FIGURE 1
PAGE 1 OF 4
Prod. | Dwg. No. CF1024
®
Advertisement
Table of Contents

Related Manuals for ZURN TEMP-GARD III Z7300-SS-MT-HW-H9


Summary of Contents for ZURN TEMP-GARD III Z7300-SS-MT-HW-H9
- Page 1 PAGE 1 OF 4 ZURN INDUSTRIES, LLC 5900 Elwin Buchanan Drive, Sanford, NC U.S.A. 27330, Ph. 1-800-997-3876, Fax 919-775-3541 In Canada: ZURN INDUSTRIES LIMITED 7900 Goreway Drive, Unit 10, Brampton, Ontario L6T 5W6, Ph. 905-405-8272, Fax 905-405-1292 Rev. H Date: 10/29/2018 C.N.
- Page 2 Install handle onto cartridge with handle pointed down. Tighten set screw. The ZURN TEMP-GARD III Pressure Balancing Shower Valve is equipped with an adjustable temperature limit stop. The temperature limit stop device is to be used to limit the valve handle from being turned to undesired hot water discharge temperatures. To adjust the temperature limit stop, see step 8 of the installation and reference figure 3.
- Page 3 COLD water lines. Proper performance is dependent upon licensed, qualified personnel performing regular, periodic testing according to ZURN specifications and prevailing governmental & industry standards and codes and upon following these installation instructions. Failure to do so releases ZURN of any liability that it might otherwise have with respect to that device. Such failure could also result in an improperly functioning device. PAGE 3 OF 4 ZURN INDUSTRIES, LLC 5900 Elwin Buchanan Drive, Sanford, NC U.S.A. 27330, Ph. 1-800-997-3876, Fax 919-775-3541 In Canada: ZURN INDUSTRIES LIMITED 7900 Goreway Drive, Unit 10, Brampton, Ontario L6T 5W6, Ph.
- Page 4 PAGE 4 OF 4 ZURN INDUSTRIES, LLC 5900 Elwin Buchanan Drive, Sanford, NC U.S.A. 27330, Ph. 1-800-997-3876, Fax 919-775-3541 In Canada: ZURN INDUSTRIES LIMITED 7900 Goreway Drive, Unit 10, Brampton, Ontario L6T 5W6, Ph. 905-405-8272, Fax 905-405-1292 Rev. H Date: 10/29/2018 C.N.
Need help?
Do you have a question about the TEMP-GARD III Z7300-SS-MT-HW-H9 and is the answer not in the manual?
Questions and answers