Table of Contents
Advertisement
RTD300 EN
7/25/03
2:36 PM
Page 2
EXPORTER
Thomson Inc.
P.O. Box 1976
IMPORTADOR
Indianapolis, IN 46206 - 1976
Comercializadora Thomson de México, S.A. de C.V.
© 2003 Thomson Inc.
Miguel de Cervantes Saavedra 57
Trademark(s) ® Registered
Col. Ampliación Granada
Marca(s) Registrada(s)
C.P. 11529 Mexico D.F.
Marque(s) Deposée
Telefono: (55)25 81 53 20
55814590 (EN/F/E)
R.F.C.: CTM-980723-KS5
www.rca.com
www.rca.com/LatinAmerica
0151
Printed in China / Impreso en China
Advertisement
Table of Contents
Troubleshooting

Related Manuals for RCA RTD300


Summary of Contents for RCA RTD300
- Page 1 RTD300 EN 7/25/03 2:36 PM Page 2 EXPORTER Thomson Inc. P.O. Box 1976 IMPORTADOR Indianapolis, IN 46206 - 1976 Comercializadora Thomson de México, S.A. de C.V. © 2003 Thomson Inc. Miguel de Cervantes Saavedra 57 Trademark(s) ® Registered Col. Ampliación Granada Marca(s) Registrada(s) C.P.
- Page 2 RTD300 EN 7/25/03 2:36 PM Page 3 RTD300 It is important to read this instruction book prior to using your new product for the first time. Es importante leer este manual antes de usar por vez primera su euipo.
-
Page 3: Fcc Information
RTD300 EN 7/25/03 2:36 PM Page 4 FCC Information This device complies with Part 15 of the FCC Rules. Operation is subject to the following two conditions: (1) This device may not cause harmful interference, and (2) this device must accept any interference received, including interference that may cause undesired operation. -
Page 4: Table Of Contents
RTD300 EN 7/25/03 2:36 PM Page 5 Contents Product Information FCC Information Contents ... 1 Identification of Controls ... 2 Remote Control ... 5 Installation Connecting with TV ... 7 FM/AM Antenna connection ...8 Speaker system connection ... 9 Connecting with Other Video Equipment ... 10 Output Select ... -
Page 5: Identification Of Controls
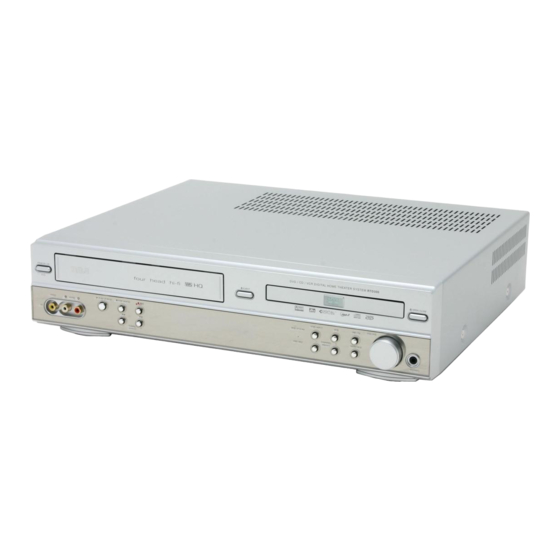
RTD300 EN 7/25/03 2:36 PM Page 6 Identification of Controls Front panel 7 8 9 0 1 Power (STANDBY/ON) button Powers the device on/off when AC power supply is connected. 2 Videotape deck Insert the desired video tape here. 3 Eject button Ejects the tape. - Page 6 RTD300 EN 7/25/03 2:36 PM Page 7 Operation Display Window 1 1 Speaker setup indicator 2 2 Memorised TV broadcasting channel or radio stations 3 3 Chapter indicator 4 4 Track indicator 5 5 Sleep time indicator 6 6 Playback disc indicator...
-
Page 7: Rear Panel
RTD300 EN 7/25/03 2:36 PM Page 8 Rear Panel 1 1 Power Cord Jack for supplying power to the unit. Connect to a wall outlet. 2 2 Analog 5.1 Speaker Out Jack Connect each of the speaker wires to the satellite speakers. -
Page 8: Rtd300 En 7/25/03 2:36 Pm
RTD300 EN 7/25/03 2:36 PM Page 9 Remote Control OPEN/CLOSE /INPUT – TRACKING CLEAR SETUP VOL– ENTER ZOOM PROGRAM – TUNING & SEARCH MEMORY STEP SEARCH SUBTITLE AUDIO SOUND FIELD REPEAT A–B DELAY MUTE CLK/CNT TV/VCR TV INPUT Child Lock!!! (VCR mode) - Page 9 RTD300 EN 7/25/03 2:36 PM Page 10 Instructions in using remote control • Operate the remote control within 7m from the unit. • Do not press 2(two) buttons at the same time. • Keep the unit away from humid and dusty areas.
-
Page 10: Connecting With Tv
RTD300 EN 7/25/03 2:36 PM Page 11 Connecting with TV During initial setup, the RF output channel for video is set to CH 3. This setting can be changed from the “Channel SET” screen in VCR operation (refer to page 13). -
Page 11: Video Connection
RTD300 EN 7/25/03 2:36 PM Page 12 Video Connection With the yellow cable (Video Cable) from the Audio/Video Composite Cable, connect the Video Out (yellow) jack on the DVD-Video player to the Video IN jack on the TV. Connect the TV to the DVD-Video player with the RF cable provided with the unit. Plug one end of the RF cable into the “RF OUT”... -
Page 12: Speaker System Connection
RTD300 EN 7/25/03 2:36 PM Page 13 Speaker system connection Connect the speakers using the supplied speaker cords by matching the colors of the terminals and those of the cords. To obtain the best possible surround sound, adjust the speaker parameters (distance, level, etc.) -
Page 13: Connecting With Other Video Equipment
RTD300 EN 7/25/03 2:36 PM Page 14 Connecting with Other Equipment You can connect a wide variety of audio/video equipment to your DVD-Video system including : an additional VCR, Laser Disc Player, DVD Player, Camcorder, Satellite Receiver or Video Game. Since all of these devices use essentially the same connections, they will be described together. -
Page 14: Output Select
RTD300 EN 7/25/03 2:36 PM Page 15 Output Select To Select DVD Press the [DVD] button. Press [DVD] to select DVD mode, the DVD indicator lights on the front panel. The remote control can then be used to access DVD functions. -
Page 15: Clock Set
RTD300 EN 7/25/03 2:36 PM Page 16 Clock Set OPEN/CLOSE POWER /INPUT – TRACKING CLEAR 100/P-SCAN SETUP VOL– VOL+ ENTER ZOOM PROGRAM CH/PRESET – – TUNING & SEARCH MEMORY SPEED/ANGLE STEP SEARCH SUBTITLE AUDIO SOUND FIELD REPEAT A–B DELAY LEVEL... -
Page 16: Memorizing Tv Channels
RTD300 EN 7/25/03 2:36 PM Page 17 Memorizing TV Channels To Memorize Channels Automatically To Memorize Channels Manually To add additional channels without affecting your existing stored channels, follow the steps below: Press the [SETUP] button. Press the [ ∞ ] button to move the cursor down to CHANNEL SET. -
Page 17: Selecting Cable Or Antenna Viewing
RTD300 EN 7/25/03 2:36 PM Page 18 To Delete Channels Manually Follow the procedures below to delete stored channels. Press the [SETUP] button and select “CHANNEL SET”. Select “Add/Remove Channels”. Select the channel to delete. Use the [NUMBER] buttons on the remote control to enter the channel to delete. -
Page 18: Vcr Playback
RTD300 EN 7/25/03 2:36 PM Page 19 VCR Playback OPEN/CLOSE POWER /INPUT – TRACKING CLEAR 100/P-SCAN SETUP VOL– VOL+ ENTER ZOOM PROGRAM CH/PRESET – – TUNING & SEARCH MEMORY SPEED/ANGLE STEP SEARCH SUBTITLE AUDIO SOUND FIELD REPEAT A–B DELAY LEVEL... -
Page 19: Using Advanced Features
RTD300 EN 7/25/03 2:36 PM Page 20 Using advanced features Play the tape automatically This feature allows the VCR to automatically start playback when a tape (with it’s safety tab removed) is inserted. Switch the VCR to TV or VCR mode automatically This feature controls whether the TV/VCR changes to VCR mode automatically when the VCR is turned on. -
Page 20: Searching A Cassette Tape For Programs (Indexing)
RTD300 EN 7/25/03 2:36 PM Page 21 Searching a cassette tape for programs (indexing) When you record a programs, the VCR places an index mark at the start of each recording. To search for an index mark: • If two... -
Page 21: Searching With The Tape Counter (Go- To Search)
RTD300 EN 7/25/03 2:36 PM Page 22 Searching with the tape counter (go- to search) You can mark a segment of the video cassette with the tape counter that will help you easily locate the segment later. Some index marks may be... -
Page 22: Daylight Saving Time
RTD300 EN 7/25/03 2:36 PM Page 23 Daylight-Saving Time SPRING Forward ; Fall Backward In the Spring, daylight-saving time begins on the first Sunday in April. Because the clock automatically changes from 2:00 AM to 3:00 AM (forward one hour), remember to include the extra hour for timer recording falling within this time frame. -
Page 23: Hi-Fi Stereo Playback (Hi-Fi Model Only)
RTD300 EN 7/25/03 2:36 PM Page 24 Hi-Fi Stereo Playback Playing a tape in Hi-Fi high-quality • Press the [AUDIO] button repeatedly to select among playback qualities. Hi-Fi LINEAR • “Hi-Fi” signal lights up at the top of a screen. -
Page 24: Dvd Initial Setting
RTD300 EN 7/25/03 2:36 PM Page 25 DVD initial setting LANGUAGE Setup A user can set OSD language, Audio, Subtitle and Disc Menu. “OSD” stands for “On Screen Display”. Only those languages available on the disc will appear as one of the language options. -
Page 25: Display Setup
RTD300 EN 7/25/03 2:36 PM Page 26 DISPLAY Setup A user can set up a connected TV condition and screen. In STOP or RESUME STOP mode, press the [SETUP] button to display the DVD SETUP menu. Press the [2 ] or [ 3] buttons to select “Display”... - Page 26 RTD300 EN 7/25/03 2:36 PM Page 27 You can also select and de- select progressive scan by pressing and holding the P-SCAN button on the remote control. Screen Saver: • On - If a screen remains on the TV display for a period of time, the TV can be damaged.
-
Page 27: Audio Setup
RTD300 EN 7/25/03 2:36 PM Page 28 AUDIO Setup Audio settings can be adjusted to match the speakers connected with the unit. OPEN/CLOSE POWER /INPUT – TRACKING CLEAR 100/P-SCAN SETUP VOL– VOL+ ENTER ZOOM PROGRAM CH/PRESET – – TUNING & SEARCH... - Page 28 RTD300 EN 7/25/03 2:36 PM Page 29 To select among the speakers (LEFT, CENTER, RIGHT, L.SURR.., SUB.W and R.SURR), press the [5 5 ], [∞ ∞ ], [2 2 ], or [3 3 ] buttons. To adjust the Level setting for the speaker you have selected above, 1 ] or [¡...
-
Page 29: Ratings Setup
RTD300 EN 7/25/03 2:36 PM Page 30 RATINGS Setup • Parental Control restricts the type of discs that can be played on the DVD/VCR according to their ratings. Discs that do not fall within the rating limits can not be played unless the rating password is The initial password is 3308. - Page 30 RTD300 EN 7/25/03 2:36 PM Page 31 DVD initial setting Press [5 5 ] or [∞ ∞ ] buttons to move the cursor to the rating level where you find is acceptable. A password is required to play discs with ratings higher then the level selected.
-
Page 31: Dvd Playback
RTD300 EN 7/25/03 2:36 PM Page 32 DVD Playback OPEN/CLOSE POWER /INPUT – TRACKING CLEAR 100/P-SCAN SETUP VOL– VOL+ ENTER ZOOM PROGRAM CH/PRESET – – TUNING & SEARCH MEMORY SPEED/ANGLE STEP SEARCH SUBTITLE AUDIO SOUND FIELD REPEAT A–B DELAY LEVEL... -
Page 32: Various Playback Methods
RTD300 EN 7/25/03 2:36 PM Page 33 Various Playback Methods For fast forward or fast reverse playback, press the [¡] or [1] button during playback. • Fast reverse playback may be unavailable for some DVDs. • Unavailable for mp3 discs. -
Page 33: Playing A Desired Scene
RTD300 EN 7/25/03 2:36 PM Page 34 Playing a desired scene To skip scenes in a disc During playback, press the [NEXT ¡ chapter (or track). The screen advances to the next chapter (or track) and starts playback. During playback, press the [7 7 1 chapter (or track). -
Page 34: Repeating A Defined Period
RTD300 EN 7/25/03 2:36 PM Page 35 Playing a programmed order Repeating a defined period Press the [REPEAT] button in playback mode and select the repeat period by using the [5 5 ] or [∞ ∞ ] buttons. - DVD - In stop mode, press the [PROGRAM] button. -
Page 35: Repeating A Defined Period From A To B
RTD300 EN 7/25/03 2:36 PM Page 36 Repeating a defined period from A to B Repeating a defined segment on the disc from A to B. A mp3 disc can not be repeated from A to B. Searching DVD with a title number, a chapter number or a time •... - Page 36 RTD300 EN 7/25/03 2:36 PM Page 37 Searching VCD and CD with a track number or time • Press the [SEARCH] button. The display shows the track number and time. To search with a time, select the time window with the [2 2 ] or [3 3 ] buttons.
-
Page 37: Confirming The Current Play Mode On Screen
RTD300 EN 7/25/03 2:36 PM Page 38 Confirming the current PLAY mode on screen Confirming the current DVD disc mode Confirming the current VCD, CD disc mode During playback, press the [DISPLAY] button. The display shows the current track number, audio selection, repeat playback mode and the time elapsed. - Page 38 RTD300 EN 7/25/03 2:36 PM Page 39 Confirming the current mp3 disc mode The Track List appears automatically in Playback mode. The display shows mp3 File information on the disc including mp3 File names and directory lists. With the [5] or [∞] buttons, move the cursor to the mp3 music File.
-
Page 39: Audio Language, Subtitle Language And 3D Audio
RTD300 EN 7/25/03 2:36 PM Page 40 AUDIO language, SUBTITLE language and 3D AUDIO Selecting an audio language The user may select an audio language and subtitle language if a disc includes Multiple languages. Press the [AUDIO] button to display audio Certain discs information available on the DVD disc. -
Page 40: Zoom, Multi Angle And Digest Play
RTD300 EN 7/25/03 2:36 PM Page 41 ZOOM, Multi Angle and Digest play Using the zoom function A picture can be magnified by about 2, 4 or 8 times the actual size. In playback or still mode, press the [ZOOM] button repeatedly until the picture magnifies to the desired level. -
Page 41: About Mp3 Discs
RTD300 EN 7/25/03 2:36 PM Page 42 About mp3 discs Playing a disc containing mp3 files This unit is compatible with mp3 files recorded on CD-R and CD-RW discs. Turn on your television and select the channel assigned to this DVD player. -
Page 42: Displaying Menus In A Disc
RTD300 EN 7/25/03 2:36 PM Page 43 Displaying menus in a disc To display menus on a disc If a disc includes menus, follow the steps below: Press the [TITLE/PBC] or [MENU] button to display menus on a disc. • Menus may vary from disc to disc. -
Page 43: Recording
RTD300 EN 7/25/03 2:36 PM Page 44 Recording To Record With VCR OPEN/CLOSE POWER /INPUT – TRACKING CLEAR 100/P-SCAN SETUP VOL– VOL+ ENTER ZOOM PROGRAM CH/PRESET – – TUNING & SEARCH MEMORY SPEED/ANGLE STEP SEARCH SUBTITLE AUDIO SOUND FIELD REPEAT A–B... -
Page 44: One-Touch Timer Recording (Otr)
RTD300 EN 7/25/03 2:36 PM Page 45 To Record From DVD To Videotape during DVD playback Press the [DVD] button on the remote control to select DVD mode. Insert the desired DVD disc. If the DVD disc has copyright protection, you will not be able to record the DVD. -
Page 45: Timer Recordings
RTD300 EN 7/25/03 2:36 PM Page 46 Timer Recordings TIMER RECORDINGS Turn on the TV. Make sure that current time is set correctly on the DVD/VCR. Insert a recordable tape with its safety tab in place. Prior to the setting, press the [VCR] button select VCR mode. - Page 46 RTD300 EN 7/25/03 2:36 PM Page 47 If a recordable tape is not inserted in Stop mode under Power ON, “Waiting for TIMER RECORDINGS. Insert a recordable tape” message is displayed on the center of screen for all changes or output conversions incurred during TIMER RECORDINGS SET.
-
Page 47: Using Video Cassettes
RTD300 EN 7/25/03 2:36 PM Page 48 Various TIMER RECORDINGS One Time : The TIMER RECORDINGS setting will only be activated at the specified time once. Daily : The TIMER RECORDINGS of the desired program will be recorded daily from Sunday to Saturday. -
Page 48: Watching And Recording Cable Tv
RTD300 EN 7/25/03 2:36 PM Page 49 Watching and Recording Cable TV To Watch and Record Cable TV Simultaneously TIMER RECORDINGS of Cable TV Power on the converter and select the channel to watch or to record. Power on the DVD-video and set the channel of the DVD-video to the converter-connected channel (CH03/04/EXTERNAL INPUT). -
Page 49: Presetting The Radio Stations
RTD300 EN 7/25/03 2:36 PM Page 50 Presetting the radio stations 50 preset stations are available for storing FM and AM stations. Before tuning, make sure that you have turned the volume down to its minimum. Tune to a station with a weak signal Press the [TUNING –... -
Page 50: Listening To The Radio
RTD300 EN 7/25/03 2:36 PM Page 51 Listening to the radio To set preset radio stations first, see “Presetting radio stations” on the previous page. To turn off the radio Press POWER to turn the unit off or select another function mode (DVD, VCR, VIDEO 1 or VIDEO 2). -
Page 51: Speaker Setup For Enjoying The Surround Sound Effect
RTD300 EN 7/25/03 2:36 PM Page 52 Speaker Setup for enjoying the surround sound effect Surround Sound Audio Components DTS Digital Surround, Dolby Digital and Dolby Pro Logic technologies can be used to enjoy 3-dimensional sound effects with video image. We recommend you use the following devices. -
Page 52: Speaker Positioning
RTD300 EN 7/25/03 2:36 PM Page 53 Speaker Positioning A typical speaker setup uses 6 speakers: 2 front speakers, a center speaker, 2 rear speakers, and a subwoofer. Add a sub-woofer to hear excellent bass sound, DTS digital surround or Dolby Digital surround. Set up a listening position;... -
Page 53: Delay Time Setting
RTD300 EN 7/25/03 2:36 PM Page 54 Delay Time Setting In Dolby Digital or Dolby Pro Logic mode it is assumed that the time it takes the sound from each speaker to reach the listener, is the same. But if the time interval from the center or rear left and right speakers to the... - Page 54 RTD300 EN 7/25/03 2:36 PM Page 55 Setting the delay time in the Dolby Digital and Dolby Pro Logic modes Press the [DELAY] button. The current surround delay time appears in the display window. Press the [DELAY] button to select the desired speaker to set.
-
Page 55: Setting The Sound Level
RTD300 EN 7/25/03 2:36 PM Page 56 Setting the sound level Setting the sound level of the desired channel To adjust the volume of all the speakers at one time, use the VOLUME control. Setting the Balance between each channel by using the test tone In Dolby Digital and Dolby Pro Logic mode use the test tone function to adjust the sound balance of the speakers from the listener’s position in DVD initial setup mode. -
Page 56: About Dvd
RTD300 EN 7/25/03 2:36 PM Page 57 About DVD Playable Disc • DVD, Video CD (Version 1.1, 2.0), S-VCD and Audio CD Disc type Playable Possible Video CD Possible Possible CD-G Possible CD-ROM Possible CD-R Possible CD-RW Possible DVD-R Possible... -
Page 57: Cleaning Disc
RTD300 EN 7/25/03 2:36 PM Page 58 CHAPTER It means the information recorded in a DVD. A title in a DVD is divided into many tracks, of which a track is called as a chapter. A certain scene of a screen can be quickly searched with the chapter number. -
Page 58: Basic Information About Vcr And Videotape
RTD300 EN 7/25/03 2:36 PM Page 59 Basic information about VCR and Videotape Terms related with VCR Automatic fine tuning, a circuit that automatically adjusts TV reception to optimum condition. CABLE Cable television. Index Search A feature of this VCR that automatically records an index each time recording begins. It helps you locate a particular segment of the tape quickly and easily. -
Page 59: Troubleshooting Tips (Dvd)
RTD300 EN 7/25/03 2:36 PM Page 60 Troubleshooting Tips (DVD) Symptom • The player does not play. • No sound comes through. • A disc is playing but screen does not appear or poor screen appears. • Sound is irregular. -
Page 60: Troubleshooting Tips (Vcr)
RTD300 EN 7/25/03 2:36 PM Page 61 Troubleshooting Tips (VCR) Symptom • “Power On” does not work. • It does not work even in “Power On” mode. • A videotape is not inputted in. • The videotape is ejected after it is inserted. - Page 61 RTD300 EN 7/25/03 2:36 PM Page 62 Symptom • Can not record a TV program. • Once [REC] is pressed, the videotape is ejected automatically. • Can not record Cable TV with timer reording. • In spite of pressing [CHANNEL], a channel can not be set.
-
Page 62: Specifications
Horizontal / Relative humidity under 80% VHF: 2-13 CH / UHF: 14-69 CH / Cable: 1-125 NTSC COLOR U/V-mixed: 75Ω unbalanced 1.0 Vp-p unbalanced, RCA JACK -8.8dBm, RCA JACK 3 or 4 CH Very high dense tapes with VHS marks DVD, VIDEO-CD, CD (12mm), CD (8mm), MP3, CD-R, CD-RW SP: 33.35mm/s, SLP: 11.12mm/s... -
Page 63: Care & Maintenance
RTD300 EN 7/25/03 2:36 PM Page 64 Care and Maintenance Disconnect the audio system from the power source before performing any maintenance. Cleaning Clean the exterior of the system using a soft dust cloth. The player CAUTION! This system operates with a laser. It must be opened by only a qualified technician. -
Page 64: Warranty
How you get service: • Take your unit to any Authorized RCA Audio Service Center. To identify your nearest Authorized RCA Audio Service Center, ask your dealer, look in the Yellow Pages, or call 1-800-336-1900. • Show the Authorized Service Center Representative your evidence of purchase date or first rental. -
Page 65: Limited Warranty (Canada)
How you get service: • Take your unit to any Authorized RCA Audio Service Center. To identify your nearest Authorized RCA Audio Service Center, ask your dealer, look in the Yellow Pages, or call 1-800-336-1900. • Show the Authorized Service Center Representative your evidence of purchase date or first rental.
Need help?
Do you have a question about the RTD300 and is the answer not in the manual?
Questions and answers