Table of Contents
Advertisement
Quick Links
Section
Advantages of -CH design
Technical Information
Materials of Construction
Control Spring Ranges
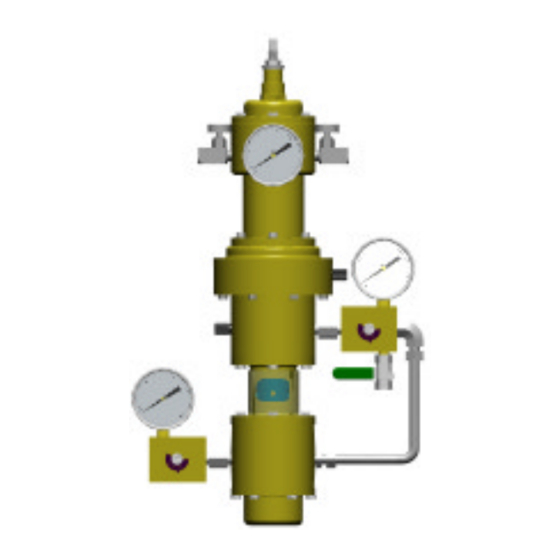
VRP-SB-CH
Instruction Manual
for
the VRP-SB-CH
Valve Regulator
Pilot
Table of Contents
Page
2
2
2
2
3
3
4
4
4
4
5
6
7
7
11
12
15
16
Section
VRP-SB-CH Blank
VRP-SB-CH Caps
VRP-SB-CH Sensing Carts. 20
Steady State Consumption
SP Series Setpoint Pump
Set Point Indicator
Assembly Procedures
Page
17
17
18
19
21
21
21
22
22
22
22
22
22
23
24
February 2000
Advertisement
Table of Contents

Related Manuals for Becker VRP-SB-CH


Summary of Contents for Becker VRP-SB-CH
-
Page 1: Table Of Contents
Description Parts Ordering Scope of Manual Seal Kits Advantages of –CH design VRP-SB-CH Blank Applications VRP-SB-CH Caps Technical Assistance VRP-SB-CH Sensing Carts. 20 Technical Information Appendix Specifications Calculations Materials of Construction Steady State Consumption Model Number Explanation Supply Regulator Capacity... -
Page 2: Introduction
Pilots represents a breakthrough in valve con- experience should install, operate, or maintain trol technology for the natural gas industry. Becker pilots. If there are any questions con- Built to exacting specifications, this easily cerning these instructions, contact your Becker... -
Page 3: Applications
Back Pressure Control valve actuators. Should you already have ex- isting control valve actuator(s) in service, the Guidelines for Usage addition of a Model VRP-SB-CH can improve performance and minimize atmospheric bleed Bleed to Pressure System: The VRP-SB-CH emissions. Pilot is typically utilized for applications with a Some Compatible Actuators: •... -
Page 4: Specifications
VRP-SB-CH Pilot Specifications Technical Specifications Model Number Explanation • The VRP-SB-CH pilot is available in four Steady State Gas Consumption Zero different models to cover sensing pres- sures from 1 psig to 1300 psig. dry, filtered (100 micron) gas Supply Gas •... - Page 5 1565 kPa 6205 kPa 6205 kPa 5516 – 8964 Table 3. Selection Chart for VRP-SB-CH pilots Remote Setpoint Change Options • The SM-1100 series motors accept a 24 VDC or 120 VAC input. The SM-1000 series motors accept a 4-20 MA signal and require a separate 12 VDC, 24 VDC or 120 VAC power connection.
-
Page 6: Principals Of Operation
Exhaust Principles of Operation The VRP-SB-CH pilot and single-acting cylinder actuator can be used in conjunction with varying valve types to provide a complete package for stable and accurate pressure control over a wide range of applications. The energy for control valve operation comes from pressure differential between the pilot supply and dis- charge pressures. -
Page 7: Adjustment Procedure
The speed control valve allows for proper adjustment of the VRP-SB-CH over widely varying operating parameters. There is no principal difference between spring to close and spring to open systems. VRP-SB-CH reverse action is achieved by tubing supply to P... - Page 8 VRP-SB-CH Pilot Adjustment Procedure DIRECT ACTING PILOT REVERSE ACTING PILOT (spring to open valve) (spring to close valve) Supply Output Output gauge gauge gauge Supply gauge Supply metering valve Exhaust metering Supply valve Vent metering port Exhaust valve metering valve...
- Page 9 VRP-SB-CH Pilot Adjustment Procedure Step 4: Turn the adjusting screw counterclockwise until the control springs is fully unloaded. You will feel the screw becoming much easier to turn. Step 5: Turn sensitivity drum to the right as far as it will turn. (In direction of increasing numbers)
- Page 10 VRP-SB-CH Pilot Adjustment Procedure For A Direct Acting Pilot (supply gas to P3) Step 6a: Turn the adjusting screw clockwise until the output gauge just drops off. Step 6b: Go to step 7. For A Reverse Acting Pilot (Supply gas to P1) Step 6a: Turn the adjusting screw clockwise until the output gauge just rises.
-
Page 11: Fine Tuning
VRP-SB-CH Pilot Adjustment Procedure Fine Tuning Procedures A. Dead Band Spring VRP-SB-CH Pilot should be adjusted at Reverse acting the minimum dead band without steady VRP-SB-CH close state bleed gas. In control, the dead band can be widened to minimize bleed gas further. -
Page 12: Troubleshooting
VRP-SB-CH Pilot Troubleshooting 1.2. Stability Adjustment for Small Downstream System The VRP-SB may be used with a dampening tank. Supply and exhaust orifices “M”, tank orifice “standard” (Not marked) This configuration is used for control valves installed for a short downstream system (For power plants use VRP-SB-PID Controller). -
Page 13: Inspection Procedures
VRP-SB-CH Pilot Inspection Procedure c. Installation 2. Spring and Piston Actuator (Single acting ball valve regulator BVR) VRP-SB-CH is typically mounted on the BVR. 2.1. Standard configurations When the VRP-SB-CH is installed away a. Typical power gas from the BVR, ½” tubing is recommended. - Page 14 All orifices are “standard” (not marked). c. Installation 1. Use 3/8” tubing minimum between the VRP-SB-CH and positioner. 2. VRP-SB-CH can be mounted directly on the control valve due to vibration resistance. 3. Refer to table 4 for proper orifice settings Open on...
- Page 15 If the control valve is in a fast cycle (5-30 sec.) slow down the response by increasing the orifice in the tank orifice. NOTE: Smaller # on the tank orifice represents faster response of the VRP-SB-CH Pilot f. If stability cannot be achieved, the supply and exhaust orifices must be adjusted to different set- tings.
-
Page 16: Maintenance Checklist
1. Close the output block valve in order to prevent the control valve from moving. Close the valve on the Measured Variable line. 2. If VRP-SB-CH is equipped with speed control valves skip this step and go to step 3. Shut off supply pressure and bleed down at pilot. Note settings of the Adjustable Orifices before re- moving them from the orifice assembly. - Page 17 VRP-SB-CH has internal friction. For example if the VRP-SB-CH is direct acting, as the adjusting screw is rotated clockwise the output gauge should go down without hesitation. If the gauge goes up or hesitates before going down, internal friction is present.
-
Page 18: Parts Ordering
Parts Lists Parts Ordering The following is provided to allow the ordering of replacement parts. Please specify the Becker instrument serial number when ordering parts (this can be found on the Stainless Steel tab at- tached to the pilot by the 7/16 hex head cap screws. If the instrument was supplied as a com- plete valve regulator package, the Stainless tag attached to the actuator piston can also provide the serial number. - Page 19 VRP-SB-CH Pilot Parts Lists VRP-SB-CH February 2000...
- Page 20 VRP-SB-CH Pilot Parts Lists Description Part No. Description Part No. 1 Seal Neck 30-7009 12 LH 1/2-20 Jam Nut 98-3213 2 Tube Cap 30-7007 13 Inner Tube 30-7003 2a Tube Cap for 1300 CH 30-7026 14 7/16-20 Jam Nut 98-2500 3 O-Ring –141...
- Page 21 VRP-SB-CH Pilot Parts Lists VRP-600-CH Sensing Assembly Description Part No. 1 1/2-20 Hex Jam Nut 98-3056 2 Thread Extension 30-7015 VRP-175-CH Sensing Assembly 3 O-Ring –012 95-2615 4 Cartridge Spacer 30-7024 5 Bottom Flange 35-1548 6 1/4-20 x 1-1/2” HHCS 98-3153 7 1/4-20 x 3/4”...
-
Page 22: Appendix
VRP-SB-CH Pilot Appendix Flow Calculations Travel Time Minimum travel time (the time the valve takes to move from one extreme position to another) 460) is achieved when the signal deviates 3% or more from the set point. This time can be... -
Page 23: Accessories
VRP-SB-CH Pilot Accessories Accessories The following Accessories are available to enhance the operation or provide additional features to your VRP-SB-CH Series Double- Acting Pilot Control System. For additional informaiton regarding a specific accessory, contact Becker. SP Series Set Point Change Pump:... -
Page 24: Volume Booster
VRP-SB-CH Pilot Accessories (Cont.) VB Series Volume Boosters: Provides additional volume capacity to the VRP- SB-CH for use with large volume control valve actuators. The VB Series Volume Boosters may also be utilized for applications that require addi- tional speed of operation. The VB-250 volume booster offers no adjustments. - Page 25 Notes:...
- Page 26 VRP-SB-CH ASSEMBLY MANUAL VRP-SB-CH February 2000...
- Page 27 VRP-SB-CH Assembly Manual ASSEMBLY NOTE: During assembly, moisten all O-rings, threads, thrust bearing, and the recess in the spring seat with lightweight silicone grease. Step 1: Using a 7/16” socket, press seat assembly (E) with rubber seat facing downward into bottom body (F).
- Page 28 VRP-SB-CH Assembly Manual Step 3: With the balanced valve assemblies now installed, perform a leak test of top and bottom valve bodies by doing the following: SOAP TEST AROUND SEAT AND RE- BOTTOM TAINER OF BALANCED VALVE AS- BODY SEMBLY.
- Page 29 VRP-SB-CH Assembly Manual Step 4: Install –012 O-rings (J) onto the groove on each piston and -010 O-ring (N) onto the stem of the top body’s inside piston (L). Step 4a: Attach posts (H) to outside pistons (K) with 8-32 x ½” SHCS (I) Step 4b: Slide the posts and outside piston assemblies through the bodies and attach them to inside pistons (L and M) with 8-32 x ½”...
- Page 30 VRP-SB-CH Assembly Manual Step 5: Slide one grooved washer (O) onto each piston with the grooves facing away from the body. Step 5a: Install convolute diaphragms (R) onto each piston as shown (see note). Step 5b: Install another washer (O) onto each piston with grooves facing the diaphragms.
- Page 31 VRP-SB-CH Assembly Manual Step 7: Center the posts assemblies in bodies (F and G) by: 1. Rotating the diaphragm assemblies (from step 5) counter clockwise until they stop (1). 2. Marking the diaphragms and bodies (F and G) with a single line.
- Page 32 VRP-SB-CH Assembly Manual For VRP-175-SB-CH. Diaphragm preassembly. Place O-ring -012 (J) in piston (DD). Place diaphragm with hole (EE) on top of piston (DD) with convolute facing down as shown. Place washer (FF) on top of diaphragm (EE) with serations facing downward. Install thread extension (HH) in piston (DD).
- Page 33 VRP-SB-CH Assembly Manual FOR VRP-600-SB-CH Step 18. Install O-ring -012 (J) into piston Convolute (DD). Step 19. Thread piston (DD) into outside piston (K) in top body (G). Step 20. Place bottom spacer (MM) on top of body (G). Install convoluted diaphragm (JJ) in the direction shown in the piston (DD) and let it sit on bottom spacer (MM).
- Page 34 VRP-SB-CH Assembly Manual Step 24: Place inner tube (VV2) inside spring cartridge (VV1) and on top of diaphragm (JJ) for VRP-600-SB-CH; for VRP-175-SB-CH and VRP-1000/300-SB-CH on top of thread extension (HH) as shown. Tighten assembly with one ½ - 20 nut (M). When placing the nut...
- Page 35 VRP-SB-CH Assembly Manual Step 27: Secure the assembly in step 26 inside the assembly in step 24 using four 8-32 x ½” SHCS (EEE). Hold the bottom piston (DD) in the vise when tightening the screws (EEE) Step 28: Place top spacer (MM) below the spring cartridge (VV1). Place the assembly on top of the body (C) and bolt it with six 1/4-20 x 2”...
- Page 36 VRP-SB-CH Assembly Manual NOTE: To assemble turn the adjusting screw clockwise. Step 29: Place O-ring-141 (HHH) in the cartridge cap (NNN) and place O-ring -115 (FFF) in seal neck (GGG). Tighten the seal neck (GGG) in the cartridge cap (NNN) as shown.
- Page 37 VRP-SB-CH Assembly Manual VRP-600-SB-CH VRP-SB-CH February 2000...
- Page 38 Maintenance Checklist Becker Operations Model VRP-SB-CH Valve Regulator Pilot Annual Maintenance Checklist Refer to Instruction Manual for VRP-SB-CH Valve Regulator Pilot (Bulletin VRP-SB-CH February 2000) unless otherwise indicated 1. ________ Clean and Inspect Adjustable Orifice Assemblies. Step 2, Page 16, Bulletin VRP-SB-CH February 2000 2.
- Page 39 While this information is presented in good faith fitness or any other matter with respect to the and believed to be accurate, Becker Precision products, nor as a recommendation to use any Equipment, Inc. does not guarantee satisfactory product or process in conflict with any patent.
Need help?
Do you have a question about the VRP-SB-CH and is the answer not in the manual?
Questions and answers