Table of Contents
Advertisement
Available languages
Available languages
Quick Links
Centronic
SunWindControl SWC52
Montage- und Betriebsanleitung
de
Sonnen-Wind-Steuergerät ohne Sensor
Wichtige Informationen für:
• den Monteur / • die Elektrofachkraft / • den Benutzer
Bitte entsprechend weiterleiten!
Diese Anleitung ist vom Benutzer aufzubewahren.
Assembly and Operating Instructions
en
Sun and wind controller without sensor
Important information for:
• Fitters / • Electricians / • Users
Please forward accordingly!
These instructions must be kept for future reference.
Notice de montage et d'utilisation
fr
Automatisme soleil-vent sans capteur
Informations importantes pour:
• l'installateur / • l'électricien / • l'utilisateur
À transmettre à la personne concernée !
Cette notice doit être conservée par l'utilisateur.
Montage- en gebruiksaanwijzing
nl
Zonne-wind-besturing zonder sensor
Belangrijke informatie voor:
• de monteur / • de elektricien / • de gebruiker
Aan de betreffende personen doorgeven!
De gebruiker dient deze gebruiksaanwijzing te bewaren.
Advertisement
Table of Contents

Related Manuals for Becker Centronic SunWindSet SWS42


Summary of Contents for Becker Centronic SunWindSet SWS42
- Page 1 Centronic SunWindControl SWC52 Montage- und Betriebsanleitung Sonnen-Wind-Steuergerät ohne Sensor Wichtige Informationen für: • den Monteur / • die Elektrofachkraft / • den Benutzer Bitte entsprechend weiterleiten! Diese Anleitung ist vom Benutzer aufzubewahren. Assembly and Operating Instructions Sun and wind controller without sensor Important information for: •...
-
Page 2: Table Of Contents
Inhaltsverzeichnis Allgemeines ....................4 Gewährleistung ..................4 Sicherheitshinweise .................. 5 Bestimmungsgemäße Verwendung ............5 Anzeigen- und Tastenerklärung ..............6 Montage/Anschluss .................. 7 Sensoren....................10 Erklärungen .....................10 Inbetriebnahme ..................15 Werkseinstellung ..................15 Programmierung ..................16 Technische Daten ................... 26 Batteriewechsel ..................26 Reinigung ....................26 Was tun, wenn...? .................. - Page 3 Sommaire Généralités ..................... 52 Prestation de Garantie ................52 Instructions de sécurité ................53 Utilisation prévue ..................53 Explication des textes d’affichage et des touches ........54 Montage/Branchement ................55 Capteurs ....................58 Explication des fonctions ................. 58 Mise en service ..................63 Paramétrage usine ..................
-
Page 4: Allgemeines
Montage- und Betriebsanleitung Allgemeines Die vom Werk mit aktuellem Datum und Uhrzeit (MEZ) ausgelieferte SWC52 steuert Ihren Sonnenschutz in Abhängigkeit von Sonneneinstrahlung und Wind- wert. Eine manuelle Bedienung der SWC52 ist jederzeit möglich. Durch den Batteriebetrieb ist auch bei abgezogenen Bedienteil eine Program- mierung möglich, da die Anzeige erhalten bleibt. -
Page 5: Sicherheitshinweise
Bestimmungen für nasse und feuchte Räume nach VDE 100, sind beim Anschluss einzuhalten. • Nur in trockenen Räumen verwenden. • Verwenden Sie nur unveränderte Becker Originalteile. • Halten Sie Personen aus dem Fahrbereich der Anlagen fern. • Halten Sie Kinder von Steuerungen fern. -
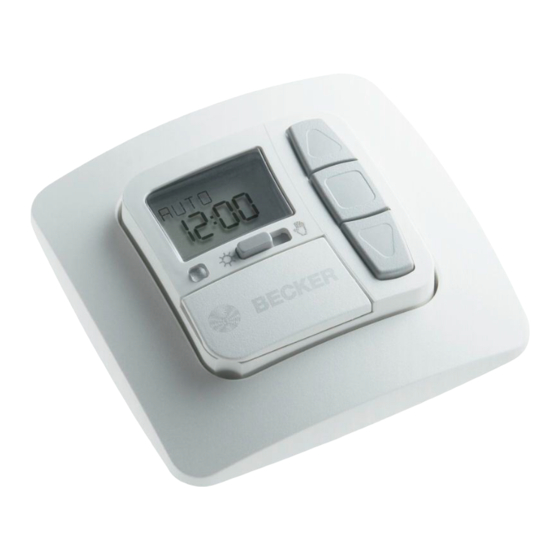
Page 6: Anzeigen- Und Tastenerklärung
Montage- und Betriebsanleitung Anzeigen- und Tastenerklärung... -
Page 7: Montage/Anschluss
Montage/Anschluss... - Page 8 • Anschluss nur durch eine autorisierte Fachkraft! • Wird mehr als ein Antrieb über die SWC52 angesteuert, müssen die Antriebe durch Relaissteuerungen entkoppelt werden. Diese Ent- kopplung entfällt bei Becker-Antrieben mit elektronischer Endab- schaltung. Beachten Sie den Schaltstrom des Gerätes.
- Page 9 Anschluss als Gruppensteuergerät Achtung Wird die Steuerung z.B. als Gruppensteuergerät verwendet, darf keine Brücke zwischen den Klemmen L und C eingelegt sein! 1. Schließen Sie das Netzteil der SWC52 wie folgt an: 2. Setzen Sie die Schutzkappen wieder auf das Netzteil. 3.
-
Page 10: Sensoren
Montage- und Betriebsanleitung Sensoren Hinweis Es können am Gerät verschiedene Sensoren angeschlossen werden (siehe Bedienungsanleitung der jeweiligen Sensorik). • Sonnensensor (Sonnensensor für Sonnen-Wind-Steuerung Centronic SensorControl SC41) • Windsensor (Windsensor für Sonnen-Wind-Steuerung Centronic SensorControl SC71) • Sonnen-Wind-Sensorik (Sonnen-Wind-Sensor für Sonnen-Wind-Steuerung Centronic SensorControl SC81) Erklärungen Hand/Auto Schiebeschalter In der Schiebeschalterstellung „Hand“... - Page 11 +/- Tasten Folgende Bedienungen sind über + und - möglich: • Menü -> Wert verändern • Auto-Betrieb -> Informationen abfragen • + Taste -> Nächste automatische Schaltzeit s • - Taste -> Nächste automatische Schaltzeit t MENUE-Taste Durch Drücken der MENUE-Taste gelangen Sie in die Menüübersicht oder in den Betriebsmodus.
- Page 12 Montage- und Betriebsanleitung Menü Einstellungen Menü EINSTELLUNG Im Menü EINSTELLUNG haben Sie folgende Möglichkeiten: • SONNE t (bei angeschlossenem Sensor) • VERZÖGERUNG t (nur bei Expert Modus ON und angeschlossenem Sen- sor) • SONNE s (bei angeschlossenem Sensor) • VERZÖGERUNG s (nur bei Expert Modus ON und angeschlossenem Sen- sor) •...
- Page 13 ENDLAGE Als Endlage wird der Punkt beschrieben, an dem sich die Sonnenschutzanlage in der eingefahrenen oder ausgefahrenen Position befindet. ZWISCHENPOSITION Die Zwischenposition ist eine frei wählbare Position der Sonnenschutzanlage, zwischen der eingefahrenen oder ausgefahrenen Endlage. Diese Position kann nach der Programmierung aus der eingefahrenen Position angefahren werden. Dazu drücken Sie die AUSFAHR-Taste zweimal kurz nacheinander.
- Page 14 Montage- und Betriebsanleitung SO/WI SO/WI bezeichnet automatische Sommer-/Winterzeitumschaltung. Werkseinstellung ist ON; die SWC52 passt sich automatisch an. Menü Funktion Dieser Modus ist nur für ausgebildetes Fachpersonal bestimmt (erscheint nur bei abgezogenem Bedienteil) Im Menü FUNKTION haben Sie die Möglichkeit, folgende Funktionen einzustel- len: - MARKISE/JALOUSIE (Auswahl des Behangs) - ANTRIEBS-/GRUPPENSTEUERGERAET...
-
Page 15: Inbetriebnahme
Inbetriebnahme Mit dem ersten Tastendruck „wecken“ Sie die SWC52 auf. Sie können nun mit den +/- Tasten die Sprache wählen und diese mir der OK Taste übernehmen. Die SWC52 befindet sich im Automatikmodus. Werkseinstellung UHR/DAT: aktuelle MEZ und aktuelles Datum EINSTELLUNG: Schwellenwert SONNE t 04 und SONNE s 03 VERZÖGERUNG t 3 Min. -
Page 16: Programmierung
Montage- und Betriebsanleitung Programmierung Menüübersicht 1. Drücken Sie die MENUE-Taste UHR/DAT erscheint. 2. Um weitere Menüs auszuwählen, drücken Sie die +/- Tasten. 3. Drücken Sie die MENUE-Taste, um in den Betriebsmodus zu gelangen. UHR/DAT (Uhrzeit und Datum einstellen) 1. Drücken Sie die MENUE-Taste, UHR/DAT erscheint. 2. - Page 17 PROGRAMM (Schaltzeit st oder Sperrzeit st) 1. Drücken Sie die MENUE-Taste. 2. Um das Menü PROGAMM auszuwählen, drücken Sie die + Taste bis PRO- GAMM erscheint. Hinweis Im Menü FUNKTION können Sie zwischen Schaltzeiten oder Sperrzei- ten wählen. Bei der Displayanzeige --:-- (zwischen der Uhrzeit 23:59 und 00:00) wird die Schaltzeit nicht ausgeführt.
- Page 18 Montage- und Betriebsanleitung EINSTELLUNG SONNE (VERZÖGERUNG) Drücken Sie die MENUE-Taste. Um das Menü EINSTELLUNG auszuwählen, drücken Sie die + Taste bis EINSTELLUNG erscheint. Bestätigen Sie mit OK Hinweis Nur wenn ein Lichtsensor angeschlossen ist, wird Ihnen dieses Dialog- fenster angezeigt. SONNE t erscheint.
- Page 19 EINSTELLUNG ZWISCHENPOSITION, TUCHSPANNUNG/WENDUNG, WINTER OFF/ON 1. Sie haben die Menüpunkte SONNE t (VERZÖGERUNG t) bestätigt. ZWI- SCHENPOSITION erscheint. 2. Mit der +/- Taste können Sie die Fahrzeit zur ZWISCHENPOSITION einstellen. Die Angabe der Fahrzeit erfolgt in Sekunden oder Sie fahren die ZWISCHEN- POSITION mit der AUSFAHR-/EINFAHR-Taste aus der oberen Endlage an.
- Page 20 Montage- und Betriebsanleitung EINSTELLUNG WINDUEBERWACHUNG, ZEIT ENDLAGE, ZEIT ZWISCHENPOSITION, ZEIT TUCHSPANNUNG/WENDUNG 1. Sie haben den Menüpunkt WINTER OFF/ON bestätigt. WINDUEBERWACHUNG erscheint. 2. Mit der +/- Taste können sie den Windwert verstellen. (Die linken beiden Stel- len im Display zeigen den aktuellen Windwert an) 3.
- Page 21 EINSTELLUNG LICHT ZWISCHENPOSITION, LICHT TUCHSPANNUNG/WENDUNG, LICHT ENDLAGE 1. Sie haben den Menüpunkt ZEIT ENDLAGE bestätigt. LICHT ZWISCHENPOSI- TION erscheint. 2. Mit der +/- Taste können Sie zwischen LICHT ZWISCHENPOSITION, LICHT TUCHSPANNUNG/WENDUNG, LICHT ENDLAGE auswählen. 3. Bestätigen Sie Ihre Auswahl mit OK. 4.
- Page 22 Montage- und Betriebsanleitung EINSTELLUNG TEST MODUS, DEUTSCH, SO/WI (Sprachauswahl, Automatische Sommer-/Winterzeitumstellung) 1. Sie haben den Menüpunkt LICHT ZWISCHENPOSITION bestätigt. TEST MO- DUS ON/OFF erscheint. 2. Mit der +/- Taste können Sie den TEST MODUS aktivieren oder deaktivieren (ON/OFF). Bestätigen Sie mit OK. DEUTSCH erscheint. Hinweis Der TEST MODUS wird beendet, wenn Sie die OK-Taste im Betriebs- modus drücken.
- Page 23 FUNKTION (nur bei abgezogenem Bedienteil, nur für Fachpersonal) MARKISE/JALOUSIE, ANTRIEBSSTEUERGERAET/ GRUPPENSTEUERGERAET, LAUFZEIT (Auswahl des Behanges, Auswahl als Antriebssteuergerät/Gruppensteuerge- rät, Laufzeit der Markise/Jalousie) 1. Drücken Sie die MENUE-Taste. 2. Um das Menü FUNKTION auszuwählen, drücken Sie die + Taste bis FUNK- TION erscheint.
- Page 24 Montage- und Betriebsanleitung FUNKTION (nur bei abgezogenem Bedienteil, nur für Fachpersonal) EXTERN ON/OFF/SCHALTER, NOTSIGNAL ON/OFF (Verarbeitung externer Signale, Verarbeitung von Notsignalen) 1. Sie haben die Funktion LAUFZEIT bestätigt. EXTERN SCHALTER erscheint. (EXTERN SCHALTER/ON/OFF bezeichnet die externen Steuersignale. Werkseinstellung ist EXTERN SCHALTER) 2.
- Page 25 FUNKTION (nur bei abgezogenem Bedienteil, nur für Fachpersonal) ERSTINBETRIEBNAHME, RELAIS, GES-ZEIT (Datum der Erstinbetriebnahme, Relaisschalthäufigkeit, Gesamtlaufzeit) Sie haben die Funktion NOTSIGNAL ON/OFF bestätigt SPERRZEIT/ SCHALTZEIT erscheint. Mit der +/- Taste können Sie zwischen SPERRZEIT/SCHALTZEIT auswäh- len. Bestätigen Sie Ihre Auswahl mit OK. EXPERTEN MODUS OFF/ON er- scheint.
-
Page 26: Technische Daten
Montage- und Betriebsanleitung Technische Daten Nennspannung 230-240 V AC / 50-60 Hz 5 A /250 V AC bei cos ϕ =1 Schaltstrom Batterietyp CR 2032 Schutzart IP 20 Schutzklasse (bei bestimmungsgemäßer Montage) Zulässige Umgebungstemperatur 0 bis +55 °C Montageart Unterputz Ø 58 mm Wandeinbau Aufputz in entsprechendem AP- Gehäuse Batteriewechsel... -
Page 27: Was Tun, Wenn
Was tun, wenn...? Störung Ursache Abhilfe Antrieb läuft nicht. Falscher Anschluss. Anschluss prüfen. Antrieb läuft in die Falscher Anschluss. Drähte s und t am falsche Richtung. Netzteil tauschen. Die automatischen Fahr- Der Schiebeschalter Stellen Sie den befehle werden nicht steht auf Handbetrieb. Schiebeschalter auf ausgeführt. -
Page 28: General
Assembly and Operating Instructions General The SWC52, which is pre-programmed ex works with the current date and time (CET), operates your sun protection system on the basis of sunlight intensity and wind speed. The SWC52 can be operated manually at any time. This device runs on battery power, meaning it can even be programmed if the operating device has been removed, as the display does not disappear. -
Page 29: Safety Information
VDE 100 are to be observed when the system is connected. • Use in dry rooms only. • Use only unmodified Becker original parts. • Keep persons away from the systems guide track. • Keep away from controls. -
Page 30: Explanation Of Displays And Buttons
Assembly and Operating Instructions Explanation of displays and buttons... -
Page 31: Assembly/Connection
Assembly/connection... - Page 32 • If more than one drive is controlled using the SWC52, the drives must be decoupled by relay controls. This decoupling is not applicable to Becker drives with electronic limit stop. Always observe the switched current of the device. 1. Connect the power supply unit to the SWC52 as follows: 2.
- Page 33 Connection as a group controller Attention If the control is used as a group control device, for example, no bridge can be inserted between the L and C terminals! 1. Connect the power supply unit to the SWC52 as follows: 2.
-
Page 34: Sensors
Assembly and Operating Instructions Sensors Note Various types of sensors can be connected to the device (please refer to the relevant operating instructions for your chosen sensor). • Sun sensor (Sun sensor for sun and wind control device Centronic Sensor- Control SC41) •... - Page 35 +/- buttons The following operations are possible using the + and - buttons: • Menu -> change value • Auto mode -> request information • + button -> next automatic switching time s • - button -> next automatic switching time t MENU button By pressing the MENU button, you can see an overview of the menu or the op- erating mode.
- Page 36 Assembly and Operating Instructions Settings menu SETTING menu The following settings can be made via the SETTING menu: • SUN t (if a sensor is connected) • DELAY t (only possible if expert mode is activated and a sensor is connect- •...
- Page 37 END LIMIT The end limit is the point the sun protection system reaches when fully retracted or extended. INTERMEDIATE POSITION The intermediate position lies between the (retracted and extended) end limits of the sun protection system and can be freely selected. The sun protection system is moved into this position from the retracted end limit position after programming.
- Page 38 Assembly and Operating Instructions SUMMER/WINTER SUMMER/WINTER refers to the automatic clock adjustment for daylight sav- ing changes. The factory setting is ON; the SWC52 device adjusts the clock automatically. Function menu This mode is intended for qualified staff only. (Only displayed when the operat- ing device has been removed.) In the FUNCTION menu the following functions can be set: - AWNING/VENETIAN BLINDS (select curtain/canopy)
-
Page 39: Initial Operation
Initial operation To activate the SWC52 control device, touch any button on the device. To select the language required use the +/- buttons and confirm your selection with the OK button. The SWC52 is now in automatic operating mode. Factory settings TIME/DATE: current CET and current date SETTING:... -
Page 40: Programming
Assembly and Operating Instructions Programming Operating mode – overview of menu 1. Press the MENU button until TIME/DATE appears. 2. To select further menus, press the +/- buttons. 3. Press the MENU button to switch to operating mode. TIME/DATE (to set the time and date) 1. - Page 41 PROGRAM (Switching timest or blocking timest) 1. Press the MENU button. 2. To select the PROGAM menu press the + button until PROGAM appears. Note The FUNCTION menu can be used to choose between switching times and blocking times. Programming will not take effect if the sign: --:-- is showing on your display.
- Page 42 Assembly and Operating Instructions SETTING SUN (DELAY) Press the MENU button. To select the SETTING menu press the + button until SETTING appears. Press OK to confirm Note This dialogue field will only appear if a sun sensor is connected. SUN t will appear.
- Page 43 SETTING INTERMEDIATE POSITION, FABRIC TENSION/TILT, WINTER OFF/ON 1. You have confirmed the menu items SUN t (DELAY t). INTERMEDIATE PO- SITION appears. 2. The switching time for the INTERMEDIATE POSITION can be set using the +/- buttons. The switching time can be set in a matter of seconds. Alternatively, you can move the shutter from the upper end position into the INTERMEDI- ATE POSITION using the EXTEND/RETRACT buttons.
- Page 44 Assembly and Operating Instructions SETTING WIND MONITORING, TIME END POSITION, TIME INTERM POS, TIME FABRIC TEN/TILT 1. You have confirmed the menu option WINTER OFF/ON. WIND MONITORING appears. 2. Use the +/- button to adjust the wind setting. (The two left-hand figures on the display show the current wind setting) 3.
- Page 45 SETTING LIGHT INTERM POS, LIGHT FABRIC TEN/TILT, LIGHT END POSITION 1. You have confirmed the menu option TIME END POSITION. LIGHT INTERM POS appears. 2. Use the +/- button to choose between LIGHT INTERM POS, LIGHT FABRIC TEN/TILT, LIGHT END POSITION. 3.
- Page 46 Assembly and Operating Instructions SETTING TEST MODE, ENGLISH, SUMMER/WINTER (Language selection, automatic clock adjustment for daylight saving changes) 1. You have confirmed the menu option LIGHT INTERM POS. TEST MODE ON/ OFF appears. 2. Use the +/- button to activate or deactivate the TEST MODE (ON/OFF). Press OK to confirm.
- Page 47 FUNCTION (Only if the operating device has been removed. To be carried out by qualified staff only!) AWNING/VENETIAN BLIND, DRIVE CONTROLLER/ GROUP CONTROLLER, RUNNING TIME (Awning/venetian blind selection, drive controller/group controller selection, awning/venetian blind running time) Press the MENU button. To select the FUNCTION menu press the + button until FUNCTION appears.
- Page 48 Assembly and Operating Instructions FUNCTION (Only if the operating device has been removed. To be carried out by qualified staff only!) EXTERNAL ON/OFF/SWITCH, ALARM SIGNAL ON/OFF (Processing external signals, processing alarm signals) 1. You have confirmed the RUNNING TIME function. EXTERNAL SWITCH ap- pears.
- Page 49 FUNCTION (Only if the operating device has been removed. To be carried out by qualified staff only!) INITIAL OPERATION, RELAY, TOTAL RUNNING TIME (Date of initial operation, relay switching rate, total running time) You have confirmed the function ALARM SIGNAL ON/OFF. BLOCKING TIME/SWITCHING TIME appears.
-
Page 50: Technical Data
Assembly and Operating Instructions Technical data Nominal voltage 230-240 V AC / 50-60 Hz 5 A /250 V AC FOR cos ϕ=1 Switched current Battery type CR 2032 System of protection IP 20 Protection class (In accordance with the assembly specifications) Permissible ambient temperature 0 to +55 °C Type of installation... -
Page 51: What To Do If
What to do if...? Problem Cause Remedy Drive is not functioning. Faulty connection. Check the connection. Drive moves in the Faulty connection. Exchange s and t wrong direction. wires in the power supply unit. Automatic control com- The sliding switch is set Set the sliding switch to mands are not carried to manual mode. -
Page 52: Généralités
Notice de montage et d’utilisation Généralités La SWC52 livré par l’usine avec la date et l’heure actuelles (heure de l’Europe centrale) pilote votre protection solaire en fonction du rayonnement du soleil et de la vitesse du vent. Une commande manuelle du SWC52 est possible à tout moment. La programmation est possible lorsque l’élément de commande est enlevé... -
Page 53: Instructions De Sécurité
VDE 100. • A utiliser uniquement dans des locaux secs. • Utilisez uniquement des pièces originales de Becker qui n’ont subi aucune modification. • Veillez à ce que personne ne se tienne dans la zone de déploiement des installations. -
Page 54: Explication Des Textes D'affichage Et Des Touches
Notice de montage et d’utilisation Explication des textes d’affichage et des touches... -
Page 55: Montage/Branchement
Montage/Branchement... - Page 56 • Si la SWC52 commande plus d’un moteur, les moteurs doivent être découplés par des commutations à relais. Ce découplage n’est pas nécessaire pour les moteurs Becker avec fin de course électroni- que. Observez le courant de commutation de l’appareil.
- Page 57 Branchement comme appareil de commande de groupe Attention Si la commande est par exemple utilisée comme appareil de comman- de de groupe, il convient de ne pas mettre de pont en place entre les bornes L et C ! 1. Pour brancher le bloc d’alimentation de la SWC52, procédez comme suit : 2.
-
Page 58: Capteurs
Notice de montage et d’utilisation Capteurs Remarque : Différents capteurs peuvent être branchés à l’appareil, cf. instructions d’utilisation des capteurs concernés. • Capteur solaire (capteur solaire pour commande soleil-vent Centronic Sen- sorControl SC41) • Capteur vent (Capteur vent pour commande soleil-vent Centronic Sensor- Control SC71) •... - Page 59 Touches +/- Les commandes suivantes sont possibles en appuyant sur + et - : • Menu -> modifier la valeur • Fonctionnement Auto -> demander des informations • Touche + -> Prochain horaire de déclenchement automatique s • Touche - -> Prochain horaire de déclenchement automatique t Touche MENU Appuyez sur la touche MENU pour accéder à...
- Page 60 Notice de montage et d’utilisation Menu réglage Menu RÉGLAGE Le menu REGLAGE vous offre les possibilités suivantes : • SOLEIL t (avec capteur connecté) • DÉLAI DE DÉCLENCHEMENT t (uniquement en mode expert ON et avec capteur connecté) • SOLEIL s (avec capteur connecté) •...
- Page 61 POSITION FINALE La position finale est le point auquel se trouve la protection solaire en position haute ou basse. POSITION INTERMÉDIAIRE La position intermédiaire est une position de la protection solaire qui peut être librement sélectionnée entre la position finale supérieure et la position finale inférieure.
- Page 62 Notice de montage et d’utilisation ETE/HIVER ETE/HIVER désigne la commutation automatique entre les heures d’été et d’hi- ver. Le réglage usine est ON ; la SWC52 s’adapte automatiquement. Menu Fonction Ce mode est réservé exclusivement au personnel spécialisé ! (n’apparaît que lorsque l’élément de commande est enlevé) Le menu FONCTION permet de régler les fonctions suivantes : - MARQUISE/STORE (sélection du tablier) - APP.
-
Page 63: Mise En Service
Mise en service Avec le premier appui sur une touche, vous « réveillez » la SWC52. Vous pouvez maintenant sélectionner la langue avec les touches +/- et la confirmer avec la touche OK. La SWC52 se trouve en mode automatique. Paramétrage usine HEURE/DATE : heure actuelle de l’Europe centrale et date actuelle... -
Page 64: Programmation
Notice de montage et d’utilisation Programmation Vue d’ensemble du menu 1. Appuyez sur la touche MENU, HEURE/DATE apparaît. 2. Pour sélectionner d’autres menus, appuyez sur les touches +/-. 3. Appuyez sur la touche MENU pour accéder au mode de fonctionnement. HEURE/DATE (régler l’heure et la date) 1. - Page 65 PROGRAMME (heure de déclenchement st ou heure de blocage st) 1. Appuyez sur la touche MENU. 2. Pour sélectionner le menu PROGRAMME, appuyez sur la touche + jusqu’à ce que PROGRAMME apparaisse. Remarque Dans le menu FONCTION, vous pouvez choisir entre les heures de dé- clenchement et les heures de blocage.
- Page 66 Notice de montage et d’utilisation REGLAGE SOLEIL (DELAI) Appuyez sur la touche MENU. Pour sélectionner le menu REGLAGE, appuyez sur la touche + jusqu’à ce que REGLAGE apparaisse. Confirmez avec OK Remarque Cette fenêtre de dialogue ne s’ouvre que lorsqu’un capteur de lumino- sité...
- Page 67 REGLAGE POS. INTERM, TENS. TOILE/INVERSION, HIVER OFF/ON 1. Vous avez confirmé les points du menu SOLEIL t (DELAI t). POS. INTERM apparaît. 2. Vous pouvez régler avec la touche +/- l’horaire de marche pour la POS. IN- TERM. L’horaire de marche est indiqué en secondes ou vous atteignez la POS.
- Page 68 Notice de montage et d’utilisation REGLAGE DETECTION DU VENT, HEURE POS. FINALE, HEURE POS. INTERM, HEURE TENS. TOILE/INVERSION 1. Vous avez confirmé les points de menu HIVER OFF/ON DETECTION DU VENT apparaît. 2. Vous pouvez régler la valeur de la vitesse du vent avec la touche +/-. (Les deux chiffres de gauche sur l’écran montrent la vitesse du vent actuelle) 3.
- Page 69 REGLAGE LUMIERE POS. INTERM, LUMIERE TENS. TOILE/INVERSION, LUMIERE POS. FINALE 1. Vous avez confirmé le point de menu HEURE POS. FINALE. LUMIERE POS. INTERM apparaît. 2. Vous pouvez choisir avec la touche +/- entre LUMIERE POS. INTERM, LU- MIERE TENS. TOILE/INVERSION, LUMIERE POS. FINALE. 3.
- Page 70 Notice de montage et d’utilisation REGLAGE MODE TEST, FRANCE, ETE/HIVER (Sélection de la langue, commutation automatique été/hiver) 1. Vous avez confirmé le point de menu LUMIERE POS. INTERM. Le MODE TEST ON/OFF apparaît. 2. Vous pouvez activer ou désactiver le MODE TEST avec la touche +/- (ON/ OFF).
- Page 71 FONCTION (seulement lorsque l’élément de commande est enlevé, seulement pour le per- sonnel spécialisé) STORE BANNE/VENITIEN, APP. COMM MOT / COMMANDE DE GROUPE, TEMPS DE FONCTIONNEMENT (Sélection du tablier, sélection comme appareil de commande de moteur / appareil de commande de groupe, temps de fonctionnement du store banne/ vénitien) Appuyez sur la touche MENU.
- Page 72 Notice de montage et d’utilisation FONCTION (seulement lorsque l’élément de commande est enlevé, seulement pour le per- sonnel spécialisé) COMMUT EXT/EXTERNE ON/ EXTERNE OFF, SIGNAL D‘ALARME ON/OFF (Traitement de signaux externes, traitement de signaux d’alarme) 1. Vous avez confirmé la fonction TEMPS DE FONCTIONNEMENT. COMMUT EXT apparaît.
- Page 73 FONCTION (seulement lorsque l’élément de commande est enlevé, seulement pour le per- sonnel spécialisé) 1-IERE MISE EN SERVICE, RELAIS, TEMPS TOTAL (Date de la 1ère mise en service, fréquence de commutation des relais, temps total de fonctionnement) Vous avez confirmé la fonction SIGNAL D‘ALARME ON/OFF. HEURE DE BLOCAGE / HEURE DE DECLENCHEMENT apparaît.
-
Page 74: Caractéristiques Techniques
Notice de montage et d’utilisation Caractéristiques techniques Tension nominale 230-240 V CA / 50-60 Hz 5 A /250 V CA pour cos ϕ =1 Courant de commutation Type de pile CR 2032 Type de protection IP 20 Classe de protection (selon le montage conforme aux prescriptions) Température ambiante admissible 0 à... -
Page 75: Que Faire Si
Que faire si ... ? Anomalie Cause Mesures à prendre Le moteur ne marche Branchement incor- Contrôler le branchement. pas. rect. Le moteur marche Branchement Remplacer les fils s et t du dans le mauvais incorrect. bloc d’alimentation. sens. Les commandes au- Le curseur est sur Mettez le curseur sur mode tomatiques ne sont... -
Page 76: Algemeen
Montage- en gebruiksaanwijzing Algemeen De door de fabriek met actuele datum en tijd (MET) afgeleverde SWC52 be- stuurt de zonwering afhankelijk van zoninstraling en windwaarde. Handmatige bediening van de SWC52 is altijd mogelijk. Door de werking op batterijen is ook bij afgenomen bedieningsgedeelte pro- grammeren nog mogelijk, aangezien het display zichtbaar blijft. -
Page 77: Veiligheidsrichtlijnen
Veiligheidsrichtlijnen Waarschuwing! • Gevaar voor verwonding door elektrische schok. • Aansluitingen op het 230 V elektriciteitsnet moeten door een geau- toriseerd vakman worden uitgevoerd. • Haal voor de montage de spanning van de aansluitkabel. • Bij het aansluiten dienen de voorschriften van het plaatselijke ener- giebedrijf alsmede de bepalingen voor natte en droge ruimten vol- gens VDE 100 te worden aangehouden. -
Page 78: Verklaring Van Displays En Toetsen
Montage- en gebruiksaanwijzing Verklaring van displays en toetsen... -
Page 79: Montage /Aansluiting
Montage /Aansluiting... - Page 80 • Wanneer meer dan één buismotor via de SWC52 wordt geregeld, ontkoppel dan buismotoren dan d.m.v. relais. Deze ontkoppeling vervalt bij Becker buismotoren met elektronische eindschakelaar. Let op de schakelstroom van het apparaat. 1. Sluit het voedingsgedeelte van de SWC52 als volgt aan: 2.
- Page 81 Aansluiten als groepsbediening Waarschuwing Wanneer de besturing bijv. als groepsbesturing wordt gebruikt, mag er geen brug tussen de klemmen L en C zijn geplaatst! 1. Sluit het voedingsgedeelte van de SWC52 als volgt aan: 2. Plaats de beschermkap weer over de voeding. 3.
-
Page 82: Sensoren
Montage- en gebruiksaanwijzing Sensoren Aanwijzing Op het apparaat kunnen diverse sensoren worden aangesloten , zie ge- bruiksaanwijzing van de betreffende sensor. • Zonnesensor (Zonnesensor voor zon-windbesturing Centronic SensorCon- trol SC41) • Windsensor (Windsensor voor zon-windbesturing Centronic SensorControl SC71) • Zon-windsensoriek (Zonne-windsensor voor zon-windbesturing Centronic SensorControl SC81) Verklaring van de functies Hand/Auto schuifschakelaar... - Page 83 +/- toetsen De + en - toets kennen de volgende bedieningsmogelijkheden: • Menu -> waarde veranderen • Auto-modus -> informatie opvragen • + toets -> volgende automatische schakeltijd s • - toets -> volgende automatische schakeltijd t MENU-toets Door het indrukken van de MENU-toets komt u in het menuoverzicht of in de bedrijfsmodus.
- Page 84 Montage- en gebruiksaanwijzing Menu Instellingen Menu INSTELLING In het menu INSTELLING zijn er de volgende mogelijkheden: • ZON t (bij aangesloten sensor) • VERTRAGING t (alleen in Expert Modus ON en met aangesloten sensor) • ZON s (bij aangesloten sensor) •...
- Page 85 EINDSTAND Als eindstand wordt het punt beschreven waarop de zonweringinstallatie zich in de bovenste of onderste positie bevindt. TUSSENPOSITIE De tussenpositie is een vrij te kiezen positie van de zonweringinstallatie tus- sen de bovenste en onderste eindstand. Na de programmering kan deze positie vanuit de bovenste stand worden bereikt.
- Page 86 Montage- en gebruiksaanwijzing ZO/WI ZO/WI geeft de automatische omschakeling van zomer-/wintertijd aan. De fa- brieksinstelling is ON; de SWC52 past zich automatisch aan. Menu Functie Deze modus is alleen voor geschoolde vaklieden bestemd (verschijnt alleen bij afgenomen bedieningsgedeelte) In het menu FUNCTIE bestaat de mogelijkheid de volgende functies in te stel- len: - ZONWERING/JALOEZIE (selectie type zonwering) - INDIVIDUELE-/GROEPSBESTURING...
-
Page 87: Ingebruikname
Ingebruikname Met de eerste druk op de toets, wordt de SWC52 „gewekt“. Het is nu mogelijk om met de +/- toetsen de taal te kiezen en deze met de OK-toets over te nemen. De SWC52 bevindt zich in de automatische modus. Fabrieksinstelling TIJD/DAT: actuele GMT+1 en actuele datum... -
Page 88: Programmering
Montage- en gebruiksaanwijzing Programmering Menuoverzicht 1. Druk op de MENU-toets TIJD/DAT verschijnt. 2. Om andere menu‘s te kiezen op de +/- toetsen drukken. 3. Druk op de MENU-toets, om in de bedrijfsmodus te komen. TIJD/DAT (tijd en datum instellen) 1. Druk op de MENU-toets, TIJD/DAT verschijnt. 2. - Page 89 PROGRAMMA (Schakeltijd t of spertijd st) 1. Druk op de MENU-toets. 2. Om het menu PROGAMMA te selecteren, op de + -toets drukken tot PRO- GAMMA verschijnt. Aanwijzing In het menu FUNCTIE is het mogelijk tussen schakeltijden en spertijden te kiezen. De programmering wordt niet geactiveerd als het teken “--:--“...
- Page 90 Montage- en gebruiksaanwijzing INSTELLING ZON (VERTRAGING) Druk op de MENU-toets. Om het menu INSTELLING te selecteren, de + toets indrukken tot INSTEL- LING verschijnt. Bevestig met OK Aanwijzing Alleen wanneer een lichtsensor is aangesloten, wordt dit diialoogven- ster getoond. ZON t verschijnt. Met de +/- toets kan de zonwaarde worden gewijzigd.
- Page 91 INSTELLING TUSSENPOSITIE, DOEKSPANNING/KANTELEN, WINTER OFF/ON 1. De menu-items ZON t (VERTRAGING t) zijn bevestigd. TUSSENPOSITIE verschijnt. 2. Met de +/- toets kan de looptijd naar TUSSENPOSITIE worden ingesteld. De aanduiding van de looptijd gaat in seconden of ga met de OP-/NEER-toets vanuit de bovenste eindstand naar de TUSSENPOSITIE.
- Page 92 Montage- en gebruiksaanwijzing INSTELLING WINDBEVEILIGING, TIJD EINDSTAND, TIJD TUSSENPOSITIE, TIJD DOEK- SPANNING/KANTELEN 1. Het menu-item WINTER OFF/ON is bevestigd. WINDBEVEILIGING verschijnt. 2. Met de +/- toets kan de windwaarde worden gewijzigd. (De twee linker plaat- sen in het display geven de actuele windwaarde aan) 3.
- Page 93 INSTELLING LICHT TUSSENPOSITIE, LICHT DOEKSPANNING/KANTELEN, LICHT EIND- STAND 1. Het menu-item TIJD EINDSTAND is bevestigd. LICHT TUSSENPOSITIE ver- schijnt. 2. Met de +/- toets kan gekozen worden tussen LICHT TUSSENPOSITIE, LICHT DOEKSPANNING/KANTELEN, en LICHT EINDSTAND. 3. Bevestigd de keuze met OK. 4.
- Page 94 Montage- en gebruiksaanwijzing INSTELLING TEST MODUS, NEDERLANDS, ZO/WI (Taalkeuze, automatische omschakeling zomer-/wintertijd) 1. Het menu-item LICHT TUSSENPOSITIE is bevestigd. TEST MODUS ON/OFF verschijnt. 2. Met der +/- toets kan de TEST MODUS worden geactiveerd of gedeactiveerd (ON/OFF). Bevestig met OK. NEDERLANDS verschijnt. Aanwijzing De TEST MODUS wordt beeïndigd wanneer de OK-toets in bedrijfsmo- dus wordt ingedrukt.
- Page 95 FUNCTIE (alleen bij afgenomen bedieningsgedeelte, uitsluitend voor geschoold perso- neel) ZONWERING/JALOEZIE, MOTORSTURING/ GROEPSBESTURING, LOOPTIJD (Selectie type zonwering, selectie van motorsturing/groepsbesturing, looptijd van de zonwering/jaloezie) Druk op de MENU-toets. Om het menu FUNCTIE te selecteren, de + -toets indrukken tot FUNCTIE verschijnt.
- Page 96 Montage- en gebruiksaanwijzing FUNCTIE (alleen bij afgenomen bedieningsgedeelte, uitsluitend voor geschoold perso- neel) EXTERN ON/OFF/SCHAKELAAR, NOODSIGNAAL ON/OFF (Verwerking van externe signalen, verwerking van noodsignalen) 1. De functie LOOPTIJD is bevestigd. EXTERN SCHAKELAAR verschijnt. (EXTERN SCHAKELAAR/ON/ OFF geeft de externe stuursignalen aan. Fa- brieksinstelling is EXTERN SCHAKELAAR) 2.
- Page 97 FUNCTIE (alleen bij afgenomen bedieningsgedeelte, uitsluitend voor geschoold perso- neel) EERSTE INGEBRUIKNAME, RELAIS, TOTALE TIJD (Datum van eerste ingebruikname, relais schakelfrequentie, totale looptijd) De functie NOODSIGNAAL ON/OFF is bevestigd SPERTIJD/SCHAKELTIJD verschijnt. Met de +/- toets is het mogelijk tussen SPERTIJD/SCHAKELTIJD te kie- zen.
-
Page 98: Technische Gegevens
Montage- en gebruiksaanwijzing Technische gegevens Nominale spanning 230-240 V AC / 50-60 Hz 5 A /250 V AC bei cos ϕ =1 Schakelstroom Batterijtype CR 2032 Beschermingsklasse IP 20 Veiligheidsklasse (na montage volgens voorschriften) II Toegelaten omgevingstemperatuur 0 bis +55 °C Soort montage Inbouw Ø... -
Page 99: Wat Te Doen, Als
Wat te doen, als ...? Storing Oorzaak Verhelpen Buismotor loopt niet. Verkeerde aansluiting. Aansluiting controleren. Buismotor loopt in de Verkeerde aansluiting. Bedrading s en t aan verkeerde richting. voeding omwisselen. De automatische scha- De schuifschakelaar Zet de schuifschakelaar kelcommando‘s worden staat op handbedie- op autom. - Page 100 Becker-Antriebe GmbH 35764 Sinn/Germany www.becker-antriebe.com...
Need help?
Do you have a question about the Centronic SunWindSet SWS42 and is the answer not in the manual?
Questions and answers