
Related Manuals for BK Precision 2540C Series


Summary of Contents for BK Precision 2540C Series
- Page 1 Series: 2540C 2 CH Digital Storage Oscilloscopes Mixed Signal Oscilloscopes USER MANUAL...
-
Page 2: Safety Summary
Safety Summary The following safety precautions apply to both operating and maintenance personnel and must be followed during all phases of operation, service, and repair of this instrument. Before applying power to this instrument: Read and understand the safety and operational information in this manual. ... - Page 3 This oscilloscope can only be used for measurements within its specified measurement category. Do not use this instrument in an electrical environment with a higher category rating than what is specified in this manual for this instrument. You must ensure that each accessory you use with this instrument has a category rating equal to or higher than the instrument's category rating to maintain the instrument's category rating.
- Page 4 The instrument is designed to be used in office-type indoor environments. Do not operate the instrument In the presence of noxious, corrosive, or flammable fumes, gases, vapors, chemicals, or finely-divided particulates. In relative humidity conditions outside the instrument's specifications. ...
- Page 5 Do not clean the instrument, its switches, or its terminals with contact cleaners, abrasives, lubricants, solvents, acids/bases, or other such chemicals. Clean the instrument only with a clean dry lint-free cloth or as instructed in this manual. Not for critical applications. This instrument is not authorized for use in contact with the human body or for use as a component in a life-support device or system.
- Page 6 Cooling fans This instrument contains one or more cooling fans. For continued safe operation of the instrument, the air inlet and exhaust openings for these fans must not be blocked nor must accumulated dust or other debris be allowed to reduce air flow. Maintain at least 25 mm clearance around the sides of the instrument that contain air inlet and exhaust ports.
-
Page 7: Compliance Statements
Compliance Statements Disposal of Old Electrical & Electronic Equipment (Applicable in the European Union and other European countries with separate collection systems) This product is subject to Directive 2002/96/EC of the European Parliament and the Council of the European Union on waste electrical and electronic equipment (WEEE), and in jurisdictions adopting that Directive, is marked as being put on the market after August 13, 2005, and should not be disposed... - Page 8 CE Declaration of Conformity This instrument meets the requirements of the Low Voltage Directive (EC Directive 2006/95/EC), Electromagnetic Compatibility Directive (EC Directive 2004/108/EC) and their amendments. Safety Directive EN 61010-1: 2010 EMC Directive EN 61326-1:2013 EN 61000-3-2:2006+A2:2009 EN 61000-3-3: 2008 EN 61000-4-2:2009 EN 61000-4-3:2006+A1 :2008 EN 61000-4-4:2004+A1 :2010...
-
Page 9: Safety Symbols
Safety Symbols Refer to the user manual for warning information to avoid hazard or personal injury and prevent damage to instrument. Electric Shock hazard Alternating current (AC) Chassis (earth ground) symbol. Ground terminal On (Power). This is the In position of the power switch when instrument is ON. -
Page 10: Table Of Contents
Contents Safety Summary ........................i Compliance Statements ....................... vi Safety Symbols ........................... viii Notations ..........................viii General Information ......................1 Product Overview ......................1 Package Contents ......................1 Product Dimensions ......................2 Front Panel......................... 3 Front Panel Description ..................... 3 Rear Panel .......................... - Page 11 Front Panel USB Connector ..................... 19 Rear Panel Connectors ....................19 Vertical System ........................ 20 To Enable the Channel ..................... 20 Adjust the Vertical Scale ....................21 Adjust the Vertical Position ..................... 21 Specify Channel Coupling ....................21 Specify Bandwidth Limit ....................22 Specify Probe Attenuation Factor ...................
- Page 12 Overview of triggering ..................... 44 Auto Setup ........................44 Setting the Trigger ......................44 Trigger Source ........................45 Trigger Mode ........................45 Trigger Level ........................46 Trigger Coupling ....................... 47 Trigger Hold Off ....................... 47 Noise Rejection ........................ 48 5.10 Trigger Types ........................49 Edge Trigger ........................
- Page 13 Display Settings ......................91 Display Type ........................91 Color-Grade ........................93 Persistence ........................94 Clear the Display ......................94 Grid Type ......................... 95 Grid Brightness ........................ 95 Waveform Intensity ......................95 Transparency ........................95 10 Save and Recall ......................97 10.1 Save Type .........................
- Page 14 11.8 Perform a Self-test ......................109 Screen Test ........................109 Keyboard Test ........................ 110 LED Test ......................... 111 11.9 Screen Saver ........................111 11.10 Option Management ..................... 112 12 Reference Waveforms ....................113 To Save a Reference Waveform to Internal Memory ........... 114 To Display a Reference Waveform ................
- Page 15 17 Arbitrary Waveform Generator ..................140 17.1 Wave Types and Parameters ..................140 Sine Waveform ......................142 Square Waveform ......................142 Ramp Waveform......................143 Pulse Waveform ......................143 DC Waveform ........................ 144 Noise Waveform ......................144 Cardiac Waveform ......................145 Gaus Pulse ........................
-
Page 16: General Information
1 General Information 1.1 Product Overview The B&K Precision 2540C series includes 3 Mixed Signal Oscilloscopes (MSO) and 3 Digital Storage Oscilloscopes (DSO). The MSOs and DSOs have high bandwidths that allows them to capture signals with real time sampling rates of up to 1 GSa/s. All of the oscilloscopes have a waveform update rate up to 60,000 wfms/s and a maximum memory depth of 14 million points. -
Page 17: Product Dimensions
1 x Digital logic probe (MSO models only) 1 x Certificate of calibration 1 x Quick start guide Verify that all items above are included in the shipping container. If anything is missing, please contact B&K Precision. 1.3 Product Dimensions Figure 1 - Product dimensions... -
Page 18: Front Panel
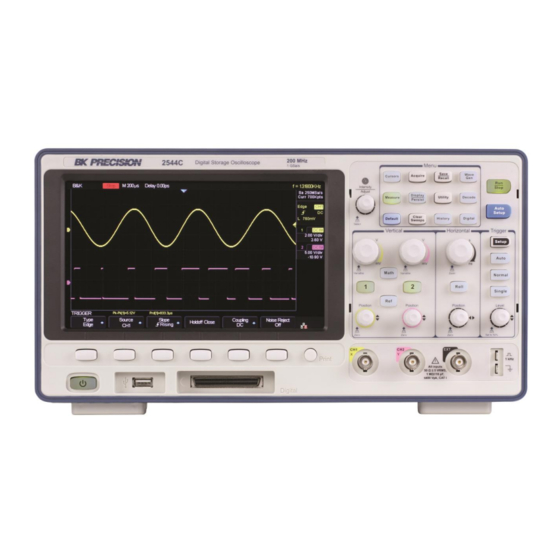
1.4 Front Panel Figure 2 - Front panel Front Panel Description ① Universal Knob ⑨ Probe Compensation Terminal ② Function Menus ⑩ External trigger input ③ Wave Gen Control ⑪ Analog Inputs ④ Decode and Digital Controls ⑫ Print Button ⑤... -
Page 19: Rear Panel
1.5 Rear Panel The following images show back and side panel connection locations. Figure 3 – Rear panel Back Panel Description ① Pass/Fail or trigger output ② External trigger input ③ USB ④ LAN ⑤ Safety lock (Kensington style) ⑥ AC power input connector... -
Page 20: Display Information
1.6 Display Information Figure 4 – Display screen User Interface Description ① Operating state ② Horizontal timebase setting ③ Trigger point position relative to center of display ④ Trigger point on waveform ⑤ Frequency counter (measures frequency of trigger signal) ⑥... -
Page 21: User Interface Functionality
User Interface Functionality 1. Operating state The states are Arm, Ready, Trig’d (triggered), Stop, Auto. 2. Horizontal Timebase Represents the time per division on the horizontal axis. Turning the horizontal scale knob (the top knob in the Horizontal control area) changes the time per division setting from 2 ns/div to 50 s/div. - Page 22 Icon Function Description Trigger Type Displays the currently selected trigger type and trigger condition setting. Different labels are displayed when different trigger types are selected. Trigger Source Displays the trigger source currently selected. Different labels are displayed when different trigger source are selected and the color of the trigger parameter area will change accordingly.
- Page 23 Vertical Scale Represents the voltage value of each vertical main division on the screen. Vertical Offset Represents the vertical displacement of the trace in voltage above or below the center of the screen. Table 2 - Trigger settings 9. Channel label/waveform Indicates the active channel.
-
Page 24: Getting Started
2 Getting Started Before connecting and powering up the instrument, please review and go through the instructions in this chapter. 2.1 Input Power Requirements The supply has a universal AC input that accepts line voltage input within: Voltage: 110 V to 240 V (±10%) Frequency: 50 Hz to 60 Hz (±5%) / 400 (±5%) Power supply power range: ≤... - Page 25 2 With a small flat blade screwdriver, insert into the fuse box slit to pull and slide out the fuse box as indicated below. 3 Check and replace fuse (if necessary). Figure 7 - Replacing Fuse Do not connect power to the instrument until the line voltage is configured correctly.
-
Page 26: Preliminary Check
2.3 Preliminary Check Complete the following steps to verify that the oscilloscope is ready for use. Security Lock Provisions for a Kensington-style lock are provided on the rear panel of the oscilloscope (a lock is not included). Align the lock with the lock hole and insert, turn the key clockwise to lock the instrument and then remove the key from the lock. -
Page 27: Adjust The Support Feet
Power socket Figure 9 - Connecting to the power line Adjust the Support Feet Pull out the support feet to tilt the oscilloscope backwards for better visibility. Figure 10 - Supporting feet adjustment 2.4 Power-on Inspection After connecting the oscilloscope to the AC power, press the power switch at the lower left corner of the oscilloscope to turn the instrument on (the LEDs in all translucent keys will turn on). -
Page 28: Self-Test
Scope ID will be displayed. Press the Single key to exit. Connect the Probe B&K Precision provides passive probes for the 2540C Series oscilloscope. Please refer to the probe’s user manual for more detailed information. Before connecting probes, please read and understand the Probe Safety section. -
Page 29: Probe Safety
Compensation signal output terminal Ground terminal Figure 11 - Compensation terminals 3. Connect the probe to channel 1's BNC connector. Connect the tip of the probe to the compensation signal output terminal. 4. Press the Auto Setup button. 5. Observe the waveform on the screen and compare it to the following figure. Figure 12 - Waveform compensation 6. -
Page 30: Probe Attenuation
Connect the probe to the oscilloscope and connect the ground terminal to ground before you take any measurements. WARNING: SHOCK HAZARD To avoid electric shock when using the probe, please make certain that the insulated wire of the probe is in good condition and do not touch the metallic parts of the probe when it is connected to a high voltage. -
Page 31: Main Functions And Operating Descriptions
3 Main Functions and Operating Descriptions To use your oscilloscope effectively, you need to learn about the following oscilloscope functions: • Menu and Control Buttons • Connectors • Vertical System • Horizontal System • Run Control • Universal knob • Display System •... - Page 32 Add options and view which options are installed Press the Decode button to open the decode menu (Decode is an optional feature). The 2540C Series supports two 8-bit serial buses for decoding. Supported serial protocols include I C, SPI, UART, CAN, and LIN.
-
Page 33: Connectors
Press the button to reset the oscilloscope to its default setup state. This is a useful starting point to let you manually adjust the oscilloscope for your measurement needs. This button has two effects. When measurement statistics are being displayed, pressing this button will set the statistics to zero and start accumulating data over again. -
Page 34: Front Panel Usb Connector
Front Panel USB Connector Figure 17 - Front panel USB connector USB Host: Setups, waveforms, screenshots, and CSV for files can be saved to or recalled from a USB device. Rear Panel Connectors Figure 18 - Rear panel connectors ... -
Page 35: Vertical System
3.3 Vertical System Figure 19 Vertical Analog Input The colors correspond to the color of the traces on the Channels screen and on the input channel connectors. Press the numbered button to turn the corresponding channel trace on and off and display the channel's menu. Vertical Scale Adjust the volts/division or amperes/division for the Knob... -
Page 36: Adjust The Vertical Scale
CH1 annotation at the left of the screen above the softkeys, which tells you which channel's settings can be modified by the softkeys. Note: To stop displaying the channel's trace on the screen, press the channel button until its light goes out. -
Page 37: Specify Bandwidth Limit
When the coupling is set to DC, both the DC and AC components of the signal will be displayed. When the coupling is set to AC, the DC offset of the signal is blocked. When the coupling is set to GND, both the DC offset and AC components of the signal are both blocked. -
Page 38: Specify The Amplitude Unit
Specify the Amplitude Unit You can display the channel's measurement unit as volts (V) or amperes (A). When the unit is changed, the unit displayed in the channel label will change accordingly. The default setting is V. 1. Press the 1 button on the front panel to display the CH1 menu. 2. -
Page 39: Horizontal System
3.4 Horizontal System Figure 20 - Horizontal menu Enter roll mode, which displays slow waveforms like a strip Roll Button chart recorder. Sets the horizontal location of the trigger event on the display. The waveform will move left or right when you turn the knob. -
Page 40: Adjust Trigger Delay
Adjust Trigger Delay Turn the Horizontal Position knob to adjust the trigger delay of the waveform. This will cause the displayed waveforms to move left or right. The delay number at the top of the screen changes accordingly. Press this knob to reset the trigger delay to zero. Changing the delay time moves the trigger point (blue inverted triangle at the top of the screen) horizontally and indicates how far it is from the time at the center of the screen. - Page 41 Zoomed time base Normal time Figure 21 – Zoom function The area of the normal display that is expanded is outlined with a dark box and the rest of the normal display is gray. The darker area shows the portion of the normal sweep that is expanded in the lower half of the screen.
-
Page 42: Run Control
3.5 Run Control Figure 22 - Run control buttons Use this button to set the state of the instrument to RUN or STOP. In the RUN state, the button glows yellow; in STOP state, the button glows red. The Auto Setup button automatically adjusts the oscilloscope's settings to get a stable display. -
Page 43: On-Line Help
3.7 On-line Help The oscilloscope has an online help function for its features. Press any button for 2 seconds to enter the on-line help. You can change the language the help is displayed in by using the Utility → Language button. Only Chinese and English are currently supported (the other language choices are for screen labels). -
Page 44: Sample System Configuration
4 Sample System Configuration This chapter shows how to use the run control and set the sampling system of the oscilloscope. 4.1 Run Control Press the Run/Stop or Single button on the front panel to run or stop the sampling system of the scope. ... - Page 45 The current sampling rate is displayed in the information area at the upper-right corner of the screen. When the sampling rate is too low, the sampled waveform may contain distortion, aliasing, and leakage. 1. Waveform Distortion: When the sampling rate is too low, waveform details are lost and the displayed waveform is different from the actual signal.
-
Page 46: Oscilloscope Bandwidth And Sample Rate
Oscilloscope Bandwidth and Sample Rate The bandwidth of an oscilloscope is usually stated as the lowest frequency at which a sine wave's amplitude is measured as 30% lower than its actual value (this is equivalent to a 3 dB drop in power because 20log(1/sqrt(2)) is -3). -
Page 47: Memory Depth
-3dB Attenuation Aliased frequency components Frequency Limiting oscilloscope bandwidth (f ) to ¼ the sample rate (f reduces frequency components above the Nyquist frequency (f Figure 29 Bandwidth and Nyquist frequency In practice, an oscilloscope's sampling rate should be four or more times its bandwidth: f = 4f This way, there is less aliasing and the aliased frequency components have a greater amount of attenuation. -
Page 48: Sampling Mode
4.4 Sampling Mode The oscilloscope only supports real-time sampling. In this mode, the oscilloscope samples and directly displays the waveform containing a trigger event. The maximum real-time sample rate of the oscilloscope is 1 GSa/s. Press the Run/Stop button to stop the sampling and the oscilloscope will display the last waveform sample. - Page 49 Figure 30 - Display type set to dots Figure 31 - x interpolation (i.e., connect the dots with lines)
- Page 50 Figure 32 - Sinx/x interpolation...
-
Page 51: Acquisition Mode
4.6 Acquisition Mode The acquisition mode controls how the waveform's points are displayed from sampled points. The oscilloscope provides the following acquisition modes: Normal, Peak Detect, Average and Eres. 1. Press the Acquire button on the front panel to enter the ACQUIRE menu. 2. -
Page 52: Average
Figure 34 - Pulse with 0.1% duty cycle, normal mode Figure 35- Pulse with 0.1% duty cycle, peak detect mode Average In this mode, the oscilloscope averages the waveforms from multiple frames to reduce the random noise of the input signal and improve the vertical resolution. - Page 53 When the number of waveform averages is large, the noise will be lower and the vertical resolution will be better. However, the response time for changes in the signal will be lower because of the need to capture the extra frames. The number of frames averaged are 4, 16, 32, 64, 128, 256, 512, and 1024.
-
Page 54: Eres (Enhanced Resolution)
Figure 37 - Random noise averaged out Eres (Enhanced Resolution) Eres mode uses a digital filter to reduce the random noise on the input signal and generate smoother waveforms. Eres can be used on both single-shot and repetitive signals and it does not slow down the waveform update speed. -
Page 55: Horizontal Format
Figure 38 - Eres mode 4.7 Horizontal Format To choose the horizontal format, press t he Acquire button. Pressing the XY softkey toggles between XY and YT mode. The default mode is YT. YT: This is the normal viewing mode for the oscilloscope and displays the channel's voltage or current as a function of time. -
Page 56: Sequence Mode
Figure 39 - Calculating phase difference with Lissajous figure The phase difference between the two sinusoids is: ( �� �� −1 �� = ������ ⁄ ) If the principal axis of the ellipse is within quadrant I and III, the phase difference should be in quadrant I and IV (between 0 to π/2 or 3π/2 to 2π). -
Page 57: Replaying A Sequence Of Captured Waveforms
6. Press the Acq. Mode softkey until it displays On. 7. You will see a message at the lower right of the screen saying the segments are being acquired. Replaying a sequence of captured waveforms 1. Press the History button to enable the HISTORY menu. Figure 41 - HISTORY menu 2. -
Page 58: Trigger
5 Trigger Figure 42 - Trigger Setup: Press this button to open the trigger menu. This menu lets you control how the oscilloscope's capture system decides when to capture a waveform. This oscilloscope provides a variety of trigger types: Edge, Slope, Pulse, Video, Window, Interval, Dropout, Runt, Pattern and Serial Bus (I2C/SPI/UART/RS232/CAN/LIN). -
Page 59: Overview Of Triggering
When a trigger is set up properly, the oscilloscope converts unstable displays or blank screens into meaningful waveforms Note: the 2540C Series oscilloscopes allow the use of either voltage or current units for waveform measurements. The remainder of this chapter will refer to just voltages, but it applies to current levels, too. -
Page 60: Trigger Source
Here is a schematic diagram of the acquisition memory. The position of the trigger event in time is defined to be the zero-time location. Waveform samples before the trigger event are in the pre-trigger buffer and samples after the trigger event are in the post-trigger buffer. By default, the trigger event is shown at the center of the screen, but turning the horizontal position knob lets you put other portions of the buffer in the center of the screen. -
Page 61: Trigger Level
After the oscilloscope begins to capture data, the oscilloscope operates by first filling the pre- trigger buffer. The oscilloscope starts searching for a trigger after the pre-trigger buffer is filled and data continues to flow through this buffer while it searches for the trigger. While searching for the trigger, the oscilloscope overflows the pre-trigger buffer and the first data put into the buffer is pushed out. -
Page 62: Trigger Coupling
5.7 Trigger Coupling Press the Setup button on the front panel to enter the TRIGGER menu. If the Trigger type has Coupling softkey, then press the Coupling softkey and turn the Universal Knob or press the Coupling softkey continually to select one of the following trigger coupling modes: DC: Allows both DC and AC components into the trigger path. -
Page 63: Noise Rejection
3. Press the Setup button on the front panel to enter the TRIGGER menu. The trigger type must be Edge. 4. Press the Holdoff Close soft key until it reads Holdoff Time. 5. Turn the Universal Knob to set the desired hold off time. 6. -
Page 64: Trigger Types
Figure 46 - Turn off noise reject Figure 47 - Turn on noise reject 5.10 Trigger Types The oscilloscope provides multiple advanced trigger functions, including various serial bus triggers. -
Page 65: Edge Trigger
Edge Trigger An edge trigger's logical condition is met when the waveform passes through a set voltage level while increasing (positive slope) or passes through a set voltage level while decreasing (negative slope). In the following diagram, the trigger event will occur when the slope is positive at the left-most trigger point. -
Page 66: Slope Trigger
Figure 49 - Edge trigger Note: Pressing the Auto Setup button will set the trigger type to Edge and the slope to rising. Slope Trigger The slope trigger's logical condition is a transition between two voltage levels when the time of the transition meets a condition. - Page 67 3. Press the Source softkey. Turn the Universal Knob to select the analog channel you wish to use as the trigger source. 4. Press the Slope softkey to choose between rising and falling slope. The current trigger slope is displayed at the upper right corner of the screen. Figure 51 - Slope trigger 5.
-
Page 68: Pulse Trigger
Note: The lower trigger level cannot be larger than the upper trigger level. In the trigger state message box, L1 means the upper trigger lever while L2 means the lower trigger level. Pulse Trigger This trigger is used to trigger on a positive or negative pulse with a specified width. Positive Pulse Width Trigger Level Negative Pulse Width... - Page 69 > (Greater than specified time): Trigger when the measured pulse width is greater than the specified time. For example, for a positive pulse, if you set the pulse width >100 ns, the oscilloscope will trigger on the following waveform ...
-
Page 70: Video Trigger
Video Trigger Video triggering is used to get stable displays of analog video signals and allows you to view any portion of a video frame. For NTSC (National Television Standards Committee), PAL (Phase Alternating Line), 1080i (50 Hz or 60 Hz), or custom video signals, you can trigger on a selected line or field. - Page 71 (line value)/3 (line value)/4 (line value)/5 (line value)/6 (line value)/7 (line value)/8 The table below takes Of Lines as 800 as an example to explain the relation between Of Lines, Of Fields, Interlace, Trigger Line and Trigger Field. Of Lines Of Fields Interlace Trigger Line...
- Page 72 2. Press the Type softkey. Use the Universal Knob to select Video and push the knob to confirm. 3. Press the Source softkey. Turn the Universal Knob to select the channel that has the video signal as the trigger source and press the knob to confirm. 4.
-
Page 73: Window Trigger
7. Press the Sync softkey to enter the TRIG ON menu to set the line and field. Press the Type softkey to select Any. If the Type option is set to Select, press the Line softkey; turn the Universal Knob to select the desired value. - Page 74 3. Press the Source softkey. Turn the Universal Knob to select one of the analog channels as the trigger source. 4. Press the Window Type softkey to select Absolute. 5. Press the Lower Upper softkey to select the Lower or Upper trigger level. Turn the Level knob to adjust the position.
-
Page 75: Interval Trigger
Figure 57 - Relative window trigger Interval Trigger This trigger should be used when the time difference between neighboring rising or falling edges meets the one of the time limit conditions (<, >, [--,--], --][--). Trigger Trigger Figure 58 - Interval trigger Setting Interval Trigger: 1. -
Page 76: Dropout Trigger
> (greater than a time value): trigger when the positive or negative pulse time of the input signal is greater than the specified time value. [--,--] (within a range of time value): trigger when the positive or negative pulse time of the input signal is greater than the specified lower limit of time and less than the specified upper limit of time value. - Page 77 Trigger Trigger Figure 60 - Edge dropout trigger Setting Edge DropOut Trigger 1. Press the Setup button to enter the TRIGGER menu. 2. Press the Type softkey. Use the Universal Knob to select Dropout and push the knob to confirm. 3.
- Page 78 Trigger when the time interval (△T) from when the rising or falling edge of the input signal passes through the trigger level to when the next edge of opposite slope passes through the trigger level is greater than the timeout time set, as shown in the figure below. Trigger Trigger Figure 62 - State trigger...
-
Page 79: Runt Trigger
Figure 63 - State DropOut trigger Runt Trigger The Runt trigger looks for pulses that cross one threshold but not another as shown in the picture below. Positive runt pulse High Level Low Level Negative runt pulse Figure 64 – Runt Trigger Description Triggering will occur when A positive-going pulse crosses a lower threshold but not an upper threshold. - Page 80 3. Press the Source softkey. Turn the Universal Knob to select an analog channel as the trigger source. 4. Press the Polarity softkey to select a positive or negative pulse to trigger on. 5. Press the LimitRange softkey. Turn the Universal Knob to select the desired condition (<, >, [--,--] or --][--).
-
Page 81: Pattern Trigger
Figure 66 - Runt trigger Pattern Trigger The Pattern trigger identifies a trigger condition by looking for a specified pattern. The pattern trigger can be expanded to incorporate delays similar to other triggers. Pattern durations are evaluated using a timer. The timer starts on the last edge that makes the pattern “true”. Potential triggers occur on the first edge that makes the pattern false, provided that the time qualifier criterion has been met. - Page 82 Figure 67 - Pattern Trigger To set pattern trigger 1. Press the Setup button to enter the TRIGGER menu. 2. Press the Type softkey. Turn the Universal Knob to select Pattern and then push the knob to confirm. 3. Press the Source softkey to select each channel and press the softkey to the right to select Don’t Care, High or Low for that channel.
-
Page 83: Serial Trigger
Figure 68 - Pattern trigger Serial Trigger I2C Triggering After the oscilloscope has been set up to capture I2C signals, you can trigger on a stop/start condition, a restart, a missing acknowledge, an EEPROM data read, a read/write frame with a specific device address and data value, or on a data length. - Page 84 Start - The oscilloscope triggers when SDA transitions from high to low while the SCL clock is high. For triggering purposes (including frame triggers), a restart is treated as a start condition. Stop - The oscilloscope triggers when data (SDA) transitions from low to high while the clock (SCL) is high.
- Page 85 The oscilloscope will trigger on the clock edge for the Ack bit after the trigger event is found. This data byte does not need to occur directly after the control byte. The oscilloscope will trigger on any data byte that meets the criteria defined by the Byte Length and Data1 softkeys during a current address read, a random read, or a sequential read cycle.
- Page 86 (hexadecimal). The oscilloscope will trigger after the start, address, read/write, acknowledge, and data events occur. c) If "don't care" (0xXX) is selected for data, the data will be ignored. The trigger will always occur on the 17th clock for 7-bit addressing or 26th clock for 10-bit addressing. If you have selected a three-byte trigger, press the Data2 softkey and turn the Universal Knob to select the 8-bit data pattern on which to trigger.
- Page 87 1. Press the Setup button to enter the TRIGGER menu. 2. Press the Type softkey. 3. Turn the Universal Knob to select Serial. 4. Press the Protocol softkey to select SPI. 5. Press the Signal softkey to assign signals to the different channels and its respective threshold.
- Page 88 Figure 75 - SPI trigger UART Triggering To trigger on a UART (Universal Asynchronous Receiver/Transmitter) signal, connect the oscilloscope to the RX and TX lines and set up a trigger condition. RS232 (Recommended Standard 232) is one example of a UART protocol. 1.
- Page 89 Figure 76: UART TRIG SET menu 7. Press the Source Type softkey to select TX or RX. 8. Press the Condition softkey and set up the desired trigger condition: Start - The oscilloscope triggers when a start bit occurs. ...
- Page 90 1. Press the Setup button to enter the TRIGGER menu. 2. Press the Type softkey. 3. Turn the Universal Knob to select Serial and press the Protocol softkey to select CAN. 4. Press the Signal softkey to configure the channels and assign to them the High or Low CAN signal and to configure the SOURCE, which can be CAN_H, CAN_L, or CAN_H-CAN_L.
- Page 91 Example The picture below triggers on ID, the ID is 14b2d4ff, and the baud rate is 100 kb/s: Figure 78 - CAN trigger LIN Triggering LIN triggering can trigger on the rising edge at the Sync Break exit of the LIN single-wire bus signal (that marks the beginning of the message frame), the Frame ID, or the Frame ID and Data.
- Page 92 Press the Bit Rate softkey and turn the Universal Knob to select the baud rate that matches your LIN bus signal. The LIN baud rate can be set to predefined baud rates from 600 to 19200 or a custom baud rate from 300 to 20000. If the desired baud rate is not listed, select Custom on the Bit Rate softkey.
-
Page 93: Math Functions
6 Math Functions The 2540C Series oscilloscopes support math operations between the analog channels and reference waveforms, including addition ( + ), subtraction ( - ), multiplication ( * ), division ( / ), FFT, differentiation ( d/dt ), integration (∫dt), and taking the square root (√). The resulting math waveform is displayed in white and labeled with the letter M at the left of the screen. -
Page 94: Multiplication And Division
6.3 Multiplication and Division When you select multiplication or division, the Source A and Source B values are multiplied or divided point-by-point and the result is displayed. Division by a waveform that passes through zero can result in positive or negative spikes in the graph. 1. - Page 95 Window Characteristics Applications Rectangle The best frequency Transient or short pulses. Sine resolution, but the poorest waveform with the same amplitude amplitude resolution. Similar and rather similar frequencies. Wide to when no window is band random noise with relatively applied. slowly changing waveform spectrum.
-
Page 96: Differentiation
Table 8 - FFT waveform in split mode 6.5 Differentiation The differentiation operation (d/dt) calculates the discrete time derivative of the source waveform: di = approximation to the derivative at the i point y = data point from the source channel ... -
Page 97: Integration
Figure 79 - Differentiation function You can use the differentiation function to measure the instantaneous slope of a waveform. For example, the slew rate of an operational amplifier may be measured using the differentiation function. Note your measured values will depend on your choice of dx. 6.6 Integration The MATH operation ∫dt (integration) calculates the numerical integral of the selected source. - Page 98 Figure 80 - Integral without offset Figure 81 - Integral with offset Like the other math functions, the Scale and Position softkeys are supplied to enlarge or reduce the displayed waveform's amplitude and position it vertically on the screen. Press the Gate softkey to open the Gate menu. Use the cursors to limit or gate which section of the waveform gets integrated.
-
Page 99: Square Root
Figure 82 - Integrate gate function 6.7 Square Root This function calculates the square root of the selected source. Points where the waveform's data are negative are set to zero. Figure 83 - Square root... -
Page 100: Cursors
7 Cursors Cursors are horizontal and vertical lines on the display that let you measure voltage/current, and time values on a waveform. Press Cursors and the Mode softkey to toggle between Manual and Track mode. 7.1 Manual Manual cursor mode enables the cursors to be moved anywhere on the screen. 1. -
Page 101: Track
Figure 84 - Measure pulse width When the X2 - X1 mode is selected, the two cursors could be moved together to the previous or following pulse to compare their widths against that of the middle pulse. 7.2 Track Track restricts the cursors to move along the source signal. This allows for quick cursor placement. X1 and X2 can have difference sources. -
Page 102: Auto Measurement
8 Auto Measurement The oscilloscope measures 36 waveform parameters and can present statistics on up to five of these parameters. These measurements are voltage, time and delay parameters. To set up the measurement function: 1. Press Measure to enter the MEASURE menu. 2. -
Page 103: Type Of Measurement
8.1 Type of Measurement Press Type to open the menu of all possible measurements. Use the Universal Knob to select which the desired parameters. Voltage Measurements Voltage measurements include 19 kinds of voltage parameter measurements as detailed in the following table: Type Description The peak-to-peak value is the difference between Maximum and Minimum... -
Page 104: Time Measurements
Time Measurements Time measurements include 11 kinds of time measurements. Type Description The time between the middle threshold points of two consecutive, like- Period polarity edges Freq The reciprocal of the period. The time difference between the 50% threshold of a rising edge to the 50% + Width threshold of the next falling edge of the pulse The time difference between the 50% threshold of a falling edge to the 50%... -
Page 105: Statistics
The time between the first falling edge of source 1 and the first falling edge of source 2 at the 50% voltage level The time between the last rising edge of source 1 and the last rising edge of source 2 at the 50% voltage level The time between the last rising edge of source 1 and the last falling edge of source 2 at the 50% voltage level The time between the last falling edge of source 1 and the last rising edge... -
Page 106: To Clear Measurement Parameters
on the waveform can be adjusted by pressing the CursorA, CursorB, and CursorA-B softkeys and turning the Universal Knob. 8.4 To Clear Measurement Parameters Press the Clear softkey to clear all the measurement parameters and statistics that are displayed on the screen. 8.5 All Measure The All Measure softkey displays 30 parameters in a display box for the channel indicated in the upper left-hand corner. - Page 107 Vectors: the sample points are connected by lines. This gives the illusion of a continuous function. This helps when reading values off the screen or using cursors, especially for waveforms with sharp edges like square waves. Dots: display the sample points as dots. You can use the cursor to measure the X and Y values of the sample point.
-
Page 108: Color-Grade
Figure 89 - Dots display Color-Grade Color-Grade mode uses color in the displayed waveform to show which values are most frequent in the waveform sample. Normally, display intensity is varied to give you hints about the most- frequent values. Color-Grade mode instead uses color to represent the relative frequency of voltage or current values appearing in the waveform (it is similar to a histogram). -
Page 109: Persistence
2. Press the Color-Grade softkey. 3. Set the option to On to turn on the color grade feature. Persistence With persistence, the oscilloscope updates the display with new traces, but does not immediately erase the previous traces. Previous traces are displayed with reduced intensity. New acquisitions are shown in their normal color with normal intensity. -
Page 110: Grid Type
Grid Type The grid (also called a graticule) is useful for making voltage, current, and time measurements directly from the display. To choose the grid type: 1. Press the Display/Persist button to enter the DISPLAY menu. 2. Press the Next Page softkey. 3. - Page 111 3. Press the Transparency softkey and turn the Universal Knob to select the desired value. The default value is 80% and the range is from 20% to 80%.
-
Page 112: Save And Recall
10 Save and Recall The Save/Recall button lets you store oscilloscope state information (Setups) and waveform bitmaps and data to internal or external storage. The oscilloscope provides a USB Host interface on the front panel to connect a USB device for external storage. 10.1 Save Type Press Save to open the SAVE menu. -
Page 113: Matlab
MATLAB ® The oscilloscope saves the waveform data to external memory in *.DAT format, an ASCII plain- text format. You can further analyze the data using MATLAB® or other software. Recalling the DAT file is not supported. MATLAB® is a registered trademark of The MathWorks, Inc. -
Page 114: Recall An External File
2. Press the Save softkey. 3. Press the Type softkey to select the type of data you want to save. 4. Press the Save To softkey and select External. 5. Press the Press To Save softkey and use the Universal Knob to select the desired location. a) Press the Universal Knob to enter a subfolder when one is selected. -
Page 115: Create A New File Or Folder
The following operations can be done through the file management menu: Create a new file or folder Delete a file or folder Rename a file or folder Create a New File or Folder This operation is only valid for external storage. The file name or folder name can contain letters, numbers, underscores and spaces. -
Page 116: Delete A File Or Folder
Delete a file or folder This operation is only valid for external storage devices. 1. Press the Save/Recall button to enter the SAVE/RECALL menu. 2. Press the Save or Recall softkey to enter the SAVE/RECALL file system. 3. Press the Type softkey, and then turn the Universal Knob to select one of the type (if you've select Setups, please set the Save To option to External). -
Page 117: Utility
11 Utility The System Function menu allows the user to view system-related information and access functionality such as system status, performing a self-calibration, sound, language, pass/fail testing, configuring the I/O interfaces, updating the firmware and configuration, setting the screen saver, and configuring optional features. 11.1 View the System Status 1. -
Page 118: Sound
3. Press the Do Self Cal softkey and the oscilloscope will display a message box shown as follows: Figure 94 - Do self cal 4. Disconnect all cables from the oscilloscope. 5. Press the Single button on the front panel to perform the self-calibration program. During the calibration, most of the keys are disabled. -
Page 119: Pass/Fail
The languages available are Simplified Chinese, Traditional Chinese, English, French, Japanese, Korean, German, Spanish, Russian, Italian, and Portuguese. 11.5 Pass/Fail One way to verify a waveform is within desired bounds is to use pass/fail testing. A pass/fail test defines a region of the oscilloscope display in which the waveform must remain in order to pass the test. - Page 120 8. Press the Create Mask softkey to create the mask. Whenever the Create Mask softkey is pressed the old mask is erased and a new mask is created. 9. Press the softkey to return to the PASS/FAIL menu. 10. Press the Msg Display to turn on or off the message display. When On is selected, the cumulative test results will be displayed in the upper-right message box of the screen: Figure 96 - Pass/fail message display The parameters are...
-
Page 121: Save And Recall Test Mask
Save and Recall Test Mask You can save the current test mask to internal memory or an external USB storage device. The file format of the test mask file is *.RGU (it's a binary file). Save a Test Mask 1. Press the Utility button on the front panel to enter the UTILITY menu. 2. - Page 122 3. Press the I/O Set softkey to enter the I/O SET menu. 4. Press the LAN softkey to enter the LAN configuration interface: Figure 97 - LAN configuration interface Press the left-most softkey (the first softkey below the screen; the firmware calls it F1) continually to go to the DHCP line;...
-
Page 123: Auxiliary Output
Figure 98 - Virtual panel Auxiliary Output You can set the type of the signal output from the TRIGGER OUT (also labelled PASS/FAIL) BNC connector on the rear panel. 1. Press the Utility button to enter the UTILITY menu. 2. Press the I/O softkey to enter the I/O SET function menu. 3. -
Page 124: Perform A Self-Test
6. Press the Single button to enter the SAVE/RECALL file system. 7. Turn the Universal Knob to select the update file (it should have an ADS suffix). Press the Load softkey to start loading the new firmware. The process takes about 7 minutes. IMPORTANT: Do not turn off the oscilloscope during this process or the oscilloscope will not start again. -
Page 125: Keyboard Test
Figure 99 - Screen test 5. Press the Single button on the front panel repeatedly to see green, blue, and red again. The different colors can show stains and scratches on the screen. 6. Press the Run/Stop button to exit the screen test program. Keyboard Test The keyboard test is used to check that the keys and the knob switches are working correctly. -
Page 126: Led Test
Figure 100 - Keyboard Test 5. Press each key and knob. If the color of the associated screen box changes to blue, then the button is working. Press the key again to verify it can change back to a gray color. 6. -
Page 127: Option Management
2. Press the Next Page softkey twice to go to the third page of the UTILITY function menu. 3. Press the Screen Saver softkey and turn the Universal Knob to select the desired screen saver time. The choices are 1 minutes, 5 minutes, 10 minutes, 30 minutes, and 1 hour. Select Off to turn off the screen saver. -
Page 128: Reference Waveforms
Figure 102 - LABEL function menu 7. Press the Information softkey to view the option information. Figure 103 - Option information 12 Reference Waveforms The oscilloscope can save analog channel or math waveforms to one of two reference waveform locations in the oscilloscope. Later, a reference waveform can be displayed and compared to other waveforms. -
Page 129: To Save A Reference Waveform To Internal Memory
To Save a Reference Waveform to Internal Memory 1. Press the REF button to enter the REF WAVE menu. When the oscilloscope is in XY mode, the REF button will not work. 2. Press the Source softkey and turn the Universal Knob to select the source for reference channel. -
Page 130: To Clear The Reference Waveform
Figure 104 - Reference waveform To Clear the Reference Waveform The oscilloscope does not have a Clear option under the REF WAVE menu. To clear a reference waveform, you can save a new reference waveform to the reference waveform's storage location. - Page 131 Figure 105 - History 3. Press the Frame No. softkey and turn the Universal Knob to select the frame to display. The first number on the softkey is the displayed frame number and the second is the largest frame number. ...
- Page 132 The following table gives the maximum number of frames based on the sampling rate and Curr number of points: Sample Rate Curr (pts) Max. Frame Sample Rate Curr (pts) Max. Frame ≤ 280 80000 57227 1.4K 33528 140K 2.8K 18338 350K 7773 500MSa/s...
-
Page 133: Default Setup
14 Default Setup Press the Default button on the front to set the oscilloscope to the recall the factory setup. The details show as below. General Settings Utility... - Page 134 Math Settings Decoding Settings (Optional)
- Page 135 Arbitrary Waveform Generator...
-
Page 136: Serial Bus Decoding (Dc2540C)
Serial bus decoding requires the license to be installed. To purchase a license key, please fill out the license request form or visit the 2540C Series accessories page. 15.1 I2C Serial Decode... - Page 137 2. Press the Address softkey to choose a 7-bit or 10-bit address size. 3. Press the Display softkey and choose On to display the decode line on the display. 4. Press the List softkey to enter the LIST menu. 5. Press the Display softkey and choose On to display the decode list on the display. 6.
-
Page 138: Spi Serial Decode
Red dots in the decode line indicate that more data can be displayed. Scroll or expand the horizontal scale to view the data. Interpreting I2C Lister Data In addition to the standard Time column, the I2C Lister contains these columns: ... - Page 139 b. Turn the Universal Knob to select the channel connected to the SPI serial clock line. c. Press the Threshold softkey and turn the Universal Knob to select the clock signal threshold voltage level. The threshold voltage level is used in decoding and it will become the trigger level when the trigger type is set to the selected serial decode slot.
-
Page 140: Spi Serial Decode
If the framing signal is set to CS (or ~CS), the first clock edge seen after the CS (or ~CS) signal transitions from low to high (or high to low) is the first clock in the serial stream. Press the CS or ~CS softkey and turn the Universal Knob to select the channel that is connected to the SPI frame line. - Page 141 Figure 114 - SPI DECODE menu Interpreting SPI Decode Active waveforms show an active bus inside a packet/frame. Mid-level blue lines show an idle bus. The number of clocks in a frame appears in light blue above and to the right of the frame. ...
-
Page 142: Uart/Rs232 Serial Decode
15.3 UART/RS232 Serial Decode The following order of operations should be followed to ensure that the trigger and decode functions are set correctly: Setup for UART/RS232 Signals UART/RS232 Decode Setup for UART Signals To set up the oscilloscope to capture UART signals: Press the Decode button to turn on the DECODE menu. -
Page 143: Uart Serial Decode
Idle Level: Select if the idle level between transmissions is LOW or HIGH. Data Length: Set the number of bits in the UART/RS232 words to match your device under test (selectable from 5 to 8 bits). UART Serial Decode To set up UART serial decode: 1. -
Page 144: Can Serial Decode
Decoded text is truncated at the end of the associated frame when there is insufficient space within frame boundaries. Blue vertical bars indicate the need to expand the horizontal scale (and run again) to see decode. When the horizontal scale setting does not permit the display of all available decoded data, red dots will appear in the decoded bus to mark the location of hidden data. -
Page 145: Can Serial Decode
Press the key to return to the DECODE menu. Press the Configure softkey to enter the BUS CONFIG menu. Figure 120 - DECODE CONFIG menu Press the Baud softkey and turn the Universal Knob to select the baud rate that matches your CAN bus signal. - Page 146 Figure 121 -CAN Decode Interpreting CAN Decode Data bytes appear in hex digits in white. A CRC (cyclic redundancy check) appears in hex digits in blue when valid or in red to indicate that the oscilloscope's hardware decode calculated a CRC that is different from the incoming data stream's stated CRC.
-
Page 147: Lin Serial Decode
15.5 LIN Serial Decode The following order of operations should be followed to ensure that the trigger and decode functions are set correctly: Setup for LIN Signals LIN Decode Setup for LIN Signals LIN (Local Interconnect Network) signal setup consists of connecting the oscilloscope to a serial LIN signal, specifying the signal source, threshold voltage level, baud rate, sample point, and other LIN signal parameters. - Page 148 2. Press the Display softkey and choose On to display the decode lines on the display. 3. Press the List softkey to enter the LIST menu. 4. Press the Display softkey and choose Off, Decode 1, or Decode 2. 5. Press the Scroll and Lines softkeys to set the position of the cursor. 6.
-
Page 149: Digital Channels (La2540C + Lp2540C)
This chapter describes how to use the digital channels of a Mixed-Single Oscilloscope (MSO). The digital channels are enabled on the 254XC series oscilloscopes that have installed the MSO license. To purchase a license key, please fill out the license request form or visit the 2540C Series accessories page. -
Page 150: Acquiring Digital Waveforms
Figure 125 - Connecting digital probes 5. Repeat step 4 until you have connected all points of interest. 16.2 Acquiring Digital Waveforms Press the Digital button to open the digital channels and start acquiring digital channel waveforms. For digital channels, each time the oscilloscope takes a sample, it compares the input voltage to the logic threshold. - Page 151 Figure 127 - Channel Height: Low Figure 128 - Channel Height: Middle Figure 129 - Channel Height: High...
-
Page 152: Turning A Single Digital Channel On Or Off
16.4 Turning a Single Digital Channel On or Off 1. Press the Digital button on the front panel to open the DIGITAL menu. 2. Press the ChannelControl softkey and turn the Universal Knob to select the desired channel number. Press the ChannelControl softkey to turn the selected channel on and off (you can also press the Universal Knob to do this). -
Page 153: Repositioning A Digital Channel
If the D0~D7 softkey is set to Custom, press the Custom softkey and turn the Universal Knob to select the desired value (-3 V to 3 V) and push the knob to confirm. 16.7 Repositioning a Digital Channel Press the Digital button on the front panel to open the DIGITAL function menu and display the digital channel waveforms. - Page 154 Figure 132 - DIGITALBUS menu 3. Press the Bus Select softkey to select Bus 1 or Bus 2. Selecting Bus 1, for example, will show the B1 bus display in blue at the bottom of the screen just above the softkeys. 4.
-
Page 155: Arbitrary Waveform Generator
17 Arbitrary Waveform Generator The oscilloscope supports a built-in Arbitrary waveform generator. The generator provides sine, square, ramp, pulse, DC, noise, cardiac, Gaussian pulse, exponential rise, exponential fall and Arbitrary waveforms. 17.1 Wave Types and Parameters 1. Press the WaveGen button to enter the built-in Arbitrary waveform generator menu. a) The first press will turn on the backlight of the WaveGen button. - Page 156 Waveform Parameters Sine Frequency, Amplitude, Offset Square Frequency, Amplitude, Offset, Duty (duty cycle) Ramp Frequency, Amplitude, Offset, Symmetry Pulse Frequency, Amplitude, Offset, Width Offset Noise Stdev (standard deviation), Mean Cardiac Frequency, Amplitude, Offset Gaus Pulse Frequency, Amplitude, Offset Exp Rise Frequency, Amplitude, Offset Exp Fall Frequency, Amplitude, Offset...
-
Page 157: Sine Waveform
Sine Waveform Figure 134 Default Sine Waveform Square Waveform Press the Duty softkey and turn the Universal Knob to set the waveform duty cycle. Duty: 20% to 80 % Figure 135 Default Pulse Waveform... -
Page 158: Ramp Waveform
Ramp Waveform Press the Symmetry softkey and turn the Universal Knob to set the ramp symmetry. Symmetry: 0% to 100% Figure 136 Default Ramp Waveform Pulse Waveform Press the Width softkey and turn the Universal Knob to set the pulse width. Press Width softkey again to enter fine adjustment mode with Width Fine softkey being displayed. -
Page 159: Dc Waveform
DC Waveform Figure 138 Default DC Waveform Noise Waveform Press the Stdev softkey and turn the Universal Knob to set the standard deviation. Press the Mean softkey and turn the Universal Knob to set the mean Stdev: 0.3 to 450 mV Mean: -2.998 to 2.998 V Figure 139 Default Noise Waveform... -
Page 160: Cardiac Waveform
Cardiac Waveform Figure 140 Default Cardiac Waveform Gaus Pulse Figure 141 Default Gaus Pulse... -
Page 161: Arbitrary Waveforms
17.2 Arbitrary Waveforms 1. Press the Wave Gen button on the front panel to enable the AWG (arbitrary waveform generator) and enter the WAVEFORM menu. 2. Using a USB cable, connect the oscilloscope to a Windows PC that has the waveform generator software installed (download the software from www.bkprecision.com). -
Page 162: Output Impedance
10. Press the Setting softkey to enter the SETTING menu. 11. Press the Output Load softkey to select high impedance (High-Z) or 50 Ω. 17.3 Output Impedance 1. Press the Wave Gen button to enter the WAVEFORM menu. 2. Press the Setting softkey to enter the SETTING menu. 3. - Page 163 Figure 144 - AWG self-calibration 4. When the self calibration program completes (it will take approximately 5 seconds), press the Run/Stop button to return to the SETTING menu.
-
Page 164: Specifications
18 Specifications Note: All specifications apply to the unit after a temperature stabilization time of 30 minutes over an ambient temperature range of 23 °C ± 5 °C. Waveform Math Model 2540C / 2542C / 2544C Add, Subtract, Multiply, Divide, FFT, Performance Characteristics Math Operation Derivative, Integral, Square Root... - Page 165 Function/Arbitrary Waveform Generator Serial Decoder (DC2540C) Sine, Square, Ramp, Pulse, DC, Threshold -4.5 to 4.5 div Waveforms Noise , Cardiac, Gaus Pulse, Exp Recorded List 1 to 7 Lines Rise I2C Decoder Arbitrary 4 Slots for Arbitrary Waveforms Signal SCL, SDA Maximum Output Frequency 25 MHz Address...
-
Page 166: Troubleshooting
19 Troubleshooting Possible problems and solutions are listed below. If one of these problems is encountered, check each possible solution listed below it. If the issue is not resolved, please contact your sales representative. 1. The screen remains dark after power on 1) Pull out the power cord from the oscilloscope and check whether the fuse is burned out. - Page 167 2) Check to see if the waveform is similar to what is expected. Make certain that the time base is in the expected range. It is common to not see a signal if the time base is set to sweep too fast. 3) Check the trigger type: the Edge trigger is suitable for general signals and the Video trigger is for video signals.
-
Page 168: Service Information
SERVICE INFORMATION Warranty Service: Please go to the support and service section on our website at www.bkprecision.com to obtain a RMA #. Return the product in the original packaging with proof of purchase to the address below. Clearly state on the RMA the performance problem and return any leads, probes, connectors and accessories that you are using with the device. -
Page 169: Limited One-Year Warranty
LIMITED ONE-YEAR WARRANTY B&K Precision Corp. warrants to the original purchaser that its products and the component parts there of, will be free from defects in workmanship and materials for a period of one year from date of purchase. B&K Precision Corp. will, without charge, repair or replace, at its option, defective product or component parts. - Page 170 22820 Savi Ranch Parkway Yorba Linda, CA 92887 www.bkprecision.com © 2017 B&K Precision Corp. V112017...
Need help?
Do you have a question about the 2540C Series and is the answer not in the manual?
Questions and answers