Advertisement
Box Contents

Tools You May Need

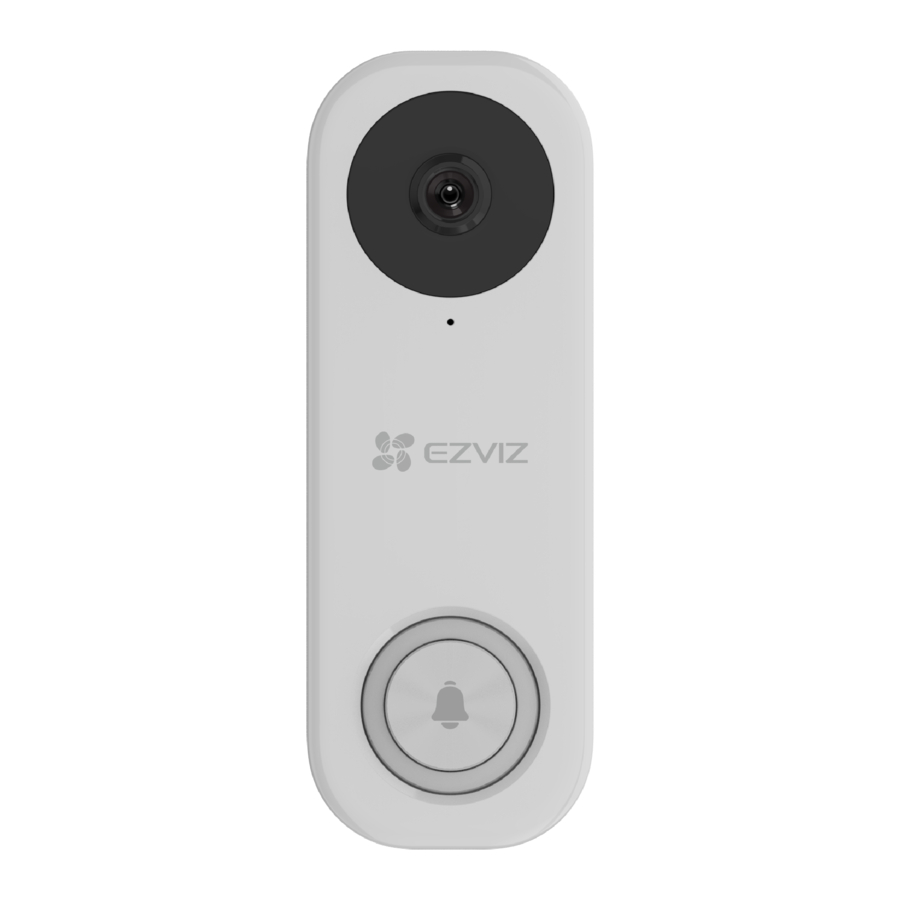
Basics

| Name | Description |
| LED Indicator | Red
Blue
|
| Reset Button | Hold for 5 seconds to reset and enter to Wi-Fi configuration mode. |

| Name | Description |
| Micro SD Card (sold separately) | Initialize the card in the EZVIZ app before using it. |
Get the EZVIZ App
- Connect your mobile phone to Wi-Fi (suggested).
- Download and install the EZVIZ app by searching "EZVIZ" in the App Store or Google Play™.
- Launch the app and register an EZVIZ user account.
![]()
EZVIZ App


 If you have already used the app, please make sure that it is the latest version. To find out if an update is available, go to the app store and search for EZVIZ.
Wiring Overview
EZVIZ doorbell with chime
If you have mechanical chime or electronic chime installed in your home, install the power kit and doorbell, and connect the wires as shown in the figure below.

EZVIZ doorbell with no chime
If no chime is installed, skip power kit installation, install the doorbell, and connect the wires as shown in the figure below.

- We recommend installing a new transformer to bring the output 16 to 24 volts.
- Please refer to Quick Start Guide of your chime or transformer for the chime or transformer installing details.
Power Kit Installation
The power kit ensures that your doorbell gets the power it needs, so be sure to install it before you install your Doorbell.
- Shut off the electricity at the breaker that controls doorbell's circuit.
![]()
- Insert one end of the wire harness into the power kit.

- Remove the cover from your mechanical chime.
![]()
- Remove the existing chime wires in the terminals named TRANS and FRONT.
![]()
- Connect the wire harness to the chime's terminals named TRANS and FRONT.
![]()
- Insert the existing chime wire and the other end of the wire harness into the wire connector and twist it tightly. Repeat this step with the other chime wire.
![]()
- Mount the power kit to the side of the chime.
![]()
- Put back the chime cover.


Doorbell Installation
Recommended Installation Height: 1.2 m (4 ft) above the ground.
- Shut off the electricity at the breaker that controls doorbell's circuit.
![]()
- (Optional) When the wall is uneven, paste the plate foam to the mounting plate.
![]()
- Use the mounting plate, or use the inclined mounting plates as a supplementary mounting bracket if you wish to see more on a specific side.
Using your mounting plate as a template, mark the location of the two mounting holes on your wall, and insert anchors, then fix the mounting plate to the wall.

- If you have a chime installed, follow Option A; If not, follow Option B.
Option A Connect doorbell with your existing doorbell wires

Option B Connect the fuse wire with your existing doorbell wire

- Install the doorbell to the mounting plate.
![]()
- Insert the security screw into the top of the mounting plate to secure the doorbell.
![]()
- Restore the electricity at the breaker.
![]()


Doorbell is powered on when its indicator flashes blue quickly. If not, make sure your electricity is off and check the wiring. If yes, proceed to doorbell setup.
Doorbell Setup

- Add your doorbell to EZVIZ app.
- Remove the faceplate of the doorbell.
- Log in to your EZVIZ account.
- On the Home screen, tap "+" on the upper-right corner to go to the Scan QR Code interface.
- Scan the QR code on the device or the cover of this quick start guide when the indicator flashes blue quickly.
- Follow the wizard to add the doorbell to the EZVIZ app.
- Put the faceplate back.
- Choose the corresponding chime type.
- In the EZVIZ app, tap the Chime Type in the Device Settings interface to go to the Chime Type interface.
- Choose the chime type which you have installed in your home.
Install the Micro SD Card (Optional)

- Remove the cover on the side of the doorbell with the screwdriver.
- Insert a micro SD card (sold separately) into the slot until a click.
- Place the cover back on, and tighten the screws with the screwdriver.
![information]() After installing the micro SD card, you should initialize the card in the EZVIZ app before using it.
After installing the micro SD card, you should initialize the card in the EZVIZ app before using it.
Initialize Micro SD Card

- In the EZVIZ app, tap the Storage Status in the Device Settings interface to check the micro SD card status.
- If the card status displays as Uninitialized, tap to initialize it.
- The status will then change to Normal and it can store videos.
View Your Device
The app interface may be different due to version update, and the interface of the app you installed on your phone shall prevail.
Live View
When you launch the EZVIZ app, the device page displays as shown below.
You can view and listen to a live feed, take snapshots, record videos, and choose video definition as needed.

Swipe left and right across the screen to see more icons.
| Icon | Description |
 | Share. Share your device with anyone you want. |
 | Settings. View or change the device settings. |
 | Video History. View Recordings. |
 | Snapshot. Take a snapshot. |
 | Record. Manually start/stop recording. |
 | Multi-screen Live. Tap to select live view window layout. |
 | Call Log. View call logs. |
 | Speak. Start using talk and listen. |
 | Definition. Select video resolution from Ultra HD, Hi-Def or Standard. |
Please refer to the actual interface for specific information.
Settings
In the settings page, you can set the parameters of the device.
| Parameter | Description |
| Answer Doorbell Call | If disabled, a doorbell call will not be answered. |
| Audio | Audio functions. When disabled, neither live view or recorded videos will have audio. |
| Status Light | You can tell device status by different lights shining. When disabled, lights will be off. |
| IR Light | IR light helps the camera get black and white images in low light conditions. If disabled, quality of images captured in dark environments will be influenced. |
| Alarm Notification |
|
| Time Zone | You can select time zone as needed here. |
| Daylight Saving Time | Select daylight saving time as needed. |
| Date Format | You can select date format as needed here. |
| Wi-Fi | You can see the Wi-Fi that the device has been connected to, and you can tap to connect another Wi-Fi. |
| Cloud Storage | You can subscribe cloud storage here. |
| Storage Status | You can see the storage status of your cloud and memory card here. |
| Device Version | You can see the device version here. |
| Image Encryption | If enabled, images captured by the device can only be available after you enter a password. |
| Change Encryption Password | You can change your encryption password here. The default password is the device verification code. |
| Offline Notification | If enabled, notifications will be pushed to your app once the doorbell is offline. |
| User Guide | You can read user guide of the device here. |
| About | You can mark where the device is installed, and get product category, device model, serial number, and device QR code here. |
| Delete Device | Tap to delete the device from your EZVIZ account. |
For privacy protection, please remove SD card or other storage media(if any)when transferring the device to others.
EZVIZ Connect
Use Amazon Alexa
These instructions will enable you to control your EZVIZ devices with Amazon Alexa. If you run into any difficulties during the process, please refer to Troubleshooting.
Before you start, make sure that:
- EZVIZ devices are connected to the EZVIZ app.
- In the EZVIZ app, turn off the "Image Encryption" in the Device Settings page.
- You have an Alexa-enabled device (i.e Echo Spot, Echo-Show, All-new Echo-Show, Fire TV (all generations), Fire TV stick (second generation only), or Fire TV Edition smart TVs).
- The Amazon Alexa app is already installed on your smart device, and you have created an account.
To Control EZVIZ devices with Amazon Alexa:
- Open the Alexa app and select "Skills and Games" from the menu.
- On the Skills and Games screen, search for "EZVIZ", and you will find "EZVIZ" skills.
- Select your EZVIZ device's skill, then tap ENABLE TO USE.
- Enter your EZVIZ username and password, and tap Sign in.
- Tap the Authorize button to authorize Alexa to access your EZVIZ account, so that Alexa can control your EZVIZ devices.
- You will see "EZVIZ has been successfully linked", then tap DISCOVER DEVICES to allow Alexa to discover all your EZVIZ devices.
- Go back to Alexa app menu and select "Devices", and under devices you will see all your EZVIZ devices.
Voice Command
Discover a new smart device via the "Smart Home" menu in the Alexa app or the Alexa Voice Control function.
Once the device is found, you can control it with your voice. Speak simple commands to Alexa.
Your device's name for example: "show xxxx camera," can be changed in the EZVIZ app. Each time you change the name of the device, you will need to discover the device again to update the name.
Use Google Assistant
With the Google Assistant, you can activate your EZVIZ device and watch live by speaking Google Assistant voice commands.
The following devices and apps are required:
- A functional EZVIZ app.
- In the EZVIZ app, turn off the "Image Encryption" and turn on the "Audio" in the Device Settings page.
- A TV with functional Chromecast connecting to it.
- The Google Assistant app on your phone.
To get started, follow the steps below:
- Set up the EZVIZ device and make sure it works properly on the app.
- Download the Google Home app from the App Store or Google Play StoreTM and log into your Google account.
- On the Myhome screen, tap "+" on the upper-left corner, and select "Set up device" from the menu list to go to the Set up interface.
- Tap Works with Google, and search for "EZVIZ", where you will find "EZVIZ" skills.
- Enter your EZVIZ username and password, and tap Sign in.
- Tap the Authorize button to authorize Google to access your EZVIZ account, so that Google can control your EZVIZ devices.
- Tap Return to app.
- Follow the above steps to complete the authorization. When synchronization is completed, EZVIZ service will be listed under your list of services. To see a list of compatible devices under your EZVIZ account, tap on the EZVIZ service icon.
- Now try some commands. Use the name of the camera that you created when you set up the system.
Users can manage devices as a single entity or in a group. Adding devices to a room allows users to control a group of devices at the same time using one command.
See the link for more information: https://support.google.com/googlehome/answer/7029485?co=GENIE.Platform%3DAndroid&hl=en
Troubleshooting
What should I do if Alexa fails to discover my device?
Check if there are any Internet connecting problems.
Try to restart the smart device and re-discover the device on Alexa.
Why the device's status is "Offline" on Alexa?
Your device might have been disconnected from the network. Restart the smart device and re-discover on Alexa.
Check if your router is connected to the Internet and try again.
For details about countries where Amazon Alexa is available, see Amazon Alexa's official website.
- have installed my doorbell, but the chime in my home doesn't function
Please confirm the following details.- Make sure the right input voltage range (16V to 24V) has been used. Your doorbell is designed to work with at least 16 volts of AC power, which is in line with a majority of standard doorbell systems. Doorbell running at a lower voltage (or runs on DC rather than AC) may cause chime malfunction.
- Select the right chime type (same as the product label) in the EZVIZ app.
- Make sure the chime model used in your home is compatible with the doorbell. Please check the compatibility list on www.ezvizlife.com.
- By any possibility exhaustion of the Doorbell's built-in battery, please power up the doorbell for at least 30 minutes before using it for the first time.
- I have failed to connect my doorbell to Wi-Fi
- Make sure your doorbell is not blocked by firewall or any limitation in your network.
- Do not connect too many devices to the router.
- Make sure the static IP setting is disabled and the router can distribute IP address to your device (DHCP is on).
- My doorbell is offline frequently
- Make sure the doorbell has received strong and stable Wi-Fi signal.
- Make sure your router and the internet is functional.
- The doorbell requires at least 2 Mbps uploading speed, please make sure the bandwidth of the network is sufficient, and do not have too many devices connected to the router.
- If all the troubleshooting techniques listed above does not resolve the problem, please delete the device from your EZVIZ account, reset and re-add.
For additional information about the device, please refer to www.ezvizlife.com.
Documents / Resources
References
![www.apple.com]() App Store - Apple
App Store - Apple![play.google.com]() Google Play
Google PlaySet up your Google Nest or Home speaker or display - Android - Google Nest Help
![www.ezvizlife.com]() EZVIZ - Creating Easy Smart Homes
EZVIZ - Creating Easy Smart Homes
Download manual
Here you can download full pdf version of manual, it may contain additional safety instructions, warranty information, FCC rules, etc.
Advertisement


Need help?
Do you have a question about the DB1 Pro and is the answer not in the manual?
Questions and answers