
Related Manuals for RITFIT CM-400 PRO


Summary of Contents for RITFIT CM-400 PRO
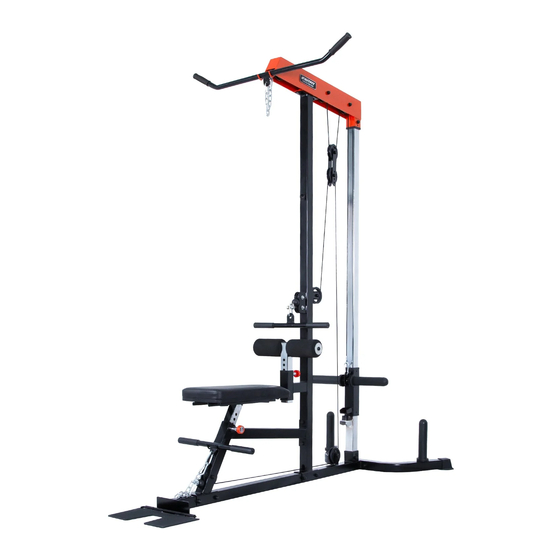
- Page 1 A GYM OF YOUR OWN LAT PULL-DOWN MACHINE CM-400 PRO CM -400 PRO Installation Guide Video Tutorial OWNER’ S MANUAL & ASSEMBLY INSTRUCTIONS...
-
Page 3: Safety And Precautions
6. Always use this equipment on a level surface. Do not clarification during your assembly process use it outdoors or near water. please feel free to contact RITFIT for direction. 7. Keep hands and feet away from any moving parts This product has been designed for light com- that are not intended to have body parts near them mercial or home use only. -
Page 4: Warranty
What’s Covered Under RitFit LLC’s Basic Warranty? - Basic Warranty A. Who Is Covered? You are covered by the Basic Warranty if you are a purchaser for use of the RitFit Lat Pull-Down Machine. B. What’s Covered? The Basic Warranty covers the cost of all parts and labor needed to repair any item on your Lat Pull-Down Machine that is defective in material workmanship or factory preparation after leaving the manufacturing plant. -
Page 5: Before You Begin
BEFORE YOU BEGIN Thank you for selecting the versatile RitFit® Lat Pull-Down Machine. RitFit® Lat Pull-Down Machine is designed and manufactured to optimize users’ workout perfor- mance and minimize adjustment or set-up time for users. For your benefit, read this manual carefully before using the Lat Pull-Down Ma- chine. -
Page 6: Parts List
PARTS LIST ·Packed in the box Quantity Description Bottom Base Upright Frame Guide Rod Bottom Arched Beam Top Beam Bench Frame Bench Adjustment Frame Seat Lat Bar Bottom Base Upright Frame Guide Rod Bottom Arched Beam Top Beam Bench Frame Bench Adjustment Frame Seat Lat Bar... - Page 7 PARTS LIST ·Packed in the box Description Quantity Knee Support Adjustment Frame Plate Carriage Low Row Bar Roller Pad Plate Holder Foot Support Plate Foot Support Pin Pulley Block Bolt Plate Knee Support Plate Carriage Low Row Bar Adjustment Frame Roller Pad Plate Holder Foot Support Plate...
- Page 8 PARTS LIST ·Packed in the box Description Quantity Roller Pad Cover Rubber Gasket Carabiner Chain Roller Pad Support Knob Cable-A Cable-B Roller Pad Cover Rubber Gasket Carabiner Chain Roller Pad Support Knob Cable-A 26 Cable-B...
- Page 9 PARTS LIST ·Packed in the box Description Quantity M10*75 Hex Bolt M10*20 Pan Head Cross Screw M10*25 Pan Head Cross Screw Washer Allen Key Open-ended Wrench M10*20 Pan Head M10*75 Hex Bolt Cross Screw M10*25 Pan Head Cross Screw Washer Allen Key Open-ended Wrench * Don’...
- Page 10 ASSEMBLY STEP 1 Description Quantity M10*75 Hex Bolt M10*25 Pan Head Cross Screw Washer Bottom Base Bottom Arched Beam Plate Holder Foot Support Plate Foot Support Pin Bolt Plate Rubber Gasket...
- Page 11 ASSEMBLY STEP 2 Description Quantity M10*75 Hex Bolt Washer Guide Rod Plate Carriage Rubber Gasket...
- Page 12 ASSEMBLY STEP 3 Quantity Description M10*75 Hex Bolt Washer Upright Frame...
- Page 13 ASSEMBLY STEP 4 Quantity Description M10*75 Hex Bolt Washer Bench Frame...
- Page 14 ASSEMBLY STEP 5 Description Quantity M10*75 Hex Bolt Washer...
- Page 15 ASSEMBLY STEP 6 Quantity Description M10*75 Hex Bolt M10*25 Pan Head Cross Screw Washer Top Beam...
- Page 16 ASSEMBLY STEP 7 Description Quantity Pulley Block Carabiner Cable-A Cable-B Start * IN A LOOKING DOWN VIEW You could adjust the length of this part by adding anextra cara- biner. Start...
- Page 17 ASSEMBLY STEP 8 Quantity Description M10*20 Pan Head Cross Screw Bench Adjustment Frame Seat Knee Support Adjustment Frame Roller Pad Roller Pad Cover Roller Pad Support Knob Step 1 Step 2 Step 1...
- Page 18 ASSEMBLY STEP 9 Description Quantity Lat Bar Low Row Bar Carabiner Chain...
- Page 19 Congratulations! You have assembled the LAT PULL-DOWN MACHINE! Now, you can officially start strength training!
- Page 20 www.ritfitsports.com support@ritfitsports.com...
Need help?
Do you have a question about the CM-400 PRO and is the answer not in the manual?
Questions and answers