Table of Contents
Advertisement
Quick Links
Particulars Furnished:
The company does not assume legal responsibility
for any derivative results of using the product;
The company reserves the right to change the product design and
manual content, and any changes will be made without prior notice!
Model: Gm1050
Version number: 1050-CH-00
Split illuminance meter
instruction manual
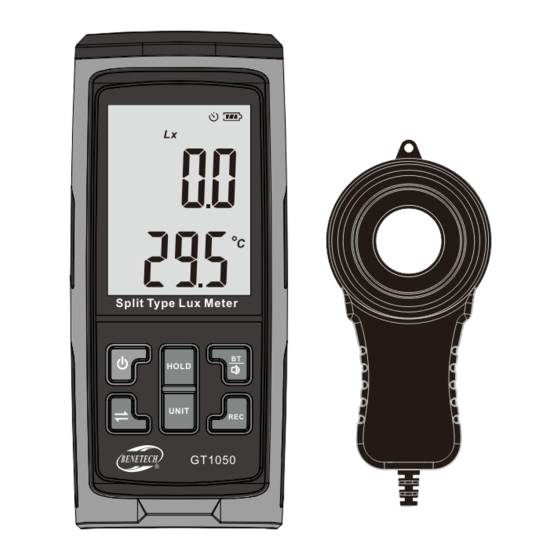
Split Type Lux Meter
BT
HOLD
UNIT
REC
GT1050
Scan the QR code to download the
LUXLab PRO App
Note: LuxLab PRO App only supports
Android 5.0 and iOS 9.0 or above
Android version
iOS version
MODEL: GM1050
Advertisement
Table of Contents

Subscribe to Our Youtube Channel
Related Manuals for Benetech GM1050


Summary of Contents for Benetech GM1050
- Page 1 MODEL: GM1050 Split illuminance meter instruction manual Split Type Lux Meter HOLD UNIT GT1050 Particulars Furnished: The company does not assume legal responsibility for any derivative results of using the product; The company reserves the right to change the product design and...
-
Page 2: Table Of Contents
I. Product introduction A split illuminance meter is a professional instrument for measuring Table of contents luminosity and brightness. It is used for light intensity measurement engineering, quality control, health prevention, and light intensity measurement in various environments, such as factories, schools, offices, traffic routes, homes, etc. II. -
Page 3: Lcd Display
V. Functional operation IV. LCD display 1. On/off operation d e f Short press the " " button to turn on, and enter the real-time interface after booting up the full screen for 2s; after booting, press the button for a long time for 1s, and then the instrument shuts off. -
Page 4: Parameters
8. Bluetooth on/off settings VII. App operation instructions In the real-time interface, short press the " " button, and " " is displayed at the top of the screen. When it flashes, it indicates that Bluetooth is on; 1. A PP main interface: when"... - Page 5 @ The "Clear Stored Data" button clears the data stored on the device, and the (3) If you need to check other functions, just click the settings button in the upper right corner. A dropdown menu with "Setting" "Folder" options will appear (click data originally stored on the device will be emptied.
- Page 6 3. Historical data page 4. On the data details page, the saved data is displayed in a list, which is (1) The currently saved data has been classified and distinguished. For the convenient for users to view The upper right corner of real-time data stored on the home page, the word "real time"...
-
Page 7: Connection Between Host And Pc
VIII. Connection between host and PC 1. Instructions for use (1) Computer configuration: Operating memory (RAM): 4G or above; Main frequency: 3G or above; 64-bit W IN7/W IN10/W In11. (2) For the serial communication method, you need to select a port. When using real-time measurement, make sure that the product is connected to the computer (that is, "connected"... - Page 8 3. Key bar (1) Start: After the product is connected to the computer, click “Start” to measure and synchronize the data to the computer in real time; (2) Stop: To end real-time measurement, press this button to stop data transmission; (3) Download: Used to download data saved on the product when not connected to a computer.
- Page 9 5. Line chart 6. Tabular interface (1) The illuminance value, illuminance unit, mode, temperature value, temperature unit, computer time, and computer date in the table will be updated each time the data is transmitted. (2) Time and date refers to the current computer time date. (3) You can drag the mouse to change the column width.
- Page 10 (4) Set the alarm value in the range of 0.0-200000, regardless of the unit. Turn on the switch and click Upload to save settings to the meter. (5) For the above box of setting values, you need to delete the value operation before entering a new setting value.
Need help?
Do you have a question about the GM1050 and is the answer not in the manual?
Questions and answers