Table of Contents
Advertisement
Quick Links
Advertisement
Table of Contents

Summary of Contents for Benetech GM130
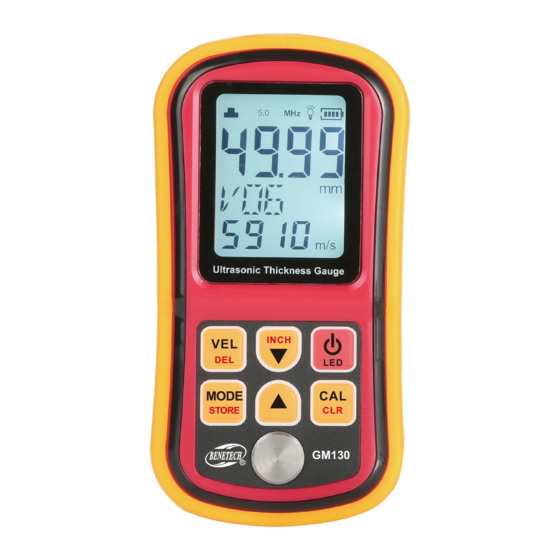
- Page 1 MODEL: GM130 Ultrasonic Thickness Gauge Instruction Manual Version: GM130-EN-03...
-
Page 2: Table Of Contents
Contents Before use Check-up----------------------------------------------(01) Introduction -------------------------------------------(02) pecification ----------------------------------------- (03) Diagram of the unit -----------------------------------(04) Operation instructions Thickness measurement----------------------------(06) Sound speed adjustment-----------------------------(07) Calibration---------------------------------------------(07) Sound speed measuring-----------------------------(08) Restoring the default speed value----------------- (08) Mode switching--------------------------------------- (09) Data saving-------------------------------------------- (09) Data reviewing---------------------------------------- (10) High/low alarm value setting----------------------- (10) Other features----------------------------------------- (11) Measurement tips------------------------------------(12) -
Page 3: Before Use
1. Before use Introduction 1).Introduction Check-up This unit is an intelligent handheld product, which adopts ultrasonic measuring principle, and is controlled by micro Carefully unpack your kit and ensure that you have processor, provides quick and precise measurement of the following items. In case that any item is missing or thickness for most of industrial material. -
Page 4: Specification
Specification Diagram Of The Unit ①. Measuring range: 1.00 to 300.0mm(steel) 1). Main Body: ②. Accuracy:±(1%H+0.1mm) H denotes the measured thickness ⑦ ⑥ ③. Working frequency: 5MHz ④. Resolution:0.01mm(1.00 to 99.99mm) ① 0.1mm(100 to 300mm) ⑤. Minimum limit for tube measuring(steel): 15*2.0mm( 6mm transducer) 20*3.0mm( 10mm transducer) ⑥. -
Page 5: Operation Instructions
2). Keyboard 2. Operation Instruction – On/off/backlight key Thickness measuring Paste the coupling agent on the measured place to INCH – Key for mode setup and retrieval MODE STORE couple the sensor with the measured material. The of data saved. thickness value appears on LCD with the coupling icon MODE –... -
Page 6: Sound Speed Adjustment
2. Sound speed adjustmen 4. Sound speed measuring Press “ VEL/DEL” key and the sound speed icon flashes, How to determine the sound speed of a certain material then press the Up key or Down key to adjust the speed, with piece of given depth:Measure the depth of the mate- press the“VEL/DEL”key the “VEL”... -
Page 7: Mode Switching
8.Data reviewing 6.Mode switching Long press on the MODE/STORE” key to enter into reviewing “ Press MODE/STORE”key to switch among normal mode, “ window, it displays “NON” if there is no datum saved. Use Up high gain mode and low gain mode. The normal mode has key or Down key to review the data. -
Page 8: Measurement Tips
3. Measurement tips 1). Cleaning surface Before measuring, the dust, dirt, rusting and grease etc that adheres on the hardware/workpiece must be removed off and cleaned. 2). Decreasing the roughness of surface Too rough surface may result in measure error/ fault Low alarm limit setting High alarm limit setting. - Page 9 by calibrating to the referring block, the effect of variation 6). Non-parallel surface of sound velocity will be minimized. To get the most exact To get a satisfying ultrasonic response, the surface must measure, a set of referring block is very important. have its one measuring side parallel with another, other- When measuring thin material which thickness close to wise will obtain wrong result.
-
Page 10: Precautions For Accuracy
4. Precautions for accuracy rasonic reflect principle cannot be applied to measure the multilayer/composite material. 1). For very thin material 7). Influence from the oxidized surface Any ultrasonic thickness gauge, when the thickness of For some metals, such as aluminum a layer of oxide being the material to be measured is less than the minimum limit generated on their surface. -
Page 11: Maintain And Warranty
5. Maintain And Warranty 2. Warranty: 1).When the tolerance is over than stated in this manual, 1). Maintain please refer to the 3, 4, 5 chapter, in this manual. (1). Battery replacement 2). Please contact us or distributor if the following occurs: A).When low battery icon is showed, please replace the A. -
Page 12: Table Of Sound Velocity
6. Table of sound velocity Sound velocity of common materials Material Material Velocity(m/s) Velocity(m/s) Aluminum Acetate resin 6320 2670 Zinc Phosphor bronze 4170 3530 Silver 3600 Turpentine 4430 Glod Glass 3240 5440 3230 Incoloy alloy 5720 Iron/Steel 5900 Magnesium 6310 Brass 4640 Monel alloy...


Need help?
Do you have a question about the GM130 and is the answer not in the manual?
Questions and answers