Table of Contents
Advertisement
Advertisement
Table of Contents

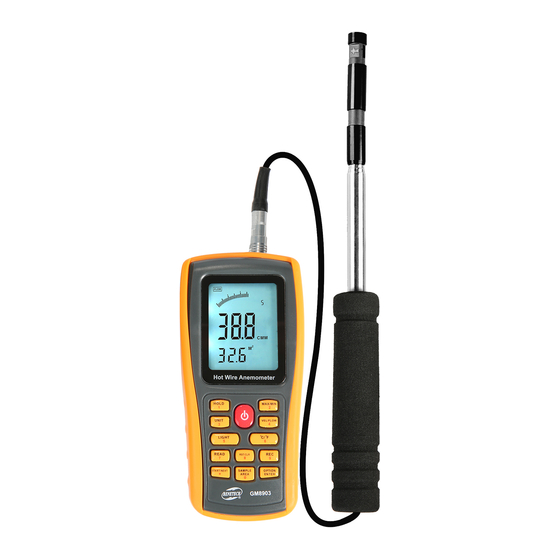
Summary of Contents for Benetech GM8903
- Page 1 MODEL: GM8903 HOT WIRE ANEMOMETER INSTRUCTION MANUAL Version:GM8903-EN-03...
-
Page 2: Table Of Contents
1、Before Use Notice CONTENTS Check up 1、Before Use Thank you for purchasing our Hot Wire Anemometer! Carefully unpack your kit and ensure that you have the Check up ------------------------------------------------ (01) following Items .In case that any item is missing or if Features ------------------------------------------------- (02) you find any mismatch or damage ,promptly contact... -
Page 3: Features
Diagram of the unit Features Measurement of wind velocity, temperature and flow Unit conversion of wind velocity, temperature and flow Measurement of maximum and minimum wind velocity Measurement of 2/3 Vmax and average wind flow Data holding, storing and deleting function Low battery indicating function It turns off automatically within 10 minutes if there is no further operation. -
Page 4: Lcd Displays
Connector (With direction indicator) LCD Display 2). LCD display : ON/ OFF key 27 26 25 24 23 HOLD :Data holding key UNIT :Unit transform key LIGHT :Backlight on/off key READ :Data read key START/NEXT :Measuring key for average value of wind flow RST/CLR :Reset key in READ mode/clear recorded SAMPLE... -
Page 5: Specifications
:Indicating duct area in square meter in flow Specifications function, "℃ " is used to indicate 1. Wind Velocity Range : wind temperature in metric. Lowest Point Wind Velocity Accouracy Unit Resolution :Wind flow unit (cube meter / minute) of start value 0.0-30.0 0.001 ±3%±0.1... -
Page 6: Measurement Of Wind Velocity And Temperature
2、Operation Instruction 5. Operation Conditions : Temperature Humidity Measurement of Wind Velocity and Temperature 0-50℃ (32℉~122℉) Host ≤80% RH 0-60℃ (32℉~140℉) Sensor Open the battery door , and install the batteries properly as shown in following figure: 6. Storage Conditions : Temperature -40℃~60℃... -
Page 7: Measurement Of Windflow
Hold the Anemometer with your hand , place the probe Measurement of Windflow in the air flow with the air direction matching the direction of the arrows printed on the inner walls of the probe ( Press the "VEL/FLOW" key to get into "FLOW" mode, please do not extrude the sensor tip, which may cause the LCD screen as shown in following figure : the inaccuracy measurement ) -
Page 8: Measurement Of 2/3 Vmax Wind Flow
Measurement of 2/3 Vmax Wind Flow Press the "VEL/FLOW" key to enter into "FLOW" mode; Select your desired unit by pressing the UNIT key,for example: select CMM for wind flow unit, M for area unit; Press the "AREA" key,letter on the LCD will disappe- ared at this time you can input duct area, such as 1.6, press "ENTER"... -
Page 9: Measurement Of Average Wind Flow
Then select another test point, press the NEXT key to Measurement Of Average Wind Flow take measurement of the second group average wind flow values. Press the "VEL/FLOW" key to get into "FLOW" mode; Repeat above steps to measure as many as 12 groups Select your desired unit by pressing the UNIT key,for of average wind flow values. - Page 10 Max and min measurement Date holding /Storeage/Reading and clearing Data holding: In wind flow and velocity measuring process, press the When taking measurement of wind velocity and flow, press "MAX/MIN" key to obtain the maximum and minimum the "HOLD" key to freeze the Data , press the "HOLD" key values, press again to exit.
-
Page 11: Connection With Pc
Reading Data stored In memory Ramdomly: Connection With Pc On read Status ,Press the "SAMPLE" Key and enter the number of the record in questions and press "ENTER" 1). Requirement of computer configuration: Key then the desired data will be displayed Press " CPU : Pentium 600MHZ Or above ;... - Page 12 3). Software interface: Please follow the install shield wizard and click on "NEXT",and select " Create a desktop icon" . Menu Until "Finish" is shown,select "Run Anemometer" Tool to complet software installation, as figure below: Menu introduction as shown in following figure: File menu bar:...
- Page 13 Tool bar introduction shown in following figure: Order function Order Real time data measurement, the measured Real time measure data will be real time as shown on the computer. Open measurement data file that is saved as Open Button Function the LAB format Save real time measurement data Save...
- Page 14 Button introduction: 4). Insert one end of the connecting cable into the USB interface of the top anemometer host; Insert other end of the connecting cable into free Button Function interface port of on the computer back, If the unit connect with PC LCD will display Click to start real time measurement ;...
-
Page 15: 3、Other Items
3. Other Items 6). Download of measurement data: Click the 'Import Data" in "File" menu bar or Import Data button on tool bar will enter download F a m i l i a r t r o u b l e s h o o t i n g contact interface of measured data, click the start to Import button on bottom to import the stored data into The following is a list of actions to be taken if the unit is... -
Page 16: Maintenance & Warranty
2). Warranty: M a i n t e n a n c e & W a r r a n t y About relative warranties please read provided 1). Maintenance: warranty card. Replacing the battery and product maintenance: We disclaim any liability due to: transportation a.


Need help?
Do you have a question about the GM8903 and is the answer not in the manual?
Questions and answers