Table of Contents
Advertisement
Quick Links
OPERATION MANUAL
FEATURES:
•
1/1.8" 4 MegaPixel Progressive Scan CMOS Sensor
•
Advanced Starlight Technology Offers Dramatically Higher Sensitivity to Light Producing Color
Images in Very Dark & Night Scenes
•
Up to 30fps live view @ 4 MegaPixel (2592 × 1520)
•
8~32mm @F1.6 Motorized Varifocal Lens
•
Matrix IR (up to 325' IR Range)
•
True Wide Dynamic Range (120dB)
•
True Mechanical Day / Night function by ICR
•
XD-DNR (3D & 2D-DNR) Noise Reduction
•
Intelligent Analytics: License Plate Recognition, Vehicle Type Detection, Video Exception
•
10,000 Vehicle Plate Database
•
0-75m/h (120km/h) Capture Speed (Dependant on Installation)
•
Overlay Options: Time, Location, License Plate Information
•
Triple Streaming: H.265+ / H.265 / H.264+ / H.264 / MJPEG
•
1 Ch. Audio In + 1 Ch. Audio Out*
•
1 Ch. Alarm In + 1 Ch. Alarm Out, 1 Ch. CVBS
•
Supports Wiegand Protocol for Advanced Access Control Integrations
•
Remote Viewing via VMS, Web Browsers, and iOS & Android Apps
•
MicroSD Card Slot for Local Recording (256GB)
•
IP67 Weather Resistance
•
Wall Mount Included, Optional Mounts: Junction Box VT-TJB01
[See Additional Mounting Options on pg. 58]
•
12VDC / 24VAC [Dual Voltage] & PoE (Power over Ethernet) Operation Options
•
3-Year Warranty
*Please research local, state and federal laws regarding audio surveillance.
PLEASE NOTE:
Complete User Guide, Software, Tools, and Updates are
available online. Scan the QR Code or visit:
http://www.vitekcctv.com/Downloads
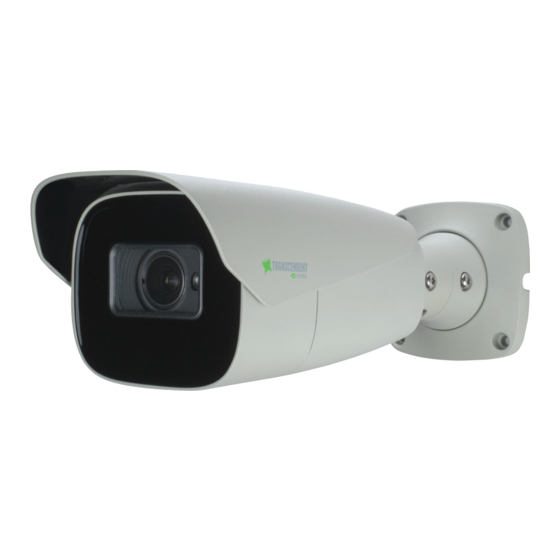
VTC-TNB4LPRN
Transcendent Series 4 MegaPixel
License Plate Recognition WDR IP
Motorized Bullet Camera
Advertisement
Table of Contents

Related Manuals for Vitek VTC-TNB4LPRN


Summary of Contents for Vitek VTC-TNB4LPRN
- Page 1 VTC-TNB4LPRN Transcendent Series 4 MegaPixel License Plate Recognition WDR IP Motorized Bullet Camera OPERATION MANUAL FEATURES: • 1/1.8” 4 MegaPixel Progressive Scan CMOS Sensor • Advanced Starlight Technology Offers Dramatically Higher Sensitivity to Light Producing Color Images in Very Dark & Night Scenes •...
-
Page 2: Regulatory Information
Disclaimer • For products with internet access, usage will be wholly at your own risks. VITEK is not respon- sible for abnormal operation, privacy leakage or other damages resulting from c y b e r attacks, hackers, virus infection, or other internet security risks; however, VITEK will provide timely technical support if necessary. - Page 3 VT-2410A-A9 - 9 Output 24VAC Power Center - 10 AMP - UL Listed VT-2415A-A18 - 18 Output 24VAC Power Center - 15 AMP - UL Listed VITEK Recommended PoE Injectors for VTC-TNB4LRPN VT-POE60 - 60 Watt POE Mid-Span Injector, 4-Pair Compliant, IEEE802.3af/at Auto Detect, Distance up to 330’...
- Page 6 Introduction Main Features l ICR auto switch, true day/night l 3D DNR, WDR l BLC, Defog, Anti-flicker, smart IR, corridor mode l ROI coding l Abnormal video signal detection (scene change, video blur detection, video color cast detection), license plate recognition l Supports mobile surveillance by smart phones with iOS and Android OS Surveillance Applications...
-
Page 7: Network Connection
VITEK - TRANSCENDENT SERIES: VTC-TNB4LPRN 1 Network Connection Connect IP-Cam via LAN or WAN. IE browser is used here as an example. The details are as follows: 1.1 LAN In LAN, there are two ways to access IP-Cam: 1. access through IP-Tool; 2. directly access through IE browser. - Page 8 VITEK - TRANSCENDENT SERIES: VTC-TNB4LPRN according to the actual scenario. For example, if the IP address of your computer is 192.168.1.4. The IP address of the camera should therefore be changed to 192.168.1.X. After modifying, please enter the password of the administrator and click the “Modify”...
-
Page 9: Directly Access Through Ie
VITEK - TRANSCENDENT SERIES: VTC-TNB4LPRN The system will display the above-mentioned textbox to ask you to change the default password. It is strongly recommended to change the default password for account security. If “Do not show again” is checked, the textbox will not appear next time. - Page 10 VITEK - TRANSCENDENT SERIES: VTC-TNB4LPRN ② Open the IE browser and enter the default address of IP-CAM and confirm. ③ Follow directions to download and install the Active X control. ④ Enter the default username and password in the login window and then enter to view.
- Page 11 VITEK - TRANSCENDENT SERIES: VTC-TNB4LPRN IP Setup ③ Go to the router’s management interface through IE browser to forward the IP address and port of the camera in the “Virtual Server”. Router Setup ④ Open the IE browser and enter its WAN IP and http port to access. (For example, if the http port is changed to 81, please enter “192.198.1.201:81”...
- Page 12 VITEK - TRANSCENDENT SERIES: VTC-TNB4LPRN Access the camera through PPPoE auto dial-up. The setup steps are as follows: ① Go to ConfigàNetworkàPort menu to set the port number. ② Go to Config àNetworkàTCP/IPàPPPoE Config menu. Enable PPPoE and then enter the username and password from your internet service provider.
-
Page 13: Live View
VITEK - TRANSCENDENT SERIES: VTC-TNB4LPRN 2 Live View After logging in, the following window will be shown. The following table is the instructions of the icons on the live view interface. Icon Description Icon Description Original size Zoom out Fit correct scale... -
Page 14: Network Camera Configuration
VITEK - TRANSCENDENT SERIES: VTC-TNB4LPRN In full screen mode, double click on the mouse to exit or press the ESC key on the keyboard. Click AZ control button to show AZ control panel. The descriptions of the control panel are as... -
Page 15: Date And Time
VITEK - TRANSCENDENT SERIES: VTC-TNB4LPRN 3.1.2 Date and Time Go to ConfigàSystemàDate and Time. Please refer to the following interface. Select the time zone and DST as required. Click the “Date and Time” tab to set the time mode. 3.1.3 Local Config Go to ConfigàSystemàLocal Config to set up the storage path of captured pictures and recorded... -
Page 16: Sd Card Management
VITEK - TRANSCENDENT SERIES: VTC-TNB4LPRN 3.1.4 Storage Go to ConfigàSystemàStorage to go to the interface as shown below. l SD Card Management Click the “Format” button to format the SD card. All data will be cleared by clicking this button. -
Page 17: Snapshot Settings
VITEK - TRANSCENDENT SERIES: VTC-TNB4LPRN Weekly schedule Set the alarm time from Monday to Sunday for a single week. Each day is divided in one hour increments. Green means scheduled. Blank means unscheduled. “Add”: Add the schedule for a special day. Drag the mouse to set the time on the timeline. -
Page 18: Image Configuration
VITEK - TRANSCENDENT SERIES: VTC-TNB4LPRN Set the format, resolution and quality of the image saved on the SD card and the snapshot interval and quantity and the timing snapshot here. Snapshot Quantity: The number you set here is the maximum quantity of snapshots. The actual quantity of snapshots may be less than this number. - Page 19 VITEK - TRANSCENDENT SERIES: VTC-TNB4LPRN Brightness: Set the brightness level of the camera’s image. Contrast: Set the color difference between the brightest and darkest parts. Hue: Set the total color degree of the image. Saturation: Set the degree of color purity. The purer the color, the brighter the image is.
- Page 20 VITEK - TRANSCENDENT SERIES: VTC-TNB4LPRN HLC: lowers the brightness of the entire image by suppressing the brightness of the image’s bright area and reducing the size of the halo area. BLC: If enabled, the auto exposure will activate according to the scene so that the object of the image in the darkest area will be seen more clearly.
-
Page 21: Video / Audio Configuration
VITEK - TRANSCENDENT SERIES: VTC-TNB4LPRN Drag “ ” icons to set the time of day and night. Blue means daytime and blank means night. If the current mode of camera parameters is set to schedule, the image configuration mode will automatically switch between day and night according to the schedule. -
Page 22: Osd Configuration
VITEK - TRANSCENDENT SERIES: VTC-TNB4LPRN setting the value higher than the frame rate is fine, potentially resulting in less bandwidth usage. However, if the value is set too high, and there is a high frequency of movement in the video, there is a risk of frame skipping. -
Page 23: Video Mask
VITEK - TRANSCENDENT SERIES: VTC-TNB4LPRN Picture Overlap Settings: Check “OSD Content1”, choose “Picture Overlay” and click “Browse” to select the overlap picture. Then click “Upload” to upload the overlap picture. The pixel of the image should not exceed 200*200, or it cannot be uploaded. -
Page 24: Roi Configuration
VITEK - TRANSCENDENT SERIES: VTC-TNB4LPRN To clear the video mask: Click the “Clear” button to delete the current video mask area. 3.2.5 ROI Configuration Go to ImageàROI Config interface as shown below. An area in the image can be set as a region of interest. -
Page 25: Lens Control
VITEK - TRANSCENDENT SERIES: VTC-TNB4LPRN 3.2.6 Lens Control This function is only available for the model with motorized zoom lens. Within this section, zoom and focus can be controlled. If the image is out of focus after a manual adjustment, one key focus can be used to set the focus automatically. -
Page 26: Ptz Configuration
VITEK - TRANSCENDENT SERIES: VTC-TNB4LPRN 3.3 PTZ Configuration This function is only available for the model with RS485 interface. It can be used with a compatible external PTZ enclosure. Go to PTZàProtocol interface as shown below. 3.4 Alarm Configuration 3.4.1 Motion Detection Go to AlarmàMotion Detection to set motion detection alarm. -
Page 27: Other Alarms
VITEK - TRANSCENDENT SERIES: VTC-TNB4LPRN first in the Email configuration interface), the captured pictures and triggered event will be sent to those addresses. Trigger FTP: If “Trigger FTP” and “Attach Picture” are checked, the captured pictures will be sent to the FTP server address. Please refer to FTP configuration chapter for more details. -
Page 28: Sd Card Error
VITEK - TRANSCENDENT SERIES: VTC-TNB4LPRN motion detection chapter for details. l SD Card Error When there are errors in writing to the SD card, the corresponding alarms will be triggered. 1. Go to Config Alarm Anomaly SD Card Error as shown below. - Page 29 VITEK - TRANSCENDENT SERIES: VTC-TNB4LPRN 2. Click “Enable” and set the alarm holding time. 3. Trigger alarm out. When the camera is disconnected, the system will trigger the alarm out. 3.4.3 Alarm In To set sensor alarm (alarm in): Go to ConfigàAlarmàAlarm In interface as shown below.
-
Page 30: Alarm Out
VITEK - TRANSCENDENT SERIES: VTC-TNB4LPRN For the model with two alarm input interfaces, you must select the sensor ID first. Then set the relevant trigger items. Click “Apply settings to” to quickly apply the settings to the other alarm input. -
Page 31: Alarm Server
VITEK - TRANSCENDENT SERIES: VTC-TNB4LPRN Day/Night Switch Linkage: Having selected this mode, select the alarm type and then choose to open or close alarm out when the camera switches to day mode or night mode. Timing: Select the alarm type. Then click “Add” and drag the mouse on the timeline to set the schedule of alarm out;... -
Page 32: Exception Settings
VITEK - TRANSCENDENT SERIES: VTC-TNB4LPRN Cameras should be installed on stable surfaces, as vibrations can affect the accuracy of detection. Avoid pointing the camera at the reflective surfaces (like shiny floors, mirrors, glass, lake surfaces and so on). Do not aim the camera at the sun, road lamp or headlights of a car. -
Page 33: Anpr (Lpr) Settings
VITEK - TRANSCENDENT SERIES: VTC-TNB4LPRN shown below. Drag the slider to set the sensitivity value or directly enter the sensitivity value in the textbox. Click “Save” button to save the settings. The sensitivity value of Scene Change Detection: The higher the value, the more sensitive the system responds to the amplitude of the scene change. - Page 34 VITEK - TRANSCENDENT SERIES: VTC-TNB4LPRN To set the detection area: Click “Draw Area” and drag the border lines of the rectangle to modify its size. Click “Stop Draw” to stop drawing the area. Click “Clear” to clear the area. Then set the detectable size by defining the maximum value and the minimum value (The default size range of a single number plate image occupies from 5% to 50% of the entire image).
- Page 35 VITEK - TRANSCENDENT SERIES: VTC-TNB4LPRN l Add vehicles Click “Add” to show a vehicle adding box as shown in the above figure. Enter the license plate number, select list type, start and end time, enter owner and license plate type. Then click “Save”...
- Page 36 VITEK - TRANSCENDENT SERIES: VTC-TNB4LPRN Set the fault tolerance, alarm list and check “alarm out”. Finally, click “Save” to save all the settings. Allow fault character(s) of the plate number: up to 2 characters are allowed. For example, if “2”...
- Page 37 VITEK - TRANSCENDENT SERIES: VTC-TNB4LPRN type will be displayed under the license plate number. Click the matched license plate picture, the matched details will pop up as shown below. ※ ※ Configuration requirements of camera and surrounding area The monitoring image should try to cover the lane, entering/exiting vehicles and these vehicles’...
- Page 38 VITEK - TRANSCENDENT SERIES: VTC-TNB4LPRN The depression angle of the camera should range from 10° to 15°. If the camera is installed on the side of the road, the pan angle of the camera should range from 0° to 20°.
-
Page 39: Network Configuration
VITEK - TRANSCENDENT SERIES: VTC-TNB4LPRN in the video. The tilt angle should range from -5° to 5°. If the captured license plate does not meet the above requirement, you can adjust the pan angle of the camera to correct it. -
Page 40: Server Configuration
VITEK - TRANSCENDENT SERIES: VTC-TNB4LPRN Either method of network connection can be used. If PPPoE is used to connect internet, the camera will get a dynamic WAN IP address. This IP address will change frequently. To be notified, the IP change notification function can be used. - Page 41 VITEK - TRANSCENDENT SERIES: VTC-TNB4LPRN 1. Check “Enable”. 2. Check the IP address and port of the transfer media server in the VMS. Then enable the auto report in the VMS when adding a new device. Next, enter the remaining information of the device in the VMS.
- Page 42 VITEK - TRANSCENDENT SERIES: VTC-TNB4LPRN Create domain name. After the domain name is successfully applied for, the domain name will be listed as below. 3. Enter the username, password, domain you apply for in the DDNS configuration interface. 4. Click the “Save” button to save the settings.
- Page 43 VITEK - TRANSCENDENT SERIES: VTC-TNB4LPRN 3.6.5 SNMP To get camera status, parameters and alarm information and remotely manage the camera, the SNMP function can be used. Before using SNMP, please install an SNMP management tool and set the parameters of the SNMP, such as SNMP port, trap address.
- Page 44 VITEK - TRANSCENDENT SERIES: VTC-TNB4LPRN higher the version is, the higher the level of the security is. 3.6.6 802.1x If it is enabled, the camera’s data can be protected. When the camera is connected to the network protected by the IEE802.1x, user authentication is needed.
- Page 45 VITEK - TRANSCENDENT SERIES: VTC-TNB4LPRN Multicast Address Main stream: The address format is “rtsp://IP address: rtsp port/profile1?transportmode=mcast”. Sub stream: The address format is “rtsp://IP address: rtsp port/profile2?transportmode=mcast”. Third stream: The address format is “rtsp://IP address: rtsp port/profile3?transportmode=mcast”. Audio: Having entered the main/sub stream in a VLC player, the video and audio will play automatically.
- Page 46 VITEK - TRANSCENDENT SERIES: VTC-TNB4LPRN Sender Address: sender’s e-mail address. Username and password: sender’s user name and password. Server Address: The SMTP IP address or host name. Select the secure connection type at the “Secure Connection” pull-down list according to what is required.
- Page 47 VITEK - TRANSCENDENT SERIES: VTC-TNB4LPRN Server Name: The name of the FTP server. Server Address: The IP address or domain name of the FTP. Upload Path: The directory where files will be uploaded to. Port: The port of the FTP server.
- Page 48 VITEK - TRANSCENDENT SERIES: VTC-TNB4LPRN * If there is a signed certificate, click “Browse” to select it and then click “Install” to install it. * Click “Create a private certificate” to enter the following creation interface. Click the “Create” button to create a private certificate. Enter the country (only two letters available), domain (camera’s IP address/domain), validity date, password, province/state, region...
-
Page 49: Security Configuration
VITEK - TRANSCENDENT SERIES: VTC-TNB4LPRN 3.6.13 QoS QoS (Quality of Service) function is used to provide different quality of services for different network applications. With the deficient bandwidth, the router or switch will sort the data streams and transfer them according to their priority to solve the network delay and network congestion by using this function. - Page 50 VITEK - TRANSCENDENT SERIES: VTC-TNB4LPRN 2. Enter username in the “Username” textbox. 3. Enter the password in the “Password” and “Confirm Password” textbox. Please set the password according to the requirement of the password security level (Go to ConfigàSecurityàSecurity ManagementàPassword Security interface to set the security level).
-
Page 51: Online User
VITEK - TRANSCENDENT SERIES: VTC-TNB4LPRN 3. Enter the old password of the user in the “Old Password” text box. 4. Enter the new password in the “New password” and “Confirm Password” text box. 5. Enter computer’s MAC address as necessary. -
Page 52: Maintenance Configuration
VITEK - TRANSCENDENT SERIES: VTC-TNB4LPRN To prevent against malicious password unlocking, “locking once illegal login” function can be enabled here. If this function is enabled, login failure after trying six times will make the login interface locked. The camera can be logged in again after a half hour or after the camera reboots. - Page 53 VITEK - TRANSCENDENT SERIES: VTC-TNB4LPRN Import & Export Settings Configuration settings of the camera can be exported form a camera into another camera. 1. Click “Browse” to select the save path for import or export information on the PC. 2. Click the “Import Setting” or “Export Setting” button.
-
Page 54: Operation Log
VITEK - TRANSCENDENT SERIES: VTC-TNB4LPRN 2. Click the “Upgrade” button to start upgrading the firmware. 3. The device will restart automatically Caution! Do not close the browser or disconnect the camera from the network during the upgrade. 3.8.4 Operation Log To query and export log: 1. - Page 55 VITEK - TRANSCENDENT SERIES: VTC-TNB4LPRN l Local Image Search Choose “Picture”—“Local”. Set time: Select date and choose the start and end time. Click to search the images. Double click a file name in the list to view the captured photos as shown below.
-
Page 56: Local Video Search
VITEK - TRANSCENDENT SERIES: VTC-TNB4LPRN Click to search the images. Double click a file name in the list to view the captured photos. Click to return to the previous interface. The descriptions of the buttons are shown as follows. Icon... -
Page 57: Sd Card Video Search
VITEK - TRANSCENDENT SERIES: VTC-TNB4LPRN Choose “Record”—“Local”. Set search time: Select the date and choose the start and end time. Click to search the images. Double click on a file name in the list to start playback. Icon Description Icon Description Play button. - Page 58 VITEK - TRANSCENDENT SERIES: VTC-TNB4LPRN Set search time: Select the date and choose the start and end time. Click to search the images. Select the alarm events at the bottom of the interface. Select mix stream (video and audio stream) or video stream as needed.
- Page 59 VITEK - TRANSCENDENT SERIES: VTC-TNB4LPRN Click to set the start time and then this button turns blue ( Select the end time by clicking on the time table. Then click to set the end time. Click to download the video file in the PC.
- Page 60 NOTES...
- Page 61 DETAILED SPECIFICATIONS: VTC-TNB4LPRN Image Sensor 1/1/8” 4.0 MegaPixel Progressive Scan CMOS Image Size 4 MegaPixel (2560 × 1520) Electronic Shutter Manual or Auto, Manual: 1 / 1 s ~ 1 / 100000s 4 MP (2592 × 1520) / 3 MP (2304 × 1296) / 1080P (1920 × 1080) Resolution / 720P (1280 ×...
- Page 62 DETAILED SPECIFICATIONS CONT’D: VTC-TNB4LPRN Storage Built-in microSD Card Slot - up to 256GB, Network Remote Storage Reset Alarm 1CH Alarm Input, 1CH Alarm Output RS485 Wiegand YES - Supports Wiegand Protocol for Advanced Access Control Integrations [In or Out Configurable]...
- Page 63 Analytic Functions and Applications! See www.vitekcctv.com for More! Also Consider Vitek Wireless Access Points to Reduce Cable Installation Costs! VT-WAP1150 and VT-WAP2150 High Speed 5.8GHz DIP AP/CPE Wireless Bridge w/ 8MB Storage, 64MB RAM, 150MBps transmission, and Point-to-Multi-Point (P2MP) Topology With high speed transmission of 150Mbps and a wireless range of 3000ft.
-
Page 64: Limited Product Warranty
LIMITED PRODUCT WARRANTY This VITEK product carries a three (3) year limited warranty. VITEK warrants to the purchaser that products manufactured by VITEK are free of any rightful claim of infringement or the like, and when used in the manner intended, will be free of defects in materials and workmanship for a period of three (3) years, or as otherwise stated above, from the date of purchase by the end user.
Need help?
Do you have a question about the VTC-TNB4LPRN and is the answer not in the manual?
Questions and answers