Table of Contents
Advertisement
Quick Links
Getting Started
This Quick Start Guide is a basic reference for information on setting up your CrewCom system with the minimum equipment
required for wireless communication. For complete operation instructions, see the CrewCom devices' Operating Manuals or the
CrewCom Support page available at
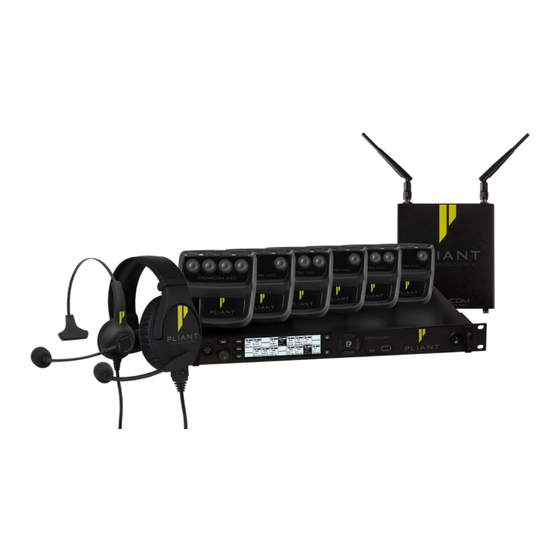
At a minimum, you will need:
•
A CrewCom Con guration File (CCF) - Created via CrewWare or Auto Con guration (instructions below)
•
1 Control Unit (CU)
•
Up to 6 Radio Packs (RPs) with charged batteries
•
1 Radio Transceiver (RT)
•
Minimum of 2 headsets to test communication
•
1 Cat 5e (or greater) cable or Single Mode Dual LC Fiber (for CU to RT connection)
Note: This document does not cover con guration nor use of a CrewCom Hub. For more information about Hubs and other advanced CrewCom con guration
possibilities, refer to the documentation provided on Pliant's website and Support via the link or QR code above.
1
Plan your coverage area and position devices.
Plan Your Coverage Area
Before installation begins, it is a good idea to plan your coverage area so that equipment is positioned in the best possible locations.
Here are some tips when planning your coverage area:
•
Map out the site and identify the most critical areas where communication is needed.
•
Consider cable length limitations during planning. Copper: 330 ft. (100 m). Fiber: 32,800 ft. (10 km).
•
Locate antennas in open spaces and avoid obstructions (especially metal) and other nearby RF sources.
•
If using omni-directional antennas, position antennas in center of coverage area and as high as possible.
Quick Start Guide
https://plianttechnologies.com/support/crewcom-support/
or scan the QR code to the right.
Advertisement
Table of Contents

Related Manuals for Pliant CREWCOM


Summary of Contents for Pliant CREWCOM
- Page 1 1 Cat 5e (or greater) cable or Single Mode Dual LC Fiber (for CU to RT connection) Note: This document does not cover con guration nor use of a CrewCom Hub. For more information about Hubs and other advanced CrewCom con guration possibilities, refer to the documentation provided on Pliant’s website and Support via the link or QR code above.
- Page 2 CrewNet Port Types RJ-45 Ports - Use the supplied 15 ft. (4.6 m) Cat 5e cable, or your own Cat 5e (or greater) cable (up to 330 ft. (100 m) in length). Any CrewCom device connected to CrewNet via a Cat 5e (or greater) cable will receive Power Over CrewNet (PoC) via the CrewNet port. In some situations, there may be too many connected devices or the cable lengths may be too long for the PoC to adequately power all devices, and this will be indicated by the NET PWR LED lighting red.
- Page 3 Rechargeable Battery B. Pry open the battery door and remove it. C. While still holding the RP at a 45-degree angle and depressing the belt clip, install a fully-charged Pliant Lithium-Polymer rechargeable battery or three AA batteries. D. Place battery door back on the RP, making sure to align and insert its tab at the top rst. Secure a magnetic door by pressing rmly until the magnet engages.
- Page 4 Auburn, Alabama 36830 USA Notice About Speci cations: While Pliant makes every attempt to maintain the accuracy of the information contained in this document, this information is subject to change without notice. Please check our website for the latest system speci cations and certi cations. Copyright ©2016-2023 Pliant Technologies, LLC. All rights ®...
Need help?
Do you have a question about the CREWCOM and is the answer not in the manual?
Questions and answers