
Related Manuals for Plextor PX-S2410TU


Summary of Contents for Plextor PX-S2410TU
- Page 1 Model PX-S2410TU (External) INSTALLATION AND USERS MANUAL SLIMLINE USB CD-R/RW DRIVE JANUARY 2003...
-
Page 2: Record Your Serial Number
Manual copyright ©2002, 2003 Plextor Corp. Second edition, January 2003. Licenses and Trademarks Plextor and the Plextor logo are registered trademarks of Plextor Corp; and PlexWriter is a trademark of Plextor Corp. Other brands and products are trademarks of their respective holders. - Page 3 FCC NOTICE This equipment has been tested and found to comply with the limits for a Subpart B digital device, pursuant to Part 15 of the FCC Rules. These limits are designed to provide reasonable protection against harmful interference in a residential installation.
- Page 4 VORSICHT: DIE TRENNUNG VOM NETZ ERFOLGT DURCH ZIEHEN DES NETZSTECKERS. Zur Einhaltung der Funk-Entstörung von nicht selbständig betreibbaren Hochfrequenzgeräten (periphere Anlagenkomponenten). Dieses Gerät entspricht als Einzelgerät den Funk-Entstöranforderungen der Postverfügung Nr. 243/1991. Wird das Gerät innerhalb einer Anlage zusammen mit anderen Geräten betrieben, so muss bei Inanspruchnahme der “Allgemeinen (Betriebs-) genehmigung”...
-
Page 5: Table Of Contents
Table of Contents 1. Getting Started...1 About this Manual ...1 Meet Your PlexWriter 24/10/24U...1 What the PlexWriter 24/10/24U Does ...1 Features of the PlexWriter 24/10/24U ...1 Minimum Configuration to Use the PlexWriter 24/10/24U...2 What You Can Do with the PlexWriter 24/10/24U ...3 What's in the Box...3 Save Your Box! ...3 PlexWriter Drive Features and Controls ...4... - Page 6 Table of Contents Appendix A: PlexWriter Specifications... 27 Appendix B: Technical Support ... 31 How to Contact Plextor Technical Support ... 31 Before You E-mail/Log On/FAX/Call ... 32 Returns... 32 Contacting Plextor’s RMA Department ... 33 Packing Your Drive ... 33 Shipping Your Drive to Plextor ...
-
Page 7: Getting Started
About this Manual This manual explains how to connect and use your external PlexWriter 24/10/24U drive. With USB, the installation process is simple. If you have problems, Plextor’s technical support staff is here to help. Please read this manual carefully and keep it handy for easy reference. Use the manual for installation, operation and troubleshooting. -
Page 8: Minimum Configuration To Use The Plexwriter 24/10/24U
• Plug & Play: Supports Windows Plug & Play. • Flash memory: Allows upgrading the PlexWriter to the latest firmware revision (available from the Plextor web site) without opening the computer or physically accessing the drive. • Buffer Underrun-Proof technology: Eliminates buffer underrun errors, so you can safely use your computer for other tasks while you’re writing to a CD-R or... -
Page 9: What You Can Do With The Plexwriter 24/10/24U
What's in the Box What you find in your Plextor box depends on what the company that sold you the box put in—or took out—while the Plextor drive was in their possession. Plextor currently sells its PlexWriter 24/10/24U drive in this configuration: •... -
Page 10: Plexwriter Drive Features And Controls
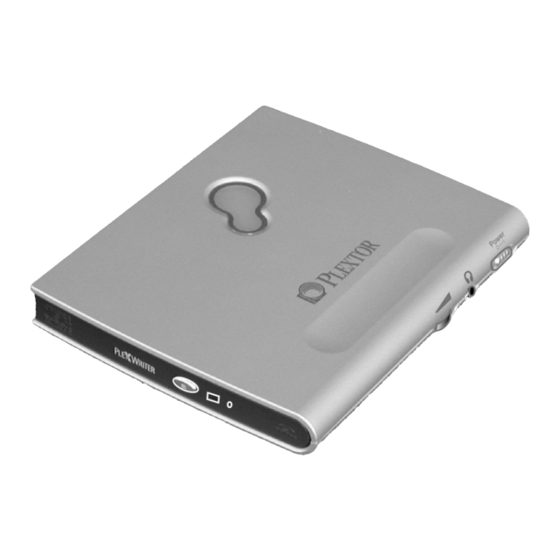
Section 1. Getting Started PlexWriter Drive Features and Controls Before proceeding, become familiar with the controls and features of your PlexWriter drive. Match the parts of your drive to the illustrations below. Figure 1: Features and Controls on the PlexWriter 24/10/24U Drive •... -
Page 11: About Software
A list of various software packages that you can use with your Plextor drive can be found in the Support/Compatibility section of www.plextor.com. - Page 12 • Do not clean discs using a circular motion. Instead, use a radial motion: start at the center of the disc and proceed to the outer edge. CAUTION: Install your PlexWriter so it sits horizontally on your desk or shelf. Plextor does not guarantee the drive’s performance in a vertical position.
-
Page 13: Connecting Your Plexwriter
2. Connecting Your PlexWriter This chapter explains how to physically connect the PlexWriter to your computer. In general, this is what you’ll do: 1. Turn your computer on and determine if it is running the Windows XP, 2000, Me, or 98SE operating system. -
Page 14: Connect The Plexwriter Drive
PlexWriter USB drive: 1. Turn ON your computer system. 2. Insert the bundled Plextor Setup Disc in your CD-ROM drive, go to the Software Installation screen, and click on the button titled USB Drivers. 3. Follow the prompts through the USB driver installation routine. -
Page 15: Record The Serial Number And Tla Code
3. Turn your computer off, then on again to reboot it. Getting the Driver for Windows 98SE If you do not have a Plextor Setup CD-ROM disc, you can download the USB drivers for Windows 98SE. They are available to download from the Plextor web site. Go to http://www.plextor.com and follow the links from the home page to... -
Page 16: If You Have A Macintosh
6. If the USB controller is listed and does not have a yellow diamond with an exclamation point, but the PX-S2410TU is listed as a “USB Storage Device,” select the USB Storage device and then select the Remove button. Reboot your system. The system will do another hardware scan and should install the driver properly. -
Page 17: Using Your Plexwriter
CD-RW writing speed you must use high speed CD-RW media. See the list of recommended media on page 27 for a list of approved media at the time this manual was printed, and see the Plextor web site at http://www.plextor.com for an updated list. -
Page 18: Installing Device Drivers And Application Software
If you have Windows 98SE, you need to install a special USB driver. You’ll find this driver on the Plextor Setup Disc, or you can get it from the Plextor web site at http://www.plextor.com. (Follow the links from the home page to Support\Downloads\Drivers.) -
Page 19: Tray Loading And Operation
Tray Loading and Operation To put a disc in the tray: 1. While the PlexWriter drive is powered up, push the eject button on the front panel. The disc tray slides out in a few seconds. 2. Pull the disc tray to open it all the way. Figure 4: Opening the Disc Tray 3. - Page 20 Section 3. Using Your PlexWriter Figure 5: Open the Tray Fully; Press On the Disc to Lock It Onto the Spindle 4. Press the tray to close it. NOTE: Always close the tray by pressing the front of the drawer by hand in a smooth and secure manner.
-
Page 21: Handling Cd Media
Section 3. Using Your PlexWriter Handling CD Media Take care when handling blank CD-R and CD-RW media. Dust, scratches, and fingerprints on either side of the disc can cause write errors during recording. When picking up or holding blank media you can either place your fingers along the outer edge of the disc, or place one finger through the center hole and one finger on the outer edge. - Page 22 Section 3. Using Your PlexWriter This page intentionally left blank. PlexWriter 24/10/24U Installation and Users Manual...
-
Page 23: Quick Guide To Roxio Application Software
PlexWriter. For more details, refer to the Help menus on each module, and to the application manual in the Manuals folder on the Plextor software CD. Easy CD Creator 5 Basic is a comprehensive, all-in-one CD-recording solution that lets you create, organize, share and store your digital content on CD. -
Page 24: Installing Easy Cd Creator 5 Basic
Easy CD Creator 5 Basic. To install Easy CD Creator 5 Basic: 1. Insert the Plextor software CD in your CD-ROM drive. A startup screen automatically appears. 2. Select the button to install Roxio Easy CD Creator 5 Basic. -
Page 25: Easy Cd Creator 5 Basic Modules
Easy CD Creator 5 Basic Modules Roll over the buttons on the Select a Project screen to view the variety of options for making music or data CD or making a backup copy of a CD. (To make a photo or video CD or create a CD label, you'll need to upgrade the basic version to the full- featured version of this product—an easy operation with the Upgrade button.) Creating a Music CD... - Page 26 Section 4. Quick Guide to Roxio Application Software 3. From the top panel, select the tracks you want to add to your greatest hits CD and drag them to the lower panel. -or- Use the Add button to add the tracks to the project area. You can also navigate to a folder on your computer’s hard drive if you have MP3, .WMA, or .WAV files that you want to include on your CD.
-
Page 27: Creating A Data Cd
Creating a Data CD A common use for Easy CD Creator is to make a data CD. This lets you archive projects and save information such as interactive training materials, important documents and research data that can then be shared with other people. To make a data CD: 1. -
Page 28: Formatting A Cd For Drag And Drop
Section 4. Quick Guide to Roxio Application Software 4. Insert a CD-R or CD-RW disc in your PlexWriter. 5. In the Data CD Project window, select the red Record button. Then click the Start Recording button to begin writing to the CD or DVD. When the burn process is done, you see a dialog box that indicates the project is complete. -
Page 29: Making A Personal Backup Copy Of A Cd
4. Open Windows Explorer and see that the CD appears with a drive letter (like E: or F:) in the drive list. 5. Drag and drop files to the CD just as if it were a hard drive or a floppy disk. Simply select a file or folder and drag it over the drive letter. -
Page 30: For More Details
For More Details For more complete procedures and details about Easy CD Creator 5, refer to the Help menu in each application, or to the application manual in the Manuals folder on the Plextor software CD. PlexWriter 24/10/24U Installation and Users Manual... -
Page 31: Maintenance And Troubleshooting
PlexWriter drive. However, we advise that our customers always update drives with the latest available firmware. Before troubleshooting a possible problem with your drive, please make sure to visit our web site at www.plextor.com to check if you have the latest firmware. -
Page 32: Troubleshooting
Section 5. Maintenance and Troubleshooting Troubleshooting If you have problems during or right after installation of your PlexWriter drive, visit the Plextor web site to find tips to help find the problem. PlexWriter 24/10/24U Installation and Users Manual... -
Page 33: Appendix A: Plexwriter Specifications
Operating system Windows: Windows 98SE, Windows Me, Windows XP, or Windows 2000. (USB storage driver from Plextor CD must be installed to enable operation on Windows 98SE.) Macintosh: OS 9.1 or higher, or OS X USB port Version 2.0 or 1.1 (Version 1.1 allows only 4X write/rewrite and... - Page 34 Other Specifications ATAPI command ATAPI-compliant support Data Buffer 2 MB Inquiry String PLEXTOR sp CD-R sp sp sp PX-S2410T (where “sp” equals one space) Error Rate Mode 1: 1 Block/10 Mode 2: 1 Block/10 PlexWriter 24/10/24U Installation and Users Manual Mode-1...
- Page 35 Front Panel Eject Mechanisms Eject Button; Manual Emergency Eject; Software Eject Indicator LED Color: Amber Reading: On: Read, access 1.6-sec interval blink: Audio play 0.8-sec interval blink: Tray load to TOC read; tray load to detection of No Disc. 0.4-sec interval blink: Eject operation Writing: 50-msec interval blink: 24X CD-R and 10X CD-RW 100-msec interval blink: 16X, 10X, 4X CD-R and 4X CD-RW...
- Page 36 Appendix A: PlexWriter Specifications Environmental Conditions Operating Temperature 5 to 35 degrees Celsius Performance Guarantee 5 to 35 degrees Celsius Temperature Operating Humidity 20% to 80% (non-condensing) Storage Temperature –20 to +60 degrees Celsius Storage Humidity 20% to 95% (non-condensing) Dimensions and Weight Dimensions (W/H/D) 141 mm x 22 mm x 171 mm...
-
Page 37: Appendix B: Technical Support
Appendix B: Technical Support Store Plextor’s e-mail, web site, phone, and fax numbers in a convenient location. Keep your drive’s serial number and a copy of your sales receipt handy as well. If you experience a problem while installing or operating your PlexWriter drive, please refer first to the relevant sections of this manual regarding setup and installation (Chapters 1–3). -
Page 38: Before You E-Mail/Log On/Fax/Call
(e.g., CD-ROM, scanner, fax board, network board). Returns In the unlikely event that you need to return a drive to Plextor, you need an RMA (Returned Materials Authorization) number. You need this number before any Plextor drive can be returned for repair or replacement. -
Page 39: Contacting Plextor's Rma Department
NOTE: The RMA number must be clearly visible on the outside of the shipping box. Drives must be sent postage prepaid. We recommend that you insure your shipment, as Plextor cannot be held responsible for any damage that may occur during shipment. PlexWriter 24/10/24U Installation and Users Manual... - Page 40 Appendix B: Technical Support This page intentionally left blank. PlexWriter 24/10/24U Installation and Users Manual...
-
Page 41: Appendix C: Warranty
Authorization is confirmed by issuance of the RMA number, which must be written prominently on the outside of the box in which the defective unit is returned to PLEXTOR. All drives returned to PLEXTOR must be securely packaged and shipped postage prepaid. - Page 42 Appendix C: Warranty This page intentionally left blank. PlexWriter 24/10/24U Installation and Users Manual...
-
Page 43: Index
· 3, 32, 33 buffer · 28 buffer underrun-proof technology · 2 cable, USB · 3, 5, 29 copying · 23 Plextor · 3 CD Copier · 23 CD-R additional driver needed · 12 formatting for drag and drop · 22 reading speed ·... - Page 44 Index Easy CD Creator · 12, 17 capabilities · 17 copying CD with · 23 creating data CD with · 21 creating music CD with · 19 formatting CD-R or CD-RW for drag and drop · 22 installation · 18 manual ·...
- Page 45 Easy CD Creator · 17 performance USB 1.1 and · 1, 27, 28 USB 2.0 and · 1, 27, 28 Plextor CD · 3 plug and play support · 2 position, operating · 6 power connector · 5, 29 power switch ·...
- Page 46 Index wake mode · 28 warranty · 35 weight · 30 Windows displaying drive’s serial number · 25 recognizing drive in · 9 Windows 2000 · 2, 7 drive installation · 8 Windows 98SE · 2, 7 drive installation · 8 manual driver installation ·...
-
Page 47: Notes
Notes PlexWriter 24/10/24U Installation and Users Manual... - Page 48 LEXTOR 48383 Fremont Blvd. Suite 120 Fremont CA 94538-6509 www.plextor.com Phone: 510-440-2000 800-886-3935 Fax: 510-651-9755 E-mail: info@plextor.com...
Need help?
Do you have a question about the PX-S2410TU and is the answer not in the manual?
Questions and answers