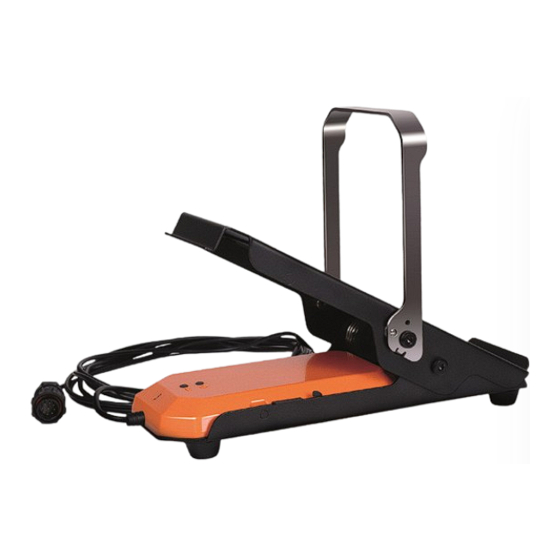
Jasic EVO2.0 Operator's Manual

Jasic EVO2.0 Operator's Manual

Wired and wireless remote control
Hide thumbs Also See for EVO2.0:

Advertisement

Quick Links

Wired and Wireless Remote Control
1

Advertisement

Table of Contents
loading
Need help?

Need help?

Do you have a question about the EVO2.0 and is the answer not in the manual?

Questions and answers

Subscribe to Our Youtube Channel

Summary of Contents for Jasic EVO2.0

  • Page 1 Wired and Wireless Remote Control...
  • Page 2: Your New Product

    Please ensure that you carry out daily and periodic maintenance checks to ensure years of reliable and trouble free operation. Please call your Jasic distributor in the unlikely event of a problem occurring. Please record below the details from your product as these will be required for warranty purposes and to ensure you get the correct information should you require assistance or spare parts.
  • Page 3: Table Of Contents

    Description of Symbols Product Overview Technical Specifications Installation Remote Description Battery Replacement Functions and operation of wireless remote control Functions and operation of wired remote control Troubleshooting Transportation Waste disposal RoHS Compliance Declaration Statement of Warranty Notes Jasic Contact Details...
  • Page 4: Safety Instruction

    SAFETY INSTRUCTIONS These general safety norms cover both arc welding machines and plasma cutting machines unless otherwise noted. The user is responsible for installing and operating the equipment in accordance with the enclosed instructions. It is important that users of this equipment protect themselves and others from harm, or even death. The equipment must only be used for the purpose it was designed for.
  • Page 5 SAFETY INSTRUCTION Use of Personal Protective Equipment (PPE) Welding arc rays from all welding and cutting processes can produce intense, visible and invisible (ultraviolet and infrared) rays that can burn eyes and skin. • Wear an approved welding helmet fitted with an appropriate shade of filter lens to protect your face and eyes when welding, cutting or watching.
  • Page 6 SAFETY INSTRUCTION Safety against fumes and welding gases The HSE have identified welders as being an ‘at risk’ group for occupational diseases arising from exposure to dusts, gases, vapours and welding fumes. The main identified health effects are pneumonia, asthma, chronic obstructive pulmonary disease (COPD), lung and kidney cancer, metal fume fever (MFF) and lung function changes.
  • Page 7 SAFETY INSTRUCTION The working environment Ensure the machine is mounted in a safe and stable position allowing for cooling air circulation. Do not operate equipment in an environment outside the laid down operating parameters. The welding power source is not suitable for use in rain or snow. Always store the machine in a clean, dry space.
  • Page 8 SAFETY INSTRUCTIONS Fire awareness The cutting and welding process can cause serious risks of fire or explosion. Cutting or welding sealed containers, tanks, drums or pipes can cause explosions. Sparks from the welding or cutting process can cause fires and burns. Check and risk assess the area is safe before doing any cutting or welding.
  • Page 9: Package And Contents

    For more detailed information please refer to the HSE website www.hse.gov.uk PACKAGE CONTENTS AND UNPACKING Supplied within your new Jasic EVO product package will be the following items with each model. Use care when unpacking the contents and ensure all items are present and not damaged.
  • Page 10: Safety Precautions

    SAFETY PRECAUTIONS The following operations require sufficient professional knowledge on electrical aspects and comprehensive safety knowledge. Make sure the input cable of the machine is disconnected from the electricity supply and wait for 5 minutes before removing the machine covers. Description of symbols Warning! Read the Manual WEEE tag...
  • Page 11: Installation

    INSTALLATION OF WIRELESS REMOTE CONTROL RECIEVER MODULE The below operation requires sufficient professional comprehensive knowledge of electrical circuits and electrical safety. Make sure the input cable of the machine is disconnected from the electricity supply and wait for 5 minutes before removing the machine covers. Installation of wireless receiver module The FRC-01 and FRC-02 remote control unit can be used with the following EVO machine models:...
  • Page 12 INSTALLATION OF WIRELESS REMOTE CONTROL RECIEVER MODULE An Installation of wireless receiver module The below operation requires sufficient professional comprehensive knowledge of electrical circuits and electrical safety. Make sure the input cable of the machine is disconnected from the electricity supply and wait for 5 minutes before removing the machine covers. 6.
  • Page 13: Remote Description

    DESCRIPTION OF THE WIRED AND WIRELESS REMOTE CONTROLS Two foot pedal wired/wireless remote controls are available in this design, the FRC-01 (wired 9 pin) and FRC-02 (wireless) remote and will adjust TIG welding current with the following EVO machine models: •...
  • Page 14: Functions And Operation Of Wireless Remote Control

    OPERATION OF THE WIRELESS FOOT PEDAL REMOTE CONTROL Wireless connection Depending on the model and user interface of your EVO model the below instructions may differ, please refer to your EVO product operating manual for further instructions. Powering up your wireless controller To power up your wireless foot pedal controller, press the power button of the wireless foot pedal controller and the power indicator will then turn on.
  • Page 15: Functions And Operation Of Wired Remote Control

    OPERATION OF THE WIRED FOOT PEDAL REMOTE CONTROL Wired connection Depending on the model and user interface of your EVO model the below instructions may differ, please refer to your EVO product operating manual for further instructions. Connecting your wired controller Model dependent and prior to powering up your EVO machine, when fitting either the 9 pin remote plug, ensure you align the keyway when inserting the plug,...
  • Page 16: Troubleshooting

    TROUBLESHOOTING The following operation requires sufficient professional knowledge on electric aspects and comprehensive safety knowledge. Make sure the input cable of the machine is disconnected from the electricity supply and wait for 5 minutes before removing any machine covers. Symptoms Reason Troubleshooting Reconnect wireless mode from the welding...
  • Page 17: Statement Of Warranty

    3 month warranty. Jasic shall in no event be responsible for any third party expenses or expenses/costs or any indirect or consequential expenses/costs.
  • Page 18: Notes

    NOTES _____________________________________ _____________________________________ _____________________________________ _____________________________________ _____________________________________ _____________________________________ _____________________________________ _____________________________________ _____________________________________ _____________________________________ _____________________________________ _____________________________________ _____________________________________ _____________________________________ _____________________________________ _____________________________________ _____________________________________ _____________________________________ _____________________________________ _____________________________________ _____________________________________...
  • Page 19 NOTES _____________________________________ _____________________________________ _____________________________________ _____________________________________ _____________________________________ _____________________________________ _____________________________________ _____________________________________ _____________________________________ _____________________________________ _____________________________________ _____________________________________ _____________________________________ _____________________________________ _____________________________________ _____________________________________ _____________________________________ _____________________________________ _____________________________________ _____________________________________ _____________________________________...

This manual is also suitable for:

Frc-01Frc-02

Table of Contents