Table of Contents
Advertisement
Quick Links
Advertisement
Table of Contents

Subscribe to Our Youtube Channel
Related Manuals for Kuppersbusch CBM6550.0


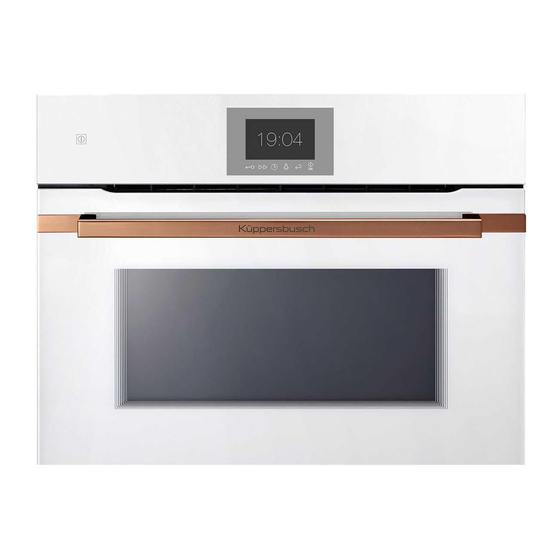
Summary of Contents for Kuppersbusch CBM6550.0
- Page 1 INSTRUCTIONS FOR USE and fi tting CBM6550.0 Please read the users instructions carefully before installation of the appliance and before starting to use it. Please, store these instructions carefully. Service and Customer Service Phone: 0209;401/ 631 Email: kundendienst@kueppersbusch.de...
-
Page 2: Table Of Contents
Contents 8.1. Selecting the microwave function 1. Explanation for symbols and ............ 26 indications ........4 8.2. Microwave quick start ....27 2. Cleaning and care ......6 8.3. Changing the microwave power 2.1. For all surfaces ......6 level ..........27 3. - Page 3 Copyright Software This documentation protected Please note that these instructions apply for copyright. Any rights duly derived, in various series of equipment. Details that particular those concerning its translation or possibly do not apply to your appliance may reproduction, the extraction of images, radio be described.
-
Page 4: Explanation For Symbols And Indications
Explanation for symbols and indications Dear new Küppersbusch appliance user... Don't worry, it's not going to be that complicated. We have made every effort structure this information briefly and succinctly, clearly and explicitly, and above all, logically. In addition to the instructions given by our Customer Service, these instructions aim at enabling you to be able to operate this appliance quickly. - Page 5 Explanation for symbols and indications CAUTION Note indicating an imminent threat which may result in death or very serious injury. DANGER Note indicating a dangerous situation which may result in minor injury or damage to the appliance. HINT Note to be observed in order to make handling the appliance easier. WARNING OF ELECTRICAL ENERGY RISK OF FATAL INJURY! Live components have been installed near this symbol.
-
Page 6: Cleaning And Care
Cleaning and care 2. Cleaning and care You should carefully read this chapter before you use your appliance the first time. If cleaned correctly and looked after regularly the appliance will remain beautiful and clean for many years. The following tips will help you to clean and care for your appliance's various surfaces gently but thoroughly. - Page 7 Cleaning and care 2.1.1 Removing dried deposits Thick deposits must be soaked to soften them beforehand. This is best done with a wet cloth. It will then be easier to remove the deposits. Over time, certain types of food such as tomatoes, vinegar and salt-baked dishes may cause the enamel to change color.
- Page 8 Cleaning and care Stainless steel Stainless steel door front and control panel Use a cloth or a soft sponge and rinse only with warm water and a little detergent. CAUTION! Stainless steel scratches very easily! Do not use a scraper! Lime scaling, grease and starch deposits must be removed immediately;...
-
Page 9: Maintenance Work
Maintenance work 3. Maintenance work 3.1. Changing the lamp ATTENTION! Before you replace the lamp, make sure that the appliance has been disconnected from the mains. The replacement bulb must withstand temperatures up to 300 ºC. They can be ordered from our technical Customer Service. 3.1.1 Changing the upper bulb □... -
Page 10: Before Using The First Time
Before using for the first time 4. Before using the first time There may be traces of fat and other substances in the appliance as a result of the manufacturing process. Proceed as follows to remove them: □ Remove all the packaging including any protective plastic film that may have been used. □... - Page 11 Before using for the first time □ The rack and some of the trays have retention grooves to prevent them from accidentally being removed Place these grooves towards the back of the appliance, facing downwards. □ The surface of the rack on which the container will rest must be below the side rails;...
-
Page 12: Oven Overview
Oven overview 5. Oven Overview Control Panel Cooling Air Exit Grill Unit Mounting Rack Levels Lamp Grid Rear Wall Baking Tray Hot Air Fan Hinge Oven Sealing Inner Glass Oven door... -
Page 13: Control Panel
Oven overview 5.1. Control Panel Time/ Timer settings ON/OFF To access the time settings. Switch the oven on and off. Light Functions To activate and deactivate the light. Select the cooking functions. To activate the light permanently press the key for 3 seconds. Back Programs back... -
Page 14: Accessories
Oven overview 5.2. Accessories 5.2.1 Standard accessories □ 1 Grilling Grid □ 1 Glass Bowl □ 1 Food probe 5.2.2 Optional accessories □ Grilling Grid □ Glass Bowl... -
Page 15: Oven Functions
Oven functions 6. Oven Functions 6.1. Baking Functions Top / bottom heat Heat from the top and the bottom ensures even baking results for food placed on one level. Ideal for baking delicate cakes and gateaux, such as yeast dough, cheesecake, etc. Intensive fan-assisted grilling + bottom heat This combination of a large-surface grill, bottom heat and a fan ensures that large food portions remain juicy inside and that they are beautifully... - Page 16 Oven functions Ökotherm pizza setting A combination of bottom heat and hot air is ideal for baking crispy bases with a moist topping. Perfect for fresh pizza, biscuits or cakes with a fruit topping and pastries and pies. Top / bottom heat with hot air The fan distributes the heat generated by the heating elements at the top and bottom evenly throughout the oven.
-
Page 17: Special Functions
Oven functions 6.2. Special Functions Defrosting This function serves to gently defrost frozen food. Slow Cook Food is cooked very gently at low temperatures, which also keep it very juicy. Ideal for beef, pork, lamb, veal and poultry. Keeping warm Food is kept warm at low temperatures, without continuing to be cooked. - Page 18 Oven functions Popcorn This program is ideal to cook microwavable popcorn. Soup This program is ideal for heating soup. Potatoes This program is ideal to cook potatoes. Bacon This program is ideal to grill bacon. Rice This program is ideal for eating and cooking rice.
-
Page 19: Operating The Oven
Operating the oven 7. Operating the oven In some cases, the fan is switched on and off, but this is not an indication of a fault. 7.1. Turning the oven on and off □ To switch on the oven press the key. -
Page 20: Selecting A Cooking Function
Operating the oven Setting the Date and time □ Press to select the year. □ Press to confirm. □ Press to select the month. □ Press to confirm. □ Press to select the day. □ Press to confirm. □ Press to select the hour. -
Page 21: Selecting A Special Function
Operating the oven 7.5. Selecting a special function INFO Some special functions operate with steam. In this cases, it is necessary to fill the water tank before using the oven. □ Press the key to switch the oven on. □ Press the key to access the functions selection menu. -
Page 22: Automatic Program
Operating the oven 7.7. Automatic program 7.7.1. Selecting an automatic program □ Press the key to switch the oven on. □ Press the to access the automatic programs options. □ Press to select the category. □ Press to confirm. □ Press to select the automatic program. -
Page 23: Altering The Parameters
Operating the oven 7.8. Altering the parameters 7.8.1. Changing the food weight The weight of an automatic program can be changed proceeding as follows: □ Press the key to return to the settings view. □ Press the key. □ Press to set a new weight. -
Page 24: Time Settings
Operating the oven 7.9. Time settings 7.9.1. Setting a cooking time There is no default time for the cooking functions, if a time needs to be set proceed as follows: □ Press the key. □ Press to set the desired cooking time. □... - Page 25 Operating the oven 7.9.4. Setting the end of a cooking time Once the cooking time is set, the oven gives the option to program an end of cooking time. □ Press and set the end of the cooking time. □ Press to confirm.
-
Page 26: Fast Pre-Heating
Microwave 7.9.8. Changing the timer □ Press key. □ Press to set the desired time. □ Press to confirm. □ After the programed time expires, the oven emits an acoustic sound and the symbol starts to flash on the display. □... -
Page 27: Microwave Quick Start
Microwave 8.2. Microwave quick start □ Press the key to switch the oven on. □ Press and the microwave starts immediately to operate in the Microwave function at maximum power for 30 seconds.. □ If you want to increase the operating time press again. -
Page 28: Favorites
Favorites 9. Favorites The favorites option, is where the most used cooking settings can be saved, it has up to 20 slots to save. 9.1. Selecting a favorite □ Press the key. □ Press to select a favorite. □ Press to confirm. -
Page 29: Settings
Settings Settings To access the settings menu proceed as follows: □ Press the key. □ Press to select the desired option. □ Press to confirm. The settings menu contains the following options: Language Startup sound Units Date and time 10.1. Language □... -
Page 30: Date And Time
Other functions 10.5. Date and time Setting the date □ Press to select the year. □ Press to confirm. □ Press to select the month. □ Press to confirm. □ Press to select the day. □ Press to confirm. Setting the clock □... -
Page 31: Restore The Factory Settings
Food probe 11.3. Restore the factory settings □ To restore the factory settings, on the standby mode, press simultaneously the keys for about 3 seconds. □ Press to select □ Press to confirm. □ The oven restarts the system. 11.4. Automatic confirmation □... -
Page 32: Using The Food Probe With Cooking Functions
Food probe The food probe can be used with all baking functions and some special functions. When the probe is pulled, the appliance returns to stand-by mode. Correct use of the food probe □ Insert the tip of the food probe horizontally from the side until it reaches the center of the food item. -
Page 33: Using The Food Probe With Automatic Programs
Food probe 12.2. Using the food probe with automatic programs □ Press the key to switch the oven on. □ Press the to access the automatic programs options. □ Press to select the category. □ Press to confirm. □ Press to select the automatic program. -
Page 34: What To Do If
What to do if… What to do if… ATTENTION! Repairs may only be carried out by qualified staff members! If your appliance is faulty, please check whether you can rectify the problem yourself by consulting these instructions for use. You may be able to rectify some problems yourself. They are described below. - Page 35 What to do if… Replace the door sealing See «Replacing the door sealing». ATTENTION! ...the door sealing is damaged? Do not use the oven when the door sealing is damaged! The oven can still be used. Replace the halogen …the oven lamp is damaged? lamp as quickly as possible when the oven is cold.
- Page 36 K02-180190/01 Küppersbusch Hausgeräte GmbH Postfach 10 01 32, D-45801 Gelsenkirchen, Küppersbuschstraße 16, D-45883 Gelsenkirchen Telefon: (0209) 401-0, Telefax: (0209) 401-303 www.kueppersbusch.de Teka Austria GmbH Eitnergasse 13, A-1230 Wien Telefon: (01) 86680-15, Telefax: (01) 86680-50 www.kueppersbusch.at 1632263-b...
Need help?
Do you have a question about the CBM6550.0 and is the answer not in the manual?
Questions and answers