Table of Contents
Advertisement
INSTRUCTIONS FOR USE
and fi tting
B6550.0
EN
BP6550.0
CBP6550.0
Please read the users instructions carefully before installation
of the appliance and before starting to use it.
Please, store these instructions carefully.
Service and Customer Service
Phone: 0209;401/ 631
Email: kundendienst@kueppersbusch.de
Advertisement
Table of Contents

Subscribe to Our Youtube Channel
Related Manuals for Kuppersbusch B6550.0


Summary of Contents for Kuppersbusch B6550.0
-
Page 1: Instructions For Use
INSTRUCTIONS FOR USE and fi tting B6550.0 BP6550.0 CBP6550.0 Please read the users instructions carefully before installation of the appliance and before starting to use it. Please, store these instructions carefully. Service and Customer Service Phone: 0209;401/ 631 Email: kundendienst@kueppersbusch.de... -
Page 2: Table Of Contents
Contents 8.5. Low-temperature cooking guidelines .......40 9. Oven functions ........41 1. Explanation for symbols and indications 6 9.1. Cooking functions ............41 9.2. Special functions .............43 2. Safety Instructions and Warnings ..8 10. Operating the oven ........45 2.1. For connection and operation ........8 10.1. - Page 3 Küppersbusch Customer Service 1. Please note: We require the following details for your re- Germany quest for customer service so that our cus- Küppersbusch Hausgeräte GmbH tomer service technicians can be well-pre- Küppersbuschstraße 16 pared for carrying out any repairs and have 45883 Gelsenkirchen the required spare parts available: 2.
- Page 4 Copyright Software This documentation is protected by copyright. Any Please note that these instructions apply for vari- rights duly derived, in particular those concerning its ous series of equipment. Details that possibly do translation or reproduction, the extraction of images, not apply for your appliance may be described.
- Page 5 Dear new Küpperbusch appliance user... Don't worry, it's not going to be that complicated. We have made every effort structure this information briefl y and succinctly, clearly and explicitly, and above all, logically. In addition to the instructions given by our Customer Service, these instructions aim at enabling you to be able to operate this appliance quickly.
-
Page 6: Explanation For Symbols And Indications
Explanation for symbols and indications 1. Explanation for symbols and indications The appliance was produced according to state of the art technology. Machines nevertheless give rise to risks which cannot be constructively avoided. In order to guarantee suffi cient safety for the use, safety instructions are also given. These instructions are marked by way of the highlighted texts which follow. - Page 7 Explanation for symbols and indications OBSERVE REGULATIONS FOR HANDLING ELECTROSTATI- CALLY SENSITIVE COMPONENTS AND MODULES (ESDS). Electrostatically endangered components and modules are located behind covers bearing the adjacent symbol. Never touch plug connections, strip conductors or component pins. Only qualifi ed staff members who are familiar with ESDs are authorised to carry out any technical intervention work.
-
Page 8: Safety Instructions And Warnings
Safety Instructions and Warnings 2. Safety Instructions and Warnings 2.1. For connection and operation □ Only KÜPPERSBUSCH ovens have been manufactured and tested for use under a KÜPPERSBUSCH hob. Do not use other hobs. □ Any handling or repair to the appliance, including replacement of the power cable, should be carried out by authorised Technical Service Personnel using original spare parts. -
Page 9: Oven
Safety Instructions and Warnings □ This appliance is not for use by persons (including children) with reduced physical, sensorial or mental capacity, or those lacking experience and knowledge, except if they have been supervised and instructed regarding use of the device by a person responsible for their safety. -
Page 10: For Persons
Safety Instructions and Warnings • Do not place containers or food on the bottom surface of the oven. Always use the trays and grid. • Do not pour water on the bottom surface of the oven when in use; this may damage the enamel. -
Page 11: Environmental Protection
Safety Instructions and Warnings □ Safety is only guaranteed if the appliance is connected to a protective conductor which complies with currently valid regulations. □ The appliance may not be connected to the power supply with an extension cable. □ The appliance may not be installed above a dishwasher or a tumble dryer: the steam released by these appliances may damage the electronic unit. -
Page 12: Intended Purpose
Safety Instructions and Warnings 2.8. Intended purpose. □ This oven is intended for household use and in household-like installation environments. □ This oven is not suitable for outdoor use. □ This oven is only to be used as a domestic household appliance for roasting, baking, grilling, cooking, defrosting, preserving and drying foods. -
Page 13: Safety Instructions Microwaves
Safety Instructions Microwaves 3. Safety Instructions Microwaves You should carefully read this chapter before you use your appliance the fi rst time. If cleaned correctly and looked after regularly the appliance will remain beautiful and clean for many years. The following tips will help you to clean and care for your oven's various surfaces gently but thoroughly. - Page 14 Safety Instructions Microwaves NEVER CLEAN WITH □ aggressive or bleach-based cleaning agents that contain active oxygen, chlorine or other caustic substances. □ abrasive cleaning or scouring agents, such as steel wool, soap-impregnated steel wool, stiff brushes, metal or plastic sponges or any similar cleaners with an abrasive surface.
-
Page 15: Cleaning The Oven Door
Safety Instructions Microwaves □ These models are very sensitive to scratches and oven spray will damage them. Do not using cleaning scrapers, pot scourers or hard-fibre sponges. Use a cloth or a soft sponge and rinse only with warm water and a little detergent. Stainless steel Stainless steel door front and control panel Use a cloth or a soft sponge and rinse only with warm water and a little detergent. -
Page 16: Pyrolytic Self-Cleaning Of The Oven
Safety Instructions Microwaves 3.2.1 Door glass Door interior – coated glass CAUTION! If possible do not use any oven spray, since its regular use can destroy the coating on the glass. A cleaning scraper is ideal for removing stubborn dirt. We recommend VSR 0-FIX-C for a thorough clean. -
Page 17: Before Using The Fi Rst Time
Before using the fi rst time VERY IMPORTANT! Remove all the accessories and dishes from the oven, including the guide rails for the baking trays and/or the glide-out shelves for the pyrolytic self-cleaning function. Remove food rests and excessive dirt since they may ignite, giving rise to danger during the self-cleaning process. -
Page 18: Accessories
Accessories Between the two rails of the side supports or on any of the extractable runners, if the oven has them. □ Switch off the electrical installation fuses or □ The rack and some of the trays have retention grooves to prevent them from accidentally being removed Place these grooves to- wards the back of the oven, facing downwards. -
Page 19: Glide-Out Shelves With Folding Clip
Accessories 5.1. Glide-out shelves with folding clip □ Remove the protective film. □ Hook the large clips on the upper rail and extend the run- ner until it hooks on the small clips on the lower rail. □ You will hear a "click" when the glide-out shelf is correctly secured. -
Page 20: Cleaning The Oven Accessories
Maintenance work □ Hook the clip on the top rail at the desired level. □ You will hear a "click" when the glide-out shelf is correctly secured. □ The notch to fix the tray/support must remain at the front part of the oven. CAUTION! Disconnect the appliance from the mains power supply before any operation. - Page 21 Maintenance work 6.1.1 Changing the side bulb □ Remove the chrome-plated runners and/or glide-out shelves by removing the screw nuts (A). □ Use a tool to take out the glass cover of the lamp mpunting. □ Replace the lamp. □ Attach the glass cover again, making sure it is properly positioned.
-
Page 22: Removing The Oven Door
Maintenance work 6.2. Removing the oven door (not possible for ovens with a microwave function) For easy cleaning, the door can be dismantled. To do this, follow the instructions for the type of door your oven has. 6.2.1 Door with hinge on body Dismantling the door □... - Page 23 Maintenance work CAUTION! Make sure the door is inserted completely by turning the latches, because otherwise it could block. If the latches are hard to turn, use a fl at tool to turn them. 6.2.2 Door with hinge on door Dismantling the door □...
-
Page 24: Dismantling/Assembling The Interior Glass Of The Door
Maintenance work ATTENTION! Make sure the door is inserted completely by turning the latches, because otherwise it could block. 6.3. Dismantling/assembling the interior glass of the door Depending on the model, your oven may have 2, 3 or 4 panes of glass. Follow the instructions for the type of door your oven has. - Page 25 Maintenance work ATTENTION! Pay attention to the order and position of the glass panes when removing them as they must be reassembled in the same order and position when you have fi nished cleaning them. □ Once clean, insert pane no. 3 into the same position so that the TERMOGLASS indication printed on it is visible as shown in the figure.
-
Page 26: Dismantling/Assembling The Shelf Runners
Maintenance work 6.4. Dismantling/assembling the shelf runners 12 rack levels are available in the side racks. Rack levels are counted from the top to the bottom from 1 to 12. Rack level 1 is the lowest rack level. Dismantling □ Open the oven door as far as it will go. □... -
Page 27: Dismantling The Rear Wall
Maintenance work 6.5. Dismantling the rear wall First of all remove the side runner to remove the rear wall, following the instructions in the previous section. □ Remove the lower four screws (1) and then the top screw (B). To assemble rear wall, carry out the steps in the reverse order. ATTENTION! For your own safety: Never use the oven without the rear wall! Ovens with a folding grill... -
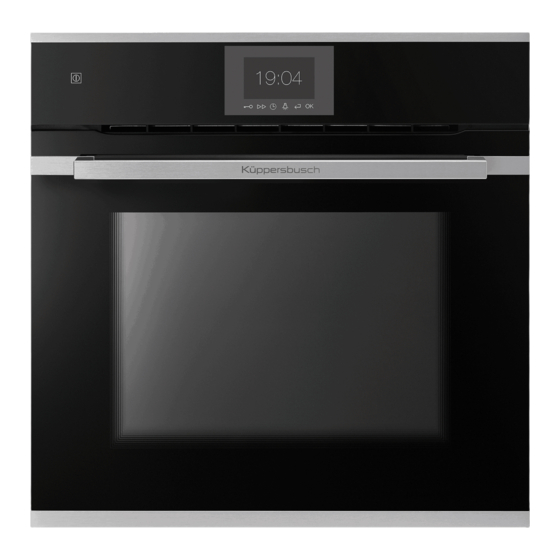
Page 28: Overview Of Your Oven
Overview of your oven 7. Overview of your oven Optional Standard Control panel accessories: accessories: Door lock (only for pyrolytic models) 1 Full glide-out 1x Enamelled baking Grill element (Acc. N. ZB1002) tray Rack levels Profession+ CookingSet 1 Universal/Enamel drip Gridiron (Acc. -
Page 29: Control Panel - Sensor Keys And Displays
Overview of your oven 7.1. Control panel - sensor keys and displays ON/OFF Rapid heating With this sensor you can switch off With this sensor you can activate or an on your appliance- deactivate the rapid heating function. Functions Time settings / Timer With this sensor you can select the With this sensor you have access to cooking functions. -
Page 30: Setting The Clock
Overview of your oven 7.2. Setting the clock The clock must be set before the oven is used and whenever power has been disconnected to the appliance. In such cases «12.00» will blink in the display. When the oven is switched on, 12:00 will blink in the display. - Page 31 Overview of your oven □ Press the symbol (up) or (down) to select the hour. Confirm by pressing □ Press the symbol (up) or (down) to select the minutes and confirm by pressing □ Press the symbol (up) or (down) to select the clock display and confirm by pressing □...
-
Page 32: Roasting And Baking Charts
Roasting and baking charts 8. Roasting and baking charts 8.1. Guidelines for baking □ The material of your baking tins also plays a role in baking. Dark baking tins, which transmit heat direct to food being cooked, are ideal. □ Baking times may differ slightly due to differences in the type of ingredients used. Testing your cake towards the end of the cooking time with a wooden skewer is ideal. - Page 33 Roasting and baking charts Kneaded dough Flan bases 170-180 180-200 25-35 Cheese cake 150-160 160-170 70-80 Small biscuits 180-200 15-30 Flat cakes with a dry topping 160-170 180-190 25-35 with a moist topping 160-170 170-180 160-170 30-50 Yeast dough Gugelhupf 150-160 175-180 40-65...
-
Page 34: Guidelines For Roasting
Roasting and baking charts Puff pastry made with leavened 170-180 190-210 30-40 dough Puff pastry made 160-180 180-200 30-40 with curd cheese Choux pastry 170-180 190-210 30-40 Dough made with 150-160 170-180 30-40 curd cheese and oil Honey cake 140-150 170-180 20-35 Bread and pizza... - Page 35 Roasting and baking charts Guidelines for roasting Operating mode Hot air Top/Bottom heat Hot air convection bottom heat Preferred settings Rack Temper- Rack Temp. Rack Temper- Weight Baking have a grey level ature in level in °C level ature in of meat time background...
-
Page 36: Guidelines For Grilling
Roasting and baking charts T-bone steak 180- (browned 180** 1,000 200** beforehand) Poultry 180- Chicken 180-200 1,000 170- Duck 170-190 1,500 170- Goose 1 or 2 1 or 2 1 or 2 170-190 3,000 170- Turkey 1 or 2 1 or 2 1 or 2 170-190 5,000 Fish... - Page 37 Roasting and baking charts Guidelines for grilling Operating mode Grill Large-surface grill Rack level 1 side 2 side 1 side 2 side Type of meat Pork Pork chop 10-12 8-10 14-15 8-10 Belly 12-15 8-10 16-18 10-12 Pork fi llet 10-12 8-10 14-16...
-
Page 38: Recommended Food Probe Temperatures
Roasting and baking charts 8.4. Recommended food probe temperatures Recommended food probe temperatures Core temperatures in °C Rare Medium well done Type of meat Pork Pork fi llet Roast pork / jam 68-70 Knuckle 80-85 Cutlet on the bone 75-80 Shoulder Gammon 55-62... - Page 39 Roasting and baking charts Lamb Lamb 79-85 Leg of lamb 70-72 Lamb chop Saddle of lamb 60-62 Rack of lamb Game Wild boar fi llet 60-63 Roast wild boar 75-78 Leg of wild boar Saddle of roe venison 50-60 Roast roe venison Saddle of deer venison 54-60 Roast deer venison...
-
Page 40: Low-Temperature Cooking Guidelines
Roasting and baking charts 8.5. Low-temperature cooking guidelines Low-temperature cooking guidelines Cooking time Cooking Browning Weight in minutes temperature time in g (core temperature in °C in minutes as an alternative) (oven setting) Type of meat Pork Pork fi llet 400-600 60-90 Roast pork / jam... -
Page 41: Oven Functions
Oven functions 9. Oven functions The functions all depend on the model in question. 9.1. Cooking functions Top / bottom heat Heat from the top and the bottom ensures even baking results for food placed on one level. Ideal for baking delicate cakes and ga- teaus, such as yeast dough, cheesecake, etc. - Page 42 Oven functions ECO makes it possible to cook dishes with a lower energy consump- tion than usual. In order to save on energy, the oven switches off automatically a few minutes before the end of the cooking time and uses the remaining heat in the oven to cook food through. Ökotherm intensive hot air The top heat switched on in addition to heating the oven up with hot air ensures a delicious crust and intensive browning.
-
Page 43: Special Functions
Oven functions Intensive fan-assisted grilling + bottom heat This combination of a large-surface grill, bottom heat and a fan en- sures that large food portions remain juicy inside and that they are beautifully crispy and brown on the outside. Ideal for stuffed roasts or poultry. - Page 44 Oven functions Gratinating This function is ideal for gratinating gratin dishes, oven bakes and souffl és. Preserving Ideal for preserving foods such as fruit and vegetables. Dehydrating With the dehydrating mode water is extracted from food to extend its shelf life. Most vitamins and minerals are preserved. Dehydrating is ideal in the production of dried fruit, dried meat, fruit purees and dried cod.
-
Page 45: Operating The Oven
Operating the oven 10. Operating the oven The fan is switched on and off in the case of some programmes, but this is not an indication of a fault. 10.1. Turning the oven on and off In order to be able to use your oven for cooking food, you will need to press on the symbol. - Page 46 Operating the oven □ Select the desired language pressing the symbol (up) or (down).. □ Confirm by pressing You will go to the Settings view. □ To confirm the language setting, press 10.3.2 Setting date and time □ Press the symbol (up) or (down) to select the date/ time tile.
-
Page 47: Selecting A Cooking Function
Operating the oven 10.3.4 Unit settings □ Press the symbol (up) or (down) to select the weight tile (kilogram preset). □ Confirm with □ Press the symbol (up) or (down) to select the temper- ature unit (Celsius preset). □ Confirm with After setting the units, putting the appliance into operation for the fi... -
Page 48: Selecting A Special Function
Operating the oven You will access the settings view. You can also set the cooking time or the fi nish time. (See chapters Cooking time setting/ End of cooking time setting.) □ To confirm the settings, press . The cooking process will be commenced. -
Page 49: Automatic Programme
Operating the oven 10.7. Automatic programme 10.7.1 Selecting an automatic programme □ Switch the oven on by pressing symbol □ Select the tile on the home screen. □ Press the symbol (up) or (down) to select the category.. □ Confirm by pressing □... -
Page 50: Changing Weight And Temperature
Operating the oven 10.7.2 Important information about cooking with programmes When a programme is activated and on the basis of the weight indicated, the oven automati- cally calculates the temperature and time needed for cooking the food. The temperature can be adapted in programmes with weight settings. - Page 51 Operating the oven You will be returned to the settings view. □ Confirm by pressing The process runs while the adaptation is taking place in the back- ground. The new settings for the process are not adopted until they are confi rmed by pressing Alternative: (The process is terminated.) □...
-
Page 52: Time Settings
Operating the oven 10.8.2 Changing the cooking temperature A cooking temperature has been pre-set for all of the programmes. The temperature can only be changed within a specifi ed range of cooking programmes with weight set- tings. For the functions, the temperature can be selected for a specifi c function within a range of 30°C (no temperature setting) and 300°C. - Page 53 Operating the oven INFO Once the programmed time has expired, the oven will switch off and an acoustic signal will sound. Press to stop the acoustic signal. The oven will then show the current time of day. The oven is switched off. 10.9.2 Changing a cooking time □...
- Page 54 Operating the oven You go back to the setting overview or to the running cooking pro- cess. □ Confirm by pressing The oven carries out the cooking process with the new settings. INFO! Once the programmed time has expired, the oven will switch off and an acoustic signal will sound.
- Page 55 Operating the oven INFO! The oven starts the process immediately after the suggested fi nal cooking time is confi rmed. 10.9.5 Changing the end of cooking time □ Touch the symbol Once you have set the cooking time and confi rmed it with (see Cooking time setting), it will be possible for you to set the end of cooking time.
- Page 56 Operating the oven 10.9.6 Deleting the end of cooking time □ Delete the end of cooking time by pressing the symbol for 3 seconds. □ Confirm by pressing You will arrive at the standby screen. 10.9.7 Setting the timer □ Touch the symbol □...
-
Page 57: Rapid Heating
Operating the oven You will access the settings view. If you set or change the timer during operation, you will be shown the process display. After the programmed time has expired, a acoustic signal is emitted, and the symbol fl ashes in the status bar. □... -
Page 58: Favourites
Favourites 11. Favourites The oven is fi tted with a memory function which makes it possible to save up to 20 programmes and cook- ing settings you have created yourself as a favourite. 11.1. Calling up a favourite □ Touch the symbol (Favourites) □... -
Page 59: Deleting Favourites
Other functions Please wait a moment, and then you will automatically go to the settings overview. INFO If you select an already assigned storage space, you overwrite the favourite stored in it. 11.3. Deleting favourites □ When in the Home display, hold the symbol pressed for more than 3 seconds and you will go to the overview for deleting favourites. -
Page 60: Factory Settings
Other functions 12.2.1 Switching on the childproof lock: □ Press the symbol for longer than 3 seconds until a long acoustic signal sounds and the symbol appears. The keys and switches will now all be disabled. 12.2.2 Deactivating the childproof lock: □... -
Page 61: Eco Mode
Other functions □ Press the symbol (up) or (down) and then select automatic confirmation or manual confirmation □ Confirm by pressing You will return to the standby display. 12.5. ECO mode □ Press the symbol. □ Press the symbol (up) or (down) to select the ECO tile. -
Page 62: Unit Settings
Roasting thermometer 12.7. Unit settings □ Press the symbol. □ Press the symbol (up) or (down) to select the Unit tile. □ Confirm by pressing □ Press the symbol (up) or (down) to select the weight unit. □ Confirm by pressing □... -
Page 63: Roast Thermometer For Cooking Functions
Roasting thermometer □ For fowl, one must also ensure that the tip does not come into contact with a bone. Using the roasting thermometer □ Place the prepared roast with the roasting thermometer inserted in the oven. □ Insert the prong of the roast thermometer into the socket located at the upper left of the oven side wall. -
Page 64: Roast Thermometer For Automatic Programmes
Roasting thermometer You will access the settings view. □ Confirm by pressing The oven will commence the cooking process. As soon as the interior of the food item has reached the tempera- ture you selected, the oven switches off. If you wish to change the set temperature or the recommended temperature of the roast thermometer, press symbol. -
Page 65: Model-Specifi C Special Settings And Additional Settings And Functions
Model-specifi c special settings and additional settings and functions 14. Model-specific special settings and additional settings and functions 14.1. Pyrolytic function NOTICE Please remove all foreign objects from the oven before you start the pyrolytic process. □ Select the tile (Pyrolysis) on the home screen. □... -
Page 66: What To Do If
What to do if … 1. What to do if … Repairs may only be carried out by qualifi ed staff members! If your appliance is faulty, please check whether you can rectify the problem yourself by consulting these instructions for use. You may be able to rectify some problems yourself. They are described below. What to do? If ... - Page 67 What to do if … What to do? If ... Switch off the oven and have Customer Service replace it ... the oven door glass cracked? Replace the door sealing See «Replacing the door sealing». Do not use the oven when the door ...
- Page 68 B6550.0 0.81 kWh/cycle* 0.68 kWh/cycle* 33 kg...
- Page 69 BP6550.0 0.99 kWh/cycle* 0.68 kWh/cycle* 36 kg...
- Page 70 CBP6550.0 0.78 kWh/cycle* 0.59 kWh/cycle* 29 kg...
- Page 72 K01-180186/01 Küppersbusch Hausgeräte GmbH Postfach 10 01 32, D-45801 Gelsenkirchen, Küppersbuschstraße 16, D-45883 Gelsenkirchen Telefon: (0209) 401-0, Telefax: (0209) 401-303 www.kueppersbusch.de Teka Austria GmbH Eitnergasse 13, A-1230 Wien Telefon: (01) 86680-15, Telefax: (01) 86680-50 www.kueppersbusch.at...
Need help?
Do you have a question about the B6550.0 and is the answer not in the manual?
Questions and answers