Table of Contents
Advertisement
Available languages
Available languages
Quick Links
T E C H N O L O G Y
F O R
T H E
W E L D E R ´ S
W O R L D .
DE Original Betriebsanleitung
EN Original operating instructions
FR Mode d'emploi d'origine
ES Manual de instrucciones original
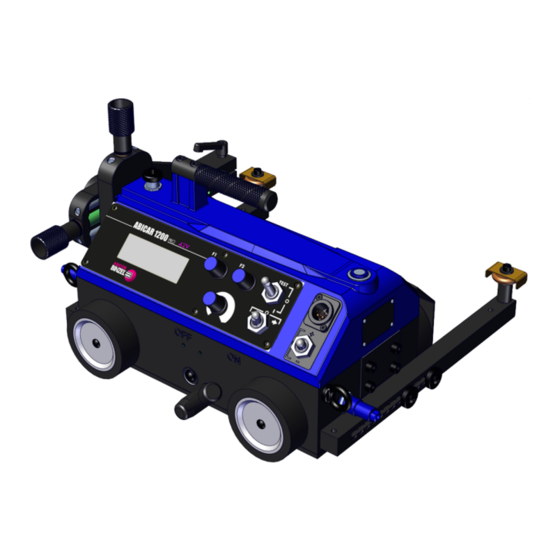
ABICAR 1200 PRO 42V
DE Schweißtraktor
EN Welding tractor
FR Tracteur de soudage
ES Tractor de soldadura
w w w . bi n z el - a b i c o r . c o m
Advertisement
Chapters
Table of Contents

Related Manuals for Abicor Binzel ABICAR 1200 PRO 42V


Summary of Contents for Abicor Binzel ABICAR 1200 PRO 42V
- Page 1 W O R L D . DE Original Betriebsanleitung EN Original operating instructions FR Mode d'emploi d'origine ES Manual de instrucciones original ABICAR 1200 PRO 42V DE Schweißtraktor EN Welding tractor FR Tracteur de soudage ES Tractor de soldadura w w w . bi n z el - a b i c o r . c o m...
-
Page 2: Table Of Contents
ABICAR 1200 PRO 42V Inhaltsverzeichnis Identifikation ..........................DE-3 Kennzeichnung..........................DE-3 Konformitätserklärung........................DE-4 Typenschild ............................DE-5 Verwendete Zeichen und Symbole ....................DE-5 Klassifizierung der Warnhinweise ....................DE-5 Sicherheit............................DE-6 Bestimmungsgemäße Verwendung ....................DE-6 Pflichten des Betreibers........................DE-6 Warn- und Hinweisschilder ......................DE-6 Grundlegende Sicherheitshinweise....................DE-7 Produktspezifische Sicherheitshinweise................... -
Page 3: Identifikation
1 Identifikation 1 Identifikation Der Schweißtraktor ABICAR 1200 PRO 42V dient zur Herstellung von kontinuierlichen Stumpf und Kehlnähten. Er wird mit Permanentmagneten befestigt und kann mit MIG/MAG-Schweißbrennern eingesetzt werden. Das Gerät darf nur mit Original ABICOR BINZEL Ersatzteilen betrieben werden. Diese Betriebsanleitung beschreibt nur den Schweißtraktor ABICAR 1200 PRO 42V. -
Page 4: Konformitätserklärung
Unterlagen Die alleinige Verantwortung für die Ausstellung dieser Konformitätserklärung trägt der Hersteller. Produkt Beschreibung Der Schweißtraktor ABICAR 1200 PRO 42V wird zur Herstellung von kontinuierlichen Stumpf- und Kehlnähten eingesetzt. Er wird mit Permanentmagneten befestigt und kann mit MIG/MAG-Schweißbrennern eingesetzt werden. -
Page 5: Typenschild
ABICAR 1200 PRO 42V 1 Identifikation 1.3 Typenschild Abb. 1 Typenschild Das Gerät ist mit einem Typenschild gekennzeichnet. ► Für Rückfragen den Gerätetyp, die Gerätenummer und das Baujahr gemäß Typenschild bereithalten. 1.4 Verwendete Zeichen und Symbole In der Betriebsanleitung werden folgende Zeichen und Symbole verwendet: Allgemeine Handlungsanweisungen. -
Page 6: Sicherheit
2 Sicherheit ABICAR 1200 PRO 42V 2 Sicherheit Das vorliegende Kapitel vermittelt grundlegende Sicherheitshinweise und warnt vor den Restrisiken, die beachten werden müssen um das Produkt sicher zu bedienen. Ein Nichtbeachten der Sicherheitshinweise kann zur Gefahr für das Leben und die Gesundheit von Personen werden und zu Umweltschäden oder Sachschäden führen. -
Page 7: Grundlegende Sicherheitshinweise
ABICAR 1200 PRO 42V 2 Sicherheit 2.4 Grundlegende Sicherheitshinweise Das Produkt wurde nach dem Stand der Technik und den anerkannten sicherheitstechnischen Normen und Richtlinien entwickelt und gefertigt. Vom Produkt gehen konstruktiv unvermeidbare Restrisiken für Anwender, Dritte, Geräte oder andere Sachwerte aus. Für Schäden, die durch Nichtbeachtung der Dokumentationsunterlagen entstehen, übernimmt der Hersteller keine Haftung. -
Page 8: Produktspezifische Sicherheitshinweise
2 Sicherheit ABICAR 1200 PRO 42V Sicherheitshinweise zur Schutzkleidung ► Tragen Sie keine weite Kleidung oder Schmuck. ► Tragen Sie bei langen Haaren ein Haarnetz. ► Tragen Sie Schutzbrille, Schutzhandschuhe und gegebenenfalls Atemschutzmaske. 2.5 Produktspezifische Sicherheitshinweise WARNUNG Verletzungsgefahr durch Aufenthalt im Arbeitsbereich des Geräts Im Arbeitsbereich des Geräts besteht die Gefahr von Verletzungen. -
Page 9: Lieferumfang
ABICAR 1200 PRO 42V 3 Lieferumfang 3 Lieferumfang Die folgenden Komponenten sind im Lieferumfang enthalten: 1× Schweißtraktor ABICAR 1200 PRO 42V 1× Brennerhalter mit kurzer Stange und Klemmsatz 2× Führungsarm (Standard) 1× Innensechskantschlüssel SW4 1× Betriebsanleitung ► Ausrüst- und Verschleißteile separat bestellen. -
Page 10: Produktbeschreibung
4 Produktbeschreibung ABICAR 1200 PRO 42V 4 Produktbeschreibung 4.1 Aufbau und Funktion Abb. 2 Aufbau und Funktion A Kreuzschlitten K Sicherungsöse B Stellschraube vertikal L Anschluss Verbindungskabel Spannungsversorgung/ C Schweißbrennerhalter Stromquellenkommunikation D Feststellung Brenner M Schweißparametertaster up/down (+ / 0 / −) E Arretierhebel für Neigungswinkel Schweißbrenner... -
Page 11: Bedienelemente
ABICAR 1200 PRO 42V 4 Produktbeschreibung 4.2 Bedienelemente Abb. 3 Bedienpanel A LED-Display F Schweißparametertaster up/down (+ / 0 / −) B Dreh-/Drückknopf F1 G Fahrtrichtungsschalter (rechts / O / links) C Dreh-/Drückknopf F2 H Geschwindigkeitsregler D Schweißstartsignalschalter (Test / O / I) I 6×... -
Page 12: Transport Und Aufstellung
5 Transport und Aufstellung ABICAR 1200 PRO 42V Tab. 1 Allgemeine Angaben Vertikale Geschwindigkeit 0–110 cm/min Geräuschpegel < 70 dB Gewicht 14 kg Tab. 2 Allgemeine Angaben Oszillator Art der Oszillation Winkel (max. 11°) Breite der Oszillation bei r = 150 mm 1–30 mm (1–100%) -
Page 13: Inbetriebnahme
ABICAR 1200 PRO 42V 6 Inbetriebnahme 6 Inbetriebnahme WARNUNG Stromschlag durch fehlerhafte Kabel Durch beschädigte oder unsachgemäß installierte Kabel kann es zu lebensgefährlichen Stromschlägen kommen. ► Überprüfen Sie alle spannungsführenden Kabel und Verbindungen auf ordnungsgemäße Installation und Beschädigungen. ► Lassen Sie schadhafte, deformierte oder verschlissene Teile ausschließlich von einer Elektrofachkraft austauschen. -
Page 14: Schweißbrenner Montieren
6 Inbetriebnahme ABICAR 1200 PRO 42V Einstellung der Länge ► Rolleneinheit auf der anderen Seite des Führungsarms montieren. Einstellung der Führungsarme für Außenkanten* ► Höhe der Rollen über die Muttern einstellen. * Zubehörteil ► Führungsarme entsprechend den Anforderungen mit den Rändelschrauben links und rechts am Gerät montieren. -
Page 15: Oszillator Montieren
ABICAR 1200 PRO 42V 6 Inbetriebnahme 6.3 Oszillator montieren Um den Oszillator zu montieren, muss zuerst der Brennerhalter inkl. der Befestigungsplatte demontiert werden. Abb. 7 Brennerhalter demontieren Abb. 8 Oszillator montieren A 4× Befestigungsschrauben M5 × 10 F 2× Befestigungsschrauben M5 × 16... -
Page 16: Führungsarme Positionieren
6 Inbetriebnahme ABICAR 1200 PRO 42V Abb. 9 Schweißbrenner justieren Um die korrekte Form der Oszillation zu erhalten, müssen sich die Achse der Ausgangswelle des Oszillators und die des Schweißbrenners kreuzen. Schweißbrenner justieren. 6.4 Führungsarme positionieren Abb. 10 Einstellung Zwangsführung... -
Page 17: Schweißbrenner Positionieren
ABICAR 1200 PRO 42V 6 Inbetriebnahme 6.5 Schweißbrenner positionieren Je nach Schweißbrennertyp und -durchmesser muss der Kreuzschlitten entsprechend eingestellt werden. Die Schweißbrennerposition kann während des Schweißens mit dem Kreuzschlitten in vertikaler und horizontaler Richtung verändert werden. Abb. 11 Kreuzschlitten einstellen... -
Page 18: Gerät Ein-/ Ausschalten
6 Inbetriebnahme ABICAR 1200 PRO 42V 6.7 Gerät ein-/ ausschalten ► Zum Einschalten des Geräts den Ein-/Ausschalter bis zum Einrasten herunter drücken. Nach dem Einschalten des Geräts wird auf dem Display zuerst die aktuelle Nummer der Softwareversion angezeigt. Danach erscheint das Hauptmenü. -
Page 19: Konfigurationsmenü
ABICAR 1200 PRO 42V 6 Inbetriebnahme Beispiel 1: ► F1 drehen um die Oszillationsbreite anzupassen. ► F2 drehen um die Oszillationsgeschwindigkeit anzupassen. Der Wert wird übernommen und muss nicht bestätigt werden. Beispiel 2: ► F1 drehen um die Verzögerungszeit 1 anzupassen. - Page 20 6 Inbetriebnahme ABICAR 1200 PRO 42V JOB speichern Alle Parameter einstellen. Tab. 5 auf Seite DE-21 Durch Drehen von F1 zu Parameter „Speicher JOB“ wechseln. Durch Drehen von F2 gewünschte JOB-Nummer auswählen. F2 drücken. Der JOB wird gespeichert und im Display wird kurzzeitig die Meldung „Fertig“ angezeigt.
- Page 21 ABICAR 1200 PRO 42V 6 Inbetriebnahme Schweißparameter einstellen Die folgenden Schweißparameter können über die Navigation eingestellt werden. Tab. 5 Übersicht der Schweißparameter Parameter Wert Beschreibung Schweißgeschw. 0,0–130,0 cm/min Geschwindigkeit des Schweißtraktors Schweißlänge 1,0–250,0 cm Länge des Schweißnaht Sprung 0,0–100,0 cm Abstand zwischen den Schweißnähten.
- Page 22 6 Inbetriebnahme ABICAR 1200 PRO 42V Oszillationsschweißparameter einstellen (optional) 6.3 Oszillator montieren auf Seite DE-15 Nach dem Anschließen des optionalen Oszillators, können im Konfigurationsmenü die Oszillationsparameter eingestellt werden. Die folgende Abbildung zeigt eine grafische Darstellung der Oszillationsschweißparameter. Abb. 15 Oszillationsschweißparameter...
-
Page 23: Funktion Testen
ABICAR 1200 PRO 42V 6 Inbetriebnahme 6.9 Funktion testen WARNUNG Verblitzung der Augen durch Lichtbogen Der beim Test erzeugte Lichtbogen kann ihre Augen schädigen. ► Überprüfen und tragen Sie Ihre persönliche Schutzausrüstung (Augenschutz). Um zu prüfen, ob das Gerät richtig angeschlossen ist, wie folgt vorgehen: ►... -
Page 24: Betrieb
7 Betrieb ABICAR 1200 PRO 42V 7 Betrieb WARNUNG Verletzungsgefahr durch Absturz des Geräts Am Ende von Werkstücken, im Betrieb auf schrägen oder senkrechten Flächen oder bei hohen Außentemperaturen kann das Gerät abstürzen und schwere Verletzungen verursachen. ► Betreiben Sie das Gerät niemals ohne Aufsicht. -
Page 25: Außerbetriebnahme
ABICAR 1200 PRO 42V 8 Außerbetriebnahme 8 Außerbetriebnahme ► Bei der Außerbetriebnahme die Abschaltprozeduren der schweißtechnischen Komponenten beachten. Gerät am Ein-/Ausschalter ausschalten. Schutzgas- Nachströmzeit abwarten. Absperrventil der Gaszufuhr schließen. Stromquelle ausschalten. Verbindungskabel Spannungsversorgung/Stromquellenkommunikation vom Gerät trennen . 9 Wartung und Reinigung Regelmäßige und dauerhafte Wartung und Reinigung sind Voraussetzung für eine lange Lebensdauer und... -
Page 26: Störungen Und Deren Behebung
10 Störungen und deren Behebung ABICAR 1200 PRO 42V 10 Störungen und deren Behebung ► Dokumentation der schweißtechnischen Komponenten beachten. ► Bei Fragen und Problemen an einen entsprechenden Fachhändler wenden. Tab. 8 Störungen und deren Behebung Störung Ursache Behebung Gerät lässt sich nicht einschalten. -
Page 27: Demontage
► Entsprechende örtlichen Bestimmungen und die Hinweise zur Entsorgung der vom Betriebsmittelhersteller vorgegebenen Sicherheitsdatenblätter beachten. 12.3 Verpackungen ABICOR BINZEL hat die Transportverpackung auf das Notwendigste reduziert. Bei der Auswahl der Verpackungsmaterialien wird auf eine mögliche Wiederverwertung geachtet. DE - 27... -
Page 28: Zubehörteile
13 Zubehörteile ABICAR 1200 PRO 42V 13 Zubehörteile Führungsarm Standard Bestellnummer: 522.0196.2 (2 Stück) Rändelschraube Bestellnummer: 522.0199.4 (4 Stück) Rad gummiert Bestellnummer: 522.0201.4 (4 Stück) Brennerklemme 16-22 mm Bestellnummer: 522.0209.1 Isolierhülse Bestellnummer: 522.0205.1 Befestigungsstange kurz Bestellnummer: 522.0206.1 Kreuzschlitten Bestellnummer: 522.0210.1 Verbindungskabel ABICAR 0,5 m Bestellnummer: 522.0276.1... -
Page 29: Ersatz- Und Verschleißteile
ABICAR 1200 PRO 42V 14 Ersatz- und Verschleißteile Schweißbrenner ABIMIG AT 355 LW 4,0 m KZ-2 PT Bestellnummer: 014.0708.1 Schweißbrenner ABIMIG W T 440 4,0 m WZ-2 PT Bestellnummer: 788.0311.1 Schweißbrenner ABIMIG MTG 455 T 4,0 m KZ-2 PT Bestellnummer: 916.0025.1 TCP Clamp Bestellnummer: 895.0021.1... -
Page 30: Schaltplan
15 Schaltplan ABICAR 1200 PRO 42V 15 Schaltplan Hauptschalter Schweißparametertaster Schnittstelle Oszillator DE - 30... -
Page 31: Gewährleistung
GmbH & Co. KG garantiert eine fehlerfreie Herstellung und übernimmt für dieses Produkt bei Auslieferung eine werksseitige Fertigungs- und Funktionsgarantie entsprechend dem Stand der Technik und der geltenden Vorschriften. Soweit ein von ABICOR BINZEL zu vertretender Mangel vorliegt, ist ABICOR BINZEL nach ihrer Wahl auf eigene Kosten zur Mangelbeseitigung oder Ersatzlieferung verpflichtet. Gewährleistungen können nur für Fertigungsmängel, nicht aber für Schäden, die auf natürliche Abnutzung, Überlastung oder... - Page 32 ABICAR 1200 PRO 42V Table of contents Identification..........................EN-3 Marking .............................EN-3 Declaration of conformity.........................EN-4 Nameplate............................EN-6 Signs and symbols used ........................EN-6 Classification of the warnings ......................EN-6 Safety ..............................EN-7 Designated use..........................EN-7 Responsibilities of the user........................EN-7 Warning and information signs .......................EN-7 Basic safety instructions ........................EN-8 Product-specific safety instructions....................EN-9...
-
Page 33: Identification
1 Identification 1 Identification The welding tractor ABICAR 1200 PRO 42V is used to produce continuous butt and fillet welds. It is attached with permanent magnets and can be used with the MIG/MAG welding torch. The device may be operated only with original ABICOR BINZEL spare parts. These operating instructions only describe the welding tractor ABICAR 1200 PRO 42V. -
Page 34: Declaration Of Conformity
This declaration of conformity is issued under the sole responsibility of the manufacturer. Product Description The ABICAR 1200 PRO 42V welding tractor assists in the creation of continuous blunt seams and fillet weld. It is attached with permanent magnets and can be used with the MIG/MAG welding torch. - Page 35 This declaration of conformity is issued under the sole responsibility of the manufacturer. Product Description The ABICAR 1200 PRO 42V welding tractor assists in the creation of continuous blunt seams and fillet weld. It is attached with permanent magnets and can be used with the MIG/MAG welding torch.
-
Page 36: Nameplate
1 Identification ABICAR 1200 PRO 42V 1.3 Nameplate Fig. 1 Nameplate The device is labeled by means of a nameplate. ► For inquiries, please have at hand the device type, device number, and year of construction as indicated on the nameplate. -
Page 37: Safety
ABICAR 1200 PRO 42V 2 Safety 2 Safety This chapter provides basic safety instructions and warnings about residual hazards that should be kept in mind in order to operate the product safely. Non-observance of the safety instructions may result in risks to the life and health of personnel as well as cause environmental or material damage. -
Page 38: Basic Safety Instructions
2 Safety ABICAR 1200 PRO 42V 2.4 Basic safety instructions The product has been developed and manufactured in accordance with the latest technology and recognized safety standards and directives. Due to the product design, unavoidable technical residual risks exist to the user, third parties, devices, and other material property. The manufacturer will accept no liability for damage caused by non-observance of the documentation. -
Page 39: Product-Specific Safety Instructions
ABICAR 1200 PRO 42V 2 Safety 2.5 Product-specific safety instructions WARNING Risk of injury due to entering the device’s work area There is a risk of injury in the device’s work area. ► Ensure that no-one is in the device’s work area when setting it in motion. -
Page 40: Scope Of Delivery
ABICAR 1200 PRO 42V 3 Scope of delivery The following components are included in the scope of delivery: 1× welding tractor ABICAR 1200 PRO 42V 1× torch mount with a short rod and clamp set 2× guide arms (standard) 1× Allen key AF4 1×... -
Page 41: Product Description
ABICAR 1200 PRO 42V 4 Product description 4 Product description 4.1 Structure and function Fig. 2 Structure and function A Cross slide K Securing lugs B Adjusting screw, vertical L Connection cable connector for power supply/power C Welding torch mount... -
Page 42: Technical Data
4 Product description ABICAR 1200 PRO 42V 4.3 Technical data Fig. 4 Dimensions Tab. 1 General information Voltage 1~42 V, 50–60 Hz Power 25 W Welding position Horizontal PA/1F/1G as per EN ISO 6947 and AWS/ASME PB/2F PC/2G PD/4F PE/4G... -
Page 43: Transport And Positioning
ABICAR 1200 PRO 42V 5 Transport and positioning Tab. 3 Ambient conditions, transport, storage and operation Ambient temperature −10°C to +40°C (operation, storage in a closed environment) Ambient temperature (transport) −25°C to +55°C Relative humidity Up to 90% at 20°C... - Page 44 6 Putting into operation ABICAR 1200 PRO 42V 6 Putting into operation WARNING Electric shock caused by damaged or improperly installed cables The use of damaged or improperly installed cables may result in a potentially fatal electric shock. ► Check all live cables and connections for proper installation and damage.
-
Page 45: Putting Into Operation
ABICAR 1200 PRO 42V 6 Putting into operation Setting the length ► Mount the roller unit on the other side of the guide arm. Adjustment of the guide arm for external edges.* ► Adjust the height of the roller using the nuts. -
Page 46: Mounting The Oscillator
6 Putting into operation ABICAR 1200 PRO 42V 6.3 Mounting the oscillator In order to mount the oscillator, the torch mount, incl. the fastening plate, must first be disassembled. Fig. 7 Disassembling the torch mount Fig. 8 Mounting the oscillator A 4×... -
Page 47: Positioning Guide Arms
ABICAR 1200 PRO 42V 6 Putting into operation Fig. 9 Adjusting the welding torch To achieve the correct form of oscillation, the axis of the oscillator’s output shaft and that of the welding torch must cross. Adjusting the welding torch. -
Page 48: Positioning The Welding Torch
6 Putting into operation ABICAR 1200 PRO 42V 6.5 Positioning the welding torch The cross slide must be adjusted according to the welding torch type and diameter. The welding torch position can be changed in the vertical and horizontal direction during welding using the cross slide. -
Page 49: Switching On/Off The Device
ABICAR 1200 PRO 42V 6 Putting into operation 6.7 Switching on/off the device ► To switch on the device, depress the on/off switch until it engages. After the device has been switched on, first the current software version number will be shown on the display. -
Page 50: Main Menu
6 Putting into operation ABICAR 1200 PRO 42V 6.8.1 Main menu Fig. 14 Main menu overview A Operating status C Function of F1 B Selected JOB (setup) D Function of F2 ► To select another JOB, keep F2 pressed and rotate left or right. - Page 51 ABICAR 1200 PRO 42V 6 Putting into operation Navigating the configuration menu You can navigate as follows in the configuration menu: Tab. 4 Menu navigation Required actions Function Rotate F1 to the right or to the left. Select the next or previous parameter.
- Page 52 6 Putting into operation ABICAR 1200 PRO 42V Setting the welding parameters The following welding parameters can be set via the navigation. Tab. 5 Welding parameters overview Parameters Value Description Carriage speed 0.0–130.0 cm/min Welding tractor speed Weld length 1.0–250.0 cm...
- Page 53 ABICAR 1200 PRO 42V 6 Putting into operation Setting the oscillation weld parameters (optional) 6.3 Mounting the oscillator on page EN-16 Once the optional oscillator has been connected, the oscillation parameters can be set in the configuration menu. The following figure shows a graphic representation of the weld oscillation parameters.
-
Page 54: Testing The Function
6 Putting into operation ABICAR 1200 PRO 42V 6.9 Testing the function WARNING Stunning of eyes by arcs Arcs produced when testing can damage your eyes. ► Check and wear your personal protective equipment (eye protection). Proceed as follows to test whether the device is correctly connected: ►... -
Page 55: Operation
ABICAR 1200 PRO 42V 7 Operation 7 Operation WARNING Risk of injury due to the device falling At the end of workpieces, during operation on inclined or vertical surfaces, or in the event of high external temperatures, the device may fall and cause serious injuries. -
Page 56: Putting Out Of Operation
8 Putting out of operation ABICAR 1200 PRO 42V 8 Putting out of operation ► When putting the system out of operation, ensure that the procedures for switching off the welding components are observed. Switch on/off the device. Wait until the shielding gas post-flow time has passed. -
Page 57: Faults And Troubleshooting
ABICAR 1200 PRO 42V 10 Faults and troubleshooting 10 Faults and troubleshooting ► Observe the documentation for the welding components. ► If you have any questions or problems, consult an appropriate specialist retailer. Tab. 8 Faults and troubleshooting Fault Cause Troubleshooting Device cannot be switched on. -
Page 58: Disassembly
► Please observe the relevant local regulations and disposal instructions in the safety data sheets specified by the manufacturer of the consumables. 12.3 Packaging ABICOR BINZEL has reduced the transport packaging to the necessary minimum. The ability to recycle packaging materials is always considered during their selection. EN - 28... -
Page 59: Accessories
ABICAR 1200 PRO 42V 13 Accessories 13 Accessories Standard guide arm Order number: 522.0196.2 (2 pieces) Knurled screw Order number: 522.0199.4 (4 pieces) Rubber wheel Order number: 522.0201.4 (4 pieces) Torch clamp, 16–22 mm Order number: 522.0209.1 Insulating sleeve Order number: 522.0205.1 Attachment rod, short Order number: 522.0206.1... -
Page 60: Spare Parts And Consumables
14 Spare parts and consumables ABICAR 1200 PRO 42V ABIMIG AT 355 LW 4.0 m KZ-2 PT welding torch Order number: 014.0708.1 ABIMIG W T 440 4.0 m WZ-2 PT welding torch Order number: 788.0311.1 ABIMIG MTG 455 T 4.0 m KZ-2 PT welding torch Order number: 916.0025.1... -
Page 61: Circuit Diagram
ABICAR 1200 PRO 42V 15 Circuit diagram 15 Circuit diagram Main switch Welding parameter button Interface Oscillator EN - 31... -
Page 62: Warranty
The warranty period is defined in the General Terms and Conditions. Exceptions in the case of specific products are regulated separately. Warranty will also be rendered invalid if spare and wear parts are used that are not original ABICOR BINZEL parts and if the product has been repaired improperly by the user or a third party. - Page 63 ABICAR 1200 PRO 42V 16 Warranty EN - 33...
- Page 64 ABICAR 1200 PRO 42V Table des matières Identification..........................FR-3 Marquage............................FR-3 Déclaration de conformité.........................FR-4 Plaque signalétique..........................FR-5 Signes et symboles utilisés.........................FR-5 Classification des consignes d'avertissement ..................FR-5 Sécurité ............................FR-6 Utilisation conforme aux dispositions ....................FR-6 Obligations de l'exploitant........................FR-6 Plaques indicatrices et d'avertissement ....................FR-6 Consignes de sécurité de base......................FR-7 Consignes de sécurité...
-
Page 65: Identification
1 Identification 1 Identification Le tracteur de soudage ABICAR 1200 PRO 42V est utilisé pour la production de soudures continues bout à bout et d'angle. Il est fixé par des aimants permanents et peut être utilisé avec des torches de soudage MIG/MAG. -
Page 66: Déclaration De Conformité
Produit Description Le tracteur de soudage ABICAR 1200 PRO 42V est utilisé pour la production de soudures continues bout à bout et d'angle. Il est fixé par des aimants permanents et peut être utilisé avec des torches de soudage MIG/MAG. -
Page 67: Plaque Signalétique
ABICAR 1200 PRO 42V 1 Identification 1.3 Plaque signalétique Fig. 1 Plaque signalétique Le dispositif porte une plaque signalétique. ► Pour tous renseignements complémentaires, garder à disposition le type d'appareil, le numéro d'appareil et l'année de fabrication indiqués sur la plaque signalétique. -
Page 68: Sécurité
2 Sécurité ABICAR 1200 PRO 42V 2 Sécurité Le chapitre suivant présente les consignes de sécurité de base et signale les risques résiduels qui doivent être pris en compte afin d'utiliser le produit de manière sûre. Le non-respect des consignes de sécurité peut entraîner un risque pour la vie et la santé... -
Page 69: Consignes De Sécurité De Base
ABICAR 1200 PRO 42V 2 Sécurité 2.4 Consignes de sécurité de base Le produit a été développé et fabriqué selon l'état actuel de la technique et les normes et directives de sécurité reconnues. Le produit comporte des risques résiduels inévitables pour l'utilisateur, les tiers, les dispositifs ou d'autres bien matériels. -
Page 70: Consignes De Sécurité Spécifiques Au Produit
2 Sécurité ABICAR 1200 PRO 42V 2.5 Consignes de sécurité spécifiques au produit AVERTISSEMENT Risque de blessure lié à la présence dans la zone de travail du dispositif Un risque de blessure existe dans la zone de travail du dispositif. -
Page 71: Matériel Fourni
3 Matériel fourni 3 Matériel fourni Les composants suivants sont inclus dans le matériel fourni : 1× tracteur de soudage ABICAR 1200 PRO 42V 1× support de torche avec une tige courte et un ajustement serré 2× bras de guidage (standard) 1×... -
Page 72: Description Du Produit
4 Description du produit ABICAR 1200 PRO 42V 4 Description du produit 4.1 Structure et fonctionnement Fig. 2 Structure et fonctionnement A Chariot croisé K Anneaux de fixation B Vis de réglage vertical L Raccord du câble de connexion pour l'alimentation C Support de torche de soudage électrique et la communication avec la source de courant... -
Page 73: Éléments De Commande
ABICAR 1200 PRO 42V 4 Description du produit 4.2 Éléments de commande Fig. 3 Panneau de commande A Écran LED F Bouton des paramètres de soudage haut/bas B Bouton rotatif/de pression F1 (+ / 0 / −) C Bouton rotatif/de pression F2... -
Page 74: Transport Et Installation
5 Transport et installation ABICAR 1200 PRO 42V Tab. 1 Informations générales Plage de réglage du chariot 0–35 mm (vers le haut/vers le bas, gauche/droite) Plage de réglage du bras de guidage 0–75 mm Vitesse horizontale 0–120 cm/min Vitesse verticale 0–110 cm/min... -
Page 75: Mise En Service
ABICAR 1200 PRO 42V 6 Mise en service 6 Mise en service AVERTISSEMENT Risque de choc électrique en cas de câbles défectueux Des câbles endommagés ou installés de manière inappropriée peuvent entraîner des risques de choc électrique dangereux. ► Veillez à ce que tous les câbles et raccordements sous tension soient correctement installés et ne soient pas endommagés. -
Page 76: Montage De La Torche De Soudage
6 Mise en service ABICAR 1200 PRO 42V Réglage de la longueur ► Montez l'unité de rouleaux de l'autre côté du bras de guidage. Réglage des bras de guidage pour les bords extérieurs* ► Réglez la hauteur des rouleaux au niveau des écrous. -
Page 77: Montage De L'oscillateur
ABICAR 1200 PRO 42V 6 Mise en service 6.3 Montage de l'oscillateur Pour monter l'oscillateur, le support de torche ainsi que la plaque de fixation doivent tout d'abord être démontés. Fig. 7 Démontage du support de torche Fig. 8 Montage de l'oscillateur A 4×... -
Page 78: Positionnement Des Arbres De Guidage
6 Mise en service ABICAR 1200 PRO 42V Fig. 9 Ajustement de la torche de soudage Afin d'obtenir une forme correcte d'oscillation, les axes de l'arbre de sortie de l'oscillateur et la torche de soudage doivent se croiser. Ajustez la torche de soudage. -
Page 79: Positionnement De La Torche De Soudage
ABICAR 1200 PRO 42V 6 Mise en service 6.5 Positionnement de la torche de soudage Selon le type et le diamètre de torche de soudage, le chariot croisé doit être réglé en conséquence. La position de la torche de soudage peut être modifiée lors du soudage avec le chariot croisé dans le sens vertical ou horizontal. -
Page 80: Marche/Arrêt Du Dispositif
6 Mise en service ABICAR 1200 PRO 42V 6.7 Marche/Arrêt du dispositif ► Pour mettre en marche le dispositif, appuyez sur l'interrupteur marche/arrêt du dispositif jusqu'à ce qu'il s'enclenche. Après la mise en marche du dispositif, le numéro actuel de la version logicielle s'affiche d'abord à l'écran. -
Page 81: Menu De Configuration
ABICAR 1200 PRO 42V 6 Mise en service Exemple 1 : ► Tournez le bouton F1 pour régler l'amplitude d'oscillation. ► Tournez le bouton F2 pour régler la vitesse d'oscillation. La valeur est enregistrée et ne doit pas être confirmée. - Page 82 6 Mise en service ABICAR 1200 PRO 42V Enregistrement d'un programme Réglez tous les paramètres. Tab. 5 à la page FR-20 En appuyant sur F1, passez au paramètre « Enregistrer progr. ». En appuyant sur F2, sélectionnez le numéro de programme souhaité.
- Page 83 ABICAR 1200 PRO 42V 6 Mise en service Tab. 5 Vue d'ensemble des paramètres de soudage Paramètre Valeur Description Choisir progr. 1–40 Chargement de la configuration enregistrée dans le numéro de programme affiché. Langue ENGLISH Langue du menu POLISH SPANISH...
-
Page 84: Test Des Fonctions
6 Mise en service ABICAR 1200 PRO 42V 6.9 Test des fonctions AVERTISSEMENT Brûlure des yeux par un arc électrique L'arc créé lors du test peut entraîner des lésions oculaires. ► Contrôlez et portez votre équipement de protection individuelle (lunettes de protection). -
Page 85: Fonctionnement
ABICAR 1200 PRO 42V 7 Fonctionnement 7 Fonctionnement AVERTISSEMENT Risque de blessure lié à la chute du dispositif À l'extrémité des pièces d'œuvre, en cas d'utilisation sur des surfaces en biais ou en position verticale ou en cas de températures extérieures élevées, le dispositif peut tomber et entraîner des blessures graves. -
Page 86: Mise Hors Service
8 Mise hors service ABICAR 1200 PRO 42V 8 Mise hors service ► Lors de la mise hors service, observez les processus d'arrêt de tous les éléments de l'installation de soudage. Éteignez le dispositif à l'aide de l'interrupteur marche/arrêt. Attendez l'arrêt du flux de gaz de protection. -
Page 87: Intervalles D'entretien
ABICAR 1200 PRO 42V 9 Entretien et nettoyage 9.1 Intervalles d'entretien Les intervalles indiqués sont des valeurs approximatives se rapportant à un fonctionnement par équipes de huit heures. Nous recommandons de consigner les contrôles dans un procès-verbal. La date des travaux, les défauts détectés et le nom de la personne chargée d'effectuer le contrôle doivent être consignés dans le... -
Page 88: 10 Dépannage
10 Dépannage ABICAR 1200 PRO 42V 10 Dépannage ► Respectez la documentation relative aux éléments de l'installation de soudage. ► En cas de question ou de problème, adressez-vous au revendeur désigné. Tab. 8 Dépannage Problème Cause Solution Impossible de mettre sous tension Le dispositif est sans électricité. -
Page 89: 11 Démontage
► Respectez les prescriptions locales correspondantes et les consignes d'élimination qui figurent sur les fiches de données de sécurité du fabricant des produits consommables. 12.3 Emballages ABICOR BINZEL a réduit l'emballage de transport au minimum. Lors du choix des matériaux d'emballage, nous veillons à ce que ces derniers soient recyclables. FR - 27... -
Page 90: Accessoires
13 Accessoires ABICAR 1200 PRO 42V 13 Accessoires Bras de guidage standard Numéro de commande : 522.0196.2 (2 pièces) Vis moletée Numéro de commande : 522.0199.4 (4 pièces) Roue en caoutchouc Numéro de commande : 522.0201.4 (4 pièces) Bride de serrage pour torche 16–22 mm Numéro de commande : 522.0209.1... -
Page 91: Pièces D'usure Et De Remplacement
ABICAR 1200 PRO 42V 14 Pièces d'usure et de remplacement Torche de soudage ABIMIG AT 355 LW 4,0 m KZ-2 PT Numéro de commande : 014.0708.1 Torche de soudage ABIMIG W T 440 4,0 m WZ-2 PT Numéro de commande : 788.0311.1 Torche de soudage ABIMIG MTG 455 T 4,0 m KZ-2 PT Numéro de commande : 916.0025.1... -
Page 92: Schéma De Connexion
15 Schéma de connexion ABICAR 1200 PRO 42V 15 Schéma de connexion Bouton des paramètres de soudage Interrupteur principal Interface Oscillateur FR - 30... -
Page 93: Garantie
à l'état de la technique et à la réglementation en vigueur. En cas de défaut dont ABICOR BINZEL est responsable, ABICOR BINZEL est tenue de procéder, à sa discrétion, à la rectification du défaut ou à la livraison d'un produit de remplacement à ses propres frais. - Page 94 ABICAR 1200 PRO 42V Índice Identificación ..........................ES-3 Etiquetado............................ES-3 Declaración de conformidad......................ES-4 Placa de identificación ........................ES-5 Signos y símbolos utilizados ......................ES-5 Clasificación de las advertencias.....................ES-5 Seguridad ............................ES-6 Utilización conforme a lo prescrito ....................ES-6 Responsabilidad de la empresa operadora..................ES-6 Señales indicadoras y de advertencia ....................ES-6 Instrucciones fundamentales de seguridad ..................ES-7...
-
Page 95: Identificación
1 Identificación 1 Identificación El tractor de soldadura ABICAR 1200 PRO 42V se utiliza para realizar soldaduras continuas a tope y en ángulo. Se fija mediante imanes permanentes y puede utilizarse junto con antorchas de soldadura MIG/MAG. El aparato debe utilizarse exclusivamente con piezas de recambio originales de ABICOR BINZEL. -
Page 96: Declaración De Conformidad
La presente declaración de conformidad se expide bajo la responsabilidad exclusiva del fabricante. Producto Descripción El tractor de soldadura ABICAR 1200 PRO 42V se utiliza para la realización de soldaduras continuas a tope y en ángulo. Se fija mediante imanes permanentes y puede utilizarse junto con antorchas de soldadura MIG/MAG. -
Page 97: Placa De Identificación
ABICAR 1200 PRO 42V 1 Identificación 1.3 Placa de identificación Fig. 1 Placa de identificación El aparato está provisto de una placa de identificación. ► Para realizar consultas, tenga preparado el tipo de aparato, el número de aparato y el año de fabricación que figuran en la placa de identificación. -
Page 98: Seguridad
2 Seguridad ABICAR 1200 PRO 42V 2 Seguridad El presente capítulo proporciona instrucciones fundamentales de seguridad y advierte de los riesgos residuales que deben observarse para utilizar el producto de forma segura. El incumplimiento de las instrucciones de seguridad puede suponer un riesgo para la vida y salud de las personas y causar daños medioambientales o materiales. -
Page 99: Instrucciones Fundamentales De Seguridad
ABICAR 1200 PRO 42V 2 Seguridad 2.4 Instrucciones fundamentales de seguridad El producto se desarrolló y se fabricó según el estado actual de la técnica y las normas y directivas reconocidas en materia de seguridad. El producto entraña riesgos residuales inevitables para el usuario, terceros, aparatos u otros bienes. -
Page 100: Instrucciones De Seguridad Específicas Del Producto
2 Seguridad ABICAR 1200 PRO 42V 2.5 Instrucciones de seguridad específicas del producto ¡ADVERTENCIA! Riesgo de lesiones por permanecer en el área de trabajo del aparato Existe peligro de lesiones en el área de trabajo del aparato. ► Asegúrese de que nadie permanezca en el área de trabajo del aparato cuando se activen los procesos de movimiento. -
Page 101: Relación De Material Suministrado
3 Relación de material suministrado 3 Relación de material suministrado Los componentes siguientes están incluidos en el volumen de suministro: 1× tractor de soldadura ABICAR 1200 PRO 42V 1× soporte de antorcha con barra corta y conjunto de fijación 2× brazo guía (estándar) 1×... -
Page 102: Descripción Del Producto
4 Descripción del producto ABICAR 1200 PRO 42V 4 Descripción del producto 4.1 Diseño y funcionamiento Fig. 2 Diseño y funcionamiento A Carro cruzado K Anillo de seguridad B Tornillo de ajuste vertical L Cable de conexión para la alimentación de tensión C Soporte de la antorcha de soldadura y la comunicación con la fuente de corriente... -
Page 103: Elementos De Mando
ABICAR 1200 PRO 42V 4 Descripción del producto 4.2 Elementos de mando Fig. 3 Panel de control A Display LED F Gatillo de parámetros de soldadura Up/Down B Botón giratorio/pulsador F1 (+ / 0 / −) C Botón giratorio/pulsador F2 G Interruptor de sentido de desplazamiento D Interruptor de señal de inicio de soldadura (Test / O / I) -
Page 104: Transporte E Instalación
5 Transporte e instalación ABICAR 1200 PRO 42V Tab. 1 Datos generales Velocidad horizontal 0-120 cm/min Velocidad vertical 0-110 cm/min Nivel de ruido < 70 dB Peso 14 kg Tab. 2 Datos generales del oscilador Tipo de oscilación Ángulo (máx. 11°) Anchura de oscilación para r = 150 mm... -
Page 105: Puesta En Servicio
ABICAR 1200 PRO 42V 6 Puesta en servicio 6 Puesta en servicio ¡ADVERTENCIA! Electrocución por cables defectuosos Los cables dañados o mal instalados pueden causar una electrocución con peligro de muerte. ► Compruebe que todos los cables y las conexiones estén instalados correctamente y que no estén dañados. -
Page 106: Montaje De La Antorcha De Soldadura
6 Puesta en servicio ABICAR 1200 PRO 42V Ajuste de la longitud ► Monte la unidad de ruedas al otro lado del brazo guía. Ajuste de los brazos guía para cantos exteriores* ► Ajuste la altura de las ruedas con las tuercas. -
Page 107: Montaje Del Oscilador
ABICAR 1200 PRO 42V 6 Puesta en servicio 6.3 Montaje del oscilador Para montar el oscilador, debe desmontarse primero el soporte de la antorcha junto con la placa de fijación. Fig. 7 Desmontaje del soporte de la antorcha Fig. 8 Montaje del oscilador A 4×... -
Page 108: Posicionamiento De Los Brazos Guía
6 Puesta en servicio ABICAR 1200 PRO 42V Fig. 9 Ajuste de la antorcha de soldadura Para mantener la forma correcta de la oscilación, el eje del husillo de salida del oscilador y el de la antorcha de soldadura deben cruzarse. -
Page 109: Posicionamiento De La Antorcha De Soldadura
ABICAR 1200 PRO 42V 6 Puesta en servicio 6.5 Posicionamiento de la antorcha de soldadura Según el tipo y diámetro de la antorcha de soldadura deberá ajustarse correspondientemente el carro cruzado. La posición de la antorcha de soldadura puede modificarse durante la soldadura con el carro cruzado en sentido vertical y horizontal. -
Page 110: Encendido/Apagado Del Aparato
6 Puesta en servicio ABICAR 1200 PRO 42V 6.7 Encendido/apagado del aparato ► Para encender el aparato, presione hacia abajo el interruptor de encendido/apagado, hasta que se enclave. Tras encender el aparato, se muestra primero en el display el número actual de la versión de software. -
Page 111: Menú De Configuración
ABICAR 1200 PRO 42V 6 Puesta en servicio Ejemplo 1: ► Girar F1 para ajustar la anchura de oscilación. ► Girar F2 para ajustar la velocidad de oscilación. El valor se programa y no necesita confirmación. Ejemplo 2: ► Girar F1 para ajustar el tiempo de retardo 1. - Page 112 6 Puesta en servicio ABICAR 1200 PRO 42V Modificar TAREA Girando F1 ir al parámetro “Cargar config”. Girando F2 seleccionar el número de tarea deseado. Pulsar F2. Se carga la TAREA guardada y en el display se muestra brevemente el mensaje “Terminado”.
- Page 113 ABICAR 1200 PRO 42V 6 Puesta en servicio Ajuste de los parámetros de soldadura oscilante (opcional) 6.3 Montaje del oscilador en la página ES-15 Una vez conectado el oscilador opcional, los parámetros de oscilación pueden configurarse en el menú de configuración.
-
Page 114: Prueba De Funcionamiento
6 Puesta en servicio ABICAR 1200 PRO 42V 6.9 Prueba de funcionamiento ¡ADVERTENCIA! Deslumbramiento por el arco El arco generado durante la comprobación del funcionamiento puede dañar los ojos. ► Revise su equipo de protección individual antes de ponérselo (protección ocular). -
Page 115: Funcionamiento
ABICAR 1200 PRO 42V 7 Funcionamiento 7 Funcionamiento ¡ADVERTENCIA! Riesgo de lesiones por caída del aparato Al final de piezas de trabajo, durante el funcionamiento sobre superficies inclinadas o verticales o en caso de altas temperaturas exteriores, el aparato puede precipitarse y causar graves lesiones. -
Page 116: Puesta Fuera De Servicio
8 Puesta fuera de servicio ABICAR 1200 PRO 42V 8 Puesta fuera de servicio ► Para la puesta fuera de servicio, realice también la desconexión de los componentes técnicos del proceso de soldadura. Apague el aparato con el interruptor de encendido/apagado. -
Page 117: Intervalos De Mantenimiento
ABICAR 1200 PRO 42V 9 Mantenimiento y limpieza 9.1 Intervalos de mantenimiento Los intervalos de mantenimiento indicados son valores orientativos y se refieren al trabajo de un turno. Recomendamos llevar un registro de las inspecciones. Hay que registrar la fecha del control, los defectos identificados y el nombre del examinador. -
Page 118: Averías Y Eliminación De Las Mismas
10 Averías y eliminación de las mismas ABICAR 1200 PRO 42V 10 Averías y eliminación de las mismas ► Observe la documentación de los componentes técnicos del proceso de soldadura. ► En caso de preguntas o problemas, póngase en contacto con su distribuidor. -
Page 119: Eliminación De Materiales
12.3 Embalajes ABICOR BINZEL ha reducido el embalaje de transporte a lo estrictamente imprescindible. Durante la selección de los materiales de embalaje se ha tenido en cuenta su posible reciclaje. -
Page 120: Accesorios
13 Accesorios ABICAR 1200 PRO 42V 13 Accesorios Brazo guía estándar Número de pedido: 522.0196.2 (2 unidades) Tornillo moleteado Número de pedido: 522.0199.4 (4 unidades) Rueda con revestimiento de goma Número de pedido: 522.0201.4 (4 unidades) Dispositivo de apriete de antorcha 16-22 mm Número de pedido: 522.0209.1... -
Page 121: Piezas De Repuesto Y Desgaste
ABICAR 1200 PRO 42V 14 Piezas de repuesto y desgaste Antorcha de soldadura ABIMIG AT 355 LW 4,0 m KZ-2 PT Número de pedido: 014.0708.1 Antorcha de soldadura ABIMIG WT 440 4,0 m WZ-2 PT Número de pedido: 788.0311.1 Antorcha de soldadura ABIMIG MTG 455 T 4,0 m KZ-2 PT Número de pedido: 916.0025.1... -
Page 122: Esquema De Conexiones
15 Esquema de conexiones ABICAR 1200 PRO 42V 15 Esquema de conexiones Interruptor principal Gatillo de parámetros de soldadura Interfaz Oscilador ES - 30... -
Page 123: Garantía
La garantía no aplica en caso de utilizar piezas de recambio que no sean piezas originales de ABICOR BINZEL o en caso de que el usuario o un tercero haya reparado el producto de forma inadecuada. - Page 124 Follow step 1 on the landing Open the app. Then scan the page of the ABICOR BINZEL page and install the free of QR code of the ABICOR BINZEL web site. charge TechCommApp. channel using the QR code scanner you find in the app.
Need help?
Do you have a question about the ABICAR 1200 PRO 42V and is the answer not in the manual?
Questions and answers