
Related Manuals for Caple Di629


Summary of Contents for Caple Di629
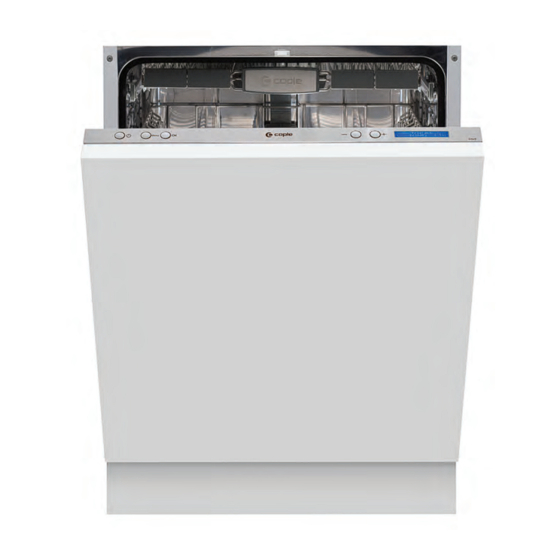
- Page 1 Instruction manual for integrated dishwasher Instruction manual for integrated dishwasher Model code: Di629 Contact Caple on 0117 938 7420 or for spare parts www.caple.co.uk...
-
Page 2: Table Of Contents
Positioning the Applian ce......15 Electrical connection........15 This manual is also available on the Caple website Water Connec tion.........1 6 www.caple.co.uk Start of dishwasher........17 Before calling for service........18 Error codes........ - Page 3 When using your dishwasher, follow the precautions listed below: This appliance is intended to be used in household and similar applications such as: -staff kitchen areas in shops, offices and other working environments; -farm houses; -by clients in hotels, motels and other residential type environments;...
- Page 4 This appliance must be earthed. In the event of a malfunction or breakdown, earthing will reduce the risk of an electric shock by providing a path of least resistance of electric current. This appliance is equipped with a cord having an equipment-earthing conductor and a grounding plug.
- Page 5 2) Warning: Knives and other utensils with sharp points must be loaded in the basket with their points down or placed in a horizontal position. Check that the detergent powder is empty after completion of the wash cycle. Do not wash plastic items unless they are marked dishwasher safe or the equivalent.
- Page 6 Dispose of the dishwasher packaging material correctly. All packaging materials can be recycled. Plastic parts are marked with the standard international abbreviations: for polyethylene, e.g. sheet wrapping material for polystyrene, e.g. padding material POM polyoxymethylene, e.g. plastic clips polypropylene, e.g. Salt filler Acrylonitrile Butadiene Styrene, e.g.
- Page 7 For detailed operating method read the corresponding content on the instruction manual. Switch on the appliance Open the door,press the On/Off button to switch on the appliance . With each wash cycle. Compartment Fill the detergent dispenser For programmes with pre-wash only. (Follow the user instructions!) Check the rinse aid level Electric indicator on control panel (if provided).
- Page 8 Control Panel Control Panel Menu Di629 1.On/Off Button: To turn on/off the power supply. 4. - Button: Move to the left. Press once the menu moves to the next item on the left.
-
Page 9: A Water Softener
Before using your dishwasher for the first time: Set the water softener Add 1.5Kg dishwasher salt and then fill the salt container with water F i l l t h e r i n s e a i d d i s p e n s e r Add the detergent The water softener must be set manually, using the water hardness dial. - Page 10 Always use the salt intended for use with dishwasher. The salt contain er is located beneath the lower basket and should be fill ed as explained in t he foll owing: Attention! Only use salt spe cif ically desi gne d for t he use i n dishwashers! Every other type of salt not speci fically de sig ned fo r the u se in a d ishwasher, espe cially table salt, will damage the w ater sof tener.
- Page 11 When to Refill the Rinse Aid Dispenser If there is no rinse-aid warning light in the control panel, you can estimate the amount from the colour " " of the optical level indicator C located next to the cap. When th e rinse-aid c ontainer is full, the whole indicator will be dark .As the rinse -aid diminishes, the size of the dark dot decreases.
- Page 12 Detergents There are 3 sorts of d etergents 1.With phosphate and with ch lorine 2.With phosphate and without chlorine 3.Without phosphate and without chlorine Normally new powdered detergent is without phosphate. Thus the water softener function of phosphate is not given. In this case we recommend to fill salt in the salt con taine r even when °...
- Page 13 Sensors intelligently check the level of cleanliness of your crockery to make maximum savings of time, energy and water. Here at Caple we want to do all that we can to save water for both ecological and financial reasons, an astonishingly low 8.4L can be used the Auto wash programme.
- Page 14 Consider buying utensils which are identified as dishwasher-proof. Use a mild detergent that is described as 'kind to dishes'. If necessary, seek further information from the detergent manufacturers. For particular items, select a programme with as low a temperature as possible. To prevent damage, do not take gla ss a nd c utlery out of the dishwasher immediately after the programme h as ended.
-
Page 15: Ba Skets
The u pper basket is designed to hold more delicate We suggest that you place large items and the most and lighter dishware such as glasses, coffee and difficult to clea n ite ms are to be placed into the lo wer tea cups and saucers, as well as plates, small bowls basket: such as pots, pans, lids, se rving dishes and and shallow pans (as long as they are not too dirty). - Page 16 Means: need to fill rinse into the Rinse-Aid Dispenser. ℃ Pre-wash (45 ℃ Autowash(45-55 AUTO Auto sensing wash, lightly, Rinse normally or heavily soiled 5/30g 0.9-1.3 8.4-12.7 ℃ Rinse crockery, with or with out Drying dried-on food ℃ Pre-wash(50 ℃ Wash (65 For heaviest soiled crockery, Rinse...
-
Page 17: Wash Cycle Table
Press the menue Button ,then press - or + button change the program as follows direction: Auto->Intensive->Normal->ECO->Glass->90 Min->Rapid->Soak; If a program is selected, the display screen will show. Press the OK button,Close the door, the dishwasher begins to start. Changing the Prgramme Premise: A cycle that is underway can only be modified if it has only been running for a short time. - Page 18 The filter prevents larger remnants of food or other objects from getting inside the pump. The residues may block the filter, in this case they must be removed. The filter system consists of a coarse filter,a flat (Main filter) And a microfilter(Fine filter). Main filter Fo od and soil particles trap ped in this filter are pulverized by a specia l jet on the lower spray arm and washed down to drain.
- Page 19 Remarks: - Inspect the filters for blo cking a fter e very time the dishwa sher has been used. - By unscrewing the coarse filter, you can remove the filter system. Re move any foo d remna nts and clean the filters under running water. The entire filter assembly should be cleaned once a week.
- Page 20 After Every Wash When not in Use for a LongTime It is recommend that you run a was h cy cle with the After every wash, turn off the water supply to the dishwasher empty an d the n remove the plug from the appliance and leave the door slightly open so that socket, turn off the wa ter supply and leave the door of moisture and odours are not trapped inside.
- Page 21 Please carefully read the installation instruction. ● Illustration s of cabinet dimensions and installation position of the dishwasher Preparations should be mad e be fore moving the d ishwash er to the fina l location. Choose a place near the sink to facilitate the installation of inlet and drain hoses (see figure 1).
- Page 22 2 Install the hook on the furniture door and put the hook into the slot of the outer door of dishwasher(see figure 4a). After positioning of the panel , fix the panel onto the outer door by screws and bolts(See figure 4b) . 【Figure4a】...
- Page 23 Tension adjustment of the door spring ● The door springs are set at the factory to the proper tension for the outer door. When the furniture door is installed, you will have to adjust the door spring tension. Rotate the adjusting screw to drive the adjustor to strain or relax the steel cable (see figure 5).
- Page 24 Dishwasher installation steps ● Install the furniture door to the outer door of the dishwasher using the brackets provided. Re fer to the template for positioning of the brackets. Adjust the tension of the door springs by using an Allen key turn ing in a clockwise motion to tighten the left and right door springs.
- Page 25 Dishwasher must be level for proper dish rack operation and wash performance. Place a spirit level on door and rack track inside the tub as shown to check that the dishwasher is level. level the dishwasher by adjusting the three levelling legs individually. When level the dishwasher, please pay attention not to let the dishwasher tip over.
-
Page 26: Positioning The Appliance
The appliance must be connected to the water mains using new hose-sets. The old hose-sets should not be reused. Water pressure must be between 0,04 MPa and 1 MPa. If the pressure is below the minimum consult our Service Department for advice. 1. - Page 27 Fuse blown, or the Replace fuse or reset circuit breaker. Remove any other circuit breaker acted appliances sharing the same circuit with the dishwasher Make sure the dishwasher is turned on and the door is Power supply is not turned on closed securely.
- Page 28 The dishes were not See notes in " Loading the Dishwasher Baskets ". loaded correctly. The programme was Select a more intensive programme. not powerful enough. See" Wash Cycle Table . " Not enough detergent Use more detergent, or change your detergent. was dispensed.
- Page 29 Height : 815mm Width : 598 mm Depth : 550mm with the door closed Water pressure: 0.04-1.0MPa Power supply: see rating label Capacity: 14 place settings...
- Page 31 5 position cutlery basket: Mod e 1 Position one: lift the left basket up, both left and right baskets are angled. Mode 2 Position two: adjust the left basket to lower position, left basket is flat and right basket is angled. Mode 3 Position three: lift the right basket up, both left and right baskets are flat.
- Page 32 Technical Data Sheet Sheet of hous ehold d ishwasher according to EU Directive 1059 /2010: Manu facturer CAPLE Type / Description Di629 Standard place settings Energy efficiency class A+ ++ Annual energy consumption 237 kWh Energy consumption of the standard cle aning cycle 0.83 kWh...
- Page 34 Caple Fourth Way Avonmouth Bristol BS11 8DW www.caple.co.uk...
Need help?
Do you have a question about the Di629 and is the answer not in the manual?
Questions and answers