
Subscribe to Our Youtube Channel
Related Manuals for Caple Di641


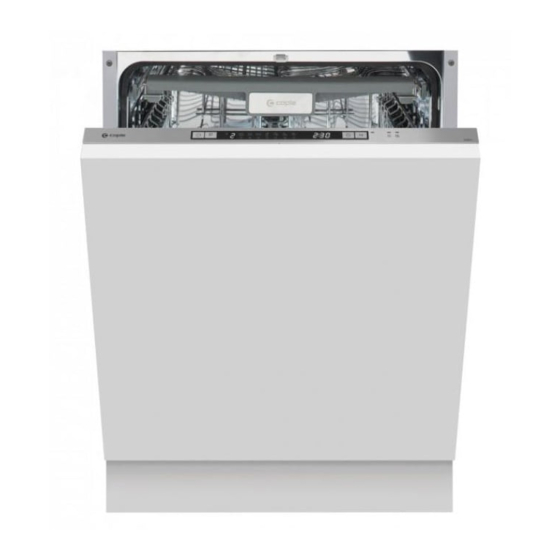
Summary of Contents for Caple Di641
- Page 1 Integrated Dishwasher instruction manual Di641 Contact Caple on 0117 938 7420 or for spare parts www.caple.co.uk...
-
Page 2: Table Of Contents
LOADING THE BASKETS CUTLERY RACK TIPS RINSE AID AND DETERGENT DISPENSER RINSE AID RESERVOIR FILLING THE DETERGENT DISPENSER WASH CYCLE TABLE ERROR CODES TROUBLE SHOOTING TIPS TECHNICAL INFORMATION TECHNICAL FICHE Please keep this instruction manual for future reference Instruction manual Di641... -
Page 3: Warnings
- This appliance is for indoor household use only. Please keep this instruction manual for future reference Instruction manual Di641... - Page 4 - Improper connection of the equipment-earthing conductor can result in the risk of an electric shock. - Check with a qualified electrician or Caple service representative if you are in doubt whether the appliance is properly grounded.
- Page 5 - For plastic items not marked, check the manufacturer’s recommendations. - Use only detergent and rinse additives designed for an automatic dishwasher. - Never use soap, laundry detergent, or hand washing detergent in your dishwasher. Please keep this instruction manual for future reference Instruction manual Di641...
- Page 6 - The appliance may only be used with correctly adjusted door springs. - If the supply cord is damaged, it must be replaced by Caple, its service agent or a similarly qualified person in order to avoid a hazard. - During installation, the power supply must not be excessively or dangerously bent or flattened.
-
Page 7: Electrical Connection
Do not modify the plug provided with the appliance; If it is not fit for the outlet. Have a proper outlet installed by a qualified electrician. Please keep this instruction manual for future reference Instruction manual Di641... - Page 8 CE DECLARATIONS OF CONFORMITY This appliance has been manufactured to the strictest standards and complies with all applicable legislation, Low Voltage Directive (LVD) and Electromagnetic Compatibility (EMC). Please keep this instruction manual for future reference Instruction manual Di641...
-
Page 9: Product Overview
Lower spray arm Salt container Filter assembly Dispenser Upper spray arm Cup rack Cutlery rack Upper basket Lower basket NOTE: Pictures are only for reference, different models may be different. Please keep this instruction manual for future reference Instruction manual Di641... -
Page 10: Using Your Dishwasher
This will prevent any grains of salt or salty water, which may have been spilled, remaining on the bottom of the machine for any period of time, which may cause corrosion. Please keep this instruction manual for future reference Instruction manual Di641... - Page 11 Depending on how well the salt dissolves, the salt warning light may still be on even though the salt container is filled. If salt has spilled, run a soak or quick program to remove it. Please keep this instruction manual for future reference Instruction manual Di641...
-
Page 12: Basket Tips
The height of the upper basket can be easily adjusted to accommodate taller dishes in either the upper or lower basket. To adjust the height of the upper rack, follow these steps: Please keep this instruction manual for future reference 11 11 Instruction manual Di641... - Page 13 FOLDING BACK THE RACK SHELVES The spikes are used for holding plates and a platter. They can be lowered to make more room for large items. raise upwards fold backwards Please keep this instruction manual for future reference Instruction manual Di641...
-
Page 14: Maintenance And Cleaning
Follow the steps below to clean the filters in the wash cabinet. NOTE: Pictures are only for reference, different models of the filtering system and spray arms may be different. Please prevail in kind. Please keep this instruction manual for future reference Instruction manual Di641... - Page 15 - NEVER use the dishwasher without filters in place. Improper replacement of the filter may reduce the performance level of the appliance and damage dishes and utensils. Please keep this instruction manual for future reference Instruction manual Di641...
-
Page 16: Spray Arms
3. Wash the arms in soapy warm water and use a soft brush to clean the jets. Replace them after rinsing them thoroughly. Please keep this instruction manual for future reference Instruction manual Di641... -
Page 17: Caring For The Dishwasher
MOVING THE APPLIANCE If the appliance must be moved, try to keep it in the vertical position. If absolutely necessary, it can be positioned on its back. Please keep this instruction manual for future reference Instruction manual Di641... -
Page 18: Installation Instruction
If the electrical socket to which the appliance must be connected is not appropriate for the plug, replace the socket, rather than using a adaptors or the like as they could cause overheating and burns. Ensure that proper earthing exists before use Please keep this instruction manual for future reference Instruction manual Di641... -
Page 19: Water Supply And Drain
3. Turn water fully on before starting the dishwasher. HOW TO DISCONNECT THE SAFETY SUPPLY HOSE 1. Turn off the water. 2. Unscrew the safety supply hose from the faucet. Please keep this instruction manual for future reference Instruction manual Di641... -
Page 20: Connection Of Drain Hoses
If you need a drain hose extension, make sure to use a similar drain hose. It must be no longer than 4 metres; otherwise the cleaning effect of the dishwasher could be reduced. Please keep this instruction manual for future reference Instruction manual Di641... -
Page 21: Position The Appliance
LEVELLING THE APPLIANCE Once the appliance is positioned for levelling, the height of the dishwasher may be altered via adjustment of the screwing level of the feet. Please keep this instruction manual for future reference Instruction manual Di641... -
Page 22: Built-In Installation Instructions
Minimum space of 50mm Minimum space NOTE: of 50mm Depending on where your electrical outlet is, you may need to cut a hole in the opposite cabinet side. Please keep this instruction manual for future reference Instruction manual Di641... - Page 23 - The door spring tension is correct when the door remains horizontal in the fully opened position, yet rises to a close with the slight lift of a finger. Please keep this instruction manual for future reference Instruction manual Di641...
- Page 24 A. Normal work surface: Put the installation hook into the slot of the side plane and secure it to the work surface with the wood screws. B. Marble or granite work top: Fix the side with Screw. Please keep this instruction manual for future reference Instruction manual Di641...
- Page 25 - When levelling the dishwasher, please pay attention not to let the dishwasher tip over. Check level front to back Check level side to side DOWN NOTE: The maximum adjustment height of the feet is 50 mm. Please keep this instruction manual for future reference Instruction manual Di641...
-
Page 26: Control Panel
For small loads, you may use just the upper or lower rack to save 1 Half-load energy. Each press of the Half Load button cycles between upper rack only and lower rack only. Please keep this instruction manual for future reference Instruction manual Di641... - Page 27 To rinse dishes that you plan to wash later that day. Rinse Aid A shorter wash for lightly soiled loads that do not 7 Warning indicator Salt A shorter wash for lightly soiled loads that do not Please keep this instruction manual for future reference Instruction manual Di641...
-
Page 28: Water Softener
3.1-4.0 23-34 41-60 29-42 4.1-6.0 35-55 61-98 43-69 6.1-9.8 1°dH=1.25°Clarke=1.78 °fH=0.178mmol/l The manufactory setting: H3 Contact your local water board for information on the hardness of your water supply. Please keep this instruction manual for future reference Instruction manual Di641... -
Page 29: Loading The Baskets
- Some types of glasses can become dull after a large number of washes - Silver and aluminum parts have a tendency to discolour during washing - Glazed patterns may fade if machine washed frequently Please keep this instruction manual for future reference Instruction manual Di641... - Page 30 REMOVING THE DISHES To prevent water dripping from the upper basket into the lower basket, we recommend that you empty the lower basket first, followed by the upper basket. Please keep this instruction manual for future reference Instruction manual Di641...
- Page 31 WARNING - Do not let any item extend through the bottom. Always load sharp utensils with the sharp point down! Please keep this instruction manual for future reference Instruction manual Di641...
- Page 32 1.UPPER BASKET: Cups Saucers Glasses Small serving bowl Medium serving bowl 2.LOWER BASKET: Large serving bowl Dessert dishes Dinner plates Soup plates Oval plates Please keep this instruction manual for future reference Instruction manual Di641...
- Page 33 3.CUTLERY RACK: 1. Soup spoons 5. Dessert spoons 2. Forks 6. Serving spoons 3. Knives 7. Serving forks 4. Teaspoons 8. Gravey ladies Please keep this instruction manual for future reference Instruction manual Di641...
-
Page 34: Cutlery Rack Tips
Move the right basket from right to left, two basket are overlapping. This creates more space for the upper basket below, for taller glasses etc. Remove the right basket from the tray. Please keep this instruction manual for future reference Instruction manual Di641... -
Page 35: Rinse Aid And Detergent Dispenser
Keep your detergent fresh and dry. Don’t put powdered detergent into the dispenser until you are ready to wash dishes. - Dishwasher detergent is corrosive! Keep dishwasher detergent out of the reach of children. Please keep this instruction manual for future reference Instruction manual Di641... -
Page 36: Rinse Aid Reservoir
Reduce it if there are Adjust lever(Rinse) sticky whitish stains on your dishes or a bluish Adjust lever(Rinse) film on glassware or knife blades. Please keep this instruction manual for future reference Adjust lever(Rinse) Instruction manual Di641... -
Page 37: Filling The Detergent Dispenser
NOTE: Be aware that depending on the soiling of water, setting may be different. Please observe the manufacturer’s recommendations on the detergent packaging. Please keep this instruction manual for future reference Instruction manual Di641... -
Page 38: Wash Cycle Table
1 piece Rinse(60˚C) Glass Drying Wash (65˚C) Rinse 1.35 12.5 Rinse (65˚C) 1 pieces 90 Min Drying Wash (45˚C) ¡ Rinse (55˚C) 0.75 Rinse (55˚C) Radid Prewash 0.02 Pre-wash Please keep this instruction manual for future reference Instruction manual Di641... - Page 39 - Press Program button more than three seconds the machine will be in stand by state. - You can change the Program to the desired cycle setting. Please keep this instruction manual for future reference Instruction manual Di641...
- Page 40 - Add the forgotten dishes. - Close the door. - The dishwasher will start running again. WARNING - It is dangerous to open the door mid-cycle, as hot steam may scald you. Please keep this instruction manual for future reference Instruction manual Di641...
-
Page 41: Error Codes
- If overflow occurs, turn off the main water supply before calling a service. - If there is water in the base pan because of an overfill or small leak, the water should be removed before restarting the dishwasher. Please keep this instruction manual for future reference Instruction manual Di641... -
Page 42: Trouble Shooting Tips
Turbo function (if present), salt have gotten into the on cutlery after adding dishwasher salt. wash cycle. The lid of the softer Check the lip .Ensure the fix is fine. is loose Please keep this instruction manual for future reference Instruction manual Di641... - Page 43 Use a mild abrasive cleaner to eliminate those marks. dishes dishes. Detergent left in Dishes block Re-loading the dishes properly dispenser detergent cups. cups Please keep this instruction manual for future reference Instruction manual Di641...
- Page 44 If a problem still persists after following the Troubleshooting advice, please contact Caple service on: T - 0117 938 7420 E - service@caple.co.uk Please keep this instruction manual for future reference Instruction manual Di641...
-
Page 45: Technical Information
TECHNICAL INFORMATION Height: 815mm Width : 598 mm Depth (D1): 550mm(with the door closed) Depth (D2): 1150mm (with the door opened 90°) Please keep this instruction manual for future reference Instruction manual Di641... -
Page 46: Technical Fiche
5 This program is suitable for cleaning soiled normally soiled tableware and that it is the most efficient programme in terms of its combined energy and water consumption for that type of tableware. Please keep this instruction manual for future reference Instruction manual Di641... - Page 47 Notes: Please keep this instruction manual for future reference Instruction manual Di641...
- Page 48 Caple Service Fourth Way Avonmouth Bristol BS11 8DW t: 0117 938 7420 e: service@caple.co.uk www.caple.co.uk Please keep this instruction manual for future reference Instruction manual Di641...
Need help?
Do you have a question about the Di641 and is the answer not in the manual?
Questions and answers