
Subscribe to Our Youtube Channel
Related Manuals for Caple DI652


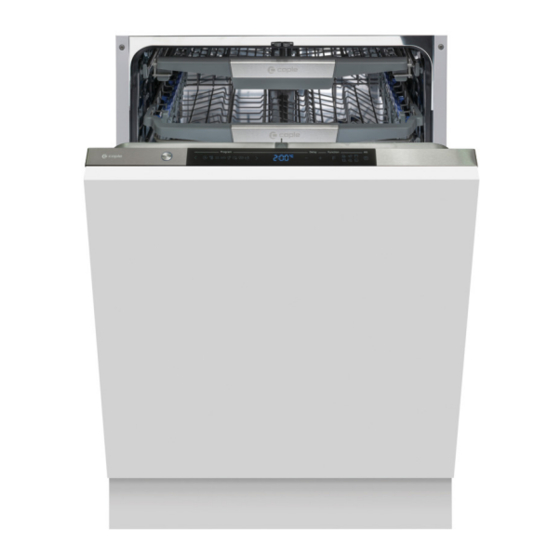
Summary of Contents for Caple DI652
- Page 1 D i s h w a s h e r I n s t r u c t i o n M a n u a l DI6 5 2 Contact Caple on 0117 938 7420 for spare parts or www.caple.co.uk...
-
Page 2: Table Of Contents
Installation Instructions Water Supply and Drain Connection of Drain Hoses Position the Appliance Free Standing Installation Built-In Installation Troubleshooting Tips Error Codes Technical Information Product Fiche Caple Contact Details Instruction manual DI652 Please keep this instruction manual for future reference... -
Page 3: Warnings
- This appliance is for indoor household use only. - To protect against the risk of electrical shock, do not immerse the unit, cord or plug in water or other liquid. Instruction manual DI652 Please keep this instruction manual for future reference... - Page 4 - Improper connection of the equipment-earthing conductor can result in the risk of an electric shock. Instruction manual DI652 Please keep this instruction manual for future reference...
- Page 5 - Check with a qualified electrician or Caple service representative if you are in doubt whether the appliance is properly grounded. - Do not modify the plug provided with the appliance, if it does not fit the outlet. - Have a proper outlet installed by a qualified electrician.
- Page 6 - If the supply cord is damaged, it must be replaced by Caple, its service agent or a similarly qualified person in order to avoid a hazard. - During installation, the power supply must not be excessively or dangerously bent or flattened.
- Page 7 - DISPOSAL: Do not dispose this product as unsorted municipal waste. Collection of such waste separately for special treatment is necessary. Instruction manual DI652 Please keep this instruction manual for future reference...
-
Page 8: Warranty
(placed on the inside of the appliance storage drawer). Registration can also be completed online by visiting www.caple.co.uk. Ensure you keep your warranty card safe, you may need to show it to Caple Service together with proof of purchase. -
Page 9: Product Overview
4.1 - 6.0 35 - 55 35 - 55 61 - 98 61 - 98 43 - 69 43 - 69 6.1 - 9.8 6.1 - 9.8 Instruction manual DI652 dH=1.25 Clarke=1.78 fH=0.178mmol/l dH=1.25 Clarke=1.78 fH=0.178mmol/l ° ° ° ° ° °... - Page 10 Water Faucet closed. If the “ ” indicator is lit, it means the water faucet If the “ ” indicator is lit, it means the water faucet closed. closed. Instruction manual DI652 Please keep this instruction manual for future reference...
- Page 11 5 minutes and extinguished on the end of the program. 5 minutes and extinguished on the end 5 minutes and extinguished on the end of the program. of the program. of the program. Instruction manual DI652 Please keep this instruction manual for future reference...
-
Page 12: Dishwasher Features
Instruction manual DI652 Please keep this instruction manual for future reference... -
Page 13: Prior To Using Your Dishwasher For The First Time
This will prevent any grains of salt or salty water, which may have been spilled, remaining on the bottom of the machine for any period of time, which may cause corrosion. Instruction manual DI652 Please keep this instruction manual for future reference... - Page 14 Contact your local water board for information on the hardness of your water supply. The manufactory setting: H3 Contact your local water board for information on the hardness of your water supply. Instruction manual DI652 Please keep this instruction manual for future reference...
- Page 15 The salt container must only be refilled when the salt warning light ( ) in the Instruction manual DI652 Please keep this instruction manual for future reference control panel comes on. Depending on how well the salt dissolves, the salt...
-
Page 16: Filling The Rinse Aid Dispenser
Don't put powdered detergent into the dispenser until you are ready to wash dishes. Dishwasher detergent is corrosive!Keep dishwasher detergent out of the reach of children. Instruction manual DI652 Please keep this instruction manual for future reference... - Page 17 4. Without operation in 5 seconds or press the Power button to exit the set model, 4. No operation in 5 seconds or pressing the Power button will exit the set model. the set success. Instruction manual DI652 Please keep this instruction manual for future reference...
-
Page 18: Filling The Detergent Dispenser
Close the flap by sliding it to the catch. catch. front and then pressing it down. 2. Open the cap by pressing down the 2. Open the cap by pressing down the Instruction manual DI652 Please keep this instruction manual for future reference release catch. release catch. -
Page 19: Preparing And Loading Dishes
» Some types of glasses can become dull after a large number of washes » Silver and aluminium parts have a tendency to discolour during washing » Glazed patterns may fade if machine washed Instruction manual DI652 Please keep this instruction manual for future reference... - Page 20 To prevent damage, do not take glass and cutlery out of the cutlery out of the dishwash dishwasher for around 15 minutes after the program has ended. program has ended. Instruction manual DI652 Please keep this instruction manual for future reference...
- Page 21 PART Ⅰ: Generic Version For the best washing effect, please load the baskets refer to standard loading options on last section of PART Ⅰ: Generic Version Instruction manual DI652 Please keep this instruction manual for future reference...
- Page 22 Move the right basket from right to left, two basket baskets overlapping. are overlapping. Remove the right basket from the tray, only leaving the Remove the right basket from the tray, only has the left basket. left basket. Instruction manual DI652 Please keep this instruction manual for future reference...
- Page 23 Loosen the four buttons on the tray and press down gently. Loosen the four buttons on the tray and press down gently. Loosen the four buttons on the tray and press down gently. Instruction manual DI652 Please keep this instruction manual for future reference...
- Page 24 It is not necessary to lift position. the adjuster handle. Instruction manual DI652 Please keep this instruction manual for future reference...
- Page 25 Folding back the rack shelves The spikes of the lower basket are used for holding plates and a platter. Instruction manual DI652 The spikes of the lower basket are used for holding plates and a platter. Please keep this instruction manual for future reference...
-
Page 26: Loading The Baskets
I T E M Item Number Dessert dishes Number Item Dessert dishes Dessert dishes Dinner plates Dinner plates Dinner plates Soup plates Soup plates Soup plates Oval platter Oval platter Oval platter Instruction manual DI652 Please keep this instruction manual for future reference... - Page 27 Gravy ladles Program: ECO Serving forks Rinse aid setting: 6 Rinse aid setting: 6 Rinse aid setting: 6 Softener setting: H3 Softener setting: H3 Gravy ladles Softener setting: H3 Instruction manual DI652 Please keep this instruction manual for future reference...
-
Page 28: Programming The Dishwasher
(1 piece) Program Self-Clean Rinse(70℃) Self-Clean Hygiene This program is the test cycle. The information for comparability test in accordance with EN 50242. Normal (*EN 50242) NOTE: Instruction manual DI652 NOTE: Please keep this instruction manual for future reference Glass... - Page 29 4. Close the door. The dishwasher will start after 10 seconds. 35 - 55 61 - 98 43 - 69 6.1 - 9.8 ° dH=1.25 Clarke=1.78 fH=0.178mmol/l ° ° The manufactory setting: H3 Instruction manual DI652 Please keep this instruction manual for future reference...
-
Page 30: Maintenance And Cleaning
» Never use abrasive cleaners or scouring pads on the outer surfaces because they may scratch the finish. Some paper towels may also scratch or leave marks on the surface. Instruction manual DI652 Please keep this instruction manual for future reference... - Page 31 For a more thorough clean, use a soft and rotate clockwise to the close arrow. cleaning brush. Instruction manual DI652 Please keep this instruction manual for future reference...
- Page 32 Wash the arms in soapy and warm water and use a soft brush to clean the jets. Replace them after rinsing them thoroughly. Instruction manual DI652 Please keep this instruction manual for future reference...
-
Page 33: Caring For The Dishwasher
One of the factors that cause odours to form in the dishwasher is food that remains trapped in the seels. Periodic cleaning with a damp sponge will prevent this from occurring. Instruction manual DI652 Please keep this instruction manual for future reference... -
Page 34: Installation Instructions
WARNING: Ensure that proper earthing exists before use. Instruction manual DI652 Please keep this instruction manual for future reference... -
Page 35: Water Supply And Drain
1. Pull The safety supply hoses completely out from storage compartment located at rear of dishwasher. 2. Tighter the screws of the safety supply hose to the faucet with thread 3/4inch. Instruction manual DI652 3. Turn water fully on before starting the dishwasher. Please keep this instruction manual for future reference... -
Page 36: Connection Of Drain Hoses
The waste connection must be at a height less than 100 cm (maximum) from the bottom of the bottom of the dish. The water drain hose should be fixed . dishwasher. The water drain hose should be fixed. Instruction manual DI652 Please keep this instruction manual for future reference... -
Page 37: Position The Appliance
The laminated top of the machine does not require any heatproof, scratchproof and stainproof. require any particular care since it is particular care since it is heatproof, scratch-proof and heatproof, scratchproof and stainproof. stain-proof. Instruction manual DI652 Please keep this instruction manual for future reference... -
Page 38: Built-In Installation
600 mm (for 60cm model) 450 mm (for 45cm model) Space between cabinet bottom and floor 600 mm (for 60cm model) Space between cabinet bottom and floor 450 mm (for 45cm model) Instruction manual DI652 Please keep this instruction manual for future reference... - Page 39 (see figure 4B). After positioning of panel , press top of the aesthetic wooden panel to make sure that the plastic k are fastened. Instruction manual DI652 Please keep this instruction manual for future reference...
- Page 40 B. Marble or granite work top: Fix the side with Screw. B. Marble or granite work top: Fix the side with Screw. Instruction manual DI652 Please keep this instruction manual for future reference...
- Page 41 Check level side to side DOWN NOTE: NOTE: The maximum adjustment height of the feet is 50 mm. The maximum adjustment height of the feet is 50mm. Instruction manual DI652 Please keep this instruction manual for future reference...
-
Page 42: Troubleshooting Tips
To clean the interior, use a damp sponge with dishwasher White film on inside detergent and wear rubber gloves. Never use any other Hard water minerals. surface cleaner than dishwasher detergent otherwise, it may cause foaming or suds. Instruction manual DI652 Please keep this instruction manual for future reference... - Page 43 Add more detergent. dishes and glasses. limescale deposits. Black or grey marks Aluminium utensils have Use a mild abrasive cleaner to eliminate those marks. on dishes rubbed against dishes Instruction manual DI652 Please keep this instruction manual for future reference...
-
Page 44: Error Codes
» If overflow occurs, turn off the main water supply before calling a service. » If there is water in the base pan because of an overfill or small leak, the water should be removed before restarting the dishwasher. Instruction manual DI652 Please keep this instruction manual for future reference... -
Page 45: Technical Information
D E P T H ( D 1 ) 550mm (with the door closed) Depth (D2) 1150mm (with the door opened 90°) D E P T H ( D 2 ) 1150mm (with the door opened 90°) Instruction manual DI652 Please keep this instruction manual for future reference... -
Page 46: Product Fiche
220 min cleaning cycle Noise level 42 dB(A) re 1 pW Mounting Built-in Could be built-in Power consumption 1930W Rated voltage / frequency 220-240V/50Hz Water pressure (flow pressure) 0.04-1.0MPa=0.4-10 bar Instruction manual DI652 Please keep this instruction manual for future reference... - Page 47 5. This program is suitable for cleaning soiled normally soiled tableware and that it is the most efficient program in terms of its combined energy and water consumption for that type of tableware. Instruction manual DI652 Please keep this instruction manual for future reference...
-
Page 48: Caple Contact Details
Caple Service Fourth Way Avonmouth T: 0117 938 1900 Bristol E: service@caple.co.uk BS11 8DW www.caple.co.uk...
Need help?
Do you have a question about the DI652 and is the answer not in the manual?
Questions and answers