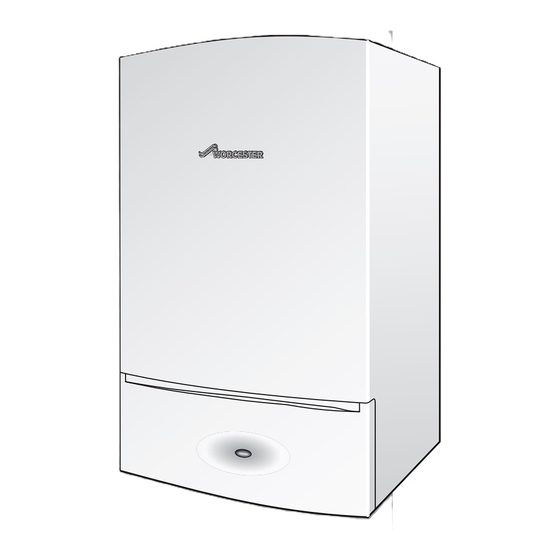
Worcester Greenstar Ri Compact ErP Installation, Commissioning And Servicing Instructions

Worcester Greenstar Ri Compact ErP Installation, Commissioning And Servicing Instructions

Wall hung rsf gas fired condensing regular boiler
Table of Contents

Advertisement

Quick Links

INSTALLATION, COMMISSIONING AND SERVICING INSTRUCTIONS
WALL HUNG RSF GAS FIRED CONDENSING REGULAR BOILER
Greenstar Ri Compact
FOR OPEN VENTED AND SEALED CENTRAL HEATING SYSTEMS AND
INDIRECT MAINS FED DOMESTIC HOT WATER
ErP
These appliances are for use with:
Natural Gas or L.P.G.
(Cat. II 2H 3P type C13, C33 & C53)
Model
Natural Gas
27Ri Compact
30Ri Compact
L.P.G.
27Ri Compact
30Ri Compact
If you smell gas:
▶ Well away from the building: call the National Gas Emergency
Service on 0800 111 999.
▶ L.P.G. boilers: Call the supplier's number on the side of the
gas tank.
GC Number
41-406-54
ErP
41-406-56
ErP
41-406-55
ErP
41-406-57
ErP

Advertisement

Table of Contents
loading

Summary of Contents for Worcester Greenstar Ri Compact ErP

  • Page 1 INSTALLATION, COMMISSIONING AND SERVICING INSTRUCTIONS WALL HUNG RSF GAS FIRED CONDENSING REGULAR BOILER Greenstar Ri Compact FOR OPEN VENTED AND SEALED CENTRAL HEATING SYSTEMS AND INDIRECT MAINS FED DOMESTIC HOT WATER These appliances are for use with: Natural Gas or L.P.G. (Cat.
  • Page 2: Table Of Contents

    Contents Contents Commissioning ....... . 33 Key to symbols and safety instructions ....4 6.5.1 Checking the gas inlet pressure .
  • Page 3: Key To Symbols And Safety Instructions

    If you are in any doubt, contact the Worcester Technical helpline (0330 123 3366). a list entry Please leave these instructions with the completed BENCHMARK...
  • Page 4: Safety Precautions

    ▶ Turn off the gas at the meter or regulator. ▶ Open windows and doors. ▶ Warn your neighbours and leave the building. Only use the approved Worcester Condensfit II flue system with this ▶ Prevent anyone from entering the building. appliance.
  • Page 5: Regulations

    Regulations Regulations Installation regulations Current Gas Safety (Installation & Use) Regulations: All gas appliances must be installed by a competent person in accordance with the above regulations. Failure to install appliances correctly could lead to prosecution. The appliance must be installed in accordance with, and comply to, the current: Gas Safety Regulations, IET Regulations, Building Regulations, Building Standards (Scotland) (Consolidation), Building Regulations (Northern Ireland), local water by-laws, Health &...
  • Page 6: Appliance Information

    Appliance Information Appliance Information Appliance 270mm 590mm* 390mm *600mm to top of case front Fig. 1 Ri Compact standard package STANDARD PACKAGE: CHECK LIST - Hardware literature pack Qty. Wall hung gas fired condensing regular boiler for central Greenstar Ri Compact Installation, Commissioning and heating and domestic hot water Servicing Instructions...
  • Page 7: Layout

    Appliance Information Layout Fig. 2 Ri Compact main boiler components Greenstar Ri Compact 6720813282 (2015/07)
  • Page 8 Appliance Information Key to figure 2 Wall mounting frame Control panel flap Primary return pipe Temperature control and reset Primary flow pipe Flue connector Flow temperature sensor (NTC) Air Pressure switch Electrode assembly Flue overheat thermostat Maximum safety sensor (NTC) Primary return connection Auto air vent Primary flow connection...
  • Page 9: Technical Data

    Appliance Information Technical data Natural Gas L.P.G. DESCRIPTION Ri Compact ErP UNIT 27kW 30kW 27kW 30kW Gas flow rate - Max. 10 minutes from lighting Natural Gas G20 m³/h 2.92 3.24 Gas flow L.P.G. kg/h 2.33 Central Heating Minimum heat input 7.15 7.15 7.15...
  • Page 10: Energy Efficiency

    Appliance Information Energy efficiency The following product data satisfy the requirements of the EU Regulations No. 811/2013 and No. 812/2013 supplementing Directive 2010/30/EU. Product data Symbol Unit 7733600064 7733600066 7733600065 7733600067 Product type – – 27Ri Compact 30Ri Compact 27Ri Compact 30Ri Compact Condensing boiler –...
  • Page 11: Pre-Installation

    ▶ It is recommended that you fit a primary water 4.2.1 Electrical supply cleanser to the system. Worcester offers a filter that • Supply: 230V - 50 Hz, 50 Watts plus pump helps remove both magnetite and non-magnetic • Cable: PVC insulated 0.75mm (24 x 0.2mm) temperature rated to...
  • Page 12 Pre-installation Sealed primary systems: Existing installations S PLAN LAYOUT NOTICE: ARTIFICALLY SOFTENED WATER MUST NOT BE USED TO FILL THE SYSTEM. • If the system is sealed then the system must be filled using a WRAS approved filling loop or comply with figure 3 for system fill. •...
  • Page 13 Pre-installation New Installation SEALED SYSTEM LAYOUT Boiler resistance Greenstar Ri Compact Water Pressure Loss 3.50 3.00 2.50 2.00 1.50 1.00 0.50 0.00 1000 1200 1400 1600 Flow rate (l/hr) 6720813282-07.1Wo Greenstar Ri Compact 6720813282 (2015/07)
  • Page 14: Condensate Pipe Work

    Pre-installation Condensate pipe work NOTICE: ▶ Where a new or replacement boiler is being installed, access to an internal “gravity discharge” point should be one of the factors considered in determining boiler location. 100mm ▶ The condensate pipe must be nominally 22mm Ø...
  • Page 15: External Connections

    Pre-installation 4.4.2 External connections NOTICE: Freezing conditions ▶ When the position of the boiler prevents internal routing, we recommend installing a CondenseSure siphon to significantly reduce the risk of freezing. ▶ Pipe work length should be kept to a minimum and the route as vertical as possible.
  • Page 16: Boiler Location And Clearances

    Pre-installation 4.5.2 Installation and servicing clearances NOTICE: Unheated internal areas. Figure 11 shows the minimum space required to install and service the ▶ Internal pipe runs in unheated areas such as lofts, boiler in a compartment. basements and garages should be treated as external runs and consideration should be given to using a 870mm CondenseSure siphon.
  • Page 17: Plumbing Manifold

    Pre-installation Plumbing manifold 4.6.1 Connections Heating System 22mm compression fittings 22mm compression fitting Use the fittings supplied in the Hardware literature pack. Fig. 13 Pipe dimensions Fig. 14 Plumbing manifold Key to figures 13 & 14: Condensate 22mmØ - Distance to left edge of case = 33mm Gas 22mmØ...
  • Page 18: Flue Options

    Flue options Flue length (mm) WARNING: Flue systems 60/100 80/125 ▶ Only use Worcester, Bosch approved flue systems, Horizontal high level telescopic flue assembly 202 - 603 no other manufacturer’s flue systems have been Table 9 approved for use with Worcester appliances.
  • Page 19 Pre-installation Vertical balanced flue assembly Maximum flue length (mm) 60/100 80/125 Horizontal flue with 2 x 90° bends 2,000 11,000 Table 13 High level horizontal flue A = 300 mm B = 500 mm Maximum flue length (mm) 60/100 80/125 Vertical balanced flue assembly 6,000 15,000...
  • Page 20: Flue Terminal Positions

    Pre-installation Flue terminal positions All measurements in millimetres 52mm 104mm 1,500 1,500 300 300 300 300 1,200 Boundary Line Fig. 15 Flue terminal positions NOTICE: ▶ All measurements are the minimum clearances required. ▶ Terminals must be positioned so to avoid combustion products entering the building. ▶...
  • Page 21: Plume Management Terminal Positions

    Pre-installation Plume management terminal positions All measurements in millimetres Flue terminal guard 7 716 191 176 ±45° Plume re-direction: 180° Flue Exhaust Outlet 1,500 Air Intake ±80° 1,200 Boundary Line Fig. 16 Plume terminal positions Maximum and minimum plume management lengths: ▶...
  • Page 22: Determine The Plume Management System Length

    Pre-installation 4.9.1 Determine the plume management system length Flue length versus plume management length Effective straight flue length with plume management Minimum plume length (M) Maximum plume length (M) 500mm 4,500mm Max flue length (L) 5,000mm Max flue length (L) 2,200mm Note: Measurement “M”...
  • Page 23: Installation

    INSTALLATION Before installing the appliance, ensure that the system has been INSTALLATION cleaned as explained on page 11. Wall mounting template & flue opening WARNING: All the previous “Pre-Installation” sections must be read and the requirements met before starting WARNING: BEFORE DRILLING, boiler or flue installation.
  • Page 24: Unpacking The Appliance

    INSTALLATION Fig. 24 Remove packaging 1. Outer carton 2. Inner sleeve 3. Packing base 4. Protective wrapping 5. Primary flow and return water pipes Removing the outer case ▶ Before the case can be remove the control panel must be moved into Fig.
  • Page 25: Boiler Connection

    INSTALLATION Fig. 26 Wall mounting plate 5.4.2 Gas and water connections ▶ The flow and return pipes can be fitted to the boiler before hanging the boiler on the wall plate. ▶ If there is greater than 600mm clearance below the appliance it is possible to fit the flow and return pipes, supplied, with the boiler installed on the wall.
  • Page 26: Hanging The Boiler

    INSTALLATION 5.4.3 Hanging the boiler NOTICE: Before hanging the boiler. ▶ If pipes require reducing in length this is best done before they are fitted to the boiler. NOTICE: Lifting the boiler. ▶ Lift the boiler using the handling holes at either side of the frame.
  • Page 27: Flue Turret/Adaptor Installation

    INSTALLATION ▶ When the condensate connections are complete, pour approximately 200 to 250ml of clean water through the inner flue opening on top of the boiler to fill the siphon. 23mm 6720806944-84.1Wo Fig. 33 Flue turret centre WALL 170mm [W] 195mm ▶...
  • Page 28: Electrical

    INSTALLATION Electrical Access to electrical connections 1. Refer to fig. 36 and remove the screws in the installer access cover. CAUTION: Mains electrical supply 2. Lift the “Installer access cover”. ▶ Isolate the mains electrical supply before starting 3. Remove the cover. any work and observe all relevant safety precautions.
  • Page 29 INSTALLATION Removing the blanking plate The control panel must be released and swung forward slightly to gain access to the top cover panel, refer to section 7.4 for access to the control panel. 1. Release the captive screws securing the top cover panel. 2.
  • Page 30: Commissioning

    ▶ Refer to manufacturer's instructions when connecting external parts to the wiring centre. Fig. 44 Condensate connection ▶ Worcester, Bosch Group cannot be held responsible for wiring errors. If the boiler is not to be commissioned immediately then, after successfully completing all of the checks and any rectification work, shut off the gas and water supply and electrically isolate the boiler.
  • Page 31: Filling The System

    COMMISSIONING Filling the system Starting the appliance Open vented systems: CAUTION: RUNNING THE APPLIANCE ▶ Ensure all system and boiler drain points are closed. ▶ Never run the appliance when the appliance/system ▶ Open all radiator valves. is empty or partially filled. ▶...
  • Page 32: Commissioning

    COMMISSIONING Commissioning Check the following points, and then continue with the commissioning: ▶ That the boiler has been installed in accordance with the installation instructions. ▶ The integrity of the flue system and flue seals. ▶ The integrity of the boiler combustion circuit and relevant seals. 6.5.1 Checking the gas inlet pressure The inlet pressure to the appliance must be checked using the following...
  • Page 33: Checking The Gas Rate And Pressure

    COMMISSIONING Gas pressure within the system 6.5.2 Checking the gas rate and pressure Refer to the figures below for natural gas or L.P.G gas pressures. ▶ The gas rate should be measured at the gas meter after 10 minutes operation at maximum output. The pressure at the boiler must not be less than the pressure read at the See Technical data section on page 9 of this manual.
  • Page 34: Co And Combustion Checks

    ▶ The gas valve is factory set and must not be adjusted during commissioning if found to be out of tolerance, please contact the Worcester, Bosch Group help line 0330 123 3366. Zero the analyser Set boiler to ≥...
  • Page 35: Finishing Commissioning

    COMMISSIONING Finishing commissioning 6.7.1 Replacing the outer case 6.7.3 Fitting the fascia flap 1. Replace outer casing. 1. Rotate the hinge to be in-line with the flap and present the flap assembly up to the fascia. 2. Ensure that the securing clips on top of the case are properly located. 2.
  • Page 36: Handover

    – You can register by ringing 0330 123 2552 Turn the valve firmly clockwise to close. • By post – Please send your completed form to: Worcester, Bosch Group, Cotswold Way, Warndon, Worcester, WR4 9SW. To read the full Terms & Conditions please visit us on-line at www.worcester-bosch.co.uk/guarantee.
  • Page 37: Checking The Gas Inlet Pressure

    Service and spares Checking the gas inlet pressure Component access To remove the outer case, to gain access to the components: NOTICE: 1. Remove the bottom panel. ▶ Do not continue with the other checks if the correct 2. Release the two screws securing the control panel. gas pressure can not be achieved.
  • Page 38: Fan Pressure Test

    ▶ Re-check the fan pressure readings. If the boiler, after completing the above checks, fails the fan pressure test then contact Worcester, Bosch Group for advice. ▶ After the measurements are taken switch the boiler off. ▶ Remove the combustion air intake pipe.
  • Page 39: Flue Gas Analysis

    Service and spares Flue gas analysis NOTICE: Combustion testing ▶ Combustion testing must be carried out by a competent person. Testing must not be attempted unless the person carrying out the combustion check is equipped with a Combustion Analyser conforming to BS 7927 and is competent in its use.
  • Page 40: Cleaning The Heat Exchanger

    Service and spares Cleaning the heat exchanger Refitting the siphon ▶ Fill siphon with 200 to 250 millilitres of water. NOTICE: Gaskets and seals 1. Push the siphon up onto the sump assembly until it fully engages with ▶ Replace the burner and electrode assembly gaskets the sump connection.
  • Page 41 Service and spares To clean the rear and middle channel of the heat exchanger On completion of the heat exchanger cleaning and re- 1. Orient the cleaning tool (2) as shown in figure 66 and insert the tool assembly, perform the fan pressure test as described in into the rear or middle channels for cleaning.
  • Page 42: Replacement Of Parts

    Service and spares Replacement of parts CAUTION: Mains supplies: ▶ Turn off the gas supply and isolate the mains supplies before starting any work on the boiler and observe all relevant safety precautions. CAUTION: Component replacement: ▶ Replace the burner housing gasket and the Flueway sump seal when re-assembling the heat exchanger.
  • Page 43: Siphon Removal

    Service and spares 7.8.3 Siphon removal 7.8.4 Primary sensor (CH NTC) The Control panel will have to be removed to gain access to the siphon ▶ Remove the combustion air inlet pipe from the pre-mix unit, rotate for cleaning or removal. anti-clockwise and pull away from the fan assembly.
  • Page 44: Flue Overheat Thermostat

    Service and spares 7.8.6 Flue overheat thermostat To remove and replace the Air pressure switch: ▶ Disconnect the lead to the thermostat. ▶ Remove the two screws [5] retaining the switch to the bracket [4]. ▶ Disconnect the tube [3] from the switch. Take care not to damage the housing when removing the ▶...
  • Page 45: Gas Valve

    Service and spares 7.8.9 Gas valve 2. Using a screwdriver under the tabs (1) next to the screws, lever the Flueway up to clear the seal and pull the Flueway forward. ▶ Isolate the mains electrical supply and the gas supply at the boiler gas cock.
  • Page 46 Service and spares Fan removal 3. Rotate the exhaust pipe anti-clockwise to gain access to the fan assembly securing screws. 4. Support the weight of the fan and remove the two screw securing the fan. Fig. 81 Moulded style seal Fitting the “tubular”...
  • Page 47: 7.8.11 Air/Gas Flap Valve Assembly

    Service and spares 7.8.11 Air/gas flap valve assembly ▶ If necessary, clean the spark electrodes and ionisation probe with a plastic scouring pad. 1. Remove the single screw securing the air/gas flap valve assembly. ▶ Re-assemble with a new electrode gasket (1), 2.
  • Page 48: 7.8.15 Heat Exchanger

    Service and spares 7.8.15 Heat exchanger Before removal: ▶ Isolate the electrical power to the boiler. ▶ Drain the boiler. Heat exchanger disconnection 1. Undo the flow and return connections. 2. Pull both the flow and return pipes away from the heat exchanger. ▶...
  • Page 49: Boiler Return Sensor (Ntc)

    Service and spares Fig. 95 Removing the control panel 1. Release the screws securing the access cover. 2. Lift the cover. 3. Pull the cover forward to remove. Fig. 93 Heat exchanger removal 7.8.16 Boiler return sensor (NTC) ▶ Disconnect the electrical connectors from the sensor. ▶...
  • Page 50: Replacing The Heating Control Module (Hcm)

    HCM - Heating Control Module Spare fuse Low voltage cable outlet Low voltage connectors Diagnostic port (for Worcester Bosch service engineers only) Mains voltage and earth connectors PCB fuse The fuse and holder (2) are located next to the high voltage connectors and the spare fuse (7) is located on the back of the installer access cover.
  • Page 51: Short Parts List

    Service and spares Short parts list Fan 8 716 117 417 Gas Valve 8 718 600 04A 0 Burner 8 718 600 23B 0 Flue overheat thermostat Electrodes (grommet type) (including gasket) 8 717 206 213 0 8 718 600 28A 0 Control panel 8 718 682 010 0 Spark generator Flow NTC...
  • Page 52: Fault Finding And Diagnosis

    This fault finding information is for guidance only. This fault finding system assumes that the appliance has been operating Worcester cannot be held responsible for costs incurred normally until the time of failure (i.e. not a first installation error). by persons not deemed to be competent.
  • Page 53: Group 1 Fault Codes

    Fault finding and diagnosis 8.1.1 Group 1 fault codes Flash sequence Type of fault Fault Possible solutions/check Light OFF No fault No boiler demand - boiler is OK Light ON Heating demand on boiler- boiler is OK Group 1 Flashing codes Locking No ionisation detection after ignition Failure of four ignition attempts, the boiler waits 30...
  • Page 54: Group 2 Fault Codes

    Fault finding and diagnosis 8.1.2 Group 2 fault codes Flash sequence Type of fault Fault Possible solutions/check Light OFF No boiler demand - boiler is OK Light ON Heating demand on boiler- boiler is OK Group 2 Flashing codes Locking Sensor test failed On power up all safety sensors are checked, the check failed.
  • Page 55: Group 3 Fault Codes

    Mains voltage interrupted after locking error Reset the boiler by turning the control knob anti- clockwise to the reset position. Locking Internal control board faults Call Worcester, Bosch Group technical help-line 0330 123 3366 Locking All other faults Miscellaneous Reset the boiler by turning the control knob anti- clockwise to the reset position.
  • Page 56: Wiring Diagram

    230V WIRING CENTER/ JUNCTION BOX EXTERNAL PUMP Neutral Live Switched Live MAINS SUPPLY Service Mode Fuse, slow Switch F 5A H 230 V 230V 230V TEMPERATURE Worcester 24V CONTROL AND controls point RESET DIAGNOSTIC INPUT 6720813282-06.1Wo Greenstar Ri Compact 6720813282 (2015/07)
  • Page 57: Boiler Function

    Fault finding and diagnosis Boiler function Fig. 103 Greenstar Ri Compact 6720813282 (2015/07)
  • Page 58: Protection Function

    Fault finding and diagnosis Protection function AUTOMATIC INTERNAL FROST FUNCTION Internal boiler Internal boiler Pump switches off temperature Pump runs temperature after a 3 minute between rises above 9°C overrun period 8°C & 5°C Boiler automatic frost function (monitors internal boiler primary temperature) Central heating Internal boiler...
  • Page 59 Notes Greenstar Ri Compact 6720813282 (2015/07)
  • Page 60 Notes Greenstar Ri Compact 6720813282 (2015/07)
  • Page 61 Notes Greenstar Ri Compact 6720813282 (2015/07)
  • Page 62 GAS BOILER SYSTEM COMMISSIONING CHECKLIST This Commissioning Checklist is to be completed in full by the competent person who commissioned the boiler as a means of demonstrating compliance with the appropriate Building Regulations and then handed to the customer to keep for future reference. CONTROLS Optimum start control Fitted...
  • Page 63 SERVICE RECORD It is recommended that your heating system is serviced regularly and that the appropriate Service Interval Record is completed. Service Provider SERVICE 01 SERVICE 02 ² % ² % ² % ² % SERVICE 03 SERVICE 04 ² % ²...
  • Page 64 0330 123 9779 LITERATURE: 0330 123 9119 TRAINING: 0330 123 0166 SALES: 0330 123 9669 Worcester, Bosch Group Cotswold Way, Warndon, Worcester WR4 9SW. Tel. 0330 123 9559 Worcester, Bosch Group is a brand name of Bosch Thermotechnology Ltd. worcester-bosch.co.uk 6720813282 (2015/07)

Table of Contents