Table of Contents
Advertisement
Quick Links
Advertisement
Table of Contents

Related Manuals for Elcomponent SPCPro2


Summary of Contents for Elcomponent SPCPro2
- Page 1 SPCPro2 USER MANUAL www.spcloggers.co.uk...
- Page 2 The information in this document is subject to change without notice. Elcomponent Ltd has made every effort to ensure the accuracy of this manual. However, Elcomponent Ltd makes no warranties with respect to this documentation and disclaims any implied warranties of merchantability and fitness for a particular purpose.
- Page 3 Set up and download of the SPCPro2 is via a USB connection to any PC running Windows XP or later software, and all survey data and user settings are securely saved in non-volatile ‘flash’ memory.
- Page 4 SET UP & USE The SPCPro2 uses a rechargeable internal battery to provide power for surveys where a mains voltage is not available, and to provide back-up power in the event of a mains failure during a normal survey. The battery will charge whenever the unit is connected to a mains supply, but a faster charge rate is achieved with the unit switched off.
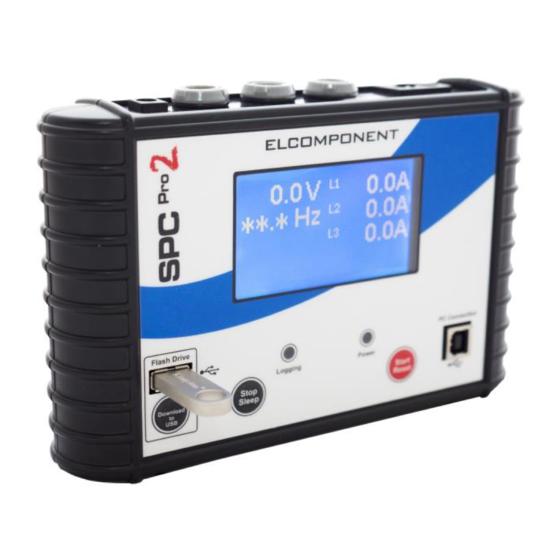
- Page 5 Display: On start-up the display shows the logger status, followed by measurement values for current and voltage. Return to the logger status screen by briefly pressing the “Start/Reset” button. Sleep Button: The ‘stop/sleep’ button will switch the unit into standby mode. If the unit is recording when the button is pressed, the display will warn that the survey will terminate, and provide a 5 second countdown to avoid unintended operation.
- Page 6 The red ‘logging’ indicator provides a short flash every few seconds whilst a survey is taking place. USB Connection Socket: The SPCPro2 is connected to a PC from this port using a standard USB ‘A to B’ interface cable (supplied). SETTING UP Refer to the ‘PowerPackPro’...
- Page 7 NOTE: Single Phase Connection – CT connection must be made using L1. If mains connection is made, this should be V1. If this cannot be checked the survey can be carried out on battery. NOTE: It is essential to orientate the CTs with the arrow pointing towards the load as shown.
-
Page 8: Starting A Survey
NOTE: It is not necessary to have a wall socket voltage connection available to carry out a survey. The SPCPro2 will continue to operate on battery power for up to two weeks on a fully charged battery. In this case, power and energy values are based on user-defined references. -
Page 9: Loading The Software
USING THE SOFTWARE OVERVIEW The SPCPro2 ships complete with a dedicated PC utility program which provides communication, set up and data presentation capabilities. PowerPackPro is designed to run on Windows XP and later platforms. -
Page 10: Operation
‘Using The Graphing Package’ section. CONNECTING THE SPCPro2 Connect the SPCPro2 to the PC using an A to B type USB cable, and an unused USB port on the PC. ... - Page 11 The successful completion of the process is indicated by a “Your hardware is installed and ready to use” message appearing. Within a few seconds PowerPackPro will locate the SPCPro2 and generate a new message. NOTE: If the Windows device recognition/drivers load process fails to function if may be necessary to load the drivers manually.
- Page 12 This provides four options: ‘View Logger Status’ (also available via the icon). Battery voltage should read over 3.7 volts. If it is lower than this the logger may shutdown if it is not connected to a mains supply. Details of the device and any recorded data are shown, along with the logging status indicator.
- Page 13 Storage Interval – Select the desired data storage interval from the available options. Note that the “Interval” pane will alter to show the storage interval at the selected survey duration, and the end time/date of the proposed survey, based on the current time. Click ‘Set Logger’...
- Page 14 ‘Download Data’ (also available via the icon). Step 1 Click ‘next’ to download the data. NOTE: This does not clear the logger memory. Step 2 When the download reaches 100%, click ‘next’ to enter the survey name, location and any relevant notes. Step 3 (Voltage present)
- Page 15 This screen shows the results of the autodetect sequence for voltage phase detection. In this example ph3 has been selected, and the resulting phase power factors shown in the lower pane. As the survey data are downloaded, the software checks the phase angle measurements for all phases to ascertain the phase which was used for the voltage connection (usually unknown to the operator).
- Page 16 Step 4 (Voltage not present only) Select a load type, or enter the power factor of the load if known. STEP 4 Select a tariff from the drop down menu for use in cost calculations. NOTE: PowerPackPro is pre-loaded with default single rate and day/night tariffs.
- Page 17 30 minute data interval with an initial view of a 1 week period. These settings may be altered manually if desired. PowerPackPro is shipped with a SPCPro2 sample survey pre-loaded which is used in the following pages. Selecting the Measurement Units: Click on the drop-down list on the toolbar to select the desired unit.
- Page 18 USING THE GRAPH TOOLS Data View Options Zoom: Click the zoom tool buttons to activate the zoom cursor. Drag the cursor over the desired graph area whilst holding down the left mouse button to define a zoom area. Release the mouse button to display the zoom area ...
- Page 19 Show Alarm Levels: Click the button to display the alarm values on the graph. Show Gridlines: Click the button to toggle the graph gridlines on and off. Options: Click the icon to open the options screen. ‘Start Up’...
- Page 20 ‘Data’ Set Detault intervals Ammend CO2 emmissions calculation figure ‘Chart’ Change line thickness ‘Colours’ Change current phase colours...
- Page 21 ‘Logging’ External Logs Start-Up is selected by Default Communications can be enabled if experiencing difficult communicating with logger. ADDITIONAL GRAPH FUNCTIONS Export to Microsoft Office: Click the Excel or Word buttons on the main toolbar to export the graph image to either of these programs. (This can also be done using the ‘Edit/Select All’...
-
Page 22: Summary Tab
SUMMARY TAB Click the ‘Summary’ tab at the bottom of the chart window to open the survey summary page. The following fields may be edited as required. Title Location Created By Voltage Phase Current Multiplier ... -
Page 23: Statistics Tab
Selecting Data: Hold down the left mouse button and drag the cursor to select data. To select the whole table click “Edit/Select All’ button on the main menu bar. Selected data may be copied and pasted as required using the relevant buttons on the main toolbar. -
Page 24: Alarms Tab
To amend an existing tariff, overtype the description field as required and enter the desired cost rates also. Note that costs are entered as p/kWh. Select the desired start/finish times from the drop-down menu. Amended values will change from black to red. Click the ‘recalculate’ button to apply the revised rates to the survey data. - Page 25 File Structure: To establish the file location of surveys on your PC click the ‘Find Survey’ button on the file tree This will give a window that tells you where the files are located: If you wish to open the folder location press the bar New Folders may also be created by pressing the “Add New”...
- Page 26 REPORT FACILITY In addition to the export functions for creating reports PowerPackPro provides a quick report summary. Select “File/Print Report” and change paper orientation to landscape. This will provide a 3 page report displaying the currently displayed graph, survey summary, survey statistics and costings. This method can also be used to save the report as a PDF file.
- Page 27 APPENDIX 1 LOADING THE SPC DRIVERS All SPC devices link to the PC via a USB connection. This provides fast reliable communications, and requires no additional configuration by the user. However, in most cases the PC must load the necessary driver files before it will recognise the SPC connected to it.
- Page 28 Ensure that your SPC Device is connected to the PC Ensure the CD minidisk supplied with your SPC device is installed in the CD drive on your Click the start button and select Control Panel. Click ‘Device Manager”. (You may need to select ‘large icons’...
- Page 29 Ensure that ‘Check for drivers automatically’ is selected and reconnect your SPC device to a spare USB port. If the PC is connected to the web, the drivers will now load. If no web connection is available the drivers can be loaded manually as follows: Ensure that your SPC Device is connected to the PC Ensure the CD Minidisk supplied with your SPC device is installed in the CD drive of your Click the start button and select control panel and click the device manager icon (you...
- Page 30 Select either of the first two options to enable Windows Update reconnect your SPC device to a spare USB port. If the PC is connected to the web, the drivers will now load. If the above option is not present, proceed as follows: Ensure that your SPC Device is connected to the PC Ensure the CD Minidisk supplied with your SPC device is installed in the CD drive of your Open “Control Panel”...
- Page 31 APPENDIX 2 EUROPEAN SETTINGS PowerPack Pro should be set for English Regional and Language Settings . Instructions for carrying this out follows below: WINDOWS 7 Select Control Panel and “Clock, Language, and Region” Selection Region & Language / Change the date, time or number format Format should be English (United Kingdom) and set as below dd/MM/yyyy...
- Page 32 Select “Additional Settings”. Ensure that the Decimal symbol is a full stop (.) this can simply be overwritten in the box below. Secondly, ensure that the list separator is a comma (,). Select “Currency”. Ensure that the Decimal symbol is a full stop (.) this can simply be overwritten in the box below.
- Page 33 Next, select “Time”. Ensure time format is HH:mm:ss Finally, select “Date”. Ensure that date settings are dd/MM/yyyy...
-
Page 34: Windows Xp
WINDOWS XP Select Control Panel and “Regional & Language Options” Regional Options Format should be English (United Kingdom) Select “Customize”/Numbers Ensure that the Decimal symbol is a full stop (.) this can simply be overwritten in the box below. Secondly, ensure that the list separator is a comma (,). - Page 35 Select “Currency”. Ensure that the Decimal symbol is a full stop (.) this can simply be overwritten in the box below. Secondly, ensure that the list separator is a comma (,). At the present time PowerPackPro displays in £ only. Next, select “Time”.
-
Page 36: Windows Vista
WINDOWS VISTA Select Control Panel and “Region & Language”. Under “Formats” tab select English (United Kingdom) Select “Customize this format” / Numbers. Ensure that the Decimal symbol is a full stop (.) Secondly, ensure that the list separator is a comma (,). Next, select “Currency”. - Page 37 Next, select “Time”. Ensure time format is HH:mm:ss Finally, select “Date”. Ensure that date settings are dd/MM/yyyy...
-
Page 38: Wiring Colours
APPENDIX 3 WIRING COLOURS Installations prior to 2005/06 MAKING SINGLE PHASE MEASUREMENTS: Live Neutral Earth Installations after 2005/06 Live Neutral Earth MAKING 3 PHASE MEASUREMENTS:... - Page 39 Installations prior to 2005/06 PH 1 Installations after to 2005/06 PH 1...
Need help?
Do you have a question about the SPCPro2 and is the answer not in the manual?
Questions and answers