Advertisement
Before using the product
This Dashboard Camera (dash cam) is a specialized onboard device that continuously records while the vehicle is in use.
This manual contains basic steps required for X1000 installation.
For detailed information, please refer to the user guide in the memory card included in the product package.
This product records videos while the vehicle is operating. Use this product only for reference when investigating incidents or road accidents. This product is not guaranteed to record or process cloud data for all events. The device may not record accidents with impacts that are too minor to activate the impact sensor or accidents with massive impacts that cause the vehicle's battery voltage to deviate.
Video recording does not begin until the product is completely turned on (booted up). To ensure that all vehicle events are recorded, wait until the product is completely booted up after turning it on, and then begin operating the vehicle.
THINKWARE is not responsible for any loss caused by an accident, nor is it responsible for providing any support regarding the outcome of an accident.
Depending on the vehicle's configuration or operating conditions, such as the installation of remote door lock devices, ECU settings, or TPMS settings, some product features may not be supported, and different firmware versions may influence the product's performance or features.
Included items
Ensure that all the items are included when you open the product box.
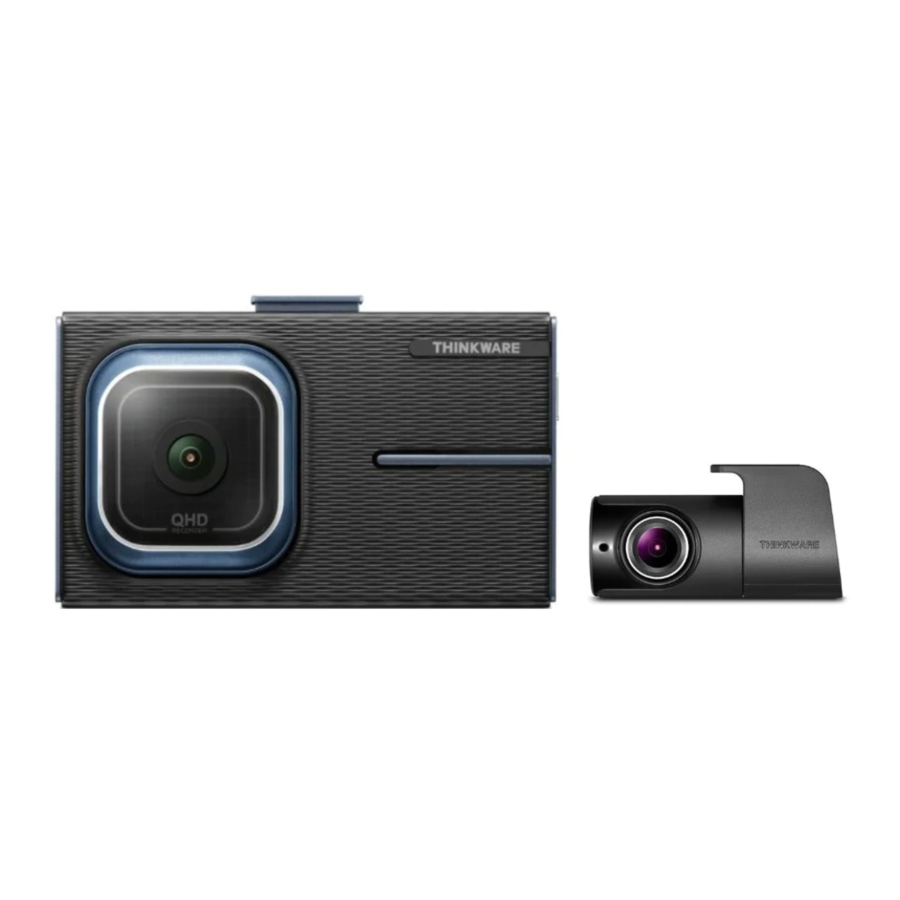
- Front camera (main unit)
- Mount
- Rear camera
- Rear camera cable
- Hardwiring cable
- MicroSD memory card
- Quick start guide & Warranty / CS information / User guide (stored in the MicroSD card)
Accessories
- Car charger
- External GPS receiver
- RADAR module
- External battery pack
Removing and inserting the memory card

Before removing the memory card, ensure that the product is turned off. Gently push the bottom of the memory card with your fingernail to release it, and then remove it from the product.
To insert the memory card into the memory card slot, ensure that the metal contacts on the memory card are facing toward the lens of the product, and insert it into the slot until you hear a click.

- Ensure that the product is turned off before removing the memory card. The recorded video files may be corrupted or lost if you remove the memory card while the product is on.
- Ensure that the memory card is in the correct direction before inserting it into the product. The memory card slot or the memory card may be damaged if it is inserted incorrectly.
- Use only authentic memory cards from THINKWARE. THINKWARE does not guarantee the compatibility and normal operation of third-party memory cards.
![]() To prevent loss of recorded video files, periodically back up the video files on a separate storage device.
To prevent loss of recorded video files, periodically back up the video files on a separate storage device.
Part names
Front camera (main unit) - front view
 - front view")
Front camera (main unit) - rear view
 - rear view")
Gently touch the screen to make inputs on the touchscreen. The screen may be damaged if you apply excessive force to the screen or if you touch the screen with a sharp object.
Rear camera

Installing the product

Select an installation location that can record the entire view in front of the vehicle without obstructing the driver's vision. Ensure that the front camera lens is located in the center of the windshield.
- Refer to the figures below to install the camera to the windshield.

- Remove the product from the mount, and then push the mount against the windshield to fix it firmly.
- Reattach the product to the mount, and then adjust the camera angle.

![]()
- To confirm the camera angle, record a video after installation and check the video using the product or the PC viewer. If necessary, adjust the camera angle again.
- The product may fall and be damaged during vehicle operation if it is not firmly fixed to the mount.
- If you need to remove the mount from the windshield to alter the installation location, be careful not to damage the windshield's film coat.
Live view screen
On the Live view screen, you can view the currently recorded video and operate the product by tapping on the LCD display. When you turn on electrical accessories and start the engine, the Live view screen will be displayed.

Using the continuous recording features
Connect the power cable to the product's DC-IN power port and then turn on the vehicle's electrical accessories or start the engine. The status LED and the voice guide are turned on, and the continuous recording starts.
| Mode | Operation description |
| Continuous recording | During driving, videos are recorded in 1 minute segments and stored in the "cont_rec" folder. |
| Incident continuous recording | When an impact to the vehicle is detected, a video is recorded for 20 seconds, from 10 seconds before the detection to 10 seconds after the detection, and stored in the "evt_rec" folder. |
| Manual recording | When you tap the manual recording ( ) button, a video will be recorded for 1 minute, from 10 seconds before to 50 seconds after pressing the button, and stored in the "manual_rec" folder. ) button, a video will be recorded for 1 minute, from 10 seconds before to 50 seconds after pressing the button, and stored in the "manual_rec" folder. |
Using parking mode
When the product is connected to the vehicle via the continuous power cable, the operating mode is switched to parking mode with the voice guide after the engine or electrical accessories are turned off.
| Option | Operation description | ||
| Motion Detection | No motion or impact detected | Monitors movement in the area or impacts to the vehicle. Video will be recorded only when motion or an impact is detected. | |
| Motion detected | When a moving objects is detected while parking, a video is recorded for 20 seconds, from 10 seconds before detection to 10 seconds after detection, And stored in the Parking recording folder. | ||
| Impact detected | When an impact is detected while parking, a video is recorded for 20 seconds, from 10 seconds before detection to 10 seconds after detection, and stored in the Parking Impact folder. (The buzzer will sound.) | ||
| Time Lapse | No impact detected | A video is recorded at a rate of 2 fps for 10 minutes, compressed into a 2-minute long file, and stored in the Parking recording folder. Since the video file recorded with this option is small, you can record a long video. | |
| Impact detected | When an impact is detected while parking, a video is recorded for 100 seconds at a rate of 2 fps, from the moment 50 seconds before detection to 50 seconds after detection, and stored in the Parking Impact folder after being compressed into a 20-second long file. (The buzzer will sound.) | ||
| Energy saving | No impact detected | Monitors movement in the area or impacts to the vehicle while parking. Video will be recorded only when impact is detected. | |
| Impact detected | When an impact is detected while parking, a video is recorded for 20 seconds from within 1 second after detection and stored in the Parking Impact folder. (The buzzer will sound.) | ||
| OFF | The product is powered off when electric accessories and the engine are turned off. | ||
![]() Refer to the user guide to check the LED indicators for each recording mode.
Refer to the user guide to check the LED indicators for each recording mode.
Upgrading the firmware
You can download the latest firmware upgrade file from http://www.thinkware.com/Support/Download. For detailed information about firmware upgrades, refer to the user guide.

Documents / Resources
References
Download manual
Here you can download full pdf version of manual, it may contain additional safety instructions, warranty information, FCC rules, etc.
Advertisement


Need help?
Do you have a question about the X1000 and is the answer not in the manual?
Questions and answers