Thinkware F750 Installation Manual
Hide thumbs Also See for F750:

Advertisement

Confidential Information
Confidential Restricted
© 2016 THINKWARE. All rights reserved.

Advertisement

Table of Contents
loading
Need help?

Need help?

Do you have a question about the F750 and is the answer not in the manual?

Questions and answers

Summary of Contents for Thinkware F750

  • Page 1 Confidential Information Confidential Restricted © 2016 THINKWARE. All rights reserved.
  • Page 2 Confidential Restricted © 2016 THINKWARE. All rights reserved.
  • Page 3 Table of Contents …………………………1 Mounting related terms ……………………………4 Dash cam components ………………5 Hardwiring cable for each model …6 Items to check when mounting a dash cam Confidential Restricted © 2016 THINKWARE. All rights reserved.
  • Page 4: Table Of Contents

    Overview of the sequence for mounting ……………… 16 ……………………24 - Removing the A pillar Order of mounting rear camera Recovery ………………17 - Recovering the weather strip ………………18 - Recovering the A pillar Confidential Restricted © 2016 THINKWARE. All rights reserved.
  • Page 5 Overview of the sequence for mounting ……………28 Order of mounting rear camera ………………………40 Testing operation of rear camera Testing operation of rear camera (Non ………………………………………30 LCD type) ………………………40 …31 Testing operation of rear camera (LCD type) Confidential Restricted © 2016 THINKWARE. All rights reserved.
  • Page 6 Memory Card Settings …………………………………48 Parking Mode ………………………………34 Camera Settings …………………………50 Additional Functions …………………………35 Road safety Settings …………52 Initializing and saving the settings ………………………………37 Record Settings ………………………………39 System Settings …………42 Initializing and saving the settings Confidential Restricted © 2016 THINKWARE. All rights reserved.
  • Page 7 SD card insertion ………………………… 54 announcement … 55 How to check SD card detection failure ………… 56 Cannot connect Wi-Fi _ F750 Cannot use road safety warning function …………………………………… 57 _X500 …… 58 Supported Micro SD memory card …………………59...
  • Page 8 Before Installation Confidential Restricted © 2016 THINKWARE. All rights reserved.
  • Page 9: Mounting Related Terms
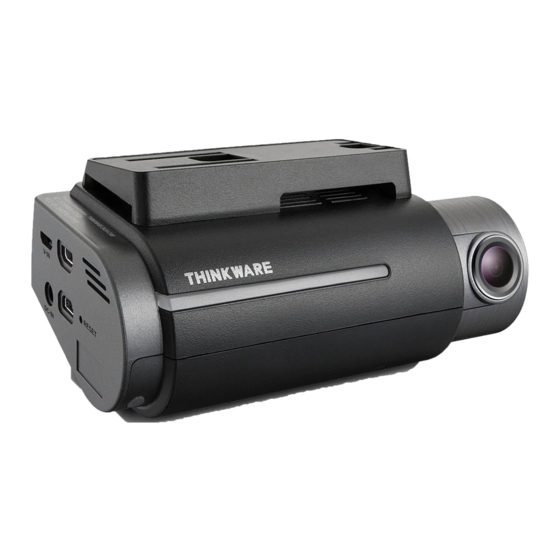
    - Often called a duck's foot. It is used to tear off indoor materials or remove the fuse cover. Remover - It is used to tear off indoor materials, remove the fuse cover or neatly arrange the wires. Hera Confidential Restricted © 2016 THINKWARE. All rights reserved.
  • Page 10 It is attached to the glass of the rear seats. Pillar [B pillar] [A pillar] Attached to the middle of the driver seat and Attached in the driver/front passenger seat. the rear passenger seat by forming a shape of T. Confidential Restricted © 2016 THINKWARE. All rights reserved.
  • Page 11 - It is called a noise filter. It reduces the level of RF interference (noise). Ferrite core - Power supply → A user can set an arbitrary voltage level on this. It is useful when you test the parking or continuous mode. Power supply Confidential Restricted © 2016 THINKWARE. All rights reserved.
  • Page 12: Dash Cam Components

    Dash cam components In the Package (Ex : F750 OR X500) LCD Type Mount with 3M tape Adhesive Cable Holder Main Dash Cam Unit Car Charger (1EA) (5EA) Quick Start Guide/Warranty/User MicroSD memory card with adapter USB MicroSD card reader...
  • Page 13: Hardwiring Cable For Each Model

    Hardwiring cable for each model F750, X500, X300, X150, H100, H50 [Type A] [Type B] F550 [TIP] Current hardwiring cable’s type is A. (After2016.03) But it will be changed to type B. So when you install the hardwiring cable, please double check which line is B+ or ACC checking tale of the each line.
  • Page 14 Do not cut or extend the rear cable when using it. When connecting the ACC, do not use a continuous cigar power jack. (EX power outlet 2) - You cannot enter the parking mode. This can cause a problem in battery discharging. Confidential Restricted © 2016 THINKWARE. All rights reserved.
  • Page 15 Installation Confidential Restricted © 2016 THINKWARE. All rights reserved.
  • Page 16 12. Wait one day(24 hours) until the 3M tape in the holder is firmly attached. Then ship out without a terminal installed in it. Confidential Restricted © 2016 THINKWARE. All rights reserved.
  • Page 17: Order Of Mounting Front Camera

    (Ensure the booting is finished successfully.) Confidential Restricted © 2016 THINKWARE. All rights reserved.
  • Page 18 A pillar and the (Ensure the booting is weather strip. completed successfully.) Confidential Restricted © 2016 THINKWARE. All rights reserved.
  • Page 19 (Ensure the booting is finished 3M tape is completely successfully.) fixed to the holder. Confidential Restricted © 2016 THINKWARE. All rights reserved.
  • Page 20 (Ensure the booting is finished 3M tape is completely successfully.) fixed to the holder. Confidential Restricted © 2016 THINKWARE. All rights reserved.
  • Page 21: Locating The Fuse Box

    Location of the fuse tester Fuse test Cautions When using a multi meter, test it by inserting it into the fuse. Be careful as this can widen the gap between pins inside the fuse box. Confidential Restricted © 2016 THINKWARE. All rights reserved.
  • Page 22 - After inserting the fuse into the fuse box, make sure that the sound. core wire is not exposed to the outside. Confidential Restricted © 2016 THINKWARE. All rights reserved.
  • Page 23: Basic Operation Test For Continuous Power Supply

    You will hear no buzzer sound Engine Start Off → Buzzer sound during a B+/ACC test unless the Engine Start OFF → Buzzer sound not heard heard GND is connected. Confidential Restricted © 2016 THINKWARE. All rights reserved.
  • Page 24: Removing The Weather Strip

    [Removing the weather strip] [Weather strip removed] ※ Pull down the weather strip rubber from the top to the bottom until reaching the location of the fuse box and then remove it. Confidential Restricted © 2016 THINKWARE. All rights reserved.
  • Page 25: Removing The A Pillar

    ※ While the weather strip is removed, pull A pillar to remove it. - If there is a pin inside A pillar, remove it first with the remover before removing the weather strip. Confidential Restricted © 2016 THINKWARE. All rights reserved.
  • Page 26: Recovering The Weather Strip

    Ensure it is straight before assembling it. - If some remaining rubber parts when you think you are finished assembling the weather strip rubber, disassemble it and assemble it again. Confidential Restricted © 2016 THINKWARE. All rights reserved.
  • Page 27: Recovering The A Pillar

    ※ A pillar can be assembled in the reverse order of removal. - Start assembling A pillar from the bottom (glass side). - If A pillar has a pin in it, then recover it to fit the pin location. Confidential Restricted © 2016 THINKWARE. All rights reserved.
  • Page 28: Attaching A Mounting (Non Lcd Type)

    To ensure that the mount is safely secured, separate the device from the mount after installation and press the mount against windshield for 5 minutes while maintaining pressure. Allow 24 hours for the adhesive on the mount to set before connecting the dash cam. Confidential Restricted © 2016 THINKWARE. All rights reserved.
  • Page 29: Attaching A Mounting (Lcd Type)

    To ensure that the mount is safely secured, separate the device from the mount after installation and press the mount against windshield for 5 minutes while maintaining pressure. Allow 24 hours for the adhesive on the mount to set before connecting the dash cam. Confidential Restricted © 2016 THINKWARE. All rights reserved.
  • Page 30: Basic Functional Tests For A Dash Cam

    - If there is no monitor(Ex. Navigation) installed in the car, adjust the visual angle while referring to the saved video. Adjust the visual angle so that 1/8~1/4 of the hood is visible. Confidential Restricted © 2016 THINKWARE. All rights reserved.
  • Page 31: Location Of Rear Camera Attachment

    (There are no option to reverse the screen.) - When you remove the rear camera, please disconnect cable from rear camera first. Otherwise it can be disabled. Also be careful of tinting and heat ray of the rear window. Confidential Restricted © 2016 THINKWARE. All rights reserved.
  • Page 32 08. Arrange the wires. (C pillar) 09. Connect the rear camera to the cable. 10. Arrange the wires. (Rear glass) 11. Perform operation test for rear camera (Test items: rear video recording check) Confidential Restricted © 2016 THINKWARE. All rights reserved.
  • Page 33: Rear Camera

    . page 22) Insert the remaining cable ④ ③ between the front Connect the glass and the rear cable to indoor dash cam. material(ceiling) and nicely arrange the cable. Confidential Restricted © 2016 THINKWARE. All rights reserved.
  • Page 34 Using a hera, firmly insert the the rear left rear cable into passenger seat and the gap between recover it while C pillar and the pushing the rear ceiling. cable to the inside. Confidential Restricted © 2016 THINKWARE. All rights reserved.
  • Page 35 ⑪ On the opposite side, ensure the rear camera's LED is properly lit. Confidential Restricted © 2016 THINKWARE. All rights reserved.
  • Page 36: Overview Of The Sequence For Mounting

    15. Recover the trunk connection cable. 16. Attach the rear camera/arrange the wires (Indoor ceiling and door trim) 17. Perform an operation test for a rear camera (Test items: rear video recording check) Confidential Restricted © 2016 THINKWARE. All rights reserved.
  • Page 37 ③ ④ Ensure the cable penetrating C pillar passes Remove the fixing through the indoor hook from the material(Ceiling) indoor ceiling. and reaches the tube in the top. Confidential Restricted © 2016 THINKWARE. All rights reserved.
  • Page 38 Arrange the wires at the After mounting the ceiling(indoor rear camera, material) and connect the cable in assemble the the direction of arrow trunk door trim and the weather as illustrated. strip. Confidential Restricted © 2016 THINKWARE. All rights reserved.
  • Page 39 From outside the vehicle, ensure the rear camera's LED is lit. Also when you see the rear camera in the vehicle, lens of rear camera should be located on your left side. Using the recorded video on the PC viewer, check that everything is ok. Confidential Restricted © 2016 THINKWARE. All rights reserved.
  • Page 40: Testing Operation Of Rear Camera (Lcd Type)

    From outside the vehicle, ensure the rear camera's LED is lit. Also when you see the rear camera in the vehicle, lens of rear camera should be located on your left side. Using the recorded video on the PC viewer, check that everything is ok. Confidential Restricted © 2016 THINKWARE. All rights reserved.
  • Page 41 After Installation Confidential Restricted © 2016 THINKWARE. All rights reserved.
  • Page 42: Items To Check After Mounting

    Check how far away the door lock can receive the signals. Separate the door lock receiver and mount a ferrite core at the input to the rear Door lock camera. Confidential Restricted © 2016 THINKWARE. All rights reserved.
  • Page 43: Window Pc Viewer Setting

    Overwriting video : The oldest file is deleted if the total size of the recorded videos in the checked folder exceeds the storage capacity of the memory card. Confidential Restricted © 2016 THINKWARE. All rights reserved.
  • Page 44: Camera Settings

    Window PC VIEWER SETTING (Camera Settings) Brightness : Sets the brightness of the front and rear view camera. Wide Dynamic Range : Sets the WDR mode to record clear videos under large variation of backlighting illumination. Confidential Restricted © 2016 THINKWARE. All rights reserved.
  • Page 45: Road Safety Settings

    : Sets the vehicle type to be used to optimize Advanced Driver Assistance Systems (ADAS) features LDWS sensitivity : Sets the lane departure detection sensitivity (It is recommended that the sensitivity is set at high level for wider vehicles) Confidential Restricted © 2016 THINKWARE. All rights reserved.
  • Page 46 : Front vehicle departure warning alerts the driver when the vehicle ahead starts to move forward from a complete stop. - The vehicle must be at a complete stop for more than 4 seconds in order for the FVDW notification to be activated. Confidential Restricted © 2016 THINKWARE. All rights reserved.
  • Page 47: Record Settings

    : Set impact sensitivity from Level 1 to 5 (1 is least sensitive/ 5 is most sensitive). Parking Mode : Monitors vehicle ignition status to automatically convert to parking mode when the vehicle engine is turned off. Confidential Restricted © 2016 THINKWARE. All rights reserved.
  • Page 48 : Dash cam can be configured to automatically shut down when battery voltage drops below preset value during parking surveillance mode in order to prevent the vehicle battery from being discharged. Vehicle voltage 12V - 11.7V-12.4V (changeable by 0.1V) Vehicle voltage 24V - 23.4V-24.8V (changeable by 0.2V) Confidential Restricted © 2016 THINKWARE. All rights reserved.
  • Page 49: System Settings

    Mode 2 (blinking) : The entire LED blinks every 0.5 seconds. Mode 3 (expanding) : LED expands and fades out to both sides originating in the center. Disabled : Security LED is turned off (default). Confidential Restricted © 2016 THINKWARE. All rights reserved.
  • Page 50 Window PC VIEWER SETTING (System Settings) Daylight Saving Time : Sets the daylight saving time (DST) on/off Speed Unit : Sets unit for the vehicle speed (Km/h or mph) Confidential Restricted © 2016 THINKWARE. All rights reserved.
  • Page 51 Mode 1 (circular) : LED moves circular Mode 2 (blinking) : The entire LED blinks. Mode 3 (depends on recording mode) : LED depends on recording mode. Disabled : Security LED is turned off (default). Confidential Restricted © 2016 THINKWARE. All rights reserved.
  • Page 52: Initializing And Saving The Settings

    Initialize settings. : resets the device settings to default factory settings. Confidential Restricted © 2016 THINKWARE. All rights reserved.
  • Page 53: Common

    Language : Sets the language for the device Brightness : Sets the brightness of the front and rear view camera. Voice Guidance : Set the volume of voice guidance from off to Level 3. Confidential Restricted © 2016 THINKWARE. All rights reserved.
  • Page 54 : Sets the brightness of the LCD screen (0~2) - LCD Auto-Off : Sets the time for LCD auto shut off. When LCD is off, pressing any button will turn the LCD screen back on Confidential Restricted © 2016 THINKWARE. All rights reserved.
  • Page 55 Vehicle type : Sets the vehicle type to be used to optimize Advanced Driver Assistance Systems (ADAS) features LDWS (Lane Departure Warning) : Sets the LDWS driver assistance notification Confidential Restricted © 2016 THINKWARE. All rights reserved.
  • Page 56 : Sets the speed at which the LDWS notification is enabled. LDWS warning will only be notified to the driver when the vehicle veers off the lane travelling at the configured speed. Confidential Restricted © 2016 THINKWARE. All rights reserved.
  • Page 57 The vehicle must be at a complete stop for more than 4 seconds in order for the FVDW notification to be activated. Confidential Restricted © 2016 THINKWARE. All rights reserved.
  • Page 58 : Dash cam can be configured to stop recording after a preset time period during parking surveillance mode in order to prevent the vehicle battery from being discharged. - Time Range : 6-48 hours Confidential Restricted © 2016 THINKWARE. All rights reserved.
  • Page 59 - Vehicle voltage 12V - 11.6V-12.4V (changeable by 0.1V) - Vehicle voltage 24V - 23.2V-24.8V (changeable by 0.2V) Confidential Restricted © 2016 THINKWARE. All rights reserved.
  • Page 60: Additional Functions

    Mode 1 (circular) : LED moves circular Mode 2 (blinking) : The entire LED blinks. Mode 3 (depends on recording mode) : LED depends on recording mode. Disabled : Security LED is turned off (default). Confidential Restricted © 2016 THINKWARE. All rights reserved.
  • Page 61 Mode 2 (blinking) : The entire LED blinks every 0.5 seconds. Mode 3 (expanding) : LED expands and fades out to both sides originating in the center. Disabled : Security LED is turned off (default). Confidential Restricted © 2016 THINKWARE. All rights reserved.
  • Page 62 Initialize settings. : resets the device settings to default factory settings. Confidential Restricted © 2016 THINKWARE. All rights reserved.
  • Page 63 Reference Confidential Restricted © 2016 THINKWARE. All rights reserved.
  • Page 64: Faq

    ○ Check the power jack. ▶ If the power jack is not correctly connected and has poor contact, it can cause repeated rebooting and the problem can be recognized as a power failure. Confidential Restricted © 2016 THINKWARE. All rights reserved.
  • Page 65: Announcement

    - When you see the format guidance text, format it and then reconnect to the dash cam and check again. ※ A dash cam's SD card is a consumable. The warranty period last for six months. If it is defective, purchase a new one. Confidential Restricted © 2016 THINKWARE. All rights reserved.
  • Page 66: How To Check Sd Card Detection Failure

    5. If the file is corrupted, proceed with recovery. 6. If the following problem persists, format the SD card. If impossible to format it, replace it with a new one. Confidential Restricted © 2016 THINKWARE. All rights reserved.
  • Page 67: Cannot Connect Wi-Fi

    2. Device will sound “Wi-Fi enabled” 3. Make sure to turn on the Wi-Fi in the device setting. In the Thinkware Dash Cam Mobile Viewer application, turn on the Wi-Fi option, select “Thinkware_000000” from SSID list, and enter password as “123456789” Password 5.
  • Page 68: Cannot Use Road Safety Warning Function

    1. Check the Road safety settings. “Main Menu > Settings > Road Safety Settings > Safety Camera Alert” Cannot use road safety warning function 2. Adjust the location of dash cam with the following image. Confidential Restricted © 2016 THINKWARE. All rights reserved.
  • Page 69: X500

    Supported Micro SD memory card Models 16GB 32GB 64GB F750 X500 ※ If you use any other Micro SD memory card(not product of THINKWARE DASH CAM), we do not assure to act dash cam properly. Confidential Restricted © 2016 THINKWARE. All rights reserved.
  • Page 70: Rf Interference Problem

    2) Make sure the instantaneous power supply for the dash cam is separated far away from the privately made power supply(continuous). - In case that the space is insufficient or there is interference among continuous power supplies, mount a ferrite core. Confidential Restricted © 2016 THINKWARE. All rights reserved.
  • Page 71: Remove The Mounting Of Dash Cam Or Rear Camera

    4. After remove the mounting of dash cam or rear camera, 3M tape lost their adhesive strength. So you need to get new 3M tape for reusing. Remove the mounting of dash cam or rear camera Confidential Restricted © 2016 THINKWARE. All rights reserved.
  • Page 72: Installation Location Of Dash Cams

    1cm into the primary (red) wiper clearance zone of the windscreen, you are committing a serious traffic offence (dangerous driving) under the UK Road Traffic Act 1988, and your vehicle is not roadworthy (it would fail an MOT). Confidential Restricted © 2016 THINKWARE. All rights reserved.
  • Page 73 If the company sells a suction mounted car camera without doing this, they have committed a crime. Confidential Restricted © 2016 THINKWARE. All rights reserved.
  • Page 74 Confidential Restricted © 2016 THINKWARE. All rights reserved.

This manual is also suitable for:

H100X500H50X300X150

Table of Contents