Table of Contents
Advertisement
Available languages
Available languages
Quick Links
Advertisement
Table of Contents

Related Manuals for Bornay WIND+


Summary of Contents for Bornay WIND+
- Page 1 Regulador de carga MPPT MPPT Charge controller Manual Versión 3 – 05.2023...
-
Page 2: Table Of Contents
Índice Índice Introducción Instrucciones de seguridad Descripción del sistema Instalación Regulador MPPT Funcionamiento del regulador MPPT Comunicaciones y Monitorización Como conectarse a la red wifi Web server Comunicación vía TCP-IP Tipos de datos y su lectura Direcciones de modbus Preguntas Frecuentes Solución de problemas Especificaciones técnicas Anexos... -
Page 3: Introducción
El regulador MPPT Bornay ha sido diseñado exclusivamente para funcionar con los aerogeneradores Bornay Wind +. El regulador Bornay Wind+ se encarga de controlar el aerogenerador y la energía que produce para cargar el banco de baterías al que se conecte. -
Page 4: Instrucciones De Seguridad
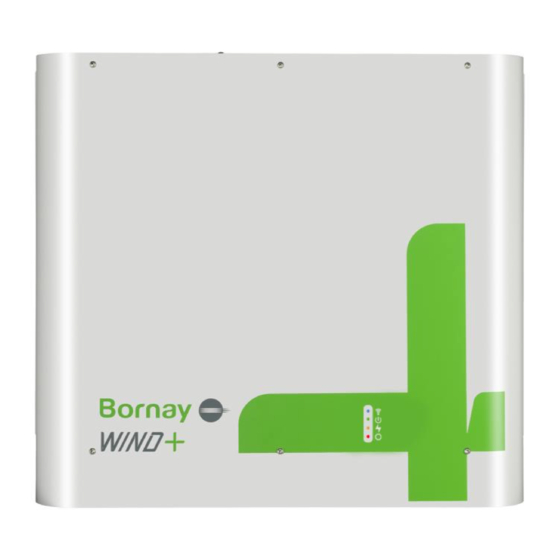
Instrucciones de seguridad Este manual contiene instrucciones importantes para la instalación, manipulación y puesta en marcha del regulador MPPT Wind+. Es necesario leer atentamente este manual y tenerlo a mano siempre que sea necesario. Aspectos generales La instalación del sistema, así como las intervenciones detalladas en este manual sólo pueden ser realizadas por personal cualificado. - Page 5 Descripción del sistema El regulador posee varias conexiones que podemos diferenciar entre conexiones de potencia y conexiones auxiliares. A continuación, se muestra una imagen del regulador con todos sus puntos más importantes.
- Page 6 Conexiones de potencia Conector para el aerogenerador: existen 3 conectores MC4 para el aerogenerador. En este punto no importa la polaridad. Conector de batería: estos conectores son los que dan paso a la potencia hacia la batería. El equipo posee un pulsador para detener el aerogenerador. Este pulsador tiene forma de seta de emergencia.
- Page 7 Conexiones auxiliares Existen 5 conectores. Cada conector tiene una utilidad específica: Conector 0: conexión de salida de frecuencia para inversores de conexión a red. Este conector NO se utiliza en el regulador de carga MPPT. Conector 1: es un conector dedicado para la comunicación RS232. Para poder usarlo es necesario cambiar la configuración del equipo.
- Page 8 Conector 4: este conector tiene 2 funciones: Pin 1: NC (No Conectado). Pin 2: GND. Pin 3: RS485B (Negativo). Pin 4: RS485B (Positivo). Conector ethernet Conector para conectar un cable de Ethernet a un router. De este modo el equipo tendrá conexión con el servidor. Antena wifi Antena para la comunicación vía Wifi.
-
Page 9: Instalación Regulador Mppt
Instalación Regulador MPPT Es imprescindible seguir estas instrucciones completamente en el proceso de la instalación de los equipos. Cualquier instalación que no cumpla con estos requisitos no reunirá las condiciones necesarias para cubrir el equipo en garantía en caso de una avería. La instalación de los equipos se debe hacer únicamente por personal especializado. - Page 10 Baterías de Plomo El esquema que se debe seguir para la instalación es el siguiente: Nota: La conexión de tierra puede ser distinta del aerogenerador y del regulador, pero ambos deben tener una buena instalación a tierra. En caso contrario pueden aparecer tensiones residuales perjudiciales para los equipos.
- Page 11 Baterías de Litio Las baterías de litio son un tipo de baterías que necesitan una instalación especial. Se debe programar el equipo para trabajar con este tipo de batería y se debe hacer la instalación para que, ante cualquier error de la batería, el regulador lo detecte y frene el aerogenerador.
-
Page 12: Funcionamiento Del Regulador Mppt
Funcionamiento del regulador MPPT El funcionamiento del regulador es muy sencillo. El equipo toma la energía alterna trifásica del aerogenerador y la transforma en corriente continua, apta para la carga de baterías. Al mismo tiempo, se encarga de controlar continuamente la velocidad de giro del aerogenerador, evitando en todo momento que se descontrole. - Page 13 El equipo viene preconfigurado de fábrica. Hay que revisar que las instrucciones que se han dado para la pre-programación de fábrica corresponden con los requisitos de la instalación real. Si necesita acceder a los parámetros de configuración, póngase en contacto con su distribuidor.
- Page 14 Indicadores Led El equipo consta de unos indicadores leds para informar sobre el estado del sistema. Las funciones son las siguientes: Azul: Conexión a internet, parpadea cada segundo, siempre y cuando el equipo este alimentado y el equipo tenga conexión a internet. En caso de led fijo, bien sea apagado o encendido, revisar el cableado de ethernet.
- Page 15 MODO LED AZUL LED VERDE LED ROJO FUNCIONAMIENTO NARANJA Conexión a Internet Alimentación Regulador Potencia Generada por Regulador Freno Revisar cableado ethernet Símbolo Significado Apagado Parpadeo Encendido...
-
Page 16: Comunicaciones Y Monitorización
Bornay tendremos acceso al equipo. De este modo el personal de Bornay podrá conectar el equipo a la red wifi que el cliente proporcione. Y dejar de ese modo el equipo conectado a la red wifi del lugar. -
Page 17: Web Server
Para acceder a los datos en tiempo real del aerogenerador a través del web server será necesario un programa de escaneados de dirección IP, con este programa se obtendrá la IP del regulador de nombre: Bornay. Nota: Esta monitorización funciona de manera local, para poder acceder o escanear es necesario estar en todo momento conectado a la misma red de internet, bien sea por wifi o por ethernet. - Page 18 Monitorización Potencia: Potencia generada por el aerogeneradora la salida del regulador Tensión de bateria Velocidad del viento: Velocidad del viento en caso de tener anemómetro Energía generada hoy: Sumatorio de KW generados desde las 00:00 hasta la hora actual. El sumatorio se actualiza cada hora. T°...
- Page 19 Gráfica En la gráfica se muestran los datos de potencia media, velocidad, potencia pico en el gráfico superior y de tensión de batería en el gráfico inferior. Los datos se muestran del día actual, es decir, desde las 00:01 hasta la hora actual. Con la leyenda superior se pueden ocultar y mostrar las diferentes medidas, además es posible a traves de la barra de menú...
- Page 20 Monitorización y gráfica en el ordenador...
-
Page 21: Comunicación Vía Tcp-Ip
Angry IP scanner, advanced IP scanner u otro programa similar, dependiendo de la versión del dongle aparecerá como raspberrypi o como Bornay. En cuanto al puerto, el utilizado de manera predeterminada es el 502. Tipos de datos y su lectura Una vez localizada la IP y el puerto, a la hora de leer los datos de monitorización se... -
Page 22: Direcciones De Modbus
Direcciones de modbus DIRECCION DESCRIPCION FACTOR UNIDADES L/E* 5000 Estado de la máquina de estados 5001 Referencia de revoluciones de la máquina de estados 5002 Potenciade W/min salida/minuto 5003 Potencia de salida/hora 5004 Potencia del W/min freno/minuto 5005 Viento RPM/min medio/minuto 5006 Viento medio/hora... - Page 23 5010 Flag sobretensión 5011 Flag revoluciones extremas 5012 Flag alimentación externa 5013 Flag viento elevado 5014 Ventilador 5015 Pulsador de emergencia 5016 Revoluciones 5017 Revoluciones máximas 5018 Freno 5019 Velocidad del viento 1/10 5020 Tensión bus DC 1/10 5021 Corriente salida 1/10 5022 Corriente freno...
- Page 24 5024 Potencia disponible 5025 Frenar 5026 Tensión salida 1/10 5027 Estado de carga baterías 5028 Viento estimado 5029 Batería cargada 5030 Tempo en absorción *L/E: Lectura y/o Escritura.
-
Page 25: Preguntas Frecuentes
Preguntas Frecuentes 1. ¿Se pueden instalar varios reguladores MPPT en una misma instalación compartiendo el mismo banco de baterías? Sí, sin ningún problema. 2. ¿Se pueden instalar varios aerogeneradores a un mismo regulador? No, no es posible ya que el regulador necesita medir todos los parámetros del aerogenerador y si hay más de uno no funciona bien. - Page 26 interface, y una sección mayor únicamente tiene sentido por las posibles pérdidas en largas distancias. ¿Qué sección de cables debo colocar para la correcta instalación del equipo? Revisar el apartado de Secciones y cableado en los Anexos.
-
Page 27: Solución De Problemas
El equipo no conecta a internet El led no parpadea Revisar conexión Ethernet y si cable tiene acceso a internet. En caso de wifi revisar contraseña(ponerse en contacto con Bornay). - Page 28 El aerogenerador hace mucho Está trabajando solo con 2 Revisar el voltaje de ruido fases. todas las fases y la Hay al mecánicamente corriente. Debe ser obstruyendo. similar en las 3 fases. Hay algún tornillo de la sujeción por apretar. Revisar las partes mecánicas del aerogenerador y...
-
Page 29: Especificaciones Técnicas
1 x M i ni USB Ti po B hem bra Bl uetooth Opci onal m edi ante adaptador Bornay Bl uetooth Paro de em ergenci a M edi ante seta con bl oqueo y desbl oqueo gi ratori o Paro em ergenci a rem oto Sí... -
Page 30: Anexos
Anexos Instalación del Regulador A continuación, se muestran las medidas y distancias que se deben tener en cuenta para la instalación del regulador. NO se puede colocar nada encima del regulador, ya que internamente lleva resistencias que disipan calor y puede provocar desperfectos en el equipo. - Page 31 Sujeción a la pared A continuación, se muestran las distancias de los orificios para sujetar el equipo a la pared.
- Page 32 Detalle de las dimensiones del equipo...
- Page 33 Dimensiones del embalaje...
- Page 34 A continuación, se presentan 2 tablas la primera es para cables en mm y la segunda es para cables en nomenclatura AWG. Modelo 0-20m 20-50m 50-80m 80-150m 150-200m Bornay 13+ Bornay 25.2+ Bornay 25.3+ Modelo 0-20m 20-50m 50-80m 80-150m 150-200m...
- Page 35 5m-10m 5m-10m (AWG) (AWG) Bornay 13+ Bornay 13+ Bornay 13+ Bornay 25.2+ * Bornay 25.2+ Bornay 25.2+ Bornay 25.3+ * Bornay 25.3+ ** Bornay 25.3+ No se recomiendan cables superiores a 10m para la conexión entre el regulador y las baterías.
- Page 36 Tensiones por defecto. Tensiones con las que el regulador vendrá programado de fábrica. ABS V 14,2 28,4 56,8 FLOAT V 13,5 EQ V 14,4 28,8 57,6 ABS V 14,8 29,6 59,2 FLOAT V 13,6 27,2 54,4 EQ V ABS V FLOAT V 13,8 27,6...
- Page 37 Se recomienda parar la carga al 95% y permitirla a partir del 85% del SOC de la batería. Bornay Aerogeneradores SLU P.I. Riu, Cno. del Riu, s/n Tel. +34/965560025 bornay@bornay.com...
- Page 38 MPPT Charge Controller Manual Installation Operation Maintenance...
- Page 39 Index Index Introduction Safety instruction Description of the system Regulator Installation Lead Acid Batteries Lithium batteries Regulator Operation Communications and monitoring How to connect to the wifi network Communication via TCP-IP Data types and their reading Modbus directions Frequent asked questions (FaQs) Solution to problems Technical specifications...
- Page 40 The Wind + MPPT charge controller is designed to work exclusively with Bornay Wind+ wind turbines. The Bornay Wind+ regulator controls the wind turbine and the power it produces to charge the battery bank to which it is connected. The design allows the unit to be used in 12V, 24V or 48V systems.
- Page 41 Safety instruction This manual includes important instructions for the installation, manipulation and use of the Wind+ Regulator. You should read this manual carefully and keep it at hand for consultation as needed. General aspects The system the installation as well as the steps described in this manual should be performed only by qualified personnel.
- Page 42 Description of the system The regulator has various connections which are known as power and auxiliary connections.
- Page 43 Power connections Wind turbine connection: there are 3 MC4 inlets for the wind turbine. At this point polarity is not important. Battery connection: these connectors are those which allow power to reach the battery. There is a switch to stop the turbine. This switch has the form of an emergency mushroom-head button.
- Page 44 Auxiliary connections There are 5 inlets. Each socket has a specific use: Connector 0: Frequency output connection for grid-connected inverters. This connector is NOT used in the MPPT charger. Connector 1: This is a connector for RS232 communication. To be able to use it, it is necessary to change the configuration of the MPPT Charger Controller.
- Page 45 Connector 4: This connector has 2 functions: Pin 1: NC (Not Connected) Pin 2: GND. Pin 3: RS485B (Negative). Pin 4: RS485B (Positive). Ethernet connector: Connector for connecting an Ethernet cable to a router. This will connect the equipment to the server. Wi-Fi antenna: Antenna for communication via wifi...
- Page 46 Regulator Installation It is essential to follow these instructions carefully in the process of installing the equipment. Any installation that does not meet these requirements will not meet the necessary conditions to cover the equipment under warranty in case of breakdown. The installation of the equipment should only be done by specialized personnel.
- Page 47 Lead Acid Batteries The following scheme must be followed to set up installation: Remember: The wind turbine and the MTTP Charge Controller grounding may be different, but both must have a connected grounding wire. Otherwise, residual voltages may be harmful for the other equipment.
- Page 48 Lithium batteries Lithium batteries are a type of batteries that need special installation. The equipment must be programmed to work with this type of battery and the set up must be carried out so that in the event of any battery error, the regulator detects it and stops the wind turbine.
- Page 49 The connection between the regulator, the master battery and the GX device (Venus, Colour Control, etc.) must be taught. Failure to make this connection can result in equipment damage. As the image shows, from IN2 of the regulator to COM3 of the battery, from NO3 of the battery to COM of the relay of the GX device, and from NO of the relay of the GX device to IN1 of the regulator.
- Page 50 Regulator Operation The operation of the regulator is very simple. The unit takes the three-phase AC power from the wind turbine and transforms it into direct current, suitable for charging batteries. At the same time, it is constantly controlling the rotational speed of the turbine, thus keeping it from going out of control.
- Page 51 The controller is factory pre-configurated. Some configurations can be done from the screen of the regulator. These configurations are protected by a password. If you need access to the parameters of the configuration, contact your distributor to obtain the access password. These adjustments should be performed only by authorized personnel.
- Page 52 LEDS The equipment is equipped with LED indicators to inform about the status of the system. The functions are as follows: - Blue: Internet connection, flashes every second, as long as the device is powered, and the device is connected to the internet. In case of fixed LED either off or on check the ethernet wiring.
- Page 53 OPERATING MODE BLUE LED GREEN LED ORANGE RED LED Internet connection Regulator powered Power generated by th regulator Braker Chek internet wiring SYMBOL MEANING FLICKER...
- Page 54 By doing this, the equipment will connect to that network (the blue led will start flashing) and from Bornay we will have access to the equipment. In this way, Bornay personnel will be able to connect the equipment to the wifi network provided by the client.
- Page 55 To Access the mill’s real-time data through the web server, an IP scanner program Will be necessary. With this program, the regulator’s IP name: Bornay Will be obtained. Note: This monitoring Works locally, in order to Access or scan it is necessary to be always connected to the same internet network, either by Wi-Fi or by Ethernet.
- Page 56 Monitoring Power: Power generated by the mill at the output of the regulator. Battery voltage Wind speed: Wind speed in case of having an anemometer. Power generated today: Sum of KW generated from 00:01 to the current time. The sum is updated every hour. Heatsink temperature: temperature of the aluminium fins at the rear of the equipment.
- Page 57 Graph The graph shows the data of average power, speed, peak power in the upper graph and battery voltage in the lower graph. The data is displayed for the current day, that is, from 00:01 to the current time. With the upper legend you can hide and show the different measurements, it is also possible through the upper right menu bar to take a screenshot and different zooms.
- Page 58 Monitoring and graph on PC...
- Page 59 Angry IP scanner, advanced IP scanner or another similar program, depending on the version of the dongle it will appear as raspberrypi or as Bornay. As for the port, the one used by default is 502. Data types and their reading...
- Page 60 Modbus directions ADDRESS DESCRIPTION FACTOR UNITS R/E* 5000 State Machine Status 5001 State Machine Revolutions Reference 5002 Output W/min power/minute 5003 Potencia de salida/hora 5004 Braker W/min power/minute 5005 Average RPM/min wind/minute 5006 Average wind /hour RPM/h 5007 Phase 5008 Aluminium 1/100 °C...
- Page 61 Temperature 5009 Braker temperature 1/100 °C 5010 Overvoltage flag 5011 Extrem revolutions flag 5012 External power flag 5013 High wind flag 5014 5015 Emergency button 5016 Revolutions 5017 Maximum revolutions 5018 Breker dutty 5019 Wind speed 1/10 5020 DC bus voltage 1/10 5021 Output current...
- Page 62 5023 Output power 5024 Available power 5025 Braking 5026 Output voltage 1/10 5027 Battery charge status 5028 Estimated wind 5029 CHarged battery 5030 Absorption time *R/W: Reading and/or Writing.
- Page 63 Frequent asked questions (FaQs) 1. Can several regulators MPPT be installed in the same installation sharing the same battery bank? Yes, with no problems. 2. Can several turbines be connected to the same regulator? No, this is not possible, as the regulator must measure all the parameters of the turbine, and if there are more than one, it would not work correctly.
- Page 64 8. What wire section should I use to install the unit correctly? See the part on Sections and Wiring in the Annexes.
- Page 65 Solution to problems Problem Possible cause Solution The wind turbine does not rotate Emergency stop Disactivate button is the button by activated turning it slightly to the left Stop button on On the screen the screen was click on the pressed button again to deactivate...
- Page 66 In case of wifi check password (contact Bornay). The wind turbine makes a lot of noise. It is working Check the with only 2 voltage of all phases. phases and the current. It...
- Page 67 The wind turbine is spinning but, does not produce Insufficient energy. wind. anemometer Batteries is present, charged or check wind equipment speed. slowed down for any reason.
- Page 68 USB connecti on 1 x M i ni USB Type B fem al e Bl uetooth Opti onal w i th Bornay Bl uetooth adapter Em ergency stop W i th em ergency sw i tch and rotary rel ease...
- Page 69 Annexes Installation of the regulator The measurements and distances that should be considered for the installation of the regulator are shown below. You should NOT put anything on top of the regulator, as inside it has resistors that dissipate heat, this can cause damage to the MPPT Charger Controller.
- Page 70 Mounting in the wall The distances of the holes for mounting the unit on the wall are shown below.
- Page 71 Detail of the dimensions of the regulator...
- Page 72 Dimensions of the Packaging...
- Page 73 You can find two different tables below. The first is for cables in mm and the second is for cables in AWG nomenclature. Model 0-20m 20-50m 50-80m 80-150m 150-200m Bornay 13+ Bornay 25.2+ Bornay 25.3+ Model 0-20m 20-50m 50-80m 80-150m 150-200m...
- Page 74 Bornay 25.3+ * Bornay 25.3+ ** Bornay 25.3+ Wires longer than 10m are not recommended for the connection between the regulator and the batteries. If, for some reason, it is required to install longer cables, it must be approved by Bornay.
- Page 75 Default voltages ABS V 14,2 28,4 56,8 FLOAT V 13,5 EQ V 14,4 28,8 57,6 ABS V 14,8 29,6 59,2 FLOAT V 13,6 27,2 54,4 EQ V ABS V FLOAT V 13,8 27,6 EQ V 15,5 ABS V 13,13 26,25 52,5 FLOAT V 12,875...
- Page 76 It is recommended to stop charging at 95% and allow it from 85% of the SOC of the battery. Bornay Aerogeneradores SLU P.I. Riu, Cno. del Riu, s/n Tel. +34/965560025 bornay@bornay.com...
Need help?
Do you have a question about the WIND+ and is the answer not in the manual?
Questions and answers