
Related Manuals for Fanmaster CF2000


Summary of Contents for Fanmaster CF2000
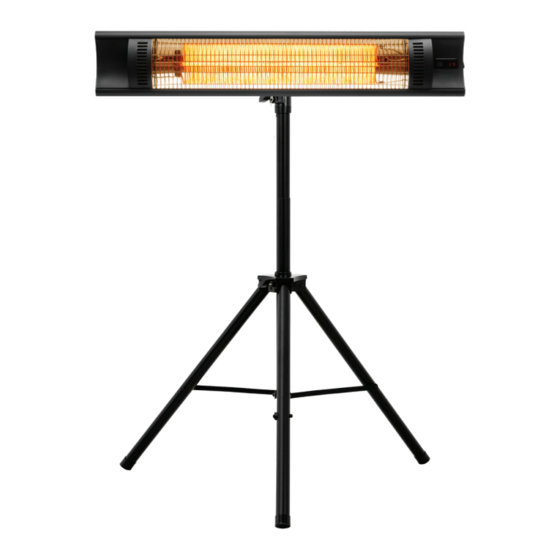
- Page 1 INSTRUCTION MANUAL ELECTRIC PEDESTAL/WALL CARBON FIBRE HEATER MODEL: CF2000 1 YEAR WARRANTY TO PREVENT SERIOUS INJURY, READ & UNDERSTAND ALL WARNINGS & INSTRUCTIONS BEFORE USE. PLEASE KEEP THIS DOCUMENT FOR YOUR RECORDS...
-
Page 2: For Your Information
FOR YOUR INFORMATION Thank you for purchasing a Fanmaster diesel heater. Please read this instruction manual carefully before using this heater. Disclaimer: Fanmaster reserves the right to make alterations to specifications, quantities, dimensions, for production or other reasons, subsequent to publication. - Page 3 ALWAYS CHECK THE POWER CABLE BEFORE USING THE APPLIANCE. IT MUST NOT BE BENT, TAUT, STRETCHED, CRUSHED OR ANY WAY DAMAGED. • IF THE POWER CORD AND/OR PLUG IS DAMAGED, IT MUST BE REPLACED BY FANMASTER, A SERVICE AGENT OR A QUALIFIED PERSONS. •...
-
Page 5: Product Description And Specifications
Current Rating (A) Net Weight Dimensions (mm) 910 x 175 x 10 Replacement element: SP-CF2000-ELEMENT SAFETY DEVICES This heater has the following protection devices: • Tilt Switch - this will automatically turn the heater off if it is not in the... -
Page 6: Getting To Know Your Heater
3. GETTING TO KNOW YOUR HEATER SWITCH HEATING ELEMENT BRACKET CABLE SAFETY BAR COVER/GRILLE REMOTE... - Page 7 3. GETTING TO KNOW YOUR HEATER CONTROL FUNCTIONS Turn ON or turn OFF the heater Push the button repeatedly to decrease power level/timer Push the button repeatedly to increase power level/timer Set the time from 0H-24H, when the timer ends, the heater will stop automatically.
- Page 8 4. ASSEMBLING & OPERATING INSTRUCTIONS • The heater must be properly installed before use. • The heater can be used indoors or in a well-protected outdoor area. • User-operated equipment intended to decrease the risk of fire, electric shock, or personal damage; must be used in accordance with instructions.
- Page 9 4. ASSEMBLING & OPERATING INSTRUCTIONS FOOT LOWER TUBE ADJUSTMENT HAND KNOB TOP TUBE L SHAPE BRACKET FIX BRACKET & SCREWS FIXED AXEL PIN LEAD CLIP...
- Page 10 4. ASSEMBLING & OPERATING INSTRUCTIONS Ensure heater is switched off before installation Tripod Installaton: (1) Loosen the screws on the back of the heater head. (2) Fix brackets to the back of the heater head. (3) Loosen the knobs (5) (4) Attached brackets to knob (5) Tighten adjustment knob and screws.
-
Page 11: Cleaning, Maintenance And Storage
5. CLEANING, MAINTENANCE & STORAGE MAINTENANCE Attention! Maintaining your heater regularly and carefully according to our guidelines is crucial if you want to ensure its long and reliable service life. Make sure the Reflector and IR-Filament are cleaned at least once a month. -
Page 12: Troubleshooting
6. TROUBLESHOOTING PROBLEM CAUSE SOLUTION E1 ERROR UNIT OVERHEATING Step 1: Wait an hour until heater has cooled down. Step 2: The product will be in standby mode (- -); Step 3: Readjust the heating level by the remote control E2 ERROR TIP OVER FUNCTION Step 1: Make sure the installation angle of the heater... -
Page 13: Warranty
This warranty is given by Fanmaster Pty Ltd ABN: 45 353 934 457 Unit 1/6-8 Yalgar Rd, KIRRAWEE NSW 2232 P: 1300 900 345 E: warranties@fanmaster. com.au This warranty is provided in addition to other rights and remedies you have under law: Our goods come with guarantees which cannot be excluded under the Australian Consumer Law. - Page 14 Fanmaster Pty Ltd | 1/6-8 Yalgar Road, Kirrawee NSW 2232 1300 900 345 | sales@fanmaster.com.au | www.fanmaster.com.au N11664 MADE IN CHINA...
Need help?
Do you have a question about the CF2000 and is the answer not in the manual?
Questions and answers