Table of Contents
Advertisement
Quick Links
Output Zone
2
3
1
24VDC
24VDC
Input
Backup
SD Card
(Firmware
updates)
+ _
-
+
Please read these instructions carefully from front to back prior to installation.
Failure to follow these instructions may prevent the unit from working as designed.
www.redbackaudio.com.au
Redback® A 1709 50 Event Weekly Timer
Auto
Manual
On
4
Interface
Micro
4
IMPORTANT NOTE:
They include important setup instructions.
Menu
Manufactured in Australia
24V DC Switched Out
By Altronic Distributors Pty. Ltd.
(Outputs limited to 120mA)
4
_
+
3
2
1
Operating Manual
A 1709
50 Event 4 Output 24 Hour 7 day Timer
A 1709
Timer
Weekly Timer
Enter
On
DIP Switch Settings
SW ON
1
Not Used
2
Station Edit Lockout Enabled
3
Edit Time Lockout Enabled
3
2
1
4
Clear Memory Lockout Enabled
5-7
Not Used
8
Battery Backup On
1
2
3
4
_
_
_
DIP Switches
+
+
+
Redback® Proudly Made In Australia
User manual revision number: 1.0 15/04/2020
Redback® Proudly Made In Australia
Power/
Standby
5
6
7
8
1
Advertisement
Table of Contents

Subscribe to Our Youtube Channel
Summary of Contents for Redback A 1709
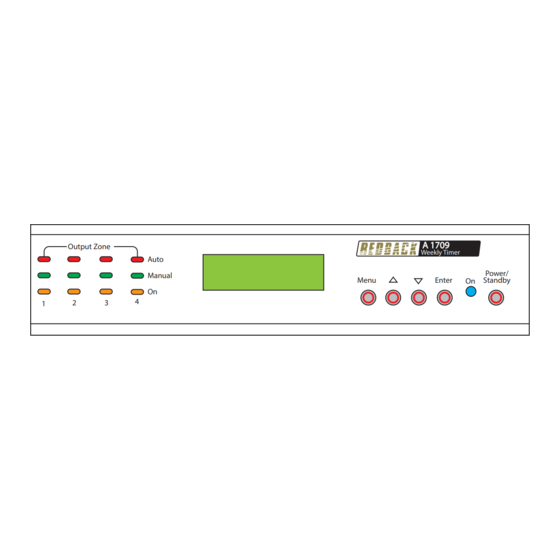
- Page 1 Redback® A 1709 50 Event Weekly Timer A 1709 Output Zone Timer Weekly Timer Auto Power/ Manual Menu Enter Standby DIP Switch Settings Manufactured in Australia SW ON 24V DC Switched Out By Altronic Distributors Pty. Ltd. Not Used (Outputs limited to 120mA)
-
Page 2: Operation
1.0 OVERVIEW The A 1709 is a versatile timer which has four switched 24V DC outputs and four closing contacts which activate simultaneously. It permits a total of 50 station (event) switching times. Each can be set to turn on any single day of the week or on multiple days, from 1 sec up to 24 hours. - Page 3 Redback® A 1709 50 Event Weekly Timer Press the “Menu” button on the front of the timer. The unit is now in “Menu Mode” and the screen should display the Manual Select of Output Zones Screen. This is the first of 5 sub menu screens which are navigated by pressing the up and down buttons as shown in Fig 3.3.
-
Page 4: Special Note
Redback® A 1709 50 Event Weekly Timer To set a Zone manually, scroll to the desired zone using the up and down buttons as shown in Fig 3.5 and then press “Enter” when you reach your selection. When finished scroll to the “Exit Manual Zone Selection” screen and press “Enter”... - Page 5 Redback® A 1709 50 Event Weekly Timer From this point the user can scroll through all 50 stations using the up and down buttons as shown in fig 3.7. This makes it very easy to view all Station time settings at a glance. Once the station number desired is shown on the LCD press the “Enter”...
- Page 6 Redback® A 1709 50 Event Weekly Timer The cursor is now positioned over the hour section of the start time as shown in Fig 3.9. Monday Start @ 23:00:00 Start time Change the hour by pressing the up and down buttons and press “Enter”...
- Page 7 Redback® A 1709 50 Event Weekly Timer Fig 3.12 illustrates the Zone Output setup procedure. There are 4 output zones to choose from. Use the up and down buttons to change the zone output and press “Enter” when finished. The zone can also be set to “OFF” which will turn this output off, but not affect the time settings so that it can easily be re-initiated by setting the zone output later.
- Page 8 Redback® A 1709 50 Event Weekly Timer 3.1.3 Edit the Clock Time This option sets the current time. After selecting the “Edit Time on Clock” option from the menu shown in Fig 3.3 the LCD will display the screen shown in Fig 3.13 where the cursor flashes on the current day.
- Page 9 Ensure power is switched off when adjusting DIP switches. New settings will be effective when power is switched back on. There are eight DIP switches accessible on the rear of the A 1709 which are for selecting the backup battery and various security lockout features (See Fig 4.1).
-
Page 10: Battery Backup
6) With the power turned OFF, insert the Micro SD card back into the A 1709. 7) Turn the A 1709 ON. The unit will check the Micro SD card and if an update is required the A 1709 will perform the update automatically. - Page 11 These contacts “close” when the output zone is set “ON”. These can be used to trigger devices such as the A 1741 MP3 Message player. Fig 6.5 demonstrates an example of how to connect the A 1709 to the A 1741. 24V DC plugpacks (supplied) are used to power the A 1709 and the A 1741.
- Page 12 Redback® A 1709 50 Event Weekly Timer 7.0 EVENT TIMES RECORD A sheet has been provided to record all of the Event(s) information for easy reference. OUTPUT 1 = OUTPUT 2 = OUTPUT 3 = OUTPUT 4 = STATION OUTPUT TURN ON TIME DURATION TURN OFF TIME Redback®...


Need help?
Do you have a question about the A 1709 and is the answer not in the manual?
Questions and answers