Avantco 178UDD1HC User Manual
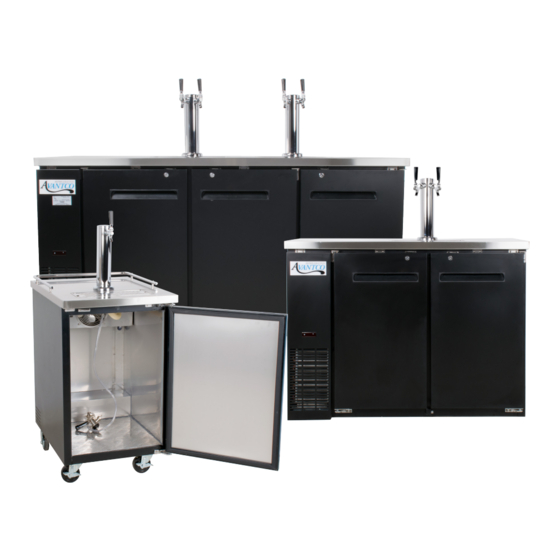
Beer dispenser
Hide thumbs
Also See for 178UDD1HC:
- User manual (19 pages) ,
- User manual (19 pages) ,
- Service manual (26 pages)
Table of Contents
Advertisement
Beer Dispenser User's Manual
178UDD1HC, 178UDD2HC, 178UDD3HC, 178UDD4HC, 178UDD1HCS,
178UDD2HCS, 178UDD3HCS, 178UDD4HCS, 178UDD48HC, 178UDD48HCS,
178UDD60HC, 178UDD60HCS, 178UDD72HC, 178UDD72HCS,
Please read the manual thoroughly prior to equipment set-up,
operation and maintenance.
User Manual
- 1 -
09/2017
Advertisement
Table of Contents

Related Manuals for Avantco 178UDD1HC


Summary of Contents for Avantco 178UDD1HC
- Page 1 User Manual Beer Dispenser User’s Manual 09/2017 178UDD1HC, 178UDD2HC, 178UDD3HC, 178UDD4HC, 178UDD1HCS, 178UDD2HCS, 178UDD3HCS, 178UDD4HCS, 178UDD48HC, 178UDD48HCS, 178UDD60HC, 178UDD60HCS, 178UDD72HC, 178UDD72HCS, Please read the manual thoroughly prior to equipment set-up, operation and maintenance. - 1 -...
- Page 2 User Manual Warning DANGER – RISK OF FIRE OR EXPLOSION. FLAMMABLE REFRIGERANT USED. TO BE REPAIRED ONLY BY TRAINED SERVICE PERSONNEL. DO NOT PUNCTURE REFRIGERANT TUBING. DANGER – RISQUE DE FEU OU D’EXPLOSION. LE FRIGORIGÈNE EST INFLAMMABLE. CONFIER LES RÉPARATIONS À UN TECHNICIEN SPÉCIALISÉ. NE PAS PERFORER LA TUBULURE CONTENANT LE FRIGORIGENE.
-
Page 3: Table Of Contents
User Manual Table of Contents Installation and Operation Uncrating ..........3 Locating . -
Page 4: Installation And Operation
User Manual Installation & Operation Uncrating If the unit has recently been transported on its side, please let the unit stand upright for a minimum of 24 hours before plugging it in. 1. Remove the outer packaging. All of the packaging (including cardboard, bubbles and plastic wrap) should be removed from the unit. -
Page 5: Proper Disposal
User Manual Proper Disposal of the Refrigerator PROPER DISPOSAL OF EQUIPMENT DANGER! RISK OF CHILD ENTRAPMENT SAFETY If you are getting rid of an old refrigerator, please follow the below instructions to help prevent a terrible accident. - Remove the doors. - Leave shelves in place to prevent children from easily climbing inside. -
Page 6: Electrical Instruction
User Manual Electrical Instruction When using electrical appliances basic safety precautions should be followed: - This cooler must be properly installed and located in accordance with the installation service representative. - Do not store or use gasoline or other flammable vapors and liquids in the vicinity of this or any other appliance. -
Page 7: Draft Tower Installation
User Manual Draft Beer Tower Installation Installing Draft Tower 1. Connect beer line connector to keg coupler. 2. Place rubber washer over draft arm mounting holes in cabinet. 3. Put beer line connector down through hole. 4. Secure draft arm with four screws. 5. -
Page 8: Drain Installation
Recommendation: Before loading product, we recommend you run your Avantco unit empty for 2-3 days. This allows you to be sure the electrical wiring and installation are correct and no shipping damage has occurred. Remember, the Avantco factory warranty does not cover product loss! -
Page 9: Temperature
User Manual Adjusting the temperature changes the minimum temperature your unit will run at. Your unit will not run constantly at this setting. To change it, follow these instructions: Digital Control Units • Hold “SET” for 1 sec. The display will flash the current minimum temperature. •... -
Page 10: Storage & Handling
Pliers These is the recommended procedure for Power Drill installing a remote CO container in your Avantco unit. Silicone Sealer 1/2” Drill Bit 1. Remove black knockout plug with pliers. (See images below for plug locations) 2. Use drill with 1/2” bit to bore a whole straight back through wall into compressor compartment. -
Page 11: Changing Co2 Gas Cylinder
User Manual Changing CO Gas Cylinder Follow these instructions at ALL times when you replace a CO gas cylinder. 1. Close cylinder at A. 2. Remove tap D from keg. Pull pressure release ring on body of tap to release pressure remaining in line. -
Page 12: Cleaning The Bar System
User Manual Cleaning Bar System Draft dispensers, regardless of design, must be cleaned at least every two weeks. Flushing the lines with water only is not enough. Tools: 1. Hand Pump Cleaning Bottle 2. Beer Faucet Brush 3. Beer Line Cleaner 4. -
Page 13: Cleaning The Condenser Coil
User Manual Regular Maintenance WARNING: Disconnect power cord before cleaning any parts of the unit. Cleaning the Condenser Coil - For efficient operation, it is important that the condenser surface be kept free of dust, dirt, and lint. - We recommend cleaning the condenser coil and fins at least once per month. -
Page 14: Stainless Steel Care & Cleaning
User Manual Stainless Steel Equipment Care & Cleaning CAUTION: Do not use any steel wool, abrasive, or chlorine based products to clean stainless steel surfaces. Stainless Steel Destroyers: There are three basic things which can break down your stainless steel’s outer defenses and allow corrosion to develop. - Page 15 User Manual Preventing Rust on Stainless Steel: 1. Use the Correct Cleaning Tools Use non-abrasive tools when cleaning. The stainless steel’s outer layer will not be harmed by soft cloths and plastic scouring pads. 2. Clean Along the Grain Polishing lines or grain are visible on some stainless steels. Always scrub parallel to these visible lines on stainless steel using a plastic scouring pad or soft cloth.
-
Page 16: Dispenser
User Manual Dispenser Trouble Shooting Compressor is Not Running Fuse blown or circuit breaker tripped. Replace fuse or reset circuit breaker. Power cord unplugged. Plug in power cord. Thermostat is at wrong temperature setting. Dial Controls: Set to higher number. Digital Controls: Set to lower number. -
Page 17: Draft Beer
User Manual Draft Beer Trouble Shooting Flat Beer Foamy head disappears quickly. Beer lacks usual zestful, fresh flavor. CO2 turned off when not in use. Keep lines properly charged at all times. Contaminated air source (usually compressed air). Drain air source & refill with clean air. Greasy glasses. - Page 18 User Manual Cloudy Beer Beer in glass appears hazy, not clear. Dirty glass or faucet. Clean glasses and faucet thoroughly before use. Beer over chilled or frozen. Check temperature setting in unit and storage area. Beer temperature variance in keg. Check around keg for hot spots.
-
Page 19: Warranty Information
5 Year Compressor Warranty In addition to the 1 year parts and labor warranty above, Avantco Refrigeration warrants the compressor on select units to be free of defects in material and workmanship for a period of 5 years from the date of delivery.
Need help?
Do you have a question about the 178UDD1HC and is the answer not in the manual?
Questions and answers